If you are faced with the task of decorating a wooden wall with tiles, then in this article we will tell you how to do it and avoid making serious mistakes. The fact is that wood, as a material, is not the most stable finishing option, for the sole reason that wood breathes, which means the cement base of the adhesive used for laying tiles can crack. As a result, your tiled wall will soon begin to crack at the seams and ultimately either lose its appearance or simply fall apart.
Let's start installing tiles on a wooden wall
- First of all, you need to use any antiseptic in order to protect your wooden walls from rotting. Since wooden walls can absorb moisture, this is a very important point; do not neglect the use of antiseptic!
- Afterwards you need to glue the roofing felt to the wooden wall. It will protect the tree from destruction. During the drying process, the cement mortar releases moisture, therefore, if you do not protect the wall with roofing felt, it will absorb all the moisture, thereby causing the formation of fungus or mold.
- Next, at a short distance from the wall, you need to mount a metal mesh, which will serve as a reinforcing material and will prevent your wall from crumbling. To install the mesh at a distance from the wall, it is advisable to use slats. This way you will give the wood the opportunity to breathe without destroying your structure.
- Afterwards, you need to roll the entire wall into cement mortar. Be sure to use cement mortar and not gypsum, otherwise you may have problems with the wall in the future. After applying the solution, it must be allowed to completely harden. Moreover, it is advisable to periodically wet the wall with water for three days so that the cement becomes as strong as possible.
- Next, we move on to the work of cladding a non-wooden wall.
- Before starting work, it is advisable to soak the tiles in water for 5 hours. Tiles soaked in moisture will have better adhesion, which will significantly increase their chances of durability.
- Be careful, because sometimes due to a violation of the tile production technology, stains may appear on it when soaked. We recommend testing one or two tiles before soaking the entire material. Those tiles on which stains appear must be returned and replaced. If you don’t want to take risks, use a spray bottle with water and simply wet the inside of the tile.
- The main thing when facing is to do everything smoothly. In simple terms, the first tiles set the vertical and horizontal of the entire future cladding. Therefore, use a bubble level or laser level to correctly lay out the first tiles.
- When laying tiles on the wall, use crosses to ensure that the width of the joints between all tiles is the same. At least two crosses are installed on each tile. It is advisable to install along the edges of the tiles to avoid accidentally bevelling.
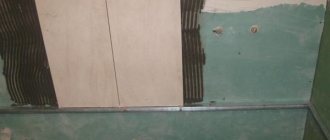
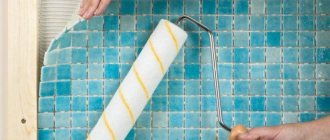
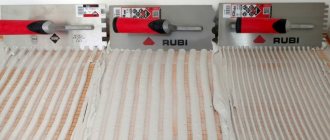
- The solution must be laid on the inside of the tile, leveling it with a comb or trowel, and then apply the tile to the wall.
- If excess mortar appears along the contour of the tile, simply remove it using a scourer.
- After the solution has completely hardened, it is necessary to remove all the crosses, clean the horizontal and vertical seams, and then fill the solution with plaster, or better yet, with a special grout for tiles.
Grouting joints
After finishing the laying work, the tiles are left for some time (1-2 days) so that the glue fixes the tiling. Then they begin to grout the tile joints. This will require the appropriate tools and materials.
It is recommended to choose special antifungal mixtures. This is a necessity in rooms with high humidity.
Apply the grout carefully with a rubber spatula so that the seams are equally beautiful. After the filler has dried, the tiles should be wiped with a dry cloth to remove any remaining mixture from the tiles.
Is it a good idea to tile wooden walls?
Frankly speaking, if we consider the option of finishing wooden walls with tiles, or finishing walls with another material, the following conclusions arise.
If you have never laid tiles on wooden walls, then it is better not to risk it and hire a professional who specializes in such work. In this case, you will at least be sure that your wall will not crack after a while, and most importantly, you will be sure that the process of wood rotting and the formation of mold and mildew has not begun under the tiles.
If you decide to do the work yourself, we strongly recommend that you choose another material for cladding that does not require such careful preparation of the walls. Otherwise, simply try to comply with all the necessary technical points in order to reduce possible problems to a minimum.
Summary
It is possible to lay tiles in the bathroom on the walls and floor in a wooden house, the main thing is to find the optimal approach.
Gluing ceramics directly to walls and floors is possible only with special adhesive solutions based on epoxy resins or polyurethane; the use of cement-sand glue with additives can cause damage to the base - saturating it with water and insulating it from air.
Experts still recommend using an integrated approach to cladding and installing an additional base of plywood or drywall - this is exactly what real professionals do. This method has a number of advantages:
- the main wood does not suffer in any way, therefore it retains its properties and integrity longer;
- the cladding can be dismantled at any time, again without harm to the main wall or floor;
- The wood has constant contact with air, which means it does not accumulate moisture and does not dry out, and the natural balance of moisture inside the timber is maintained.
Whatever installation method is chosen, special attention should be paid to adhesive compositions: read the instructions and description. Perhaps the mixtures have narrowly targeted properties that are suitable specifically for your room (humidity, type of materials used, etc.).
- Exterior finishing
What are the reasons
- Even if there are minimal conditions for the formation of humidity or generally changes in temperature conditions, the wood will expand and contract depending on the air.
- The tiles and the mortar itself also have the ability to change depending on air humidity and room temperature.
- The tile itself is very fragile, it is comparable only to glass, so for its installation you need the most static base.
- Wood, even covered with tiles, will still absorb moisture from the environment, so without any care it will begin to rot and form fungus and mold.
- The seams, which are made of gypsum grout, will begin to crack soon after installing the tiles on a wooden wall, and then your tiles will begin to crack.
Which tile adhesive to choose
To install ceramics on a wooden or plywood base, you should choose an elastic adhesive based on:
- polyurethane;
- epoxy resins.
These materials serve as both fasteners and waterproofing. Glue with natural and artificial resins is sold in finished form, and two-component adhesives are sold in powder form, which must be diluted with water before use according to the instructions.
You can also use “liquid nails”, which are suitable for working in wet conditions. These retain their load-bearing properties even when exposed to moisture; the usual composition for bathrooms and kitchens is a short-lived option.
Preparation for installation
Various options for finishing
Often you have to make repairs in an old house, so in this case it is better to remove the old tiles and, after dismantling, adjust the corners of the walls and check them for the degree of curvature.
The building level will help with this. And since the curvature indicators will be disappointing, you need to eliminate the problem with the help of beacons to the level of the plaster.
This is a rather labor-intensive process, but the quality of the entire masonry may depend on its result.
The curvature has been dealt with, now you can prime the wall, thanks to which in the future, when applying the adhesive composition, you will get good adhesion. On plasterboard walls, you can lay tiles on a primer.
The same material (plasterboard) is good for leveling old surfaces instead of using plaster. Next, it is important to competently approach the choice of adhesive composition for tiles.
Floor covering
First of all, take care of the flooring. Let's take a closer look at gluing tiles to a wooden surface. In addition to the plywood flooring, it is recommended to make a screed, having previously waterproofed the floor. To close the joints and cracks, but still allow the flooring to move when conditions change, it is recommended to use polyurethane foam; it will serve as a kind of compensator. Membrane polymer waterproofing is additionally spread over the base. The pieces of material are overlapped and secured together with adhesive tape.
After this, a small layer of concrete screed is poured. Today on sale there are special mixtures intended for wooden surfaces, which are elastic even when frozen and do not crack when the base moves. After drying, the concrete is primed.
Stages of finishing a wooden surface with ceramic tiles
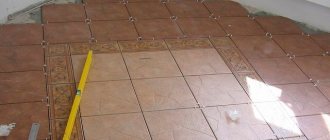
Now let's start tiling the floor. The tiles are laid using standard methods. In the kitchen, it is recommended to start installation from the farthest visible corner or from the middle of the room. In the latter case, divide the surface into 4 parts from the central point and work on each zone separately. After completing installation, be sure to seal the seams with a resin-based mixture or latex mastic.
What are clinker panels?
Clinker panels are an innovative multilayer material for cladding any external surfaces. The basis of the slabs is made up of high-quality polyurethane foam insulation with a thickness of 2-8 cm. The facing part of the tile itself is fixed to the insulation with glue.
The ceramics that make up the material are highly resistant to moisture and temperature, and firing the tile makes it durable. Thanks to polyurethane foam, clinker panels combine the best qualities of a facing material.
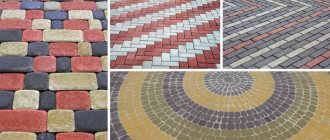
The slabs are made in special shapes, thanks to which they are tightly enclosed in the structure of the canvas.
Layout options for floor tiles in bathrooms
The classic rule for ceramic flooring is to lay it out from the middle of the room towards the walls. This allows you to finish each row against the wall with a large piece of tile, more than half its width/length.
The bathroom and toilet are initially the smallest rooms in a cottage or apartment. At least 2/3 of the floor area is occupied by a toilet, shower stall and/or bathtub, washing machine and floor cabinets, washbasin pedestals and laundry baskets.
Therefore, special layout schemes are used here:
- on the floor, not the middle between the walls is marked, but between the free wall and the plumbing or household appliance that is permanently standing on the tile;
- Under the bathtub, washing machine and toilet, the cladding is started randomly.
Defects in the geometry of rooms, including bathrooms, are masked by diagonal layout schemes. For example, if the walls are not parallel, it will not be noticeable.
Thus, there are several technologies and construction materials that make it possible to tile a wooden floor and ensure a long service life of the coating. All of them are available for independent implementation in a country house or city apartment.
Wet screed
The wet screed method allows you to create a monolithic layer between wood and ceramics. This method of laying tiles ensures that any changes that occur to the wooden floor will not affect the condition of the tiled covering.
But one nuance must be taken into account: a wet screed creates additional thickness that needs to be masked.
Preparation for installing a screed begins with laying polyethylene with a thickness of 100 microns or more on a wooden covering. The strips are laid overlapping, the joints are taped.
The polyethylene should extend onto the walls, forming a kind of edges 15-20 cm high. Along the perimeter of the room, a damper tape 8-13 cm wide is attached to the perimeter of the room with double-sided tape. It will separate the leveling mixture from the floor and wall.
A reinforcing steel mesh with 10x10 cells is laid on the prepared surface, after which cement mortar or a purchased polymer screed is poured.
Installation
- High-quality cladding of a wooden house with thermal panels begins with marking the area and marking the horizons. We must not forget about the diagonals of the walls.
It is very convenient to use mooring cords smeared in crushed chalk. By strengthening them along the required axes and tapping them on the surface, the master will achieve an accurate result.
- Next, the sheathing. It doesn’t matter what the house is - timber or logs, it is needed one way or another. You can use the cladding material to guide you according to the installation steps of the wooden profile bars - three pieces per component.
Thermal panels for the facade of a wooden house are presented in three options - corner, row and additional. You need to focus on the broadest. Align profiles only vertically, thereby creating the necessary air corridors.
- You should start working from the bottom up, inserting the tenon elements into the groove. The seams must be foamed. Then the second row is laid and so on. The corners will be the last. Moreover, having finished working on one surface, you must first set them up, and then start working on another, in order to avoid inconsistencies.
- After the installation of thermal panels on a wooden house has been successful, you should start tidying up the seams. If the outside temperature is sub-zero, then work should be postponed until it warms up.
The optimal atmospheric temperature is +5-10⁰. Be sure to use a jointing tool; it will allow you to create almost factory-made seams.
- When the work is finished, the surface can be wiped with detergent.
That's all - finishing a wooden house with thermal panels is not difficult. Below are a number of errors in this process, for craftsmen without experience in construction and repair.
Tile selection
When choosing a tile, you must first evaluate its quality. You need to select the material according to the following parameters:
- the difference in diagonal sizes is less than 1 mm;
- the products do not have chips or other damage;
- the ribbing on the reverse side is more than 1.5 mm high.
It is important to know the difference between floor and wall tiles :
- The floor often bears shock loads from objects falling on it, so during production the enamel coating, like the tile itself, is made thicker.
- Floor tiles have a denser structure and are more difficult to cut; you will need a special tile cutter for the job.
- To provide slip resistance, the surface of floor tiles is embossed or matte.
When purchasing ceramic tiles, you should take the material with a margin of 7-10%; this amount will be used for trimming.
Preparing the room for tiles
Before starting repairs, it is necessary to clean the room, remove all dust and construction debris, preferably wet cleaning. After which the insulation procedure is carried out.
Next, precise measurements are taken, taking into account all the architectural features of the room. This is done for subsequent calculation of the amount of materials and drawing up an estimate.
Their presence will allow you to save money if there is no balance, or eliminate the need to purchase additional materials.
The easiest way to count the number of square tiles is with the direct installation method. To do this, you need to calculate the surface area, divide it by the area of one tile.
Also take into account the thickness of the grout joint (from 2 to 10 mm) and 10-15% of the material for the breakage.
To calculate the number of rectangular tiles, when using decorative ones, when laying diagonally, it is better to use a construction calculator.
Square tiles are easy to calculate
Do you need a screed?
Before laying, you should check the coating and evaluate how even it is using a level. If there are significant deviations, it is necessary to make a screed before facing.
What alignment methods are there?
Wet screed. Suitable for cases where it is necessary to increase the strength characteristics of the floor. At the same time, a gap is created around the perimeter of the room, taking into account possible deformation. This condition allows the base to move without destroying the installed coating;
- Dry screed method. This method is the most popular because it allows you to create not only a flat, but also a reliable floor with high load-bearing capacity;
- Leveling with gypsum board sheets is considered the easiest option. First of all, carefully examine the condition of the wood floor. Those bars that have rotted should be replaced with new elements. Next, the drywall is installed, the sheets are fixed with polyurethane glue, and the joints are treated with sealant. You should also soak the sheets with a primer mixture.
Floor covering
First of all, you need to take care of the flooring. Let's take a closer look at how to glue ceramic tiles to a wooden surface. To do this, it is recommended to make an additional screed in addition to the plywood flooring, having previously waterproofed the floor. To close all joints and cracks, but at the same time maintain the possibility of movement of the coating when conditions change, it is recommended to use polyurethane foam; it will serve as a kind of compensator. An additional polymer membrane waterproofing should be spread over the base. The pieces of material are overlapped and secured together with adhesive tape.
After this, you need to pour a small layer of concrete screed. Today on sale you can find special mixtures designed for wooden surfaces, which are elastic even after hardening and do not crack when the base moves. After drying, the concrete is primed.
Stages of tiling a wooden floor with ceramic tiles
Now you can start tiling the floor. The tiles are laid using standard methods. If this is a kitchen, it is recommended to start installation from the farthest visible corner or from the center of the room. In the latter case, you need to divide the surface into 4 parts from the central point and work on each zone separately. After installation is complete, be sure to seal the seams. To do this, you can use resin-based mixtures or latex mastic.
Pros and cons of using a plywood base
Before you figure out how to lay ceramic tiles on plywood, you need to figure out why they can’t just be laid on a wood floor? The answer is simple: the physical characteristics of wood and ceramic tiles are too different, and such an idea will not lead to anything good.
Laying tiles requires an absolutely motionless base. Otherwise, the tile will collapse or begin to “walk”, and cracks will appear at the seams. Wood changes its geometric dimensions under the influence of temperature and humidity. Therefore, combining these materials requires extensive preparatory work, during which an intermediate layer is formed, leveling out the differences between tiles and wood.
To prepare a high-quality base, you can use various methods and materials. But laying plywood has a number of undeniable advantages:
- This is the fastest way: you don’t have to wait a long time, as, for example, when drying a cement or self-leveling screed.
- When laying plywood on the floor, much less dust and debris is generated than with other methods.
- The weight of the structure being erected is insignificant, so the load on the logs or wooden floors will increase insignificantly.
- The method is quite simple and does not require specific skills or materials. At the same time, it will allow you to obtain a high-quality base with the required characteristics.
Naturally, there are also disadvantages:
- Plywood is incompatible with “warm” floors.
- The quality of waterproofing work will be of great importance, especially in rooms with high humidity. This may result in additional costs.
Block house for wall cladding
Block house for wall cladding
Some apartment owners strive to make their homes original and even extravagant in some ways.
So if you are tired of boring solutions, then pay attention to the block house, that is, a board whose cross-section imitates the rounded log known to everyone from village landscapes. Using this material you can achieve a real “rural” interior in your home.
To make the design look even more impressive, it is recommended to resort to a method such as artificial “aging” of the wood. For this, the method most often used is “brushing”, that is, processing the material with a wire brush. During the processing of wood, fibers are removed from it, which creates an interesting relief. After this, the material is painted and, without allowing the paint to dry, it is removed.
