The traditional curtain made of water-repellent material for enclosing the shower area no longer meets consumer requirements: it is not aesthetically pleasing or durable enough.
It was replaced by opening or sliding curtains made of glass or plastic. A shower screen is an important element of bathroom zoning. It will not only separate the bathing area, but also protect furniture, floors and walls from water and splashes.
A functional and beautiful bath screen, assembled with your own hands from simple materials, can become a source of personal pride and decoration for a bathroom or shower room.
Curtains have a richer assortment
Bathroom curtains are made from inexpensive PVC or water-repellent polyester. Unlike glass structures, curtains can have any pattern, color and degree of transparency. This makes it possible to add variety to the interior design: if you get tired of the look of the bathroom, changing the curtain will not be difficult.
Advantages of a homemade screen in the bathroom
Protective curtains are available in every construction supermarket. They differ in size, material and design features: you can choose a finished product to suit every taste and budget. At the same time, it is not difficult to build a good curtain with your own hands.
And this option has its undeniable advantages:
- Originality. You can make a design of a non-standard configuration that will harmoniously fit into the interior of the bathroom.
- Compliance with all the requirements and wishes of the owner. For example, you can accurately maintain the required dimensions without losing even 1 cm of usable space.
- Ergonomics. If there is a shortage of space, using a non-standard partition will help you adjust the layout: allocate less space for the shower area and gain space for household appliances.
With the help of modern materials with a wide palette of colors and textures, you can realize any idea. Glass or plastic panels can be embossed or smooth, plain, patterned or transparent. They can cover the opening completely or partially, be stationary or fold and open in different directions.
The curtain is cheaper
Finding a fabric product to your liking will not be difficult: any construction hypermarket or home goods store offers them.
Creative individuals can order a curtain on online services using the individual printing function, and even this exclusive option will be much cheaper than purchasing, delivering and installing a glass partition.
Varieties of design
Protective screens for showers and bathtubs are divided into frameless, framed and combined.
Depending on the method of connecting the panels to each other, partitions are:
- Stationary. Such curtains are fixed motionless and protect only that part of the bathtub where the shower stand is installed.
- Foldable. They consist of narrow sections that fold like an accordion. A convenient option for a corner or curved bathtub.
- Swing. The design is similar to doors; they consist of 1-2 leaves suspended on hinges. An inconvenient option for cramped bathrooms - it requires a lot of space to open freely.
- Sliding. The blades move along the guides, opening or closing the opening. For better sliding, roller systems are used. Versatile and compact option. Suitable for limited space.
Frame screens
This design involves the presence of a framing profile made of aluminum or plastic. For panels, 4 mm glass or plastic is used. Such protective screens can consist of one or several sections.
Some of the panels can be fixed motionless, making them a stationary partition, while the remaining ones will fold or move on rollers along the guides.
Frame screens are durable and reliable. They are sealed and well protect surrounding objects from splashes and streams of water. Rigid construction is the safest solution for families with small children.
The main disadvantage of a screen on a frame is its massiveness. It can only be installed in a spacious room: in a cramped space, such a design will look too bulky, visually reducing the space, which is already small.
Using frame technology, you can also make sliding screens that hide pipes and connections. An original screen for the bathtub, made with your own hands from the same materials as the shower curtain, will stylistically support the design of the bathroom. In addition to aesthetics, such a screen also performs a practical function, for example, it adds stability to an acrylic bathtub.
Frameless structures
They are most often made of thick tempered glass (6-8 mm). Sections can be installed permanently, moved away or folded. Fixed load-bearing elements are made from thicker canvases, movable ones from light and thin ones.
The absence of a frame makes such structures smaller in size and visually light. They look great in small spaces. Folding screens are especially convenient: they are easily assembled like an accordion against the wall and do not clutter up the approach to the bathroom.
The main disadvantage of this design is poor tightness: water easily seeps into the cracks between the panels. But if you use the shower carefully and do not turn on high pressure, this will not create problems.
Combined
Such screens combine the design features of the first 2 options. For example, the stationary part is framed by a profile, and the movable part is a glass or plastic panel with hinges or hinges.
The screen does not hide space
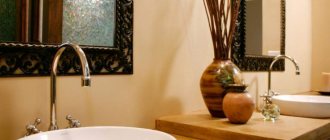
Transparent glass structures allow light to pass through, making the bathroom visually lighter and airier. They are suitable for interiors where no frills are required, and seem to dissolve in space, becoming almost invisible in the right lighting.
This is especially appreciated in small bathrooms in Khrushchev-era buildings, as well as in bathrooms up to 3 sq. m.
Design of glass curtains in the interior
Transparent
Designers like to use transparent partitions in minimalist interiors or small bathrooms. In small spaces, clear glass is almost invisible, making it appear as if it is not there. This makes the room visually seem larger.
Photo by ReRooms
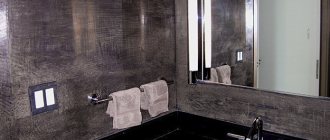
Matte
Matte partitions are often used in combined bathrooms. Due to the fact that the material is opaque, you will not be visible behind it. Of course, it won’t hide you completely, but being in the shower will become much more comfortable.
Photo by ReRooms
Glass partition is more modern
Glass screens are not yet as common as curtains, so they look more original and elegant. There are interiors where a fabric curtain does not fit into the chosen style - this applies to luxury bathrooms with luxury renovations: in this case, a glass partition becomes a more appropriate solution.
Advantages
Glass partitions have many more advantages than disadvantages, which speaks in their favor.
- Glass partitions look very stylish. The stores have a huge selection, so you can choose a model to suit your taste and budget.
- Glass curtains are suitable for baths of any design and size.
- Glass curtains are much more hygienic than fabric curtains. During manufacturing, glass partitions undergo special treatment, which subsequently repels bacteria. Thanks to this feature, cleaning the partition is much easier.
- If you regularly and properly care for your partitions, plaque will not accumulate on them.
- Glass partitions give the room a cozy look, as the transparent material looks light and does not reduce the space of the room.
- The glass used for making partitions is tempered and durable, so there is no need to be afraid that it will break easily.
Calculate the exact cost of repairs using an online calculator
and receive a free detailed estimate for repairs
Calculate
Photo by ReRooms
BelBagno shower curtain in the ReRooms project
Partition between plumbing fixtures
Now let's look at what you can use to make a partition between the toilet and the bathroom. Since the structure will not only have to be in conditions of high humidity, but will have to come into contact with water, it should be made from moisture-resistant materials.
At the same time, it should not be too heavy so as not to create unnecessary stress on the floor. Considering these requirements, you can give preference to the following materials:
- aerated concrete;
- hollow brick.
Next we will consider both of these options.
From aerated concrete
To build a partition, you can use D400 aerated concrete. On such a wall you can hang shelves or other lightweight interior items.
Instructions for building a wall are as follows:
- First of all, you need to mark the location of the partition. To do this, first apply the markings to the ceiling, then use plumb lines to transfer it to the floor;
- After this, you need to prepare the floor - if necessary, you need to dismantle the floor finishing coating. In addition, the surface must be cleaned of debris;
- The aerated concrete partition is now being waterproofed. To do this, any waterproofing material is laid on the floor;
- then a vibration damping strip is laid, which prevents the occurrence of cracks. Mineral wool or high-density polystyrene foam can be used as a vibration damping strip.
It must be said that roofing material can perform the function of waterproofing and compensation tape;
- then the first row of blocks is laid. To do this, special glue with a thickness of no more than 5 mm is applied to the surface of the vibration-damping strip;
- A perforated metal strip is laid on top of the first row, which is placed on the wall and attached to it with dowel nails. To avoid cracks in the corners, damper tape or foam is placed between the partition and the wall;
- According to this principle, the partition is erected to the required height. A damper tape is also laid between the ceiling and the wall.
Now that the partition is built, you need to finish it yourself.
The optimal solution is to plaster the wall with a moisture-resistant compound. Since the seams between the blocks are minimal and the wall is smooth, plastering can be done without guides.
As an alternative to plastering, you can consider covering the partition with panels. This option is even simpler and faster.
Note!
Before finishing, the surface of the partition must be primed with an antiseptic primer, which improves adhesion and prevents the occurrence of mold.
You can stick tiles on top of the plaster or finish it with other materials. If the wall is to be painted, it must first be puttied and thoroughly sanded.
Made of brick
If you need a strong partition on which you can place communications, a washbasin, etc., it is best to build it from brick. The process of its installation is in many ways similar to the construction of aerated concrete partitions:
- before making a brick partition, you need to make markings and lay waterproofing and damping tape;
- then the first row of bricks is laid on the cement mortar. Since bricks are much smaller in size than blocks, pull laces along the partition, which will serve as beacons for you, so that the wall is level;
- Every three rows, pins should be driven into the main wall, the edge of which is placed in the gap between the bricks.
Here, in fact, are all the nuances of constructing a brick partition. Otherwise, the technology does not differ from the construction of aerated concrete structures.
Drywall
If during the renovation process the partition between the bathroom and the rest of the apartment was removed for redevelopment, you will probably think about what to make a new partition from. If it is not adjacent to a shower or bathtub with a shower, you can use moisture-resistant drywall for this purpose.
This design can be erected quite quickly without any serious effort.
The process of installing a plasterboard partition includes several main steps:
The frame installation process is as follows:
- you need to start work by making markings on the ceiling, according to which the partition will be located;
- Using plumb lines, the markings must be transferred to the floor. This must be done very carefully and carefully so that the wall turns out smooth;
- Now, according to the markings, you need to secure the guides to the floor and ceiling. To do this, use dowel nails;
- on the walls adjacent to the partition, profiles should be fixed after inserting them into the lower and upper guides;
- then intermediate racks are installed in increments of about 40 cm. To increase the strength of the structure, insert wooden beams into the racks through one;
- After installing the racks, they should be reinforced with jumpers. The latter should be located at different levels, i.e. in a checkerboard pattern.
Note!
Before using a wooden beam in a frame, it must be treated with antiseptic impregnation.
The next step is to install the drywall. The work is carried out in the following sequence:
- First of all, cut out the sheets of drywall. To do this, apply markings on them and cut the surface of the cardboard along it with a mounting knife. After this, the sheet is broken and the cardboard is cut from the reverse side;
- Now the sheets need to be secured to the frame. To do this, use self-tapping screws. The latter should be located in increments of about 25 cm. When screwing in the screws, recess their heads so that they do not protrude above the surface of the drywall. To make the partition in the bathroom durable, during the installation of sheets, leave a gap between the floor of about 1-1.5 cm;
- Mineral wool or expanded clay can be placed in the space between the sheets of drywall to provide sound insulation. Also, do not forget to lay out the wiring and cut holes in the sheets of drywall for mounting switches;
- After this, you need to cut off the chamfers at the junction of the sheets with smooth edges. The chamfer width should be about 5 mm;
- then the surface of the drywall needs to be primed. To perform this procedure, pour liquid into the roller tray, then dip the roller itself into it and, after squeezing it out, treat the wall.
Make sure that the soil “lays down” in a thin layer without drips. When the surface is dry, apply primer again;
- after the surface has dried, stick a special self-adhesive reinforcing tape onto the joints of the sheets;
- To complete the work, cover the screw heads and the joints of the sheets with starting putty.
Note!
To putty drywall, use only moisture-resistant polymer putty.
Now all that remains is to do the puttying. It must be said that in the case of finishing the surface with ceramic tiles, puttying may not be performed.
So, this procedure is carried out as follows:
- Apply primer to the surface using a wide spatula. Work as carefully as possible so that you end up with a smooth surface;
- After the putty has hardened, sand it with a special grater with a mesh. After this, you can stick wallpaper on the wall on the side of the apartment;
- if the surface is to be painted, the wall should be cleaned of dust, then primed again and a thin layer of finishing putty applied;
- At the end of the work, the putty must be carefully sanded with fine sandpaper. Work in bright light so that all surface imperfections are clearly visible.
That, perhaps, is all the information regarding bath partitions that I wanted to share with you. Now you can decide for yourself which partition to make in the bathroom and from what.
Additional installation tips
The service life of the screen largely depends on the assembly. Accuracy of execution, accuracy of measurements and technical nuances are important here.
Before installation, think through all the details:
- Do you need a gap between the top edge and the ceiling to ventilate your shower stall.
- Is there a need to install an additional lamp in the water treatment area?
Pay special attention to the selection of metal fittings: rollers, hinges, fasteners, rubber bands, etc. Products of poor quality are not able to ensure trouble-free sliding or smooth opening of the sashes.
Photos of homemade bath structures
Your homemade curtain will look no worse than an expensive purchased booth if you follow 3 basic rules:
- correct design;
- careful installation;
- careful operation and regular maintenance.
If you don’t yet know how to decorate the shower area of your bathroom, photographs of successful homemade projects will help you make a decision.
How to choose which screen to make
The design of the screen, its shape and color can significantly improve or, conversely, ruin the appearance and ergonomics of your bathtub.
Pay careful attention to the choice of design and color:
- a room decorated in dark colors is visually smaller than a light one;
- matte partitions look more massive than transparent ones;
- bright designs and large patterns quickly become boring and difficult to combine with the rest of the decoration.
To install a screen on a bathtub, you do not need the skills of a professional finisher or plumber. If you doubt your abilities, give up glass. It is easier to work with plastic: it does not require special tools for processing (you can cut the canvas with a stationery knife) and will not crack at the slightest blow.
Materials used
To install the screen you will need:
- guide profile (aluminum can withstand heavy loads and will last longer);
- sheets of plastic or glass cut to size;
- silicone sealant;
- accessories: hinges, screws, etc.
Transparent materials are the most popular: they are economical and do not overload the interior. The most expensive option is tempered glass with a decorative pattern.
Plastic or polycarbonate
Plastic attracts with its variety of colors, decor and low price. It is practical, easier to work with at home: it is easy to cut, does not prick, etc. The main disadvantage of this material is that it will not last as long as glass or polycarbonate, it is easily scratched and quickly loses its appearance.
When choosing this material, keep in mind that plaque and dirt appear on it quickly. With insufficient care, the appearance becomes untidy and the surface becomes cloudy. Fungus or mold may appear.
Polycarbonate is a durable, versatile polymer. It is lightweight and impact-resistant, therefore safe and easy to install.
It is more practical in operation than plastic; it can easily withstand high humidity and temperature changes, which is why it is often used for making cabinets and screens. In appearance and durability, things made of polycarbonate are no worse than glass.
Glass
This material is not as impact-resistant as polycarbonate, although high-quality tempered glass comes close in this characteristic. The safest and most durable is triplex. The risk of injury when using it is minimal: if such glass breaks, it will not crumble into small and sharp fragments.
The remaining performance characteristics of this material are higher than those of plastic. Mold does not form on it; its surface can be easily cleaned with a special product and a cloth or paper napkin.
A transparent glass screen is a win-win option, suitable for any style of bath design.