Many people imagine concrete as a gray, shapeless mass. This opinion has existed for decades, dating back to Soviet times. However, a lot has changed in the construction industry in recent years. In this regard, even such familiar technologies and building materials can be looked at from a completely different angle. This also affected concrete. Now decorative concrete completely changes the attitude towards itself. But first, let’s look at what it is and what requirements apply to decorative concrete.
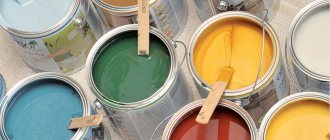
Coloring compounds
Not every paint is suitable for this - it is necessary to create a coating that is resistant to the sun and water, which can be done by:
- stain for concrete;
- rubber enamel;
- epoxy and acrylic paints;
- polyurethane varnish.
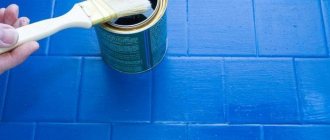
Staining
To cover a concrete surface, you must use a special stain for this material. There are solutions with intense or translucent color. They are similar in effect to wood paints - they only add a tint and allow you to create an imitation of noble marble and other rocks.
Stain is a liquid solution that, when applied, penetrates deep into the concrete through micropores. The chemical-based product interacts with the components of the concrete stone, permanently pigmenting it. The result is a moisture- and stain-resistant coating with improved surface quality. To get a good result, you will have to cover the path 2-3 times.
Stain can also act as a primer for higher density pigmented paint.
Rubber paint
Painting concrete paths with rubber paint is a way to create an elastic coating that is resistant to any type of impact. It is not for nothing that it is used to cover floors in garages with heavy traffic of people and vehicles.
The elasticity of the rubber coating does not allow the paint to quickly wear out under load of any intensity. The service life on garden paths can reach 10 years.
Epoxy and acrylic paints
We have combined these compounds into one group due to the similarity of their properties:
- form an elastic coating on concrete;
- do not penetrate deeply into the structure of the stone, therefore they require application in 2-3 layers;
- have a similar service life - 2-5 years;
- paints with deep colors and a wide palette;
- do not lose color under the sun for a long time.
- easy-to-apply solutions.
Paints based on artificial and natural polymers are sold in different containers in any construction stores, so purchasing them will not be difficult.
Polyurethane varnishes
The polyurethane varnish coating forms a translucent protective layer on the concrete path. The varnish can be clear or pigmented and is suitable for covering the painted layer to extend its service life.
The product can also be used to protect concrete that has been pigmented prior to placement.
Application area
Stamped concrete is a versatile product that can be used both outdoors and indoors. It can be used to create paving slabs, garden paths or in parking lots.
Printed concrete in landscape design
To create it, you do not need to prepare a special base, so it is very popular for decoration:
- terraces;
- floors of shopping and entertainment centers;
- gazebos;
- sidewalk;
- parking lots;
- exhibition halls.
Printed concrete has high strength values, so it can be actively used in playgrounds and crowded places.
Printed concrete on stairs
The ability of printed concrete to imitate different types of surfaces makes it indispensable for repair work. It is able to withstand high mechanical loads and large temperature changes. Thanks to these properties, it has become in demand in almost all corners of the country.
Imitation wood board
Using stamps, you can create a textured surface of any complexity or design. Textured concrete can be used to decorate rooms in loft, high-tech or modern style. This approach will create an atmosphere of large-scale space that does not have a single hint of the use of concrete.
Preparing the stone before painting
When buying crushed stone, you get a heterogeneous composition; the size of each stone can vary from 10 to 30 mm. There are also smaller fractions that are more suitable for interior decoration. Therefore, packaging by size is necessary.
This can be done manually on a sieve with the required mesh size, or, which is faster and easier, use a “screen” machine. Any of the above technologies provides for the separation of excess litter, too small pebbles, and sand.
But in order for the acrylic paint to adhere well, the crushed stone also needs to be washed. This will ensure better adhesion of the dye to the surface of the stone and will allow you to create exactly the shade that you want, since if the stone is not washed it can darken.
You can wash it directly on the screen, using a hose or water from a bucket. Due to the fact that the machine creates shaking, cleaning will take place from all sides. After this, spread the washed mass in a uniform layer on a wire rack and dry it in the open air.
Painting a concrete path: mastering the technology yourself
With the help of capacious and informative master classes, hacienda owners will be able to not only independently master the technology of producing forms for garden paths, but also receive valuable recommendations on the technology of competent coloring of concrete. The step-by-step guide below will help them quickly complete a large amount of work and give stable and reliable concrete paths on the site a neat and well-groomed appearance.
- Preliminary cleaning of the path from litter, soil, dust and sand using a broom. Removing any grease and oil stains from the surface of the trail with solvents or special detergents.
- Determining the required amount of paint by measuring the area of the garden path to be painted.
- Using film or paper to wrap trees, bushes, small architectural forms and other elements. This is necessary in order to prevent them from being contaminated with paint during the work on improving the path.
- Preparing tools for work. The developer needs to pour the enamel into the paint sprayer, following the instructions for the paint coating for concrete paths.
- Carefully spray paint from a height of half a meter. It is better to start work from the corners, gradually moving towards the center. Achieving optimal results is possible by applying several layers of coating. However, each layer must be thoroughly dried before the next one is applied.
- After applying the final layer, the path is left for several days for the coating to dry. Only after this period will it be possible to step on it.
- To better preserve the color, developers can apply a concrete sealer over the paint layer. Its composition will protect the surface from fading, cracking and other defects that appear on painted concrete paths under the influence of the sun, temperature changes and humidity.
Imitation stone: subtleties of textured coloring of paths
Second method: preparing inventory
To independently prepare pigmented cement mortar, you will need the following set of tools:
- mixing container;
— a hammer drill with a “mixer” attachment;
The materials you will need to purchase are white cement, sand, gravel, pigment, and clean water.
Working on mixing cement and color
The coloring pigment in the cement mortar can be of any shade. Therefore, the developer will only have to choose the color scheme he likes and prepare the mixture in accordance with the instructions below, using white cement as a base.
- Water is poured into a container - a bucket, a wide basin or a construction trough.
- The following mixture ingredients are added in a ratio of 1:1:3:4:
3. The mixture is carefully stirred to a homogeneous consistency, eliminating lumps, air voids and other defects.
4. A coloring pigment is added to the resulting dough-like mixture.
5. The solution is mixed again.
After this, the mixture is ready for use. It can be poured into molds, and after drying, colored blanks can be used to pave pedestrian paths in the garden.
Beautiful paths can decorate any garden. Special paint for concrete paths will help make them more aesthetically pleasing and well-groomed. By spending a little money and time, you can significantly transform your garden plot.
The simplicity of the technology and the availability of paints and varnishes will allow you to do all the necessary work yourself.
Another way of coloring
If you don’t have access to a concrete mixer, then it will be more difficult to create painted crushed stone, but it is possible - you will have to pour the stone into a container with paint and mix it yourself, and then dry the crushed stone.
Making your own painted crushed stone for finishing park areas or a plot near your house is much cheaper than buying a finished product: for an unpainted product you will pay a thousand rubles, while a colored one costs over 20 thousand. Considering such savings and extremely logical production technology, the idea of making crushed stone for decoration with your own hands is rationally determined.
The most read on the LandshaftBlog.Ru website:
Brick barbecue Gazebo with barbecue Concrete paths Landscaping Choosing a brush cutter Geogrid Guzmania Ornamental grass Decorative flower beds Decorative fence Children's slide Garden design Firewood for the dacha Mesh fence Winter garden Ideas for the dacha Flower bed made of stones Flower beds of perennials Lianas for the garden Polycarbonate awnings Site lighting Greenhouse do-it-yourself sandbox Do-it-yourself area for a car Retaining wall Facade lighting Swing gates Garden arch Garden fountains Snow shovel Brick tandoor Topiary in the garden Thuja occidentalis Plot 15 acres Figures for the garden Coniferous plants
Step by step painting instructions
The technology for painting concrete paths is the same for all products.
Surface preparation. It is recommended to work with concrete that has reached 28 days. The surface must be cleaned of any contaminants and thoroughly rinsed with pressure water from a hose. It is not recommended to use detergents - they partially remain in the upper pores of the coating and can interfere with the adhesion of the paint to the base. When working with stain, you do not need to use a primer, but when painting with other compounds it is necessary
Popular articles Description of hydrangea variety Dentel de Gorron, planting and care
It is important to choose a concrete primer - it penetrates into the upper layers of the path and strengthens them, creating a non-porous base for painting. Apply the solution to the surface with a roller or spray. When the soil is dry, you can begin painting the concrete surface.
To do this you will need a brush, roller or paint sprayer with a compressor. Applying color with a brush is convenient for working out the texture of the stone when creating a pattern using a template. A spray bottle is useful for evenly applying paint.
Brush painting technique
You should choose a brush of a convenient width to work out the pattern and texture:
- For seams between stones and thin patterns - width 2-5 cm;
- To cover large fragments, use a wide brush from 5 cm.
You can add the texture of stone or imitate masonry by eye or using a template.
You don’t have to buy a template - you can make it yourself from cardboard, which is recommended to be covered with film for easy cleaning. Painting tape will also help to create a texture - it can be glued to the concrete path in any order, indicating stones.
The paint must be applied through a tightly attached template. It is convenient to first draw the outline, then paint over the middle of the fragment. After transferring the template and removing the tape, use a brush to carefully paint over the “seams” of the simulated masonry.
Subtleties of working with a paint sprayer
When working with a paint sprayer, you must first protect the surrounding area - cover bushes, walls and other objects located next to the path with film.
Methods of painting concrete with a paint sprayer:
- Uniform coloring is the simplest option. The jet is directed at an angle of about 45° to the plane, the distance from the tool to the track is 50...60 cm. The jet is directed from the edge in parallel lines. For non-professionals, it is recommended to work continuously across the entire width of the pavement to prevent the formation of color transitions.
- Structured application allows you to achieve a visual resemblance to marble. To do this, the jet is not directed in strictly parallel lines, but with emphasis on individual areas.
We have presented several ways to improve concrete country paths. Coloring is available to everyone; you don’t need to hire professionals or spend a lot of time. All that is required is to choose the right paint composition and apply it according to technology. Then the result will please you for a long time!
Instead of the costly and labor-intensive process of constructing a garden path from natural stone, clinker bricks or granite pavers, rational and forward-thinking developers prefer paths made from concrete. The process of paving them does not require high qualifications in the field of construction and allows you to do all the work from scratch with your own hands. And if the garden owner paints the paved paths in stylish colors, then the path will fit perfectly into the surrounding landscape and give the landscape of the site a complete look.
Preparatory stages
For successful construction, you need to choose a place for the path in advance, draw up a project, perform calculations, and stock up on materials and tools. You need to think about the location of the structure. Based on this, the width and shape of the structure are calculated. You will need a regular sheet of paper on which we will make a homemade plan. We indicate the location of buildings and important areas. We connect them with lines, which will be the axes for the tracks. It is advisable to make the paths slightly curved - this way the view of the territory will look more interesting.
The tools we will use are a hammer, a concrete mixer or other container for mortar, shovels, spatulas, etc. We will also need cement, sand, crushed stone, a mixture for waterproofing, and components for formwork.
Design
Drawing up a work plan is an important step-by-step process of any construction. This will not only help you visually present the result, but will also save you from purchasing unnecessary resources.
Before installing a concrete path, you need to draw up a plan and calculate the amount of materials
The solution layer is selected depending on the soil:
- for clayey – 4–6 cm;
- for sandy, light loamy soil – 8–10 cm;
- for a marshy one you will need a layer of gravel 5 cm thick.
You can’t do without a “pillow” made of sand. Its thickness is 12–15 cm.
As for calculating proportions, there is nothing complicated here. For example, we are building a path 1 m wide (W), 10 m long (L), 10 cm thick (T), the bottom layer of sand (P) is 10 cm. To properly make a sand cushion, you need to calculate the amount of sand. Let's resort to the formula WxLxL - it turns out 1 m. In total, 2200–2400 kg of sand will be needed for the underlying pouring.
Concrete can be prepared at the rate of 3 parts sand plus 1 part crushed stone, cement, water. The composition may be different. We calculate how much concrete is needed: WxLxT. It turns out 1 m. Since approximately the weight of a cubic meter of concrete is 2800 kg, we divide this figure into 5 parts. It turns out 560 kg.
Such calculations will not provide perfectly accurate data, but you can know approximately how much material will be needed.
Marking and soil preparation
When the preparatory stage is completed, you can select an area for the path. Keep the shape of the path in mind. The most convenient way to mark points is with wooden pegs. They are driven in at an identical distance, and a rope is pulled between them. The more bends in the path, the more pegs.
First you need to mark the future path, then prepare the soil
You can begin to remove the top layer of soil. We remove everything, right down to the roots, as they can rot and accumulate water, and this will negatively affect the structure in winter. Let’s assume that the layer of “cushion” is 10 cm, the cement is also 10 cm, it is desirable that the path rises a little. From 20 cm we subtract 3 cm. It turns out that you need to clear the soil to 17 cm.
Work technology
When painting concrete paths with your own hands, it is important to follow a few simple rules. Even minor disruptions during operation are fraught with a significant reduction in the service life of the coating and even its destruction in a very short period of time
Preparatory stage
First, you should stock up on everything you need so that work does not stop due to a lack of any material or tool:
- Paint in sufficient quantities, remember that for the best result you will need at least 3 layers, you should not save, since redoing the surface in a year or two is much more expensive than doing everything thoroughly at once.
- If the surface is tile, and grass has grown between the seams, you should stock up on a tool to remove it; it can be a shovel, a special hook, or something else.
- If there are stains of oil, resin or other difficult-to-remove stains on the surface, you should purchase a special composition, since the paint in such places may peel off.
There are special formulations on sale that can easily cope with any stains from petroleum products.
You need to decide how to paint the concrete path; a brush is best for this; with its help, the composition will get into all the unevenness and fill the entire surface, which is very important for the best adhesion
For work you should choose a high-quality tool with natural bristles
- To remove sand and other debris, you will need a broom or a stiff brush; they are the best way to remove sand.
- It is also advisable to have a pressure washer. With its help, you can thoroughly moisten the surface and remove all remaining contaminants. If you don't have such equipment, you can borrow it or rent it for a few hours - it won't cost much.
Washing will help remove all dirt from concrete.
If everything you need has already been purchased, you can begin preparing the surface; for this you should choose dry, moderately sunny days; rain during work is extremely undesirable.
The sequence of events is as follows:
- As noted above, if there are concrete tiles on the path and grass has grown between the seams, it should be removed, otherwise the quality of the paint will be very poor.
- Next, using a stiff brush, you should remove all the sand as thoroughly as possible (if you have an industrial vacuum cleaner, the work can be done with it). (See also the article How to paint paving slabs: features.)
PVC brushes and brooms are an excellent option for cleaning concrete paths
And finally, the very last step is to moisten the surface using a hose or a special sink. The second option is preferable because the pressure washer not only moisturizes the concrete, but also removes any remaining grains of sand.
Application of the composition
To ensure that the coating lasts a long time, you should follow a few simple recommendations:
You can start work only after the moisture on the surface has completely dried, this is very important for the adhesion of the solution
Until the surface is completely dry, you should not begin work.
The first layer serves as a kind of primer, so the paint should be thinned. The brand of thinner most suitable for these purposes will be indicated by the instructions on the packaging. The dilution ratio is 4 parts of paint to one part of solvent; the composition will be quite liquid, so it will be able to penetrate all surface irregularities.
If desired, the path can be painted in different colors, which makes it even more similar to natural stone.
If you have a metal fence or other decorative elements next to the path, you should take care of protecting them; Zinga electrically conductive paint works well. If you are not satisfied with the silver color, you can use fire-retardant paints for metal Polistil, they are not only fire-resistant, but also resistant to atmospheric influences, in addition, you will be pleased with the rich color range of compositions.
How to care for a painted path?
In order for the applied coating to last as long as possible, it must be carefully looked after. The presence of sand and other abrasives can compromise the integrity of the layer. To prevent this, the paths should be washed as often as possible by spraying them with water from a hose or wiping them with a bulky sponge. In the latter case, you need to act very carefully.
Thus, anyone can paint concrete paths with their own hands if they wish. The main thing is to purchase the appropriate tools and materials. In this case, the end result will be “pleasant to the eye” for quite a long time.
Source: tehno-beton.ru
Acrylic paints for concrete walls
Most often, acrylic compositions, which are divided into organic and water-based, are used to decorate walls (both internal and external). Solvent paints form a coating with high mechanical strength that is resistant to temperature changes, moisture and other aggressive influences.
Many of them (for example, “Akrial-Lux” from KRASKO price - 140 rubles / kg) allow work in the winter. And yet, in private homes, organic paints and varnishes are rarely used. The reason is a sharp unpleasant odor, difficulties with tinting and a relatively long drying time.
Water-soluble acrylic paints do not have all these disadvantages. But they are inferior to “organic” in terms of strength and durability of the coating. However, in suburban properties the load on the facades and internal walls of buildings is much lower than in industrial areas, so most often the owners of private houses give preference to water-soluble emulsions. They are produced by almost all large “paint” companies, both domestic and foreign. The average cost of the product at the moment is 125-200 rubles/kg.
Popular articles The most fragrant and fragrant varieties of roses
Another option for finishing concrete walls is alkyd enamels.
Interestingly, they can be used not only on mineral, but also on metal and wooden surfaces. The paint layer adheres firmly to materials with completely different properties thanks to the binder – alkyd resin.
In air it polymerizes, forming a smooth and elastic coating with good adhesion. Alkyd compositions are extremely durable (much stronger than acrylic), but it should be noted that they are solvent-soluble. with all the ensuing consequences - unpleasant odor, long drying time, etc. The cost of products of this kind is relatively low.
For example, the price of PF-115 universal enamel from TEX in a 2.5 kg container is about 500 rubles. Alkyd enamels come in three levels of gloss: glossy, semi-gloss and matte. For outdoor work, it is reasonable to give preference to the first type - a smooth paint layer lasts on average 15-20% longer than a rough one.
Marking passages on the site - how to do it beautifully
Before designing, you should determine what types of paths and how many of them should be on the site. Utility rooms are intended for access to objects located around the house: a barn, a woodshed, a bathhouse. Walking chairs are for utilitarian purposes and are needed as decorative elements.
When planning a site, it is necessary to calculate the required number of paths
The most durable and long-lasting paths should be those that are used most often. First of all, this is a path from the gate to the house
Paths and paths add a picturesque touch and serve to visually adjust the territory. Short sections divide the garden into small fragments, making the area appear smaller. Winding paths, on the contrary, will create the impression of spaciousness.
Two to three operational passes are enough, the rest have a decorative function.
Any garden path should be practical, without puddles or potholes. When designing a garden, areas of high humidity are marked in the garden drawing.
It is important to make the correct slope so that rain and melt water drain away faster, to provide drainage in an area with high groundwater levels
When there are too many paths, they divide the area into small fragments, making it look much smaller than it actually is.
A long path visually enlarges the area
Paths between flower beds and beds are made from separate unconnected fragments so that coverings can be easily dismantled and damaged tiles replaced with new ones.
A path made of individual tiles can be easily moved to another place if necessary
Durable coatings are necessary for heavy loads, in places where people constantly move. On small paths it is wise to lay coatings of a small thickness.
61c609aab503e5a228f809585ce31079.jpe
2f5576a5d5a865a489e7e733b6c2e6ba.jpeWinding paths with hedges create intrigue, creating the illusion of a long journey and space.
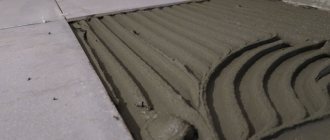
Preparation of a colored solution
https://youtube.com/watch?v=aHZLV1CZCjo
You can get the desired color of concrete by preparing a solution that contains dyes. This method will allow you to fill the entire structure of the cement-sand mortar with a colored component, which will preserve the brightness of the color in case of abrasion of the top layer. This option is used mainly on surfaces that are susceptible to adverse influences. Paving slabs are made from colored mortar, the top layer of which is subject to constant loads.
When making a colored solution, the following proportions should be observed:
- two and a half parts of sand, preferably white;
- one fourth part of water;
- four parts fine gravel;
- part of the cement (it is advisable to use white cement);
- dye, which will require no more than five percent of the total volume.
These proportions are used for the manufacture of structures with moderate wear. For a pedestrian area with increased load, the proportions are slightly changed, namely, the portion of sand and gravel is reduced. This ratio will provide a durable surface that will not crack during periods of low temperatures and high loads.
Special additives will increase the strength of the concrete solution:
- Plasticizers that increase the plasticity of the mixture and make their surface smooth and durable.
- Special water-repellent additives. They can increase resistance to moisture.
- Dust-removing compounds.
- Additives to accelerate concrete hardening.
The components of the solution are mixed and filled with water; it is important to ensure that the ingredients are thoroughly mixed so that the additives and dyes are completely and evenly dispersed throughout the entire volume
Causes of destruction
Premature destruction of printed concrete can be prevented if production technology is correctly followed and high-quality materials are used.
Violation of technology
We can highlight the main mistakes made in the production of printed concrete:
- No plastic film between the soil and the mixture.
- Violation of the temperature regime (extreme heat or low temperatures).
- Late consolidation of the composition.
- Poor quality installation of fittings.
Stamp "European Fan"
Poor quality concrete mix
Low-quality concrete can be of the following types:
- Thick – makes it difficult to print stamps.
- Liquid – excess water reduces strength.
- Not corresponding to the brand - it is not permissible to use a concrete grade less than M300.
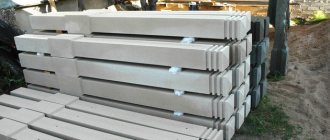
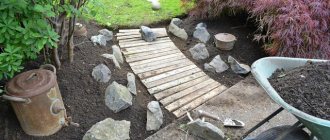
Do-it-yourself concrete paths in the country using pouring forms
If you have ready-made rigid or flexible forms for pouring, there are usually no problems with arranging beautiful paths with shaped elements. Manufacturers recommend a certain composition of concrete and give advice (in pictures, so that everyone, even those who cannot read, can understand) on use. However, we will not rely on manufacturers and will make our recommendations based on the information from this video.
- It is necessary to prepare a bed for the path - dig a trench, install fences, make a sand and gravel cushion and compact it.
- Prepare sand-cement mortar according to the above proportions. It is advisable to use Portland cement grade M400.
- Place the rigid form on a level and, using a shovel, pour ready-made concrete into its cells.
- After the initial hardening (at least an hour!) of the mixture, remove the mold, move it to a new location and fill the cells with concrete again. Given the low hardening speed, it is advisable to have several molds for quick work.
Please note: before each subsequent use, the mold must be washed, dried and lubricated with a water-repellent agent, such as machine oil.
The gaps remaining between the path fencing and the finished elements are filled last. To ensure that the shape of the “stones” does not differ from the main part of the surface, it makes sense to cut the waste plastic mold into pieces and use these pieces to mold the missing elements.
Types of stamps
Today, massive aluminum stamps have been replaced by more convenient forms:
- polyurethane (silicone);
- plastic.
Polyurethane forms are flexible in design and allow you to create textures of any complexity. Undemanding to additional lubrication. Plastic forms create an imitation of brick and are used on vertical and horizontal surfaces.
When choosing forms, you need to look at their degree of rigidity. The accuracy of the pattern simulation depends on this. The higher the rigidity, the better the result.
You can find out the pattern of a stamp used once by pressing it into dense sand.
Separately, you can highlight stencils. These are ordinary forms into which concrete mixture is poured. After the concrete has set, the forms are removed and the pouring process is repeated, moving the form to another place. With these shapes you can create an unusual garden path or a floor in a gazebo.
Types of paints for painting concrete or cement plinths, which is better?
Having started to transform the house, you have to solve many problems - how to paint the base of the house over plaster or stone.
Acrylic paint
A water-soluble dye based on acrylates is one of the most popular varieties, which has also found worthy use as external coatings. Initially, environmentally friendly compositions, close to conventional water-based emulsion, were used only for interior work.
Today this is an improved formula, so they are included in the standard list of what to paint the foundation of a house with. A durable protective layer is a durable finish that offers superior aesthetics in any color, including black or brown foundations.
A durable protective layer is a durable coating with excellent aesthetics in any color.
Latex paint
Elastic water-based paint is one of the best suggestions when you are wondering how to paint the exterior of a house’s foundation. A water emulsion containing elastomers, which give it excellent properties - it repels dirt and water.
“Rubber” dyes have high hiding power, are easy to apply and dry relatively quickly. The alkali-resistant latex layer is resistant to aggressive weather and climate conditions.
“Rubber” dyes have high hiding power, are easy to apply and dry relatively quickly.
Epoxy paint
The composition is made on the basis of resinous substances. Epoxy resin is known to dry to form a hard polymer that resembles artificial amber. Paints on a similar basis also have this property.
The durable coating will last about 20 years, so you don’t have to think any further about how to paint the base of your house for a long time. It will protect the base from all unfavorable factors, without losing its attractiveness from UV rays and the acid-base environment of groundwater.
It will protect the base from all adverse factors.
Polyurethane paints
This variety is environmentally friendly; the composition does not produce caustic fumes. The durable film protects against destruction by active substances and is suitable for urban buildings and the private sector - it can be used to paint a cement base. Even with sudden temperature changes, the integrity of the coating is maintained.
This variety is environmentally friendly; the composition does not produce caustic fumes.
Alkyd paints
One of the best paints for plaster plinths, with excellent performance characteristics at an affordable price. It is one of the most popular enamels for exterior use.
In specialized stores they are presented in a large assortment - from domestic and foreign manufacturers. Preliminary priming of vertical surfaces is suggested. After painting, it perfectly prevents the penetration of moisture into concrete.
After painting, it perfectly prevents the penetration of moisture into concrete.
Oil paints
This variety is produced on the basis of vegetable drying oil, it is applied in 2-3 layers (intermediate time for drying), working in a respirator. It is undesirable to use bright shades on the sunny side, they will fade.
Oil paints are traditional compositions that reject moisture. This is a “classic” of paint and varnish mixtures. Although many mixtures with improved characteristics are offered today, this variety can be used for treating the basement level.
Oil paints are traditional compositions that reject moisture.
Cement
Silicate compositions are the optimal means for protecting the base; they are included in the category of facade varieties based on liquid glass. It has most of the properties inherent in water-based analogues. The use of such compositions does not require additional surface treatment. It is often applied without a primer. Painting the base usually lasts for at least 10 years - it does not fade, does not crack, and perfectly fixes the plaster and concrete facade.
Silicate compounds are the optimal means for protecting the base.How to paint a concrete floor - step by step plan
Painting a concrete floor includes 4 stages:
- Preparation
Use a grinding machine, scraper or wire brush to remove the old paintwork from the surface. Chemical stains are cleaned with a solvent (for example, sodium orthophosphate), the floor is degreased and dried. Cracks and chips are widened, cleaned and filled with concrete. After repair, the concrete is again cleaned of dirt and dust and degreased with a soap solution.
- Treatment with primer or primer.
Popular articles Mini landscape design in a pot
The primer will increase the adhesion of concrete and reduce the degree of paint absorption (and therefore the cost of repairs!). For this purpose, you can use the primer composition GSR. It is applied generously, in several layers, over the entire surface, with a roller or spray, and along the perimeter with a brush. An additional layer of sealant will help to obtain a flat and smooth surface in the future.
- Coloring
You can apply the paint with a sprayer, or with a brush to hard-to-reach areas. Each new layer is laid on the dried previous one. Work begins from the window.
- Drying
The painted layer should dry at an air temperature of +18–24 °C and a humidity of no more than 80%. You can use the floor in limited mode no earlier than after two days. Full mechanical loads should be postponed until a later time.
Safety precautions
As when performing any work, simple safety rules should be followed. The coating must be done in special clothing, protecting your hands and face from paint, acids and other solutions.
You also need to remember a few simple tips:
- Use a respirator when removing old paint. In the past, lead-containing paints were often used; their dust is harmful to health.
- Collect waste during processing in a closed container.
- For work, use a mixture with a valid expiration date.
- Store the remaining paint after finishing the work tightly closed in a room with a temperature not lower than +12°C.
- If paint gets on your skin, be sure to wash it off with a cotton pad soaked in solvent or sunflower oil.
Also learn about how to make concrete products for landscaping.
Epoxy paint for concrete: features, advantages, disadvantages
Epoxy paint for concrete, as well as its “related” adhesive - epoxy resin, as supplied, is sold as a set of two components: paint based on epoxy resin and a hardener - cycloaliphatic polyamine, a water-based substance.
Immediately before use, the components are thoroughly mixed in a certain consistency and applied to the prepared concrete base for a short time.
Over a certain short period of time, the paint hardens, forming an aesthetically attractive, hygienic and very durable film on the concrete surface that hides minor defects.
Advantages
- No odor – ability to work in enclosed spaces;
- Possibility of application to the concrete surface immediately after setting (4-5 days after pouring). In this case, the concrete surface does not require preliminary preparation. Paint applied within a specified period of time retains moisture located in the thickness of concrete and thereby creates conditions for its “correct” hardening, all other things being equal;
- If epoxy paint is used as a finishing coating for a concrete floor, it acquires maximum wear resistance and durability;
- The ability to choose the color and texture (mirror smoothness, “orange peel” or Venetian texture) of the future painted surface;
- Maximum color resistance of the film to ultraviolet sunlight and detergents;
- The use of detergents of any composition and type is allowed;
- Affordable cost compared to other types of concrete paint.
Flaws
- Short period of use of the finished composition;
- Environmental hazards of components before mixing. After mixing the components, epoxy paint becomes completely safe for people and animals.
Features of application
Surface preparation includes standard cleaning of dirt, dust, oil stains and flaking fraction. In this case, the paint is applied in several, usually two layers. The following stages of preparation and staining are followed:
Prime the surface with a composition recommended by the manufacturer; Thoroughly mix the components using a mixer attachment and an electric drill (hammer). Average mixing time – at least 2-3 minutes
The second coat of paint is applied in the same way as the first. Each brand of paint has its own drying time; you can find this information on the paint can to know exactly how long it takes for epoxy concrete paint to dry.
In conclusion, we should answer a fairly common question from home craftsmen: “Can pneumatic spray guns be used for painting with epoxy paint?”
Carrying out work
Despite the differences in the materials used, the basic steps involved in installing garden paths will be the same in most cases.
Sod removal
It is not advisable to lay tiles, bricks, wood covering options (planks, round saw cuts) or any other material directly on the existing soil, since the path will quickly collapse. In addition, it will look unaesthetic. Therefore, first you need to remove the turf and some of the soil underneath it. The depth of the notch depends on the material. That is, you need to calculate so that the finished path is on the same level with the entire site, unless the design of garden paths provides otherwise
At this stage, it is also important to remove the roots of trees and bushes, which in the future are likely to disrupt the integrity of the masonry or backfill
Ground leveling
The ground under the future path should be as level as possible, without bumps or holes. In addition, to avoid slight displacement, the soil should be compacted well.
Materials and tools
Making paths is a fairly simple process that does not require expensive tools or materials. All you need are wooden boards for the formwork, pegs for its installation, a hammer, a bucket and a shovel. The materials you will need to purchase are several bags of cement grade M400 or higher, small crushed stone, gravel or granite screenings for the drainage layer. It would also be useful to have a concrete mixer, but for small work areas you can get by with a large bucket or metal trough.
Tools for making paths
If you need to make a path for a car, you need a ready-made reinforcing mesh or steel rods with a diameter of about 7-8 mm. Such a structure will be able to withstand the weight of passing traffic without collapsing.
The subsequent design of the paths is carried out using various decorative elements - fragments of stone and brick, dyes and protective compounds. Their use depends on your wishes and imagination.