Thanks to the easy care of the surface and the ability to withstand heavy loads, the tiles have no equal in the field of tiling rooms with high humidity. To learn how to lay it correctly with your own hands, you just need to be patient and have the right tools and materials.
Be sure to read our article to the end to find out how to lay tiles on the floor several times faster and more accurately than hiring a professional.
Tools to get started
Before laying tiles on the floor, make sure you have everything you need:
- building level,
- pencil and tape measure,
- roller and brush,
- 10cm spatula and rubber spatula for rubbing joints,
- comb,
- mixer and glue bucket.
From the material we will need:
- the tile itself,
- tile adhesive,
- dividing crosses,
- primer,
- grout (fugue)
Recommendations
Knowing how to lay a mosaic correctly, listen to the advice of experienced craftsmen:
- do not press the sheets against the wall with your hands to avoid unevenness;
- to prevent the glue from drying out, the surface area should be no more than nine tiles;
- dilute the glue to a medium consistency, since a thick composition dries quickly, and a liquid one sticks;
- carry out installation at a temperature not exceeding +25 degrees;
- Apply mosaic adhesive on the mesh in a layer of no more than 3 mm, so that excess solution does not complicate the grouting.
Recommendations will help you avoid mistakes.
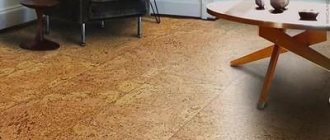
Mosaic masonry looks both solid and in combination with other materials. Source keram-market.ru
Preparatory work
The surface for cladding should be as smooth as possible. For these purposes, the floor is equipped with a screed or a self-leveling floor is made. The first option requires more practice, but is suitable for leveling floors with significant slopes. Self-leveling flooring will be a little more expensive, but it does not require any special skill or skill.
A thorough inspection is carried out on the concrete base where the tiles are going to be laid. To avoid unstable areas, every centimeter of the floor is tapped. The level checks horizontalness. If the differences do not exceed 3 cm, the coating is quite suitable. If the conditions are not met, then pouring the screed cannot be avoided. The surface must not contain paint, parts of old coating or traces of petroleum products. Detected areas of crushed concrete or deep oiling are removed down to the “healthy surface”.
Wide cracks are cut to a width of up to 15 cm. All tubercles and protrusions must be removed, since the evenness of the tile laying depends on this. The surface is dust-free, and the areas to be filled with the repair compound are primed.
You can consider the option of a classic cement-sand mixture in proportions 1:3. This mixture will take quite a long time to dry. Cement-based tile adhesive can be used as a repair composition, but such a solution will only be reasonable for small defects; otherwise, a lot of it will be needed.
All cracks and potholes are sealed with mortar and leveled with the general surface. The point of leveling is not so much to accurately smooth the mortar, but to fill cracks and crevices as much as possible.
After the repair composition has hardened, the surface is primed in two layers, with each layer required to dry. This is done to ensure excellent adhesion and surface hardening.
But there are situations when, when repairing a small section of the screed, further delamination is observed, the so-called “avalanche-like process” occurs. In this case, remove all the old screed up to the floor slab and pour in a new one, about 300 mm thick. After hardening, the screed is primed.
How to make a self-leveling floor
A completely cleaned surface of debris and dirt is treated with a deep penetration primer.
Mix the mixture with water according to the parameters indicated on the package. It is better to mix the solution in a large container using a mixing attachment. The prepared solution is poured onto the floor and spread with a needle roller with a long handle to remove air bubbles. For the self-leveling floor to dry well and harden, it must take at least three days. After this, the surface is primed with a deep penetration primer.
Tile layout options
There are many tile placement technologies. Let's consider only the main layout options:
- classic “seam to seam” layout;
- diagonal;
- in a run;
- "deck";
- "herringbone";
- modular;
- with contrasting inserts;
- combined.
Where to start laying tiles
How to lay tiles on the floor correctly? Based on the selected type of layout, the floor is marked. Starting to lay the floor away from the wall is very risky. It is best to do this from the most visible area. Therefore, the reference lines are most often placed closer to the center of the room. The first support line is drawn along the room. In order to do this, you need to measure the distance between the walls and mark the connecting points. After which the points are connected with a coated cord. Then a second line is drawn perpendicular to the first, and also approximately in the middle of the room.
Don’t be too lazy to make a test laying of these two rows without using mortar. This way you can evaluate the future picture by eye and finally decide on the type of tile installation.
Examples of successful solutions
When implementing a project, you can use ready-made interior design ideas. The combination of 3 types of slabs when finishing surfaces looks original; medium-sized rectangular blocks, square elements and mosaic masonry are used. Shades must correspond to the chosen style and tonality of the scale. When implementing schemes, it is necessary to take into account the equipment of the bathroom.
Separate bathroom without toilet
When placing a bathroom and a toilet separately, it is recommended to choose the same stylistic direction for the premises. The color scheme of the rooms must match, and plumbing fixtures are selected from the same collection.
To visually expand a room with a bathroom, slabs with glossy surfaces, mirror mosaics, and large mirrors are used to decorate one wall. It is possible to decorate the surface with artistic mosaic tiles made of glass or smalt.
To increase the space, floor slabs are mounted diagonally, wall panels are decorated with horizontal stacking of blocks and friezes. The horizontal strip is located 80-90 cm from the floor.
Combined bathroom
When decorating a combined bathroom and toilet, it is necessary to create different accents in the functional areas while maintaining a single color scheme. When creating an interior in light colors, it is not recommended to use only white slabs; it is possible to include gray, pastel, milky shades. The bright room is complemented by artificial lighting on the ceilings.
A compact bathroom with a square configuration will be expanded by vertical laying of rectangular blocks. Finishing can be done on walls and floor surfaces. A bathroom decorated with slabs of blue shades can be complemented with marble inserts or blocks with imitation stone.
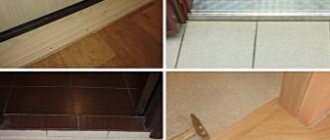
Differences from laying tiles in a toilet, bathroom, hallway, kitchen
If it is not necessary to apply a waterproofing layer in the hallway and kitchen, then in the bathroom and toilet you cannot do without it. The waterproofing layer will protect you from accidental flooding of your neighbors living below.
Waterproofing can be carried out in several ways:
- Pasting. Roofing felt or polyethylene film is glued to the base.
- Coating. The previously prepared floor surface is coated with a special liquid composition.
- Coloring. The floor is covered with special paint, and the walls of the room can also be treated.
Only after the waterproofing layer has completely dried do they proceed to further manipulations.
Combination of several techniques
If you want to make your bathroom original, you can use several masonry techniques at the same time. For example, the base is an imitation of brickwork, and the interior panel in the shower is in the form of a parquet board. You can use elite tiles with a beautiful figured shape. It is used to line the following areas: near the sink, faucets, and shower head riser.
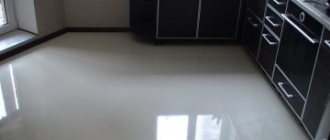
Beautiful bathroom design with tiles Source dizajninterer.ru
Tile work
If during work you need to cut a piece of tile, it is best to use an electric or manual tile cutter for these purposes. Initially, do not forget to mark the element to be cut.
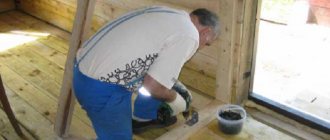
We lay the tiles on the floor with our own hands. To work with the solution, you will need spatulas (regular, serrated, rubber for subsequent grouting).
Tile adhesive can be purchased at any store and diluted with a certain amount of water specified in the instructions. You need to stir the glue until you get a fairly uniform layer that will not spread over the tile. The finished composition is left to “ripen” for 5 minutes, finally mixed and application begins.
After which the tile is pressed tightly to the floor with your hands. Its positioning is performed relative to the reference lines. The work process continues in the same way with the obligatory fastening of crosses, which help maintain a certain gap between other plates. At the same moment, the necessary adjustments are made - removing or adding mortar, inserting new wedges, etc. Make sure that there is no excess glue left in the space between the plates. Excess glue is immediately removed. The solution stains that dry out on the tiles are washed off with water. The surface is wiped with a dry cloth. After the tiles have acquired good immobility, the crosses are removed. You should not wait for the solution to completely harden, since then it will be very difficult to remove the separators.
Selection of adhesive mixture
Compositions for gluing floor tiles can be purchased dry or ready-made. Bulk mixtures require subsequent dilution with water right before laying the material. They are sold in bags and packages. You need to prepare glue at home according to the instructions, strictly observing the proportions. The advantage of using dry mass is the ability to dilute only the required amount of substance for installation, and an affordable price.
Ready-made mixtures are produced in plastic buckets or canisters. They are ready for application and begin to harden upon contact with air. Due to their high cost, they are purchased only if it is necessary to lay tiles over a small area, for repair work on an already finished coating. With certain skills, any adhesive mixture can be replaced with cement-sand mortar.
Quick laying of tiles with the DLS system
The DLS tile laying system is a way to level the plane of laid tiles based on spacers and spacers for them. Using these tools allows you to largely automate the process and make it accessible even to beginners. With the help of the DLS system, a novice master can, for example, lay tiles in the bathroom several times faster and with better quality than using traditional crosses and wedges. This leveling system is also suitable for laying porcelain tiles.
The T-shaped lining is fixed under two adjacent tiles and acts as a spacer cross, only it additionally aligns the edges of the tile. The spacer is inserted into this element and tightens it, additionally aligning the tiles, creating pressure on them with its plane. Due to the large width of the system, it is possible to align 4 tiles at the same time at the intersection of the seam. To install the spacers, a special tool is used - clamping pliers. The spacers are removed after the glue has dried by simply knocking them down, but their bases remain under the tile.
The system compares favorably with older installation methods. When using crosses to lay tiles on the floor or wall, you cannot always level the plane: this is a feature not only of cheap types of ceramics, but even of expensive collections.
Features when working with the DLS system
This system is even better suited for installing expensive textured tiles - it allows you to align the tiles along the back, flat side.
Nobody canceled the level!
When using the system, one thing must be remembered - the initial leveling of the tile surface is also necessary. It is important to set the first row correctly. For a large plane, it is necessary to control its entire surface, so you can lay out two rows (on the long and short sides of the plane) using the traditional method: by level, using wedges and crosses. Otherwise, by “chasing” the tiles row after row, at the end of the plane you can accumulate an error and go beyond the level.
Whatever surface level you set with the first tiles, you will get the same level over the entire surface using the DLS system. Therefore, it is necessary to ensure that it is a strictly vertical or horizontal plane (depending on where the tiles are laid: on the wall or on the floor).
Glue – more is better than less!
It is also necessary to get used to applying the glue - in this case it is applied only to the surface of the base: wall or floor. If you apply little, the DLS system may tear the tiles away from the adhesive layer during the leveling process. This is especially important when laying tiles on the floor, because you may not feel this moment, and then after the glue has dried, when you first test the surface by simply walking, the tile can be loosened or broken.
In this case, it is better to apply a little more glue and then remove the remaining residue. If you apply less, there is a risk that the tile will stick to only part of its surface or not stick at all. To do this, be sure to stock up on a rubber mallet and, before tightening the wedges, carefully tap the tiles with it.
Operating procedure
- Apply glue to the surface with a notched trowel.
- Install spacers under the tiles of the previous row.
- Install the next row of new tiles on top of the spacers.
- Level the tiles to within 0.5...1 mm using a rubber mallet.
- Remove any remaining glue that has come out.
- Tighten the element using a wedge and clamp.
- Proceed with the installation of the next tiles, controlling the thickness of the adhesive applied.
Advantages and disadvantages of the method
Advantages.
- The speed of work, judging by the reviews and videos we watched, is really growing. A DIY tile kitchen backsplash will be ready in less than a day of work. And this is with a reserve - in reality, a day is also enough to choose the tiles and purchase all the materials =) It’s a joke, of course, but the complexity of the work, which consists in constantly monitoring the plane during installation, is really reduced to a minimum.
- Applying glue to the floor is actually easier and faster than applying it to each individual tile, holding it in your hands.
- The necessary tools for laying tiles using the new method are the same as before.
Flaws.
- Using a DLS system increases the cost of laying tiles, since the system itself is quite expensive.
- Only the wedges are reusable, the T-pad is a consumable item and must be purchased again.
- When installing the first elements, you need to feel the degree of tightening of the assembled element so as not to overtighten it and break it - there is no limiter.
Laying tiles on the floor without crosses using the DLS system is a progressive installation method. With skill, a tiler can lay up to 50 m2 without trimming, a beginner will at least meet the quality standard with laying up to 20 m2. The DLS system is only suitable for flat surfaces, so for complex wall shapes (radius) traditional inspection and installation methods are still required.
Place the trimmings
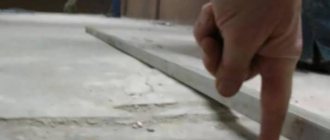
Lastly, tiles are laid around the perimeter of the walls, as well as those adjacent to pipes and external corners. Such tiles must first be cut to the required size using a tile cutter or an angle grinder with a diamond disc. And then lay it on the glue in the same way as whole tiles: using crosses and checking the flatness with a level.
How to cut with a tile cutter
- Measure the required length of the tiles, taking into account the seams.
- Place marks on each side with a pencil and draw a line.
- Place the tile on the tile cutter table according to the mark and press it against the edge of the bed.
- In one movement, move the roller along the cutting line.
- Apply light pressure to the handle to separate the tiles.
How to cut with an angle grinder
- Mark the cutting line on the tile and secure it with improvised means.
- Put on your glasses and grab a grinder with a solid diamond blade.
- Without applying pressure, gradually cut through the tiles, without going deep into the entire thickness at once.
- To avoid raising dust, you can moisten the tile and cut through only the top layer, and then place a nail under the tile and break it as if using a tile cutter.
Grout, fugue
Grouting is the last step in creating a tile floor. And you need to buy it to match the color of the material being glued. Make sure the glue has cured well. Clean the seams from any remaining tile adhesive. Using a rubber spatula, apply the grout mixture into the joints. Remove the excess.
Can tiles be laid on a wooden base?
The tree does not tolerate unstable temperatures, constantly changing its size. It is not difficult to imagine what will happen to the ceramic tiles: the ceramics will begin to crack and move away from the base. However, there are times when it is vital to install tiles on a wood floor. In such cases, you have to make exceptions and painstakingly prepare the foundation, shelling out a lot of money for materials. You can create a strong and level base that will be suitable for ceramics by choosing a wet or dry leveling method.
Is it possible to tile a heated floor?
Can. The best option for laying ceramic tiles is an electrically heated floor. The rules for laying ceramic material on a heated floor do not differ significantly from facing a conventional base. The main feature is the choice of tile adhesive. For underfloor heating, adhesive with increased plasticity and thermoregulating additives is used.
Useful tips from experts
When choosing a material, you must carefully study the characteristics of each type of tile. They must meet the needs of the owners. It is necessary to take into account the degree of strength, thickness, and the need for a glazed coating.
The texture of floor tiles should be moderate. Slight ribbing will prevent slipping. If the patterns and grooves protrude too much, this may make cleaning difficult. The gloss will highlight even the slightest dirt.
It is better to dilute the adhesive composition for installing tiles in small portions. If unforeseen circumstances arise and the installation process slows down, it will not be able to dry. Only cold water is used for mixing. Hot liquid will deteriorate the quality of the adhesive solution.
The material can only be laid on a flat, clean floor; door frames and baseboards must be removed. It's easier to work along guide lines. The resulting gap between the outer row of tiles and the wall can be hidden with a plinth or you will have to glue a ceramic strip.