In this article I would like to talk about my experience of laying ceramic tiles on the kitchen floor. I purchased tiles measuring 60×60, seven packs of eight pieces. In total, 17 thousand rubles were spent on installation. In principle, for a kitchen measuring twenty square meters this is an acceptable amount.
Choosing tiles: I am not a professional tile maker. You can say that I am new to this business. The main nuance of a kitchen floor is an uneven floor. Initially, there was no talk of a self-leveling floor in the kitchen.
Tips for initial selection of ceramic tiles
At the initial stage of choosing tiles, follow the advice.
- Consider the tile manufacturer. There are many manufacturers that have proven themselves in the market (both budget and “expensive”). If you liked the tiles, don’t be lazy to read reviews about the manufacturer. That's exactly what I did.
- Safety. Choose a matte surface, glossy - slippery.
- For myself, I learned the following: it is difficult to wash off the remaining dirt from ceramic tiles, especially if you have pets.
- When your order has been collected, check the article number and color of the tiles so that there is one batch. Measuring is also important. The correct measurement of the room determines how much excess material will remain. There should be a reserve in any case. What if you cut the tile incorrectly or a crack or defect appears during transportation.
- Pay attention to the size of the tiles, because for a small room, a large tile will look ridiculous. You are unlikely to like a wall made of two or three tiles and pieces. There will be a lot of cuttings.
- There are tiles that need to be matched with a pattern, just like when wallpapering a wall.
What do glue manufacturers recommend?
In addition to the recommendations of professional builders, it is also worth listening to the words of tile adhesive manufacturers. After all, they are the ones who know well what the tool should be like in order to leave behind the optimal thickness of the adhesive mixture. If the comb is selected perfectly, the adhesion strength of the tile to the wall will be maximum. Therefore, on packages of construction adhesive, manufacturers often indicate a table corresponding to the size of the tile and the thickness of the teeth on the spatula:
| Comb tooth length | Minimum tile size | Maximum tile size |
| 3 mm | 50 mm | 70 mm |
| 4 mm | 70 mm | 100 mm |
| 6 mm | 100 mm | 200 mm |
| 8 mm | 200 mm | 300 mm |
| 10 mm | 300 mm | 500 mm |
| 12.5 mm | 500 mm or more | |
If the teeth on the spatula are too small, there will be insufficient amount of glue on the tile - it will not adhere well and will come off over time. Too large teeth guarantee huge waste on repairs and peeling off the tiles (the glue will not hold the heavy mass of the tiles).
Spatula with teeth of various sizes
Different types of glue have different compositions, therefore, the shrinkage coefficient and setting time will not be the same. In order for the repair work to be carried out to the highest possible quality, it is recommended to deviate from the average parameters indicated in the table above and follow the indicators characteristic of a particular brand of glue:
| Ceresit CM11 Plus | |
| Maximum tile size | Maximum tine height |
| 5 cm | 3 mm |
| 10 cm | 4 mm |
| 15 cm | 6 mm |
| 25 cm | 8 mm |
| 30 cm | 10 mm |
| Ceresit CM14 Extra | |
| Maximum tile size | Maximum tine height |
| 15 cm | 6 mm |
| 25 cm | 8 mm |
| 30 cm | 10 mm |
| 45 cm | 12 mm |
| Ceresit CM12 | |
| Maximum tile size | Maximum tine height |
| 30 cm | 10 mm |
| 60 cm | 12 mm |
| Ceresit CM17 | |
| Maximum tile size | Maximum tine height |
| 10 cm | 4 mm |
| 15 cm | 6 mm |
| 25 cm | 8 mm |
| 30 cm | 10 mm |
| 45 cm | 12 mm |
One last tip: be sure to follow the manufacturer's recommendations when diluting the adhesive in a bucket. Even with a slight violation of the proportions, the characteristics of the adhesive may be lost. It is not recommended to use a substance whose expiration date has already expired (usually glue is stored for 3-4 days after dilution).
Preparation
This stage includes:
- Removing old flooring. I had linoleum flooring.
- Dust removal of the room. Cleaned the room thoroughly before laying the tiles.
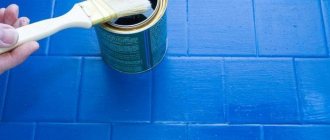
- I additionally used a primer from Ceresit - it costs around 629 rubles. The main advantage is the drying time. The downside is the liquid consistency. After application, leave the surface to dry completely, one hour was enough for me. And then, I started to test lay out the ceramic tiles. Placed it around the entire perimeter of the kitchen. After that, I set aside the required amount of tiles that had to be cut. If you want to buy a better quality primer, then choose KNAUF BETOKONTAKT, its consistency is thick, dries quickly and does not leave solutions. Price from 2000 rubles.
Tools needed at this stage: primer roller, dilution container, damp cloth.
Categories
- Apartment design
- All about repairs
- Doors
- Window
- Ceiling
- Walls
- Plaster and putty
- Drywall
- Furniture
- Other about repairs
- Floor
- Leveling the floor
- Cement strainer
- Dry floor screed
- Semi-dry screed
- Self-leveling floor
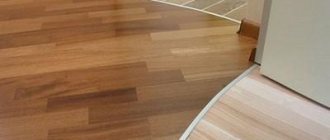
- Flooring
- Warm floor
- Electric floor
- Water heated floor
- Floor coverings
- Tile
- Laminate
- Everything about plumbing
- Water pipes
- Bath, shower
- Faucets
- Toilet
- Heating
- Everything is electrical
- Wiring
- LED in everyday life
- Ventilation
- Construction materials
- Tools
- Materials
- Construction calculators
- Repair of a country house
- Miscellaneous articles
- Top review
- Question answer
- News
- Repair video
Tile cutting
For cutting ceramic tiles I used:
- Grinder and wheels.
- Tape measure or ruler for measuring the required lengths.
From my experience, I will say that it is better to choose a diamond blade, the best option for a diamond blade is Di-Star. The cost is around 2000 rubles.
If you have a tile cutter, then the issue with the grinder and discs disappears.
In principle, nothing complicated, I marked the segment that needed to be cut, put the tile on the table and cut the required size along the marked line with a grinder.
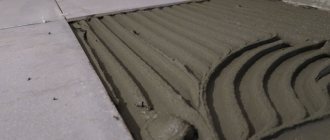
What are the benefits of comb styling?
First of all, it saves tile adhesive. The savings are not financial; this is a dubious question, which depends on the cost of preparation. The savings are primarily reflected in lower labor costs and movements of the tiler. Make less batches, apply less, etc. - this saves a decent amount of time.
Secondly, it takes less time to level the glued tiles. In fact, the tile is only slightly adjusted to an acceptable result.
Third: due to the fact that the amount of glue is clearly measured, during adjustment there is no need to expel excess glue from under the tile. This means that the seams will be cleaner to begin with and there will be much less hassle in preparing for jointing.
It is unlikely that it will be possible to achieve such clean seams when working with layers of tile adhesive.
And the fourth advantage is quality. Of course, with a fairly level base, the facing plane will be smoother than when working with layers. After all, a thick layer (more than a centimeter) tends to float and shrink when dried. After all, a thick layer of adhesive takes longer to set and the tiler can easily disturb the position of previously laid slabs while leveling the newly glued one.
How to lay tiles on an uneven floor
Tools needed: wedges, crosses, notched trowel, level.
- I marked the highest point on the floor with a level. I started laying tiles from there. I started laying from the far wall and from the highest point!
- After a test layout, I began to study the instructions for diluting the glue. This is an important point, especially for those who are laying for the first time. I used glue from BauGold. You should not dilute the glue by eye. Tiler experts point out that the glue must be diluted strictly according to the instructions. This is not cement. The glue has a certain time of being in open space, after which it begins to harden. This glue has a hardening time of 20 minutes.
- A bag of dry glue was 25 kilograms. This amount required 4 liters of water. Make sure that the glue is neither dry nor liquid.
- A small amount of glue was applied to the surface of the tile. And with a notched spatula (choose a spatula at your discretion, the main thing is that there are teeth) to remove excess glue. Press the spatula harder. If you notice that there is not enough glue, lift the tile and put the required amount of mixture.
- Prepared crosses and wedges. It is important that the glue does not dry out. It must be used immediately after laying the tiles.
- After laying the first tile, place the heel of the cross into the seam. 2 on each side.
- We apply the tiles and fix them with wedges. So in circles.
After 12 hours, knock down the crosses and rub the seams.
Tooth shape
- To apply ridges from 6 to 10-12 mm, standard square teeth are used.
- For ridges over 12 mm when working with cement mounting mixtures, semicircular teeth are used. At this thickness, the track combs more evenly and does not fall off if it has a semicircle in cross-section rather than a square. They are also used for applying synthetic adhesives with strong spreadability, regardless of the layer thickness.
- There are also sometimes combs with triangular teeth. They are not suitable for laying tiles; they are used for applying elastic adhesive in a thin layer (up to 4 mm) for PVC tiles.
Depending on the shape of the teeth, the spatula may be marked with letters and numbers. The number indicates a group of size parameters, and the letter indicates the shape:
- A – triangular teeth, without large spaces between them;
- B – triangular with large intervals;
- S – triangular without gaps;
- C – square;
- R – rectangular (including irregular shape);
- M – semicircular.
Tooth sizes
The thickness of the applied glue can be adjusted by changing the angle of inclination. Also keep in mind that after pressing the tiles, the glue will distribute into the voids and settle.
The adhesive layer flattens out after pressing.
Approximate sizes of teeth depending on the area of the tile:
| Tile area, cm2 | Teeth size, mm | Adhesive layer after pressing when applied at an angle of 45°, mm | Adhesive layer after pressing when applied at an angle of 60°, mm |
| 2500 | 12 | 4,2 | 5,2 |
For a floor or uneven base, the size of the teeth is selected larger.
How to lay tiles on an uneven floor?
To lay tiles on an uneven floor you need:
- Measure the floor and find the high point.
- Start gluing from the selected highest place.
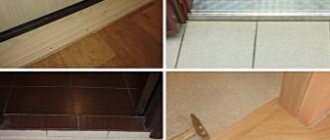
- The distance from the tiles and the wall should be 2 cm; the remaining space can be covered with skirting boards.
- Try to use less glue on high points and more on low points.
Ivanov Alexander Sergeevich, 23 years old. I graduated from a vocational technical school and now work as a tile layer. It is definitely possible to lay tiles on an uneven floor. But in any case, during the installation process you will level the floor. For leveling you will use tile adhesive.
Recommendations from the experts
The work of tiling the floor yourself includes selecting materials, preparing the surface and giving the coating a finished look. At each stage you need to adhere to technology and study the features of the procedure.
Expert recommendations:
- before marking, calculate the coverage area;
- Install first along the long wall;
- clearly mark the location of the drawing;
- To save grouting material, use a syringe or pastry bag.
Follow the technology and recommendations to simplify the process of laying floor tiles. Make sure tools and materials are available. Taken together, this will lead to the expected results. If difficulties arise, seek advice from a specialist.
What to do with uneven planes: solutions
As mentioned above, significant relief must be removed, otherwise the tile will
won't lie down. A self-leveling screed is useful for this. This product will make it possible to easily achieve a very smooth surface, although it does not take 1 day to dry. Specialized mixtures speed up the process, but the work stops for two to three days. You need to understand that this will cause the floor to rise and, as a rule, you will have to correct the surface level throughout the house.
The screed will also be a lifesaver in case of a significant tilt. Unfortunately, it will also eat up space, but gluing the tiles will become much easier.
In general, the screed has its own positive qualities:
- perfectly aligns;
- fills open voids in the rough base;
- has an antifungal effect;
- makes it possible to hide the heated floor system;
- provides additional noise and heat insulation.
If this option is not very suitable, then it is possible to do without alignment. In this case, the tiles are laid on the floor according to special rules that differ from traditional tile laying options. Otherwise, you don’t need to count on a solid and good result: the first flaws will appear in the first month of operation. However, when implementing the recommendations, even on such a poor base, the tiles
will serve for more than a dozen years.
Frame wall alignment
The weakly adhering finish is removed from the wall, the bulges are cut off, primed, and then the depressions are roughly rubbed. If gypsum plasterboard is used for leveling, even moisture-resistant, it is better to waterproof the wall, easier - penetrating. To make the frame, wooden blocks are used after antiseptic and hydrophobic impregnation, or better yet, a thin-walled steel profile for gypsum plasterboard, galvanized or painted.
To ensure that the base for tiling is sufficiently rigid, the pitch of the profile or bar in the frame is no more than 40 cm, and the coating is often made of two layers of plasterboard.
Laying tiles on gypsum board, fiber board or flat slate is done in the same way as on any stone base. The disadvantage of this alignment is the loss in room dimensions due to the use of a frame.
Dry screed
This option requires a minimum of time, since after installation you can immediately begin facing work. However, first remove excess old building material and repair large cracks, if any. For additional protection against moisture and fungus, the floors are impregnated with an antiseptic and primer.
To level the surface for laying tiles using the dry method, use sand and expanded clay chips as the main substrate. The thickness of the bulk layer is exactly as much as required to remove all protrusions on the surface. In order to compensate for the expansion of the mass, a damper tape is installed around the perimeter of the room. Next, the dry materials are carefully compacted and leveled using the rule. Sheets of plywood or fiberboard are laid on top of this screed, so make sure in advance that their thickness fits into the workspace.
Recommended Posts
Recently viewed by 0 users
No registered user is viewing this page.
9 things you should never put in the microwave
A bright kitchen with a place for everything
Heart of the home
The best articles on the IVD website
Are you a professional architect or designer?
Are you a professional architect or designer?
The IVD.ru website is a leading Internet project dedicated to the issues of reconstruction and interior design of residential premises. The main content of the site is the archive of the magazine “Ideas for Your Home” - exclusive author’s articles, high-quality illustrations, practical tips and lessons. A team of professionals is working on the project in close collaboration with famous designers, architects and leading publishing experts.
On our website you can choose comprehensive design solutions; view detailed reviews of the market for construction and finishing materials, furniture, machinery and equipment; compare your own ideas with design projects of leading architects; communicate directly with other readers and editors on the forum.
Are you a professional architect or designer?
Source of the article: https://forum.ivd.ru/topic/67501-%D0%BF%D0%BB%D0%B8%D1%82%D0%BA%D0%B0-%D1%81-%D0% B2%D0%BE%D0%BB%D0%BD%D0%B8%D1%81%D1%82%D1%8B%D0%BC-%D0%BA%D1%80%D0%B0%D0%B5 %D0%BC/