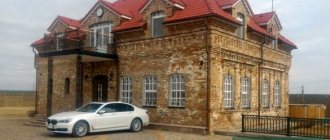
People throughout history have sought out various materials for building houses, laying roads, and other engineering tasks. There were great and successful discoveries, and there were also failures. Clinker brick for facade houses and more was born not so long ago, although bricks are already many years old. The Dutch were the first to use this material at the beginning of the 19th century. The best proof that clinker brick has become synonymous with reliability and durability This is due to the fact that after its invention, many factories for its production appeared in Europe and the USA. Further proof of its durability are the very roads and buildings that were built from it in the mid-19th and early 20th centuries. They still delight the eyes of tourists and perform their task perfectly.
Clinker bricks for European-style facades
Many people wonder why it is worth choosing clinker bricks for the facade ? What is good about clinker brick and what makes it special? Also, many are concerned about the decision whether to choose ordinary ceramic bricks or dare and purchase clinker bricks. This is understandable, because the price of clinker bricks is higher, which means that anyone wonders whether the investment will pay off. In any case, be that as it may, in order to carry out exterior decoration properly you need to have at least 4 things: time, money, taste and knowledge . If with the first three a person can only help himself, then with knowledge you can help. This is what we will do in this article.
Your opinion is important to us! Write in the comments what you think, is it worth using clinker bricks for the facade?
Clinker bricks for facades - history
Experts believe that clinker brick is one of the strongest and most reliable materials known to mankind. Such bricks are practically resistant to external destructive influences. Due to its reputation and its properties, professionals recommend using clinker bricks for the facade and decoration of the house. In addition to the fact that clinker brick will reliably protect your walls from almost any influence, it will also give your home a stunning, authentic look . Your home will stand out from other materials and remind everyone of reliable and durable ancient stone buildings. To know the properties of a given brick, you can spend time, it deserves it. And most importantly, you can always show off your home thanks to the amazing properties of this material.
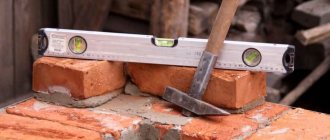
In the last article we already looked at white sand-lime brick and comments and reviews about it. Therefore, according to tradition, let's find out what the meaning of the name clinker brick is and where it came from. In fact, everything is very simple, clinker brick for the facade received its name from the German language, and in particular the word “klirren” , which translated into Russian means “ringing” . This is understandable; it received its name not only for its amazing properties of hardness and strength, but also because of its characteristic sound. When you hit a brick, a loud, distinct sound appears. Of course they influenced the name and features of clinker brick production.
Clinker brick makes a loud sound when struck
Clinker bricks for facades: general information
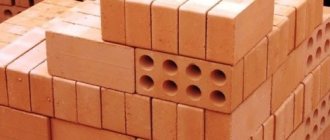
In itself, clinker bricks for facades are not some kind of supernatural invention. This is the same ceramic material, but it is made from a special type of clay , and also withstands certain conditions during production . For example, when firing clinker bricks, a temperature of 1100-1200°C is used. It is thanks to this temperature that the brick acquires that characteristic ringing sound that we talked about earlier. This sound vaguely resembles glass. In the past, clinker bricks were often called refractory bricks.
The important thing is that thanks to these special production and heating conditions, the brick acquires frost resistance and hardness. But the moisture absorption of clinker bricks is minimal. This combination of properties allows clinker bricks to reliably perform their tasks for hundreds of years . Therefore, experts confidently say that clinker brick is a unique material . This means that your home will amaze everyone with its beauty and grandeur for many years to come.
Clinker bricks for house facades and cladding
To understand in more detail all the properties of clinker bricks, we will take a closer look at how they are produced . This knowledge will help you choose the best clinker brick from the variety available on the market. The point is that you will know what to look for when choosing, so that the brick will really serve you reliably for a very long time.
Materials for clinker production
The basis for the production of clinker products is refractory types of clay with a high content of aluminum oxide. This element is responsible for ensuring that the product does not deform during the firing process. If there is an insufficient amount of aluminum oxide in the clay, kaolinite clay is added to the mass.
Clay is highly plastic. The raw materials should not contain salts or limestone rocks.
The forming mixture also contains:
- magnesium oxide;
- calcium oxide;
- iron oxide;
- calcium;
- magnesium;
- silicon.
The content of each substance is limited to the permissible norm. Exceeding will have a negative impact on the original product.
Production of clinker bricks
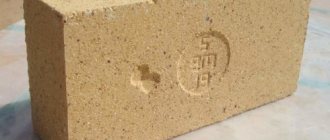
What is so special that they use in the production of clinker bricks that its properties have such amazing properties. To start the production of clinker bricks, we will need special raw materials, namely kaolin clay . It is she who has special substances, such as aluminum oxide, iron oxide and others, which enhance the properties of the brick during firing and it is they who give it a special shade from cherry to dark purple. But gray and black shades appear due to carbon monoxide. It appears due to the fact that during firing the amount of oxygen decreases. And so, what is required for the production of clinker bricks.
- Kaolin clay.
- Powdered igneous rocks (they increase the volume of glass phase in the product).
- Feldspars.
- Clay minerals. These include silicates, which make up the core mass of clay deposits. As we have already said, thanks to them, brick has all the physical, chemical and mechanical properties that we described earlier.
There are two ways, so to speak, of the production mode of clinker bricks for the facade. The first extrusion method is more popular and widespread. For this method, the following technology is used. The plastic material is continuously pulled through the molding grooves with periodic cutting of the material into individual bricks.
Brick molding chute
The second method is to mold each brick separately . Usually this is done only for very expensive types of material and only for certain special orders. If there are no special conditions that must be observed, then the first method is considered more suitable , since each brick is the same size and has the same shape. And this makes working with such material much easier.
Process of making clinker bricks
- Components intended for production, first of all, need to be moved. You should get a homogeneous clay mass.
- The resulting mixture must be diluted with water and run through the extruder. Thanks to this, the material takes shape.
- Next, the resulting workpieces need to be dried. this is necessary in order to reduce the amount of moisture contained in the bricks. Dry the brick until the moisture content is 3%. And if we talk about very durable and high-quality products, then up to 2%.
- After this comes the most important process - firing in the kiln. This is usually done in a tunnel kiln. The temperature in this furnace reaches 1200-1300°C. In addition to the type of clay, this is another important difference between clinker brick and regular brick. Ordinary bricks are also fired in a kiln, but the temperature in such kilns usually does not exceed 1000°C, or even less.
Clinker brick production technology
Thanks to all the production nuances, the clinker brick is of such high quality that it allows this material to be used in conditions unusual for bricks. Vivid examples would be the use of clinker bricks for finishing swimming pools or even for paving sidewalks . Clinker bricks will perform their tasks successfully in these areas as well.
Durability, service life of insulation
In scientific articles you can find statements that the duration of effective operation of buildings insulated with mineral wool or polystyrene boards before the first major repair is 25-35 years. During this period, a complete replacement of the insulation is required.
But in order to replace the insulation, you will need to destroy such a durable, beautiful and expensive clinker facade!
The website of a well-known manufacturer of mineral wool products claims that the service life of thermal insulation materials is at least 50 years, provided that the company’s recommendations on installation technology and operating conditions are followed.
Moreover, the manufacturer does not explain what happens to the material at the end of its service life, and how to determine the moment when it needs to be replaced. It only notes the lack of an approved methodology for determining the durability of building materials. The question arises: what is the basis for the figure of 50 years?
All sources of information agree on the same opinion that the durability of insulation made from mineral wool, from various types of foamed polymers and ecowool is noticeably less than the materials from which walls are laid.
It is known that organic substances age much faster than mineral ones. During the aging process, the chemical composition and physical structure of the material changes. The material ceases to perform its functions in a particular building structure.
Mineral wool slabs contain 3-10% organic substances - binder resins. Over time, the binder gradually decomposes and ceases to hold together the mineral wool particles. The particles fall off, the cotton wool loses its spatial structure, cakes, and shrinks.
Any insulation gradually, over the years, loses its heat-saving properties.
It has been established that the higher the density of mineral wool slabs (kg/m3), the slower the heat-saving properties of the insulation are lost. To increase service life, it is recommended to use high-density boards, although they are more expensive. This rule is also true for other types of insulation.
When to change insulation?
The insulation should be changed when it ceases to perform its functions. How to determine this moment?
Legislation in the field of construction and housing and communal services requires an energy audit to be carried out upon completion of construction of a building . During the audit process, using measurements with instruments (thermal imagers, etc.), the heat-saving parameters of walls and other enclosing structures are determined.
Based on the audit results, an energy passport is drawn up, and the building is assigned to one or another energy-saving class.
In the European Union, the procedure for obtaining an energy passport is mandatory for new private houses. The energy efficiency class of a home greatly influences the value of the property.
In the Russian Federation, energy audits of private houses are not mandatory and are usually not carried out. And probably in vain.
After 25 - 30 years, the energy audit is carried out again. The indicators of the heat-saving properties of walls and ceilings then (in a new house) and now are compared.
If, for example, the heat transfer resistance of a wall has decreased by 1/3 or more from the original, then it is recommended to carry out a major overhaul - changing the insulation and outer cladding of the wall.
After another 25 years (or earlier), the next regular audit is carried out. Thus, based on periodic measurements of the heat-saving properties of the external fences of the house, the need to replace the insulation in one or another element of the house is determined.
Since the mass use of effective insulation materials began 20-25 years ago, and energy audits are not carried out in many cases, there are no reliable statistics on the service life of insulation materials used in the Russian Federation.
Tips for the developer
For clinker cladding, it is best to do without insulation in the wall - build a house with single-layer walls made of aerated concrete or porous ceramics and line them.
To increase the service life of a facade with durable and expensive brick cladding, it is recommended to use mineral insulation made from aerated concrete or foam glass.
Traditional mineral wool insulation must have a high density , at least 75 kg/m3, and be manufactured by well-known manufacturing companies in the European Union.
When insulating a wall with polymer insulation, use only high-density extruded polystyrene foam.
Find a contractor and order an energy audit of your newly built home. A house with proven energy-saving parameters will increase in price. And in the future, it will be possible to control the condition of the insulation in walls, floors and ceilings.
More articles on this topic:
⇒ External three-layer stone wall with brick lining
More articles on this topic
- Choosing façade plaster for finishing the exterior walls of a house
- Dew point, vapor barrier and ventilated wall gap
- Height, dimensions, waterproofing and insulation of the basement of the house
- Floating floor - soundproofing floors in the house
- What is the best way to make walls for a home?
- Cement, sand, crushed stone - selection and consumption of materials per 1 cubic meter of concrete
- Should I build a house on one floor or two?
- Forced ventilation device in a private house
Clinker bricks for the facade: its advantages and disadvantages
Now we have come to the point where it is time to list all the general advantages of clinker bricks, as well as its disadvantages. You and I are smart and educated people and we know that there are no ideal building materials . Each material is suitable in the area where its properties are valuable.
Advantages of clinker bricks
Conventionally, all existing facade bricks can be divided into two types - facing and clinker bricks . But if you compare these two types. then clinker brick is definitely better in all respects. Here are all the advantages of this material.
Types of bricks
High strength
Clinker bricks for facades have very high bending and compressive strength. It is several times superior to other types of bricks in this indicator. Another important feature of clinker bricks is that they hardly wear out. grade of such a brick is M400-M1000 , which means that a wall made of clinker bricks will last for hundreds of years. It is thanks to this high strength that clinker bricks can be used in road paving.
Does not absorb moisture
Clinker bricks practically do not absorb moisture . We all know that water destroys material over time, especially water that gets inside. Therefore, professional builders are very fond of clinker bricks, the whole point is that it does not absorb water even if such a brick is immersed in water, unlike sand-lime bricks. Thanks to this property, clinker bricks are absolutely not afraid of any weather conditions : rain, snow, fog, high humidity and others.
Frost resistance
The frost resistance of clinker bricks can reach 200 cycles . The whole point, again, is low moisture absorption, it is thanks to this that clinker bricks for facades are able to withstand 200 cycles of freezing and defrosting without losing their properties. And this figure is not the limit. Even if you now look at those buildings that were built from clinker bricks 200 years ago, when they were first invented, they still stand and look very reliable. Is other evidence needed?
Amazing durability
Clinker bricks for facades have truly amazing wear resistance . In addition to the fact that it is not exposed to weather conditions, it is also not afraid of the effects of acids, salts and alkalis. Clinker bricks will perform their main task without fading or drying out in the sun; they are also not afraid of mold or scratches . I'm glad that this effect can be achieved without special additional processing.
Ecologically pure
We know that clinker bricks contain exclusively natural ingredients . This means that clinker bricks for facades are an environmentally friendly material. Moreover, even different shades of brick colors are achieved by using different types of clay, rather than chemical dyes. , a combination of durability and environmental friendliness is rare
Variety of colors
Clinker bricks for facades have a rich variety of colors . Such diversity can surprise and delight anyone, even the most spoiled buyer. Clinker bricks have another ace up their sleeve. In addition to the variety of shades, it also has a variety of textures and textures. To achieve a special texture, clinker bricks are shotcrete. This means that mineral chips are applied to it before it is sent to the kiln for firing.
Clinker brick for facade with mineral chips
Long service life
Clinker bricks can serve you for many years. Long service life is another advantage of clinker bricks. All the properties that we have discussed before guarantee you that your house will last 200 years or more . Experts who studied the masonry of clinker brick buildings that were built 150-200 years ago concluded that such buildings can last just as long.
Variety of sizes and shapes
In principle, this point is true for almost any brick. The simple fact is that individual orders for clinker bricks are much more common. of any shape, size and color at your request . And this allows you to bring even the most daring design ideas to life.
Wide scope of use
If we summarize all the mentioned characteristics and the fact that clinker bricks can be of any color, shape and size, then we can safely conclude that such bricks are used in different fields and areas of construction . These areas include the construction and cladding of external and internal walls, the construction of bridges, columns, sidewalks and various sites.
But we must understand that there is simply no point in using clinker bricks where ordinary sand-lime bricks can be used. It's all about economic benefit. The cost of clinker bricks is several times higher than the cost of standard bricks.
Problems that clinker bricks solve
In order for us to better understand all the advantages of clinker bricks, we will look at several problems that are inherent in ordinary bricks, but are not typical for clinker bricks. This will help you understand the difference and make the right choice in favor of one or another material.
- Low frost resistance leads to destruction . Simple brick, especially if we talk about hollow brick, i.e. with holes absorbs moisture during operation, and this leads to the destruction of the brick. The walls of such bricks begin to crack and break. Clinker bricks for facades can also be hollow, but they are not afraid of . It is able to withstand loads even after 90-100 years.
- The appearance of salts on bricks . If you look closely at brick buildings, you may notice a white coating on some of them. Builders call this coating efflorescence. In simple words, it is the release of salts and sulfates that are present in the clay. bricks do not have this problem either ; the fact is that all the salts come out of it due to firing at high temperatures.
- The so-called "Shots". This problem is again related to the composition of the brick. If the clay is not mixed well enough, calcium and magnesium carbonates will be present in the mixture, and when fired at a temperature of 1000°C they will not melt. later they seem to “shoot out”, which means that they damage the brick from the inside. The danger of such shots is that they cause cracks in the brick. The situation is different with clinker bricks . Due to the fact that the brick is fired at a higher temperature, all carbonates are melted without any problems, which means that the problem is solved before it even begins .
Efflorescence
Disadvantages of clinker bricks
But it is also impossible to say that clinker brick is an ideal material without disadvantages and shortcomings. Clinker bricks have their own disadvantages that need to be taken into account. Therefore, next we will consider all the disadvantages of clinker bricks in more detail.
High price
When choosing clinker bricks for construction, you must understand that this type of brick is considered the most expensive among all other bricks. Therefore, unfortunately, we must admit the fact that many simply cannot afford it. Even if you can raise the money to buy the bricks themselves, you will have to use a special mortar to lay them, and this will also cost a pretty penny.
We need specialists
Of course, it is advisable to look for professionals in everything, but with clinker bricks the situation is even more serious. It's all about that very solution. with this solution . and if a person works with it for the first time, then there is a high probability that in the future such masonry will crack or even collapse. So it turns out that you need to spend more money on a professional in order to save in the future. Therefore, this should also be taken into account when choosing clinker bricks for the facade.
High specific gravity
At first glance, the seemingly insignificant problem of high specific gravity of brick affects many things, including the cost of construction as a whole. To begin with, we note that the weight of standard size clinker bricks is not small, about 3.5 kg . This weight is due to the fact that during production the porosity of the material is reduced, which means the weight of the product increases. It turns out that the solid weight of the façade brick puts a serious load on the foundation . To solve this problem, many experts recommend building an additional foundation when using clinker bricks. The problem is solved, but the construction cost will be much higher.
Does not allow air to pass through
Clinker brick has low vapor permeability. This is again due to the fact that the brick has practically no pores, which means that such a brick practically does not let air into the building. This negative property makes it difficult to maintain a normal microclimate in the house. This means that residents will have to ventilate such houses more often.
High density
High density is not always a plus. If the material has a high density, it will lose heat very quickly. This is exactly what happens with clinker bricks. Statistics show that clinker bricks lose heat 1.5-2 times faster compared to ordinary bricks. Therefore, a façade made of clinker bricks cannot be considered insulation for a house.
Insulation for clinker bricks for facades
Durability interferes with work
The high strength of the material is one of the main advantages of clinker bricks, but not for the mason who lays it. The thing is that high strength makes working with brick very difficult. It is difficult to spray and almost impossible to split evenly with a mason's hammer.
Same color
To maintain the same color scheme, you need to buy the required number of bricks from one batch. The fact is that production technology cannot always guarantee the same shade of the material. Of course, this cannot be called a serious disadvantage of clinker bricks, but still. this creates certain inconveniences in some cases.
But you need to understand that the high price for the material itself and its installation, one way or another, is explained by the fact that this is a one-time investment . The finished coating is unlikely to bother you or require any additional care. This means no future expenses.
Windows and doors in a three-layer wall
The pictures below show how to correctly make openings for windows and doors in the wall of a house with clinker cladding.
Construction of an external clinker window sill:
In the figure: 1 - clinker window sill (shaped brick or tile); 2 - joint sealing; 3 - window box; 4—groove—dropper; 5 - ventilated gap.
The window sill on the outside of the window is made of specially shaped clinker bricks. A window sill is also made from bricks of a standard shape, laying it on an edge with a slope to drain water. In the latter option, a drip groove is cut on the bottom surface of the bricks so that water from the window sill does not flow onto the wall.
Instead of a brick window sill, you can install standard metal or plastic ebbs. But such a solution usually does not look very aesthetically pleasing and presentable (cheap) for a house with clinker wall cladding.
Section above the window of an external wall with clinker brick cladding:
In the figure: 1 - horizontal waterproofing with a turn on the wall; 2 - hole in the vertical seam between the bricks for water drainage and ventilation; 3 - reinforced concrete lintel in the cladding, covered with clinker tiles; 4 — silicone sealant or sealing tape; 5 - window, located in the thickness of the heat-insulating layer; 6 - reinforced concrete lintel in the load-bearing layer of the wall.
Reinforced concrete lintels are installed in the cladding over window and door openings, which are then covered with clinker tiles (in the figure above).
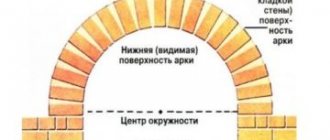
The best option is to make lintels over openings made of clinker bricks. It is convenient to lay the brick lintel in the shape of an arch. Straight lintels made of vertically installed bricks are made with reinforcement of the vertical joints of the masonry and horizontal reinforcement of the masonry above the lintel.
Horizontal waterproofing must be installed above door and window openings, pos. 1, with a turn on the wall, to a height of 150 mm, to protect the load-bearing wall from water that can accumulate on the waterproofing layer in the ventilated gap. To drain water and ventilate the gap in the brickwork above the waterproofing, holes are provided, pos. 2 in the picture
Types of clinker bricks
We have already learned a lot about clinker bricks. To continue, we need to remember that clinker bricks are divided into 6 varieties. Each subtype of clinker brick has its own tasks, so they can differ from each other not only in shape, but also in properties. Well, let's study each subspecies separately.
- Clinker tiles . This material is used exclusively for decoration, both inside and outside the house. Due to the fact that such material is produced with holes inside, it does not create a dangerous load on the foundation. Clinker tiles have two subtypes, distinguished between clinker for interior decoration and facade clinker . For interior decoration, such material can be useful in lining walls or stoves, and facade bricks are, of course, used for external cladding of buildings or other structures.
- Acid resistant clinker brick. Due to the fact that such bricks perfectly withstand any chemical influences, they are used in places with very harsh climates or for various industrial needs. Near chemical plants, for example, buildings can last much longer than those made of any other material.
- Clinker for technical needs. Continuing the theme of production, such solid bricks are used for laying walls in hazardous areas or for lining chimneys or furnaces. Sometimes such bricks are used in the construction of roads, bridges, and squares. This type of brick is not suitable for cladding .
- Waterproof clinker bricks. This material gets along well with water and steam . For this reason, it is usually used in places such as baths, saunas, swimming pools and other buildings that are in constant contact with water.
- Figured clinker brick. This clinker brick is made to order. The shape of such a brick is made directly for the needs of the future structure. Such a brick takes into account individual parameters and can have various shaped elements, be convex or concave.
- Paving clinker bricks. This brick is specialized for use in laying sidewalks, roads, and if we talk about private construction, garden paths in the yard.
Technology of cladding buildings with clinker bricks
We have already mentioned that for clinker bricks, the requirements for cement-sand mortar differ from the standard ones; only an experienced mason can prepare the mass. Only he knows how much to reduce the amount of water, taking into account the weather and the location of the masonry. Otherwise, the thickness of the seams and the degree of adhesion will be compromised, and this has an extremely negative effect on the appearance and stability of the lined wall.
Buildings can be clad both during the construction of walls and after its completion. In addition, during cladding, additional insulation of the facade is possible.
House cladding
We will provide step-by-step instructions for all types of work and consider each technology separately. Let's talk about possible mistakes of inexperienced masons.
Application of facing bricks
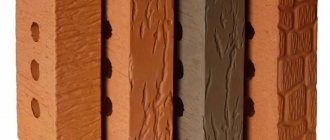
Types of clinker facing bricks
To make an informed choice when choosing clinker bricks for a facade, you need to know some types of facing bricks . Below in the picture you will find the types of surfaces that clinker bricks can have.
Types of clinker brick surfaces
Also, to choose, you need to know the standard sizes of clinker bricks . The picture below shows what standard sizes exist for such bricks.
Standard sizes of clinker bricks
Clinker bricks can be solid or hollow. It can also have different shapes. The so-called additional bricks are produced in various modifications. They are needed in order to make neat transitions during construction and design complex architectural elements. There are about 20 different options for custom-shaped bricks. Such blocks can be used to design various complex elements for execution. For example, arches, columns, bay windows, window sills, basement edges, cornices, corners with depressed or rounded edges and many other elements of architectural art.
Application of additional clinker bricks
Formats and sizes of clinker bricks
Here are a few formats you need to know. These formats are used not only in Russia, but also in Europe. Each format has its own dimensions. In Russia, they mainly use the NF format - 240x115x71 mm, although all types of material are sold. It is important to clarify the format of the bricks before purchasing, especially if you plan to use different ones in construction. This is necessary so that there is no mismatch of materials. The picture shows different formats of clinker bricks.
Clinker brick formats in Russia and Europe
How to lay bricks correctly?
To ensure uniform masonry during the construction of cottages, it is necessary to mix material from different pallets. You can mix several shades to get an exclusive effect. To lay out clinker you will need the following tools:
- trowel (a tool for creating a seam between brick layings);
- a simple pencil;
- hammer-pick;
- sieve with a mesh of 2 mm;
- meter;
- spirit level;
- Metal sheet;
- a brush with stiff bristles;
- trowel for expanding horizontal seams.
Lay the clinker based on the instructions:
- The first layer of stone is laid “dry” to obtain a clear marking of the vertical joints, which should have a thickness of 10 mm.
- The laying mixture is divided into working sections.
- A ventilation hole is provided. When carrying out installation work, nothing should get into it.
- After laying out the clinker stone, make recesses in the joints with a depth of 20 mm. The rate of hardening of the solution depends on the brand used. Each manufacturer is different.
In order for the masonry to look neat and beautiful, it is better to invite a team with experience in working with this type of brick. Not all builders can work with it. Considering the cost of the material, the money saved on labor during the construction of a cottage can lead to financial losses. Also, when planning to use clinker, you need to use the services of a designer who, at the end of the project, will calculate the amount of material for a specific cottage.
Properties and technical characteristics of clinker bricks
Let's summarize and list the main properties that clinker bricks should have. You can use these properties as a checklist when purchasing and choosing clinker bricks. In the picture we briefly and clearly outlined all the properties.
Basic properties of clinker bricks
Let's look at everything point by point again. The structure of clinker bricks has practically no pores. The moisture absorption of clinker bricks is minimal, and this ensures high frost resistance. It is important that during construction there are no open planes of hollow bricks through which water could enter. It is the water that gets inside that can tear the brick from the inside when it freezes. High temperature and open fire will not harm clinker bricks. But the soundproofing properties of the material are not so good. Sound waves pass through dense material without problems.
Clinker brick has a feature that may be useful in the future. Such a brick can be disassembled, the insulation replaced and put back. Clinker bricks can be cleaned quite easily from hardened mortar. This means that the material can be reused.
Areas of application
Clinker blocks and tiles are used mainly in facing works. The material is used for laying floors in industrial premises. Stoves, chimneys, and fireplaces are made from bricks.
Paving clinker is intended for laying:
- pavements;
- sidewalks;
- walking paths;
- alleys in parks and gardens.
Clinker material is reliable and durable, does not wear out, resists mechanical stress, and does not crack from frost.
The facing material is additionally glazed, ideal for interior decoration and external cladding. Clinker bricks are used for decorative purposes to create small architectural forms; the blocks can serve as elements of a landscape landscape.
Waterproof clinker is intended for the construction of hydraulic structures operated in environments with high humidity.
For the construction of residential buildings, clinker bricks are used extremely rarely due to their high cost. In addition, this material has high thermal conductivity, so an insulating layer will be required. Another reason is heavy weight. We will have to create a reinforced foundation. In construction work, bricks are suitable for creating supporting elements:
- columns;
- stair steps;
- ground floors;
- foundations.
Monumental structures are characterized by increased strength and are resistant to the negative effects of the environment.
Preparing the wall for cladding
We know that clinker bricks last a very long time , so cladding a facade with such bricks should not have any flaws during the work. Otherwise, the presence of any flaws on the wall will lead to a decrease in the service life of clinker bricks . If you do not fix all the problems in advance, then after installation it will be too late. The insulation must be installed on a completely flat surface. It should not form any gaps or cavities in which liquid can subsequently accumulate. If the insulation gets wet, it will quickly deteriorate, and this is unacceptable and must be avoided at the stage of preparing the wall.
Stages of wall preparation before laying clinker bricks
- It is necessary to completely clean the surface of all foreign objects and materials. Such as old paint, layers, shedding and others.
- All remaining defects on the wall or those defects that appeared during the cleaning process must be filled with putty . If there are cracks, they need to be widened and their structure determined. The fact is that inside they can expand and form large cavities.
- In cases where there are too many problem areas or the defects are large, the best solution in this case would be complete plastering of the wall .
- After leveling, it is necessary to saturate the wall with two layers of primer - primer , which penetrates deeply inside. This action will help strengthen the contact of the wall with the insulation adhesive. It will also strengthen the top layers of plaster and prevent them from collapsing.
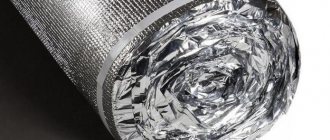
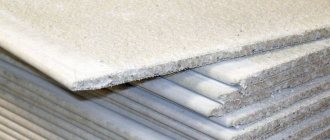
- Installing insulation, if done correctly, is not difficult. According to the usual scheme, it is necessary to install the insulation so that there are no cracks or gaps. Various materials can be used as insulation, for example, slab mineral wool, penoplex or polystyrene foam and others.
Insulation between facing brick and base
It must be borne in mind that the choice of insulation is not accidental . This depends on the presence of a ventilation gap between the cladding and the insulation. Materials that are vapor permeable, such as mineral wool, require a gap. And materials that do not have vapor permeability, such as polystyrene foam, penoplex and others, do not need a gap. If you choose vapor-permeable insulation, then you must lay a sealed layer of waterproofing membrane on top of it.
Ventilated gap between cladding and insulation
Water may appear at the border between the cladding and insulation.
Moisture appears as a result of condensation on the surface of a brick of water vapor, a constant flow of which tends to pass through the wall from the premises to the outside (more details here).
In addition, water can get inside due to the cladding not being sealed when the wall is soaked by slanting rain.
Water on the inner surface of the cladding soaks the insulation, and also flows down and collects on the horizontal waterproofing of the base and lintels above the openings.
If vapor-permeable mineral wool slabs are used to insulate walls, then of 3-5 cm wide must be left between the cladding and the insulation layer
The ventilated gap must be through and ventilated to the entire height of the wall.
For air circulation in the gap in the brick cladding, holes are left in the vertical joints of the masonry. Water accumulated on the horizontal waterproofing flows out through these same holes.
In brick cladding, the walls between the bricks are left with vertical seams free of mortar to allow air circulation in the gap and water drainage.
Special inserts are installed in the mortar-free vertical seams between the bricks to protect the holes from insects.
Holes in the brick cladding are made in the following places:
- Above the horizontal waterproofing of the base (item 7) and lintels above the openings (item 2 in the figure) for water drainage and air flow into the gap, every second or third vertical seam is left unfilled with mortar.
- At the top, under the eaves overhang, in the third or fourth row of brickwork from the top, to allow air to escape from the gap, vertical seams are left free of mortar at the rate of one or two seams for every 1 m2 of wall area.
A ventilated gap is also necessary when cladding single-layer walls with brick (without a layer of insulation between the cladding and the wall), if the load-bearing wall is made of autoclaved aerated concrete. gas silicate or non-sandy large-porous expanded clay concrete, as well as when facing wooden and frame walls.
If the facade is insulated with slabs of polymer insulation - polystyrene foam, extruded polystyrene foam, then a ventilated gap is not needed . In the vertical joints of the cladding masonry, only holes are left for water drainage every 800 - 1000 mm.
Products for construction and repair
⇆
Brick cladding of single-layer walls made of porous ceramics or walls made of SIP panels is done without a ventilated gap .
Features of clinker brick laying
Let us repeat once again, working with clinker bricks should be done by a professional who knows what the solution should be based on future operating conditions. A person who has started working with clinker bricks must pay close attention to the thickness of the seams and the degree of adhesion.
You can cladding a building either as it is being built or as a final finishing touch.
Specialists who work with laying clinker bricks make a more viscous solution. In other words, the mortar must contain a higher percentage of cement than the mixture for ordinary red brick. Another feature is that the sand should only be river sand. Without clay admixture and well sifted. In order to start laying clinker bricks you need to have:
- mason's hammer;
- building level;
- roulette
- trowel;
- cord and plumb line;
- jointing;
- building code;
By the way, there will also be special devices that you can buy in the store for even laying of bricks. They represent a metal structure, which makes it possible to lay evenly in relation to the existing one.
Clinker laying technology
Checking the condition of load-bearing walls and foundations
An important step before starting to lay clinker bricks is to check the foundation and load-bearing walls. It is necessary to ensure that the load-bearing walls are reliable . To do this, they are checked and if cracks are detected, they must be eliminated and repaired. The foundation also needs to be inspected and made sure that its width is greater than the width of the brick. If this condition is not met, then the clinker brick will have to be replaced with another material. If you find that the existing foundation is cracking and has begun to deteriorate, then you need to replace the damaged areas with new concrete.
It is believed that a water barrier for clinker bricks is not necessary. But all experienced builders still lay a layer of roofing felt.
First row of bricks
You need to start from the corner . We lay the brick in the direction of the other corner dry, without using mortar. It would be nice if the length of the brick is enough for optimal overlap. If it is not enough, you will have to cut off the protruding part of the brick. Experienced builders always buy several halves of clinker bricks. This solution will help you save time and effort, because cutting clinker bricks is not an easy task. When determining the correct layout, we must remember that the cladding can be laid out either flush or with a protrusion of several centimeters.
It is necessary to lay the first row of clinker bricks along the entire perimeter of the building. You need to find the right position. This must be done before laying the bricks on the mortar. It is possible to adjust the laying of bricks, if necessary, by adjusting the gap on the brickwork. Or again use a more complex one - cutting bricks.
Start of laying clinker bricks
Laying out the first line of bricks is very important . It is necessary so that you can determine the exact gap between the bricks . And based on this, determine the amount of solution . And also, if necessary, you can count the number of halves you need and purchase them. This will make your work easier.
Preparing the solution
We have already mentioned the solution above. The mortar for clinker bricks should be thicker and more viscous . This is due to the fact that clinker bricks for facades have low water permeability. Builders with experience working with clinker bricks recommend laying no more than four rows per day . Only after part of the wall has hardened do they continue laying. Also, experienced builders never make a lot of mortar at once . The fact is that laying clinker bricks progresses much more slowly. This means that the solution will thicken and require constant stirring.
Laying clinker bricks
Masonry starts from the corners. First of all, a mortar approximately 1 cm thick is applied , and then they begin to lay several bricks on both sides of the corner. It is important that the length of the first row should be four bricks , and the subsequent rows should be half a brick less. Let us repeat once again, only 4-5 bricks are laid in height per day . As with conventional masonry, the position of the brick is constantly checked with a level. The verticality of the masonry must be checked with a plumb line.
The same scheme allows you to lay out the second corner of the facade. Experts recommend laying out all the corners of the building in sequence. And only after that you can start covering the walls. To make masonry defects less noticeable, it is recommended to start it from the back side of the building. And then gradually move towards the facade.
When you start installing masonry doors or windows, you will most likely need metal corners for lintels . It is not recommended to take corners that are too thick. Firstly, the corners are needed only during the installation process, after which the entire structure will be supported by the mortar. And secondly, too large jumpers will clearly stand out and ruin the appearance. It is important not to forget about unstitching. This can be done only in the first hours after laying the bricks. Since the solution sets quickly. You can choose almost any form of jointing. It just depends on what tool you use for this.
Joint jointing of brickwork
Fixing the cladding to the load-bearing wall
It is necessary to secure the cladding to the main wall . Although many do not pay due attention to this part of the work. They claim that the solution is quite enough for adhesion. The issue is controversial, so we still recommend using fastening. The easiest way to make them is from rebar. It is necessary to drive reinforcement into the main wall. It should go between the bricks, only into the mortar and not go outside beyond the edges of the brick. It will be quite acceptable if you make such fastenings every two meters of brick laying. And after 4-5 rows, respectively, vertically.
How to do simultaneous insulation
Facade cladding with clinker bricks with simultaneous insulation
Today, a number of legislative acts have been adopted to ensure that buildings for various purposes comply with energy efficiency standards. It is almost impossible to do this without the use of modern technologies and thermal insulation materials. For example, for the central part of the Russian Federation, the thickness of a brick wall must be at least 120 cm, and the thickness of a wooden frame within 50 cm. Only such walls meet heat conservation standards.
No one will build houses with such thick walls; the solution is to use effective insulation. The most commonly used are mineral wool (pressed or rolled) and polystyrene foam. It is recommended to do insulation at the same time as wall cladding.
Facade cladding scheme
Step 1. Decide on the type and size of insulation. We will look at an example of using pressed mineral wool 6 cm thick and 60 cm high.
Step 2. Using the method described above, bring the height of the cladding to the level of 8 rows, the height will be approximately 60 cm. Specific values depend on the thickness of the seam and the size of the clinker facing brick.
Step 3. Buy thermal insulation material. When purchasing, pay attention to density and the possibility of shrinkage. The fact is that the sheets will lie vertically on top of each other; under the influence of gravity they should not deform or sag.
Step 4. Lower the thermal insulation board into the gap between the load-bearing wall and the cladding; the distance between the cladding and the insulation should be approximately two centimeters. Natural ventilation of the space will occur through them.
Fixing the insulation
Prices for mineral wool
Mineral wool
Ventilation in the air space between the insulation and the cladding is provided by vents; they can be made with special grilles inserted into the cladding or by not filling some vertical joints with cement-sand mass. The second option looks better in appearance, but is less effective. Which ventilation method to choose depends only on the preferences of the developer and the material used for the load-bearing walls. If you choose a seam arrangement of vents, then they should be every three meters in height and every meter in width in a checkerboard pattern.
Step 5. To ensure a gap between the insulation and the cladding, use flexible connections. They consist of a fiberglass rod and wide spacer washers. They are placed on the brickwork and the insulation is pressed against the load-bearing wall. Use at least three ties for each mat.
Then repeat the work until the building is completely finished.
Tips for novice masons (we use clinker bricks for the facade)
- the brick want to stick to the mortar ? Most likely the problem is in the solution, it turned out to be too liquid or, on the contrary, thick. It also happens that after you laid a brick, you often corrected it. You tapped it in one direction or another, and at the moment of tapping, the brick could lag behind the mortar. There's nothing you can do about it; you'll have to completely redo this area.
- You should not try to align the brick with millimeter accuracy. Frequent tapping will not only weaken the rigidity of the masonry, but the seams will also not be strong. Believe me, in a finished wall, no one will ever notice a difference of a few millimeters. And you will save a lot of time and effort.
- After the masonry is ready, you can find frozen mortar on the surfaces of the bricks. Removing such a solution is a very unpleasant and difficult task. To avoid this, make it a habit to wipe off fingerprints of the solution as soon as you see them , preferably before the solution hardens.
- You need to grab the brick with one hand and hold the trowel with the other hand. It is necessary to immediately, as quickly as possible, install the brick evenly, so as not to disturb the masonry later. It is important that the strength of the masonry depends on the speed of this operation.
- If you see that the solution hardens too quickly, then you need to add cement to it. And if the solution settles quickly, experts recommend adding sand. The solution should not be left for a long time . With every minute its properties are weakening. 1-2 hours and such a solution is no longer suitable for masonry, keep this in mind.
The masonry process is clear
Step-by-step masonry guide
Laying clinker bricks requires compliance with technological standards. The process is carried out with great care; the blocks must be placed in such a way that they do not end up being defective. Prepare tools for work:
- elastic trowel;
- hammer to chop blocks;
- wooden slats;
- grater;
- cord - mooring;
- grout for clinker;
- a brush or wooden spatula to remove excess solution;
- sponge;
- V-shaped steel sheet to widen the seams.
For installation work you will need a special mixture.
The algorithm of actions is as follows:
- clean the surface;
- the first row is laid dry, without mortar, to mark vertical seams;
- measure the height of the block in order to calculate the average height of the masonry, taking into account the horizontal seam;
- outline a horizontal level;
- install vertical wooden slats along the length of the facade surface;
- pull the mooring cords to determine the height of each layer;
- prepare building materials and laying mortar.
The mixture will need to be divided into parts for each section. Laying is carried out in whole layers.
Facing bricks are characterized by low moisture absorption, so the blocks must be dipped in water before laying. I lay each layer to the established cord level. It is necessary to maintain the average thickness of the seams. Expansion joints are located near the corners of the building. Up to six rows are laid at one time. The masonry is leveled by sawing. Excess solution is immediately removed using a wooden spatula. You can use a stiff brush.
Types and formats
There are several types of clinker tiles. The difference lies in the functional features:
- Technical. Facing base for sidewalks and roads. Often used for laying floors in public spaces.
- The waterproof option is used for finishing rooms with increased hydrostatic load.
- A facing variation used for finishing the interior and exterior of houses.
- Special configurations of elements used for arranging architectural objects of complex structures.
The dimensions and thickness of any option are determined by production features and scope of application. Typically, tiles look like bricks with standard parameters. You can find any alternative to natural stone and metal. There is even a wood color option. There is a fireproof material variation for hazardous objects.
Hollow and solid clinker
Clinker is similar to classic brick by the fact that this material can also be produced in two types - hollow and solid. The filling of the material largely determines the scope of its application.
- Solid clinker . From the name you can understand that this is a material with a homogeneous structure. The product is distinguished by its heavy weight, but at the same time, extreme strength, making this clinker ideal for the construction of house walls, stoves, and chimneys for them.
- Hollow brick . This is a lightweight version of clinker, which has various recesses and holes inside, both rectangular and round. Standards allow up to 35-40% voids. The presence of voids helps to lighten the material, which means it significantly reduces the load on the foundation of the house. And the cost of the material is cheaper, and this despite the fact that such clinker copes with loads and external influences no worse than solid clinker.
The only negative is that due to the presence of voids, such bricks are not suitable for the construction of load-bearing walls of buildings. But this material is ideal for facing work!
What is the difference between clinker and ceramic bricks?
At first glance, it may seem that there is no difference between clinker and ceramic bricks. Especially if we are dealing with engobed brick, the surface of which is finished with a thin layer of ceramics. However, in reality, the differences between these materials are quite significant.
The main differences lie in the technical characteristics. It is no secret that the key characteristics of brick that determine its performance properties are: density, strength, frost resistance and water absorption.
In these parameters, clinker brick is many times superior to ceramic brick. Judge for yourself:
- The density of clinker is 1450 kg/m3, while for ceramic bricks this figure does not exceed 1100 kg/m3;
- The strength of clinker material does not fall below M350. And there are bricks whose strength reaches the M1000 grade! At the same time, bricks with ceramic coating have a strength of M200;
- Frost resistance gives an even more eloquent answer to the question of how these two materials differ. The frost resistance of clinker is 300, and that of ceramic brick is only 60;
- Water absorption is another key indicator. The lower the water absorption of a brick, the longer its service life and the greater the opportunity to use brick in the northern regions of our country. So, clinker brick has a water absorption of 2-6%, while ceramic material has a water absorption of 9-12%.
The only thing that ceramic brick has a significant advantage in is its more affordable price compared to clinker. Practice shows that clinker bricks can cost 3 or even 10 times more!