After listening to numerous pieces of advice, you decided not to hire craftsmen to install the heating system and make all the connections of polypropylene pipes yourself. If you are confident of success and are good at working independently, then feel free to start preparing and producing work.
For our part, we will tell you what tools and equipment will be required for installation and how to properly solder polypropylene pipes. By default, we will assume that all the materials have already been purchased, all that remains is to assemble everything according to the scheme.
Welding machines for polypropylene pipes
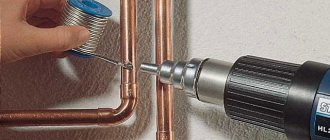
Let's start by preparing the installation tool. Since all connections of PPR pipes and fittings are made by soldering, you will need a special soldering iron for this purpose.
Note. The joining of PPR parts is sometimes called welding. In order not to get confused, remember that when it comes to polypropylene pipes, there is only one connection method - soldering, but it is often called welding. These systems are not installed using press or threaded fittings, like metal-plastic pipes.
The welding machine used for polypropylene pipes is offered on the market in two types:
- with a round heater;
- flat heating element.
The latter was popularly nicknamed “iron” due to some external resemblance to this household appliance. Different welding machines have no fundamental differences, only structural differences. In the first case, nozzles for Teflon pipes are put on and attached to the heater like clamps, and in the second case they are screwed to it on both sides. Otherwise, there is not much difference, and the device has one function - soldering polypropylene.
Soldering machines are usually sold complete with attachments. The cheapest and minimal kit made in China is a soldering iron with a power of up to 800 W, a stand for it and nozzles for 3 sizes of the most common pipes - 20, 25 and 32 mm. If your heating scheme contains only such diameters and you do not plan to solder polypropylene pipes anywhere other than your home, or do it professionally, then a budget set will be quite enough.
If, in accordance with the calculation and diagram, you need to join pipes of sizes 40, 50 and 63 mm, then you will have to spend money and purchase another soldering kit, which contains the corresponding parts. Well, the most expensive kits are produced in European countries and are distinguished by their reliability and durability. Similar kits include the following tools:
- soldering iron with stand;
- Teflon nozzles for soldering iron of all the above diameters;
- scissors for cutting pipes at a precise angle of 90º;
- hex wrench;
- Phillips screwdriver;
- roulette;
- gloves.
Important! Since soldering polypropylene pipes involves working with heated equipment, it is strongly recommended to always use gloves, regardless of whether they are included or not. This is especially true for beginners, who in 99 cases out of 100 accidentally touch the heating element.
The working part of a soldering iron (heater) of any design is designed in such a way that 2-3 nozzles for small-diameter pipes can be installed on it. This allows you to save a lot of time when working with lines ranging in size from 20 to 40 mm.
A little about the power of the soldering machine. High power is necessary for quick and uniform heating of large diameter parts, which are considered to be sizes 63 mm or more. For home purposes, it is enough to have an iron with a power of 0.7-1 kW. Soldering irons with heaters above 1 kW are considered professional, and accordingly, they are more expensive than regular ones.
Signs of a leak
If the pipes become damp, droplets of moisture similar to dew appear at the fittings, or the pressure in the system drops sharply, the property owner should pay attention to the condition of the plumbing structure and take appropriate measures.
When a plastic pipe leaks at the junction, and measures are not taken in a timely manner, even a small trickle of water can cause a lot of trouble. It can get on household appliances, electrical wiring, or ruin new renovations in the apartment below.
Installation recommendations
In addition to the iron, you should prepare another tool for soldering polypropylene pipes; its composition is given above in the list. If you don’t have scissors for cutting the pipe at an angle of 90º, then for this purpose you can use a hacksaw and a carpenter’s miter box, or make it yourself, guided by the drawing:
Note. When there are no scissors for polypropylene pipes and they are cut with a hacksaw, then the end must be cleaned of burrs outside and inside the product.
Before cutting a section of the required length, it must be accurately marked. The fact is that when connecting, part of the pipe fits into a tee or any other fitting; this is called soldering depth. Therefore, to the required size of the area, determined using a tape measure, you need to add the value of this depth, measuring its value from the end and putting a mark with a pencil. Since soldering technology provides for different immersion depths for different pipeline diameters, its values can be taken from the table:
Note. The table shows soldering depth ranges, since it varies within these limits among different manufacturers of PPR pipes. The value can be determined by measuring several fittings with a depth gauge.
When installing heating systems, reinforced polypropylene pipes are soldered; they differ from conventional pipes by the presence of a layer of aluminum foil, fiberglass or basalt fiber. Moreover, this layer can be made differently in products from different manufacturers. When the reinforcement is not located in the center of the wall thickness, but near the outer edge, then stripping will be required before soldering the polypropylene pipes. There is a special device for this:
Property of polypropylene
Polypropylene is a product of the polymerization of 2 gases - ethylene and propylene. They are mixed in a certain ratio. As a result, it is possible to obtain granules from which pipes are made. This is done using the extrusion method.
The characteristics of the material are given in the table:
| Index | Meaning |
| Operating temperature range | -10 — +90 degrees |
| Melting point of plastic | 149 degrees |
| Nominal pressure | 1.5-2.5 atmospheres |
The specified characteristics are suitable for cold water supply. Thanks to fiberglass or aluminum reinforcement, it is possible to obtain products that are suitable for batteries and hot water supply.
Welding process
Before you start working, you need to put attachments on the soldering iron that match the size of the pipes, and then turn it on and configure it. Here you need to know at what temperature to solder polypropylene pipes. Most manufacturers indicate an operating temperature of 260-270 ºС; you should not raise it higher, otherwise overheating cannot be avoided. Underheating is also fraught with poor-quality and leaky connections, where a leak will then quickly form.
It must be understood that heating time, product diameter and welding temperature are interconnected. In the table we indicate the welding time intervals at a standard temperature of 260 ºС.
Note. The duration of welding is the time until the plastic completely hardens, when the joint gains maximum strength.
When setting up the iron is completed, we proceed to welding, following the instructions for soldering polypropylene pipes:
- Taking the pipe in one hand and the fitting in the other, we put them on the nozzle of a heated soldering iron on both sides simultaneously, without turning them around their axis.
- We maintain the allotted time.
- Carefully remove both connecting parts from the Teflon nozzle, again, without rotating.
- Smoothly insert the pipe into the fitting up to the mark without turning and fix it for the time indicated in the table, at this point the joint is ready. The operation is shown in more detail in the video:
It is more convenient to use the soldering iron correctly when it is installed on the table, so it is recommended to solder several practice joints first. After this, you can assemble all possible nodes with short sections in a convenient position. Next comes the laying of highways with the connection of tees locally; here it will be more difficult. A heated iron for soldering will need to be put on one side of the laid pipe, and the tee will need to be pulled on the other side, holding the device suspended. Then the soldering iron is removed from both parts and they are joined.
When laying main pipelines, follow the order of installation of sections and elements. Start assembling the system from the heat source and go to the end, and to connect two polypropylene pipes, try to use only tees, from which branches will go to the batteries. Use couplings for this purpose when it is impossible to do otherwise. Avoid joints in hard-to-reach places, otherwise to make them you will have to work with two soldering irons at once in order to simultaneously heat the parts being connected.
Advice. Many manufacturers of polypropylene systems develop their own instructions for installing their products. You can get a lot of useful information from there, take advantage of it.
Errors during soldering
Sometimes during soldering various problems arise. They may be associated with the following errors:
- the material has not been cleaned from the fatty film;
- the cutting angle of the parts was made incorrectly;
- parts are insufficiently or excessively heated;
- the end of the pipe is not tightly seated in the fitting structure;
- the reinforced layer has not been completely removed from the pipe;
- the position of the parts is corrected after the material has set.
Impact of errors on welding quality
Failure to comply with welding technology leads to negative consequences. It provokes internal deformation, in which molten polypropylene blocks the internal passage of the pipe. Subsequently, the node becomes inoperable. Blockages appear in this area, which impede the movement of water.
Errors during welding lead to poor-quality joints
How to connect a metal-plastic pipe with a polypropylene pipe
Due to various circumstances, it happens that it is necessary to connect different types of pipes, for example, PPR and steel, metal-plastic with polypropylene, and so on. Such situations happen in apartments where it is difficult to change a section of a common water supply or heating riser laid with a steel or metal-plastic pipe, but you need to connect to it. This is not a big problem, you just need to take into account that all such connections are made through threaded fittings.
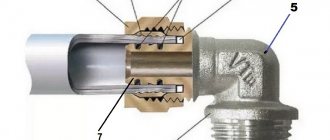
Since metal-plastic pipes can be connected using press and dismountable fittings, for joining with polypropylene it is more convenient to use a detachable fitting with an external thread. In turn, a fitting with an external thread is soldered to the end of the polypropylene pipe, after which the connection is twisted in the traditional way, with flax or fum tape wound up.
Detachable fitting for connecting pipes
When you need to cut into metal-plastic pipes, it is most convenient to install a tee with a threaded outlet, where you can subsequently screw the fitting, and then solder the polypropylene pipe to it. True, you will have to tinker with the installation of the tee: you need to turn off the water or empty the heating system, and then cut the metal-plastic and carry out the installation.
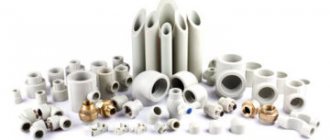
Types of fittings
It is possible to connect 2 pieces of different materials using special fittings. They are also used when you need to connect plumbing fixtures to steel fittings. Inserts on fittings are necessary for a strong connection. They can be made of brass or chrome. Today the most common options are:
- crosses;
- combined tees;
- coupling;
- Ball Valves;
- adapters (have an external plastic thread).
Fitting into socket
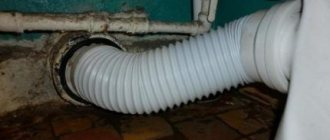
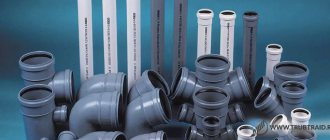
In this way, sewer systems are assembled from polypropylene and PVC pipes, one end of which is made in the form of a socket. The use of this connection reduces installation time and is cheaper, since there is no need for additional connecting elements. The assembly of pipelines using this technology can be carried out by any beginner independently.
Before joining, you need to make sure that the end without a socket is perpendicular to the axis, otherwise the pipeline may bend during operation. The edge is chamfered with a file so as not to damage the rubber sealing ring in the socket. It is cleaned of dirt and dust. To achieve increased sealing, the prepared end of the pipe is lubricated with silicone grease, then inserted into the socket until it stops. At the place where its edge stopped, a mark is placed and moved back 1 cm. The resulting gap is necessary to compensate for the linear expansion that occurs during heating.
Using flanges
This connection is made using adapter bushings welded to the ends, or slip-on steel flanges (profiled and smooth) with threads on one side. They are installed without welding. Among the advantages, the high reliability of the joints is noted, withstanding high temperatures and pressures of up to 16 atm. The connection can be made on pipelines of different diameters from 2 to 120 cm.
Docking begins by pulling the flange onto the pipe and putting on the rubber gasket. It is installed at a distance of no more than 10 mm from the end. The flange is moved towards the gasket, and another pipe is prepared in the same way. The bolts are tightened carefully so as not to crack the plastic.
