Most new materials and finished structures introduced into the construction and finishing industry almost completely eliminate the free movement of air. The tightness they provided, along with the advantages, brought a significant disadvantage - a violation of ventilation processes.
They simply need to be restored, because, you see, without a regular supply of fresh air to the room it is impossible to live in it!
We know how to solve such a difficult problem: exhaust ventilation through the wall to the street will form the normal movement of air masses. A small wall device will ensure exhaust flow removal and excellent air exchange.
The article we propose will introduce you to the intricacies of choosing a valve for organizing exhaust ventilation, and the rules for its installation and operation. The information presented for consideration is confirmed by photographic materials, diagrams and video instructions.
Typical ventilation problems
Natural ventilation of residential premises is based on the presence of micro-slits, characteristic of wooden window structures. Through such small openings, air regularly entered from the outside and was removed from the house through ventilation ducts installed in the building structures.
Thus, there was a constant change of air masses in the apartment, promoting a normal level of humidity, removing unpleasant odors, etc.
Regular renewal of the air mass, which occurs naturally through the loose fit of window sashes and door panels, as well as through ventilation, creates an optimal microclimate for life, removes excess moisture, carbon dioxide and other harmful toxic substances
Improper air exchange in the house is an almost inevitable problem when taking measures to reduce heat loss. When installing new windows and doors, trying to minimize heat loss, few people think about ventilating their homes.
But soon problems manifest themselves in the form of a stuffy atmosphere, mold growth in the bathroom and other similar phenomena. Soon, the abnormal microclimate begins to negatively affect the health of those who live in such a house.
Ventilation supply units of various types and types help to deal with excessive sealing of rooms, but this may not be enough for normal ventilation.
The draft of natural exhaust ventilation is often weak, or even completely absent. Due to problems with the design of ventilation structures, some of the air masses that should be removed from the house penetrate back.
Lack of ventilation or its improper organization is dangerous not only for human life. Moisture condensing on surfaces that is not eliminated as a result of ventilation causes premature failure of structures, communications, and finishing.
The state of draft in the ventilation system of a house or apartment is also reflected by the air temperature outside, or rather, the difference in temperature inside and outside.
In winter, this gap is quite large, which provides good traction. But in the summer, the difference in temperature between the external and internal air is not so significant, and this does not have a very good effect on the quality of traction.
For these reasons, you should consider installing special exhaust valves. They will ensure quick and effective removal of exhaust air from the home, and will also prevent its re-entry.
Stagnant, musty air and an excessively humid environment contribute to the spread of fungal colonies, threatening residents with serious diseases and destruction of building materials (+)
Finally, about the importance of a full influx
In a “thermos” house with tightly sealed windows and entrance doors, the following happens:
- indoor air is humid and heavy;
- residents feel stuffy; windows are often opened for ventilation;
- unpleasant odors are slowly removed from the kitchen and bathroom;
- Gas-using equipment - household stoves, ovens, instantaneous water heaters - does not work well due to lack of oxygen.
Note. An insufficient amount of inflow provokes automatic shutdown of gas boilers - the draft or flame ionization sensor is triggered. Difficulty ignition is also observed - the electrodes “spark” for a long time, and when ignited, a strong bang is heard in the chamber.
A supply valve in the outer wall solves all of the above problems. When fresh air enters the house, the hood functions properly. The ventilation elements are distributed as follows: exhaust ducts are located in more contaminated rooms (kitchen, toilet), and inflow valves are located in living rooms.
Types of exhaust valves
The low efficiency of exhaust ventilation is most often explained by various reasons, for example, a violation of the patency of the channels or their tightness.
In multi-storey buildings, such situations often arise due to flaws during repairs, and it is not always possible to eliminate the consequences of errors and restore the normal state of ventilation ducts.
Depending on the installation location of the exhaust ventilation, use a horizontal or vertical valve model and a fan with a sufficiently high performance (+)
In this case, exhaust valves may be more than appropriate. The design of these devices is very simple; their main purpose is to let air flow outward and prevent it from penetrating back. According to the type of installation, such valves are divided into horizontal and vertical, it all depends on the direction of air flow.
If the exhaust flow must move vertically, choose a valve with horizontal installation. And to remove air horizontally, a vertical valve is needed. Typically, exhaust valve models are equipped with a fan. They are used where air must be removed from the room forcibly.
Another significant point is the noise level that the operating device produces. The lower the sound effects from the valve blades opening and/or the fan spinning, the better. Much useful information can be found in the product data sheet.
When choosing an exhaust valve that will be installed in the wall, you should take into account the thickness of this wall, as well as the material in which the hole will have to be made
What you need to consider when organizing a hood in your home
If you decide to install a hood in your home that exhausts exhaust air outside, you may encounter some legal aspects of this process.
To install a hood, you need to make a hole through which air will escape, and also adjust the outlet of this air. Two questions arise: is it possible to make a through hole in the wall of an apartment building and is it allowed to remove dirty air outside the apartment?
If the diameter of the hole does not exceed 200 mm, then it does not require a permit. Such openings are allowed to be made for ventilation and air conditioning of premises. However, it will not be possible to vent the hood through such a hole - according to the law, this may interfere with the comfort of neighbors, through whose window your exhaust air may escape. Before installing the hood, it is necessary to design the exhaust duct and go through the approval procedure.
The simplest and most convenient option is a hood with an exhaust duct in the wall.
The video shows how to properly organize the exhaust duct:
Informed choice of the appropriate option
Most often, wall ventilation exhaust valves are made of metal or durable plastic. Plastic products are not suitable for conditions of high temperature and humidity, for example, for a bath, but they have proven themselves excellent in less difficult situations.
When selecting a valve, you should take into account its cross-section: rectangular or round.
The most important indicator is the air flow speed for which the device is designed. The most common are models designed for a flow of 4-6 m/s.
To organize forced exhaust ventilation in an apartment or house, you can use a design consisting of a fan and a check valve
If the valve is selected for a natural ventilation system, it is very important that the damper damper elements respond sensitively to even small air flows. But for systems with low draft, the presence of an exhaust fan is mandatory, so such sensitivity is not needed.
But here it is important to choose a fan that is suitable in power depending on the volume of the room for which the device is selected. So, for a kitchen, the fan power is calculated using a multiplying factor of ten, and for a bathroom this figure can be seven units.
In multi-storey buildings, the exhaust ventilation pipe must be installed one meter above the roof so that unpleasant odors do not penetrate from the lower floors to the upper ones.
How to calculate the hood through the wall
Calculation of air exchange for different rooms
The simplest calculation of filter ventilation in a private house comes down to determining the performance of electrical equipment necessary to ensure air exchange. To do this, you can use the multiplicity method. Its essence lies in the fact that for each type of room the volume of air mass must be replaced a certain number of times per unit of time (one hour). The power of an electric fan is also calculated by the ability to pump out a certain volume within an hour. Therefore, to calculate productivity, use the formula M=nx V, where:
- M – calculated fan power;
- n is the frequency of change in the air volume of the internal space (for each type of room it is different and regulated by standards);
- V is the cubic capacity of a specific room.
All these calculations are relevant for any type of electrical exhaust equipment:
- axial structure models;
- centrifugal fans;
- in-canal devices.
In addition to basic devices, a standard supply and exhaust circuit may contain supply valves, check valves, round and rectangular pipes, decorative and protective grilles, and mosquito nets.
For efficient operation of the equipment, you should choose devices with a small performance margin.
Subtleties of constructing exhaust ventilation in the wall
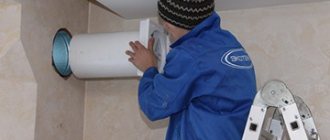
In private houses and even in multi-storey buildings, in many cases it is more convenient to make a ventilation outlet directly through the wall. For this purpose, models of exhaust valves with a fan are used, which is inserted into the mounting coupling intended for their location.
You can also use overhead fan models that are mounted on the inside of the wall.
To install an exhaust ventilation valve in a wall, you first need to make a marking and drill a hole of the required size in it.
To install such a simple design, you will need to make a fairly large hole for installing ventilation in the outer wall of the house. But first you need to choose the right device.
Manually controlled models have an affordable price, but they are extremely inconvenient to use, since you have to constantly remember to turn the exhaust valve on or off.
The exhaust fan is installed on the inside of the hole made in the wall, and the check valve and protective grille are installed on the outside.
To automate the process, you can use a timer. You will need to select a time schedule; in accordance with these settings, the valve will turn on and off at the specified time. It may be more effective to use a sensor that responds to the level of humidity in the room.
In this case, the device will start working when the air in the room becomes too humid, and the fan will stop when the humidity drops. When choosing automatic control devices, you should make sure that when the power is turned off, the previously set settings are retained.
To ensure good air exchange in the room, it is necessary to use a sufficiently powerful fan. A unit that is weak in this regard simply cannot cope with the movement of a large volume of air masses, and as a result, ventilation will not be effective enough.
The choice of location for installing a wall ventilation valve is based on the requirements specified in the device manufacturer’s instructions
When making calculations, a simple formula is usually used:
M=O*B
Where:
- M – required fan power;
- О – volume of the room in which the device will be installed;
- B – increasing air exchange coefficient.
The volume of a room, as you know from a school mathematics course, can be calculated as the product of the area and height of the room. The air exchange coefficient is determined depending on the purpose of the room.
This indicator should be:
- for a separate toilet – 8;
- for the kitchen – 15;
- for a bathroom or combined toilet – 20.
All that remains is to determine the volume of the room and multiply it by the appropriate coefficient to obtain an indicator that will help you choose a valve with a sufficiently powerful fan. You should not take an overly powerful model, this will only cause unnecessary expenses and will not have a beneficial effect on the ventilation process.
When calculating the power of an exhaust fan, it is necessary to take into account the sensitivity of such equipment to system resistance. The presence of a decorative grille and valve can reduce the speed of air flow by three to five and even ten times. Therefore, you should not choose a device with minimal size and power.
The fan performance must be sufficient to ensure that exhaust air leaves through the valve from adjacent rooms, and not just from the room in which the device is installed. Before starting work on installing an exhaust valve with a fan, you must select a suitable location.
The hole for the exhaust valve is best made in the upper part of the outer wall, this position facilitates the effective removal of exhaust air
To do this, use a wall that is as far as possible from the place where fresh air is taken in. Typically, supply ventilation is installed in the walls or windows of rooms such as a bedroom or living room.
A kitchen or bathroom is more suitable for exhaust ventilation. As a result, unpleasant odors, excess water vapor, etc. are also removed with the exhaust air.
The hole for the exhaust valve must be made at the top of the wall. First they mark, then start drilling. A hole of suitable size is made with a drill and a feather annular drill. Sometimes you have to use a special tool with a diamond attachment.
The opening for the exhaust valve must be sized and configured to match the dimensions of the fan. This is usually a round device, but sometimes it is more convenient to use a device with a square body. In this case, the hole for the valve must be hollowed out using a hammer drill with a spatula-shaped attachment.
The diameter and shape of the hole in the wall for installing the exhaust valve must correspond to the characteristics of the fan that comes with the device
Such work is usually accompanied by a large amount of dust, from which even the use of an industrial vacuum cleaner cannot help. Before starting drilling, it is necessary to cover the surfaces with film or other suitable materials to protect them from contamination.
A core drilling machine can be used to drill through particularly thick exterior walls made of durable materials. This is expensive equipment that is cheaper to rent than to buy. Specialized companies provide core drilling services at a relatively low price, which depends on the drilling depth and wall material.
To drill through thick walls when installing a forced ventilation exhaust valve, you can rent a core drilling machine that can handle almost any material
During operation of such equipment, water cooling is used. At the same time, a device is used to collect waste material and water, but some of it will still end up on the wall; this point should be taken into account before starting work.
After the hole is prepared and cleaned of dust, it is necessary to insert a coupling into it; it is supplied complete with the valve.
Now you need to mark the mounting locations for the fan. The device is fixed to the wall through the holes provided for this purpose. Dowel-spacers are most often used as fasteners. Usually there is a small gap between the coupling and the wall, through which air can subsequently penetrate.
All such cracks are carefully filled with polyurethane foam, which will provide the structure with the necessary tightness. After this, you can begin installing the exhaust valve. You should act very carefully so as not to damage the valve itself during installation and to prevent construction debris from getting inside it.
After installation, you need to make sure that the valve flaps move freely and do not jam. After this, you need to install a decorative grille on the outside of the house wall, which will close the hole and give the structure an aesthetic appearance.
To improve the efficiency of the exhaust valve and reduce the likelihood of it freezing in winter, it is recommended to lay a layer of thermal insulation material around the coupling. This point must be taken into account when calculating the diameter of the hole for the exhaust valve.
Some craftsmen consider the coupling that comes with the exhaust valve to be not strong enough. They note that if installation is necessary, the coupling may be accidentally damaged, and recommend replacing it with a piece of stronger plastic pipe of the appropriate diameter.
The design of the exhaust ventilation must be airtight, therefore, after installing the main elements of the device, the cracks must be blown out with foam
If such a pipe turns out to be slightly wider than the fan that is inserted into it, you can make a winding of electrical tape or other suitable material so that the device fits tightly enough.
The fan must be powered from the inside. The cable is connected to the electrical panel; when connecting, fuses are used for safety reasons.
When installing an exhaust valve in a toilet or bathroom, the power supply can be connected in such a way that the fan turns on simultaneously with the lighting. In this case, the timer can be set to turn off after a certain period of time after the lights are turned off.
In order for exhaust ventilation in the toilet and bathroom to work effectively, air flow into these rooms should be ensured. Usually, special ventilation grilles are installed at the bottom of the doors for this purpose.
The exhaust fan is fixed to the wall using dowels, which are included in the kit, and then covered with a special grille
During the operation of the exhaust valve, one should take into account such a problem as the occurrence of blockages. If debris gets inside the unit, it may damage the valve and make it difficult for the fan to operate.
If this happens, the device will have to be dismantled, cleaned of dirt and installed again. In winter, butterfly valves can become covered with a layer of ice, which also leads to problems in the operation of the mechanism.
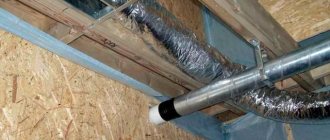
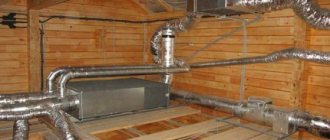
Air duct installation rules
Types of air ducts
- Pipes can be attached to walls, ceilings or placed directly on kitchen wall cabinets.
- If it is decided to fix the air duct to the walls or ceiling, then the installation begins with drawing up a diagram and applying markings for fastenings along it. The step between them on a straight section is 50-60 cm, and an additional holder is placed at each bend.
- Drill holes for dowels according to the markings.
- The assembly of the air duct begins from the exhaust hole. It is recommended to treat the joints with sealant. The holders are fixed with self-tapping screws, screwing them into the installed dowels.
- The hood is connected to the air duct using corrugation.
Lastly, the decorative casing is installed. Sometimes it has to be cut to height. It is allowed to make a side hole in the casing for the air duct outlet (if this is required by the layout features).
To hide the air duct, you can mount a box made of plasterboard, wood, or other materials that match the facades of kitchen furniture.
Conclusions and useful video on the topic
The process of installing a fan and check valve through the wall is described in detail in this video:
Here we demonstrate the operation of a high-power exhaust fan with a check valve. The device is characterized by increased durability and low noise level during operation:
Exhaust ventilation is a necessary element for normal air exchange in the house. If it is installed correctly, then normal humidity and a microclimate favorable for human health will be maintained in residential premises.
Do you have experience in installing wall ventilation ducts? Or still have questions on the topic? Please share your opinion and leave comments. The feedback form is located below.
At what height should the hood be installed above the gas stove?
Recommendations for selecting the distance between the stove and the hood come not only from device manufacturers, but also from specialists who install them. An important question that faces people: at what distance should a hood be hung above a gas stove? After all, they predominate in many apartments and houses, and the substances released during cooking on burners are greater than from other types of stoves.
Manufacturers add documentation to each hood, which indicates not only distance indicators, but also other installation recommendations. For example, it strongly recommends that buyers install the hood at a height of 75 cm from the surface of the gas stove. Bosch, in turn, attributes the figure to 55 cm (the distance has been reduced to achieve greater performance).
Only three criteria determine the distance (risk of fire, convenience during cooking and power of the equipment). Having accurate numbers and hood indicators, you can independently calculate the installation height.
It is also important to consider at what height to install the hood above the electric stove. It would seem that an electric stove emits fewer unpleasant objects during operation than a gas stove, but it is important not to go overboard with reducing the distance
Distance from the hood to the gas and electric stove
Horizontal hoods can be installed above an electric stove at a height of 65 cm. This is an optimal indicator that will not disturb human comfort and will allow the equipment to reveal its potential without experiencing any loss in performance.
It is better to install inclined hoods above an electric stove at a distance of 40-50 cm. However, it should be understood that for tall people this figure will mean a feeling of discomfort near the stove.
Why ventilate the underground?
If an uninsulated foundation is not ventilated, the basement quickly becomes very damp and sooner or later turns into condensation. Moisture in the form of water vapor seeps through the floor slabs from the house, as well as from the ground. The foundation cannot be ventilated, so it accumulates in the soil under the house, in the basement walls, on the floor beams, on the floor boards and/or on the soffits.
In the same rooms where the temperature and humidity are positive and high (in a heated house the temperature is always above the freezing point, even in deep frosts), bacteria, fungi and decomposing materials are very active. As a result, very unpleasant odors enter the house and materials deteriorate.
The second reason to weatherize your basement is radon gas, which is released from the soil, sometimes in significant quantities. It is a naturally occurring radioactive gas. Without ventilation, radon will accumulate at the top of the basement, gradually seeping into the house. What the presence of radioactive gas in your living space can lead to is probably not worth talking about. So this is another good reason to ventilate your basement.
There are two ways to ventilate the space under the floor:
- Make ventilation holes in the foundation. In this case, moisture is removed by a draft - ventilation holes are located in opposite walls.
- Organize an air intake from the basement - run a ventilation pipe to the roof, and air flow through the blinds into the rooms. In this case, there are no holes in the foundation, but it is necessary to carefully insulate the outer foundation + basement + blind area. Next, waterproof the basement foundation.
The second solution offers the opportunity to improve aesthetics and avoid freezing through drafty basements, but requires a significant investment in materials. This option is suitable if you are going to build an energy efficient, well insulated house. In all other cases, foundation openings are more suitable.
Rules for ensuring air exchange
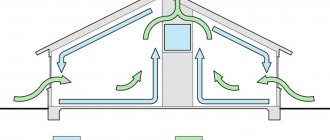
To effectively change air, remove household fumes and prevent the formation of condensation, it is necessary to correctly calculate the total cross-sectional area of all ventilation openings. According to the rules, it must be at least 1/500 of the overlap area.
Properly organized air exchange will not only prevent excess moisture, but also equalize internal and external pressure. And, accordingly, it will protect the connecting elements of the roof from destruction.
In addition, it is important to consider the properties of building materials. Modern versions of insulation and moisture-proof films allow less air to pass through than their predecessors
Therefore, more efficient ventilation is required.
Therefore, when using materials with a high degree of tightness, it is worth increasing the cross-sectional area to 1/400 and even 1/300 of the total floor area.
Where to install the socket
There is often a situation in which a block of sockets and switches is installed on the wall, between the hob and the hood. This is not entirely the right decision. Sockets cannot be located immediately behind the burners. The power cord from the hood is shorter than the distance to the hood from the outlet. To avoid this, it is recommended to install a power supply point for the hood.
The socket should be installed at a height of about 2-2.5 meters. This will be a place above the wall cabinet or inside it
Before fixing the outlet, you should pay attention to the location of the air duct. Receptacle installation cannot be done on a duct line
The outlet point should be equipped at a distance of 15-20 cm from the air duct.
Types of wall supply devices
Three types of valves are used to supply fresh air to living spaces and any other rooms:
- passive wall fans (natural supply);
- overflow devices;
- installations of supply and exhaust air with forced air circulation and air heating by heat recovery.
Attention! The cheapest and most primitive way to ventilate rooms is window ventilation valves. The disadvantage of fans is their low throughput.
In addition to the above products, apartments use so-called breathers - wall-mounted household appliances with forced air heating and automatic heating to a set temperature. Freezers are full-fledged supply devices, the price of which is 3-5 times higher than that of any air outlet valve.
Natural inflow valves
The design of a wall diffuser is considered using the example of a fairly popular product KIV-125 from KIV. Similar valves are produced by the companies “Vents”, “Domvent”, “Aereco”. The design of household appliances includes the following elements:
- air duct - PVC pipe with a diameter of 125 mm and a length of up to 1 m, inside - a soundproofing insert;
- external air intake grille with rain cover and insect screen;
- silicone O-ring for sealing inside the wall;
- a damper with a double spring that regulates the amount of incoming air;
- air purifier class G3-G4;
- mechanical drive that controls the valve;
- additional insulation, inner housing cover.
The air intake is built into the outer wall, only the grille is visible from the outside, and the header with an adjustment knob is visible from the inside. The principle of operation is simple: air from the street enters the pipe, is cleaned by a filter and exits through the slots in the collector. Valve operation specifics:
- the air flow is dispersed along the wall towards the ceiling;
- road noise is absorbed by the thermal insulation insert;
- flaps can cover the channel cross-section by 100%;
- adjustment is made using a handle or a special cable when the device is installed under the ceiling.
Air flow on other brands of valves may be adjusted using a plastic slider or diaphragm.
The performance of the product depends entirely on the draft in the exhaust shaft; at a negative pressure of 10 Pa, about 55 m³ of air enters the room in 1 hour. But the fan is also capable of moving a larger volume of air. For example, you turned on the hood, which easily “pulls” 150 m3/h through the valve.
Advantages of wall diffusers:
- energy independence;
- reliability, maintenance frequency – once a year (filter cleaning);
- product availability;
- compatibility with any ventilation system - natural, mechanical, combined.
In contrast to its many advantages, the passive air supply valve has two significant disadvantages: it supplies cold air and sometimes freezes in low temperatures. True, frost appears due to excess humidity (condensation) remaining in the room for various reasons.
Ventilation transfer elements
Tightly closed interior doors without a ventilation slot (or grille) disrupt air exchange in the house. If flows from living spaces to the kitchen and bathroom are cut off, the ventilation in the home will stop working.
There is no need to modify sealed doors between rooms by installing bars or cutting door panels. It is enough to build an inlet and outlet air valve of this design into the partition:
- 2 decorative lamps for opening Ø125-160 mm;
- a cylindrical insert hollowed out of sound-absorbing material, 15 cm long;
- 2 clamping rings + clamping screw.
Attention. Bypass valves are manufactured only for partitions up to 150 mm thick - half a brick plus cladding. For thicker walls, you will need to make a homemade bracket.
Installation of the air supply and exhaust unit is very simple: the sound insulation is inserted into the prepared hole, then the rings are attached to the ends and screwed together. Added to this are diffusers that prevent light from penetrating from one room to another. More information on how the damper works can be found in the video:
Supply and exhaust valves with heat recovery
There are situations when a private house initially does not have ventilation ducts. Ventilation of apartments may also be ineffective - the draft in the shafts of the upper floors is quite weak. This problem is solved by installing reversible supply and exhaust devices.
Structurally, the installation is similar to a fan, only inside the pipe there is an axial fan and a ceramic heat accumulator, as shown in the figure. The wall reversing valve can operate in 3 modes:
- Only supply + filtration of outside air.
- Only leave the room outside.
- Heat recovery – combined mode, supply and exhaust operate alternately.
The third mode is the main one. The operating algorithm is as follows: for 70 seconds, the fan blows air from the room to the outside through a ceramic heat exchanger. Then everything happens in the opposite direction - the fan blows in the opposite direction, drawing in outside air heated along the way by the battery. After 70 seconds the cycle repeats.
Manufacturers change the direction of flow 180° in two ways: by changing the direction of rotation of the impeller in the opposite direction or by turning the fan itself using an additional servo drive.
Advantages of the recuperator valve:
- there is no need to build flue gas channels from brick, plastic or galvanized pipes;
- heated air enters the premises;
- ventilation efficiency does not deteriorate in summer;
- energy saving - the device recovers part of the heat used by the heating system to heat the ventilation air;
- similarly, the device retains the coolness created by the air conditioner in summer;
- regulation of the amount and temperature of supplied air;
- choosing a model with the required productivity from 25 to 70 m³/h.
An unpleasant disadvantage of the recovery valve is its high price. Judging by the reviews, it is this factor that keeps most users from purchasing this device. Please note that for complete ventilation you need several devices - one in each living room.
Other shortcomings do not play a significant role, even the high noise level. For more information about the heat recovery air intake, watch this video:
Purpose of the roofing element UP
Diagram and overall dimensions of the passage unit for a soft roof.
The unit for the passage of the ventilation duct through the roof is marked UP; in the standard version there are 11 items. For difficult operating conditions, this additional element is designed and manufactured individually. The pipe passage through the roof is regulated by GOST 15150, which determines the diameter and dimensions of the structure.
With the help of a roof penetration, only cold air is removed; for chimneys, structures made of fire-resistant materials are used, the dimensions of which are controlled by other SNiP standards.
When choosing a control unit for an air duct through the roof, they are guided by the degree of dust, temperature differences, gas contamination, and humidity of the transported air mixture. The additional element of the passage of the air duct through the roof is fixed to the roof's load-bearing frame (lathing or counter-lattice). Shown in Fig. 1.
Expert advice
As in any other work, when making holes there are features and nuances that must be known to achieve the desired result. For example, how to choose the correct hole size. The choice depends on the material from which they are made. If the hole is made of wood, then it is necessary to leave a gap, which is determined by the thickness of the heat and waterproofing layer. It is not recommended to make allowances that are too large, more than 10 cm, as in this case they will be difficult to weld. It is sometimes difficult for a craftsman to make a round hole in wood. It is possible to make a square hole, which in practice is much easier to make.
However, in concrete walls and ceilings it is better to make holes with an exact diameter. This material is resistant to fluctuations in temperature and humidity. One of the typical mistakes in work may be the following features of building a house:
- wiring. Without knowing the exact electrical diagram, do not start work. Recovery will take a lot of time and money;
- equipment. Without special equipment, it is difficult to find a place where its absence is guaranteed. If the drill suddenly hits an obstacle, stop working, try making a hole in a different location or cutting out metal;
- Weakening the load-bearing wall. A hole in a concrete monolithic wall can be made without worry. However, a brick or block wall is less durable. When working with a hammer, you can easily break the integrity of the area above the hole, which can crack and, in some cases, collapse.
All work must be carried out in accordance with current regulations. Holes with a diameter of less than 200 mm are not adjustable and can be made by property owners at their own discretion. If it is necessary to drill a well with large values, it is necessary to coordinate this operation with the relevant authorities, otherwise serious problems may arise, including a minor fine and restoration of the drilled well.
Features of various types of room ventilation in a private house
Window
- For high-quality air exchange you will need (depending on the size of the room) from 30 minutes to an hour.
- At low temperatures outside, there is a high probability of condensation appearing on windows, slopes, and window sills.
- The longer the window is open, the greater the heat loss.
Window
It is understood that the sash swings open completely.
- 5 to 10 minutes is enough.
- The formation of condensation and cooling of the air in the room is excluded.
Full ventilation
All windows and doors open
It is recommended only in individual cases, with precautions taken (especially for children), and for a few minutes (no more than 3 - 4)
If the simplest ventilation system does not provide adequate comfort in a private home, then other options should be explored.
For example, a ventilation scheme with recovery.
It is also useful to understand the types and varieties of fans, noise suppressors, models of kitchen hoods and other devices that can be installed. But these are already separate and rather voluminous topics, so the author considers it possible to limit ourselves to the information provided.
It is quite enough to understand the principle of operation of ventilation in a private house, and possible schemes for organizing it yourself.
