The construction market is constantly updated with new materials; it is difficult for an inexperienced developer to navigate the wide variety on his own. Moreover, many companies use obscure names in order to increase product sales and increase their cost. Very often, such an advertising campaign works, and the profitability of commercial activities increases without much effort.
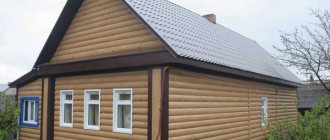
Beveled larch plank
What is planken and its varieties
The unusual name hides an ordinary board made from different types of wood. It’s just processed on all sides and has a standard thickness: from 20 to 24 mm. The length starts from 2 m, it all depends on the technical and technological capabilities of the equipment used.
Planken is available in three varieties on the market:
- Direct . This is a board whose cross-section is a rectangle with right angles (90°). This type of plank is not used for cladding houses. When joining the boards, gaps form between the boards, through which the sheathing is visible. Moisture also penetrates here, which negatively affects the finish, as well as dust and debris. Typically, this type of finishing material is used in the production of sandbanks or the construction of fence structures.
Direct version of planken Source diesel.elcat.kg
- Beveled . During processing, the ends of the material are cut at an angle of 45°. That is, the cross-section results in a parallelogram. During installation, the adjacent beveled planes of the two sheathing elements being connected are joined, and one part covers the other. An almost seamless cladding is obtained on the surface of the wall being finished. Therefore, this type of plank can be used for façade cladding of house walls.
Beveled variety of planken Source sekil.yukle.mobi
- Wedge-shaped , that is, the thickness of the material varies along the width of the board. Cladding a house with this type of plank has an original look. And this is where its advantages over other types end.
Wedge-shaped planken Source houtweb.nl
Now about why this finishing material is more expensive than lining, although it is no different from it. As mentioned above, manufacturers, by changing the name, receive fabulous profits. For example, the price of “Extra” class Euro lining is 850-900 rubles. for 1 m². The price of planken of the same class is 1300 rubles/m². The difference is 40%.
But that's not all. It is necessary to talk about the cost of planken and the technology of its production. Let's start with the fact that this building material is made on a conventional four-sided jointer. Cutting is done with straight cutters, which are easier to install and adjust, and easier to sharpen. In the production of lining, milling cutters with complex profiles are used. That is, the cost of planken is lower than that of lining. That is, manufacturers deceive consumers twice.
Four-sided jointing (planing) machine Source remlandia.ru
Scope of application of planken
As mentioned above, direct modification is used in the production of furniture, decorative elements and fencing structures. Beveled and wedge-shaped are mainly used for finishing facades, as well as in the interior design of premises. When the task is external cladding, the plank is treated with protective impregnations, varnishes and paints. The latter are rarely used, because the pattern of the wood structure is hidden under the paint layer. But paints are often used in interior decoration.
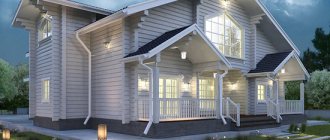
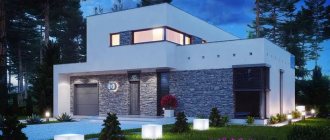
It should be noted that any structure can be sheathed with planken. That is, it can be a stone house, a wooden log house or a frame building. This universal material, like lining, is mounted only on the sheathing, which is installed and attached to the walls of the house.
Straight plank fence Source electric-fences.net
See also: Catalog of companies that specialize in facade and finishing materials.
Specifics of the material
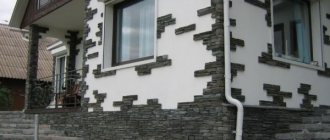
Planken is a wooden board with a chamfer on each side. Recently it has been particularly popular among facade finishers. If we compare planken with classic lining, it has a difference in the form of a rounded edge, which allows it to harmoniously imitate timber. Various types of wood are used in the production of the material: teak, spruce, but most often larch. Being a natural, natural and environmentally friendly material, planken radically transforms the external walls of a building. The material retains heat well, which is important for country buildings. You can buy planken either directly from the manufacturer or at a specialized hardware store.
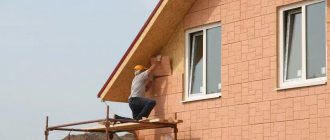
Technology of cladding house walls with planken
The finishing of the facade with planken is usually carried out horizontally. This means that the sheathing elements are installed vertically in the same plane. But you need to start by calculating the amount of planken required for cladding. Everything is simple here - the area of the wall is divided by the area of one board, and 5-10% is added to the resulting number (as reserve for trimming).
Installation of the frame (lathing)
For lathing, you can use wooden bars with a cross-section of 50x50 mm or galvanized metal profiles, which are used when installing plasterboard sheets. The second option is better because with changes in humidity and temperature, which are common outside, they do not change their size and characteristics.
Depending on which house is planned to be finished with planken, minor repairs to the walls are carried out. This mainly applies to brick, block and stone buildings. Repair is the repair of wall defects and priming of its surface so that the surface layer does not crumble.
Frame made of wooden bars under planken Source fd-kostroma.ru
- Then vertical lines are drawn from the corner of the building along its entire length every 50-60 cm .
- Direct hangers along the lines every half meter , which are attached to the wall of the house with self-tapping screws. wooden blocks are used as sheathing elements , then fastening can be done with long self-tapping screws , screwing the slats directly to the wall. Wooden stands are installed in the pestles to lower the plane level.
- Metal profiles or slats are attached strictly vertically to the suspensions . The main task of the work manufacturer is to form one vertical plane .
If wooden slats were used as lathing, they must be treated with an antiseptic composition.
Scope of application
Typically, boards of this type are used in the process of performing many works:
- Installation of ventilation facades of various architectural buildings;
- Installation of floors and ceilings;
- Used as elements in the design of verandas and terraces of cottages;
- As fences and fences;
- Benches and benches are created using boards;
- Take part in the construction of children's playgrounds;
A facade made of special boards is a common option, since this material is not subject to deformation, is resistant to moisture and dampness, and is not afraid of temperature fluctuations. Typically, plank installation is carried out in two ways: open (or visible) and closed. If the boards were installed using the open method, they can be easily replaced in the future; the deformed element can be easily replaced or repaired. And in the case of hidden installation, you will need to remove the entire part. You can buy boards at a good price from the manufacturer.
Video description
To make it clearer to you how the plank is installed on the facade of the house, we suggest watching a video:
There is another option for attaching the plank. It uses decorative nails. They are simply driven into the boards at the location of the sheathing elements. The opinions of designers in this regard differed greatly. Some say that the heads of even decorative nails spoil the appearance of a building. Others, on the contrary, welcome the unusual approach to implementing such a design solution. The choice, as always, remains with the owner of the house.
Wall cladding with planken fastening with decorative nails Source lt.decoratex.biz
The third fastening option is overlap. This is done like this: the first row is installed at the very bottom without a starting bar. Fastenings are carried out with long nails or self-tapping screws, which are driven into the upper part of the plank. The second row is laid so that the lower edge of the boards covers the upper part of the plank of the first row. In this case, the upper elements of the cladding will cover the caps of the fasteners. Everything is exactly the same with other rows. That is, it turns out that each board is attached only along the top edge. This is clearly visible in the photo below.
Laying planks overlapping each other Source remlandia.ru
Differences in quality
The cost of lumber is affected by:
- Dimensions.
- Wood.
- Variety
Pine has 2 grades: A and AB. Grade A material has no knots and is characterized by a homogeneous composition. AB grade products may have more knots and have a less uniform wood composition. Larch lumber is divided into 4 grades: AB, BC, prima and extra. The latter variety has perfect wood without knots and a beautiful natural pattern. There are no defects or defects. Available class is BC. Low-grade wood is used in production, so the finished product is not aesthetically pleasing.
Repair of a plank wall
Planken, like lining, does not cause any particular trouble. But sometimes situations arise when you need to replace one board. This process is actually very complex. You can't do it yourself. Even many experienced craftsmen encounter problems when carrying out repair work if Duet clamps were used for fastening.
Here is the sequence of operations:
- It is necessary to tap the board being replaced to determine the location of the frame elements. Mark these places with a pencil .
- If in the future the defective cladding part is not used somewhere, then it can be cut with a grinder , on which a thin cutting disc is used, used for cutting metal. The main task in this situation is not to damage the sheathing .
- After that, the cut parts of the board , and then the fasteners are dismantled
If the planken board is used somewhere in the future, then dismantling it will be much more difficult. To do this you need to get to the fasteners. Usually, to do this, use a chisel to select the location of the intended fasteners, which are then dismantled, that is, the screws are unscrewed.
But the most interesting thing is that the open space must be covered with plank, which will have to be fastened to the frame elements with nails. In this case, the caps cannot be left if other fastening methods were used during the sheathing process. After that, the fastening points are covered with colored putty, matched to the color of the plank, or tinted.
Features of ventilated facades
When cladding a building with curtain panels, it does not matter what type and what material it is necessary to design the ventilated space between the wall and the cladding. For better insulation of the room, it is recommended to use practical and proven materials, for example, mineral wool. To create a ventilated facade, a lathing is made on the wall, with a step width equal to the width of the insulating material. Most often, the width of mineral wool is 60 cm. It is also worth considering that the thickness of the lathing beams should be 20-30 mm. thicker than the thickness of the insulation.
The insulation is attached to the wall using mushroom dowels. After fixing the mineral wool, it must be covered with plastic film. This is necessary to prevent it from becoming saturated with moisture. You can also secure the film using mushroom dowels . When strengthening the film, insulation material may be wound around the drill; to prevent this from happening, it is necessary to use a tube with a diameter of 3-4 mm. exceeding the diameter of the drill. After completing the installation of the insulation, you can begin installing the plank.
History of appearance
It is impossible to establish more precisely the origin of this lumber, but it is well known that it first appeared on the markets of Western European countries in the 60s of the last century. Initially, wood extracted in the Scandinavian countries was used for its manufacture, but a little later European manufacturers began to use Canadian and Russian larch, as well as some other types of wood. It is worth noting that Russian Angarsk larch today is one of the most popular materials for creating planken boards.
Thanks to the extreme simplicity of design, high technical characteristics and excellent resistance to negative environmental influences, boards of this type gained popularity first throughout Europe, and then throughout the world. With the disappearance of the Iron Curtain and the USSR itself, this lumber began to be imported to the CIS countries, and after some time, full-fledged local production of planken was also established in them.
Production process
How planks are made
To make boards, special automated machines are used, which themselves cut the wood to the required sizes. To prevent cracks, chips, burrs and other defects from occurring during the pruning process, the wood is pre-dried.
Drying is carried out in special closed chambers. It allows you to get rid of excess moisture, as a result of which the board dries to the optimal size and density, which are well suited for quick cutting. Drying also kills fungi and microorganisms.
After processing, planken can be coated with various protective compounds, for example, antiseptics, oils, stains, fireproofing impregnation and a paint layer. Then the boards are hermetically packaged in plastic and delivered to sellers for sale.
"Cobra"
The fastener is intended for fixing planks with a straight profile made of soft wood (for example, larch or pine) on horizontal and vertical surfaces. Depending on the operating conditions, it is made of steel with thermal diffusion or galvanized coating.
"Cobra"
The element is a fitting with two bases located at an angle and directed in different directions. On one of them there is a spike 11 mm high, and on the other there are three holes:
- the main thing is necessary to fix the boards at an angle of 90 degrees;
- additional is used in cases where access to fittings during installation is difficult and the “cobra” needs to be fixed at a different angle, 45 degrees;
- a hole on the vertical part is required for attaching the fittings to the finishing board.
| Thickness, mm | Width, mm | Length, mm | Material | Technological gap, mm | Additional fasteners |
| 2 | 30 | 48 | Stainless steel | 6 | Screws |
Step-by-step instructions for installing the cobra fastener
Cobra fastener
Step 1. Place cobra fasteners on the sheathing at all points where it will intersect with the boards and secure with screws through the main hole.
Step 2. Place the first board on the tenons and drive it through the block until the surface touches the stopper.
Step 3. Place the horizontal ends of the fasteners into the gap between the board and the sheathing.
Step 4. Secure the structure with a screw using the hole on the vertical plate. If this is not possible, screw the screw into the additional mounting hole at an angle of 45 degrees.
Step 5. Take the next board, nail it onto the tenons of the fastener, then secure it and repeat the above steps.
Fastening systems
Many people are puzzled by the question of how to attach the plank. There are two main types:
- using self-tapping screws. Installation is simple, no special fastening systems are required, facade cladding takes less time than with hidden cladding. The disadvantage of this method is the visibility of the screws.
- using hidden fastening systems - a more complex and time-consuming installation method. The main advantage is the beautiful, aesthetic appearance of the house, with invisible fasteners. In this case, finishing will take longer and will cost more if the installation is carried out by hired builders.
The specific method of fixing the plank depends on a number of factors, the main of which are the type of boards, budget and requirements for the aesthetic appearance of the cladding.
Price list
Design work
| Name of works | Price from, rub. |
| Testing | For free |
| Geodetic survey of the structure | from 20 rub/m2 |
| Creation of working documentation for the installation of a ventilation façade | from 70 rub/m2 |
| Registration of a color passport | RUB 155,000 |
| Issue an OATI order | 10000 rub |
| Project development | 30,000 rub. |
| Development of a work project | 30,000 rub. |
| Creation and approval of TDR for the duration of repair work | 30,000 rub. |
Construction works
| Name | Price |
| Assembly of the vertical subsystem: | from 500 rub/m2 |
| — galvanized with polymer coating | 400 rub/m2 |
| - aluminum | 600 rub/m2 |
| - made of stainless steel | 800 rub/m2 |
| Assembly of the interfloor subsystem: | 500 rub/m2 |
| — galvanized with polymer coating | 480 RUR/m2 |
| - aluminum | 720 RUR/m2 |
| - made of stainless steel | 960 RUR/m2 |
| Horizontal-vertical subsystem: | 650 rub/m2 |
| — galvanized with polymer coating | 560 RUR/m2 |
| - aluminum | 840 RUR/m2 |
| - made of stainless steel | 1120 rub/m2 |
| Wall insulation in 1 layer | 200 rub/m2 |
| Wall insulation in 2 layers | 300 rub/m2 |
| — basalt heat-insulating slabs, density = 45 kg/m3, m3 | 1850 rub/m3 |
| — basalt slabs, density = 80 kg/m3 | 2750 rub/m3 |
| — penoplex, ground floor | 5020 rub/m3 |
| Installation of the protective membrane | 100 rub/m2 |
| - windproof membrane | 95 RUR/m2 |
| Fastening of facing material S, m2: | |
| S≥ 1 m2 | 600 rub/m2 |
| 1>S≥ 0.36 m2 | 720 RUR/m2 |
| 0.36>S>0.1 m2 | 900 rub/m2 |
| S≤0.1 m2 | 4200 rub/m2 |
| Cladding material: | |
| - planken | 2100 rub/m2 |
| Installation work: | |
| Construction of a subsystem for a parapet cover | 500 rub/m. |
| — galvanized with polymer coating | 320 rub/m. |
| - aluminum | 480 rub/m. |
| - made of stainless steel | 640 rub/m. |
| Assembly of additional elements | 350 rub/m2 |
| - metal | 277 RUR/m2 |
| - aluminum-composite | 288 RUR/m2 |
| - aluminum | 550 rub/m2 |
Practical advice
- When designing the arrangement of planks on the facade, try not to place more than three of them in a row.
- To paint or process the ends of boards, use a small sponge rather than a brush or roller. The work will be more accurate.
- When using nails for fastening, choose ones that are resistant to corrosion, and protect the surface from it with a paint coating. Otherwise, rust stains will inevitably appear on the surfaces.
- The nails used can be made invisible, or almost invisible, by hammering each of them into the bar and depriving it of its head (cut off with wire cutters). Then it is driven deep into the wood with a small drift. The remaining small dents can be hidden with wood putty (if the final painting of the facade is planned with opaque paint).
- You can use homemade putty to hide nail indentations. Mix one part of transparent varnish (which will cover the surface later) with one part of sawdust from the wood of this plank (easy to collect when sawing off excess pieces of boards at corners, in niches). The mixture is used to cover the dents with a construction knife or an artistic palette knife.