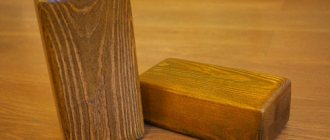
Arbolite houses are one of the most common today. Arbolite combines all the advantages of concrete and wood. This building material is very unique and various technologies are used for its finishing. The principle of finishing is that it is necessary to avoid materials that can harm the wood concrete. Due to the fact that wood concrete has a large-porous structure, finishing of wood concrete must be carried out to prevent the penetration of moisture. If moisture gets inside the material, it will begin to deteriorate from the inside. The type of protective and finishing coating is determined in each specific case depending on the purpose of the building, its location, as well as the amount of funds invested in construction.
How can you plaster wood concrete?
The main method of finishing a house made of wood concrete is plaster. Since the surface of the material is rough, the adhesion between wood concrete and plaster is as high as possible. In this case, there is no need for preliminary preparation for finishing. Although many experts recommend stuffing metal mesh for better adhesion. It is also believed that this can significantly extend the life of the finish. Fastening the mesh is very simple, just nails and a hammer are enough.
The following types of plaster can be used:
- Cement plaster. The composition includes sand and cement. For a wall with a standard thickness (30 cm), the thickness of the plaster layer should be 20 mm.
- Gypsum plaster. The main component is gypsum with various fillers.
- Lime plaster. The base is lime. After applying a layer of plaster, putty over the primer. After this work, some developers paint the walls with facade paint.
- Decorative plaster. There are lime, acrylic, latex. Acrylic plaster is one of the most convenient. Available in the form of ready-made mixtures. It has very good vapor permeability, which is a great advantage for wood concrete.
Materials and tools
- The plaster mixture
acts as a base. Cement products are used for the interior, and gypsum is used inside. - Metal guide profiles
will serve as a guide when applying coating to the side planes. - A hammer drill with a special attachment
for preparing the solution will allow for high-quality mixing. - Dowels and screws
will be needed to fix the beacons. The first of them are needed for attaching elements to a concrete surface. - A building level
of at least two meters long will allow you to level the guide plates. - A cutting tool
like a grinder or metal scissors is necessary for cutting profiles. - A hammer
is required to drive dowels into a concrete wall. It is advisable to use a lightweight tool. - A rule of aluminum
2-2.5 meters long is necessary to level the applied layer. - A spatula
15 centimeters wide will be the main tool for spreading the finished mixture. - A wooden grater
allows for high-quality rubbing to make the surface smoother. - The primer
is used to improve adhesion between the side planes and the applied layer. - A container such as a bucket, basin or trough
is needed for mixing the solution and delivering it to the work site. - A roller or brush
is required to apply the primer. You will also need a small container. - The measurement is made using a regular tape measure
, the length of which should not be less than 3 meters.
Addition! When simple plastering of walls is carried out indoors or on the outside, gloves are required to protect hands from sticking of the solution.
How can you veneer wood concrete?
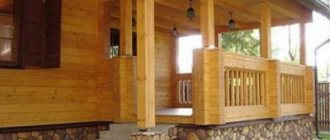
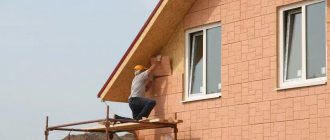
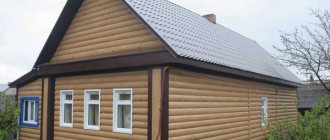
Another way to cover the exterior walls of a home is cladding.
A wide variety of materials are used - siding, lining. In addition to them, brick finishing is carried out. In this case, several problems are solved at once - the houses acquire some kind of armor and additional heat and sound insulation is created. The properties of wood concrete allow cladding without insulation, however, at the request of the developer, a layer of mineral wool can be laid. For wood concrete this will only be a plus, since this material will allow it to “breathe”. It is important that there is a gap of 4–5 cm between the wood concrete and the brick, this will help to avoid moisture. It is also important to install ventilation systems with brick cladding. Otherwise, wood concrete may be destroyed by moisture. You can use vinyl siding for cladding. These panels retain all the properties of wood concrete and allow the walls of the house to breathe. In addition, this finish looks aesthetically pleasing and is very resistant to external influences, such as moisture. But there is a disadvantage in the form of deformation from high temperatures. Use of Block House panels as a finishing material. Provides a mandatory frame of bars onto which the panels themselves are attached.
Cladding has become very popular. Lining allows you to visually align the walls. If the walls themselves are smooth. then you can mount the lining directly to the wall. If there are any flaws, then you can use the already familiar crate. In general, the installation of lining is carried out according to the same principle as siding panels or Block House.
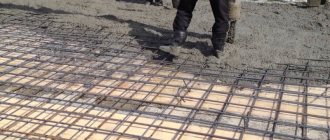
Basic Process Stages
This instruction is intended to review the main stages of the work, so that it is easier for novice craftsmen to navigate when applying the mixture. According to this scheme, both internal and external plastering of walls is carried out. In this case, the material of the side planes does not matter much, however, there are some subtleties when working with certain types.
Surface priming
The adhesion of the solution to the base can be improved if the vertical edges are treated with a special compound. Concrete contact is usually applied to smooth surfaces. When plastering arbolite walls, as a rule, a primer with deep penetration is used, because this material has a porous structure.
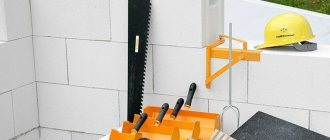
Installation of guide profiles
To determine the location, preliminary marking is carried out, after which the elements are attached to the surface.
The main advantage of using guide plates is the possibility of quick installation, with no special skills required.
- First, the side surface is examined for vertical deviation, for which a two-meter level is applied to it. If there are depressions and bumps, they are marked with a marker.
- Next, markings are carried out to determine the location of the metal beacons. The distance between vertical elements depends on the length of the rule used.
- Self-tapping screws are fixed along the edges using dowels. If the walls are to be plastered from timber, then the fasteners are screwed directly into the side plane.
- Before metal profiles are installed, all screws must be aligned. To do this, the cord is usually pulled diagonally. With this option, it is possible to correctly set the beacons.
- After installing the landmarks in the form of self-tapping screws, the profiles are fastened. Small piles of the mixture are made between the fasteners. By pressing through the rule, the beacons are deepened until they stop.
Note! When plastering walls in a Khrushchev building, special attention is paid to the evenness of the guide profiles, since most often such buildings have curved surfaces.
Self-application of the mixture
At this stage, the side surfaces are coated with a special composition, the price of which is usually not very high, unless it is necessary to improve the characteristics of the finishing layer.
To avoid deformation of the wooden rule, it is advisable to cover it with waterproof paint, then the main tool will serve for a long time.
- Immediately after installing the beacons, you can begin applying the solution to the side edges of the room. To do this, fill the bucket one third with water, and add the dry mixture inside and mix thoroughly with a mixer.
- Using the cape method, the finished composition is applied to a vertical surface. A spatula is used as a basic tool. The layer of finishing mortar must be sufficiently dense and protrude beyond the profiles.
- Using the mixture, the mixture is evenly distributed between the vertical beacons. The movement is carried out from the bottom up along a zigzag path, and the solution is thrown from above.
Attention! If you are plastering walls made of shell rock, it is recommended to wet it before applying the mixture, otherwise the finishing material will quickly give up moisture and crack.
Grouting the surface
The final leveling of the finishing layer is carried out after it has hardened. During the work, a wooden grater is used, which is applied to the side plane and moves in a circle, producing high-quality grinding.
- Any irregularities and bubbles that appear must be repaired without fail, because this is due to the fact that the main composition does not completely reach the side surface.
- When plastering wood concrete walls, it is recommended to use a vapor-proof mixture with good moisture-resistant characteristics on the outside.
- If differences on one plane exceed 5 cm, then the solution must be applied in two layers. The first of them is thrown on immediately without preliminary leveling, and the second is laid after a couple of days.
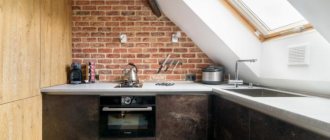
What is the difference between the interior finishing of wood concrete and the exterior?
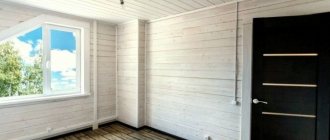
The interior finishing of wood concrete also has its own characteristics. Of course, the main place here is given to plaster. It is applied according to the same principle as external cladding. It is very important to know that during work and during subsequent operation of the house, the humidity should not exceed 70%. This building material should not be used in buildings where there will be aggressive conditions. It is worth recalling that substances that improve the characteristics of wood concrete are important in the composition of plaster. These include perlite, which, in turn, is a good insulation material. After this, you can safely paint the walls or stick wallpaper on them.
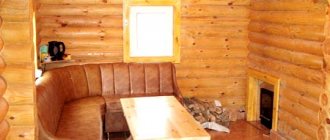
Also, the inside walls are trimmed with clapboard. To install it, it is necessary to install a wooden sheathing. This will hide communications and will not interfere with vapor permeability. As a minus, we can note the increased fire hazard of this material.
Application conditions
The basic requirements for plastering walls are reflected in SNiP III-21-73, and the quality of work is divided into three levels.
- For normal finishing, some deviations are allowed, not exceeding 3 mm per square meter. At the same time, such unevenness should be no more than 15 mm over the full height of the room.
- Improved plaster is subject to more stringent requirements. Vertically, you can leave a slope of less than 2 mm per square meter, but not more than 5 mm relative to the entire height of the room.
- The most stringent requirements apply to high-quality side cladding. Deviations should not exceed 1 mm per square meter. As for the height of the room, a skew of no more than 5 mm is allowed.
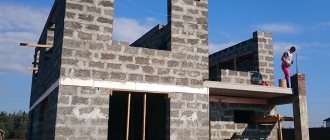
Characteristics of arbolite blocks
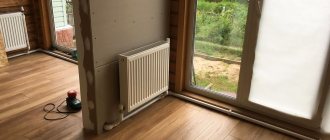
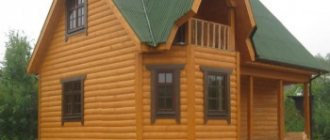
Photo. How to insulate a wood concrete block from the outside
Arbolite (wood stone) is a lightweight concrete made from a mineral binder and filler from wood waste or other cellulosic organic raw materials. In terms of technical and operational indicators, a house made of wood concrete blocks has no equal. The house has a dry climate, the walls made of wood concrete are light and easy to finish.
Arbolite does not burn and is not subject to rotting. The mass of one cubic meter of the wall of an arbolite house is 3 times less than that of an expanded clay concrete house. According to the thermal insulation characteristics, a wall made of arbolite blocks 40 centimeters thick corresponds to a brick wall about 1 meter thick. A house made of wood concrete blocks can be insulated with additional laying of hollow bricks.
additional information
This guide examines the main stages of wet finishing of premises and facades, as well as the requirements for the quality of the work carried out. To create a high-quality finishing layer yourself, it is enough to study the sequence of basic operations. In addition, there is a video in this article for an object lesson.
Arbolite houses are one of the most common today. Arbolite combines all the advantages of concrete and wood. This building material is very unique and various technologies are used for its finishing. The principle of finishing is that it is necessary to avoid materials that can harm the wood concrete. Due to the fact that wood concrete has a large-porous structure, finishing of wood concrete must be carried out to prevent the penetration of moisture. If moisture gets inside the material, it will begin to deteriorate from the inside. The type of protective and finishing coating is determined in each specific case depending on the purpose of the building, its location, as well as the amount of funds invested in construction.
Insulation with mineral wool
When the thickness of arbolite walls is about 30 cm, it is recommended to insulate them from the outside with mineral wool. Its layer must be at least 10 cm.
The main advantages of mineral wool include:
- financial accessibility;
- possibility of fastening without arranging sheathing;
- the ability to retain moisture, but not interfere with its evaporation;
- low thermal conductivity;
- fire safety;
- resistance to sudden temperature changes;
- chemical and biological stability;
- high vapor permeability.
If the technology for constructing high-quality vapor and heat insulation is violated, mineral wool will absorb water and lose its thermal insulation qualities.
This material is not used for insulating residential buildings from the inside. Since it releases harmful particles that provoke allergic reactions in people.
The process of installing mineral wool is quite simple. There are two options used here: dry and wet. The first involves laying slabs between the wall and the sheathing. To do this, it is recommended to make a wooden sheathing. The material itself is attached in the spaces between the profiles. The second option involves gluing the slabs to the surface of the walls.
Not recommended insulation
Wood concrete is rarely used as insulation. It is also not recommended to seal it with polystyrene foam. The material has the following disadvantages for this design:
- Expanded polystyrene suffers from direct sunlight. It releases toxic substances that are dangerous to humans and the environment.
- Steam cannot pass through penoplex. When using the material, you will need to additionally think about room ventilation. Arbolite is used to maintain heat indoors. In combination with polystyrene foam, this advantage will be completely absent.
Manufacturers
When choosing suitable wood concrete panels for the construction of load-bearing partitions or other structural elements, one cannot limit oneself to only assessing their dimensions. It is very important to take into account the reputation of manufacturers and their compliance with standard requirements.
First of all, it is worth considering the products of the Ivanovo Design Bureau "Sfera" . Dozens of other Russian factories produce wood concrete using the equipment of this particular company, and this fact already means a lot. No less high-quality blocks are made at another enterprise from the Ivanovo region - at the TPK “Pilim Doski” . This company has allocated a separate heated room for the so-called maturation of its products.
Slightly less advanced, although larger, panels are made in the vicinity of Dmitrov near Moscow. Tver LLC "Arbolit 69" only recently began work. But in the Arkhangelsk region, in the town of Nyandoma, Monolit LLC . They make blocks of a special, “northern” format.
Errors allowed
Errors that result in a house being deprived of heat:
- It is imperative to plaster the walls of the house on both sides, otherwise the wall will be blown through, or the wood concrete itself will no longer retain heat. It is necessary to create conditions under which the air in the pores of the wood concrete will be motionless.
- According to GOST, for external arbolite plaster a layer of at least 2 cm thick is required. For internal – 1.5 cm.
- Before plastering, some limit themselves to just priming. This does not solve the problem of water being drawn out of the solution.
Plastering wood concrete is not such a complicated procedure in itself. But the entire result depends on the thoroughness of the work.
In forms or instant demoulding
Each produced wood concrete product must be stable both in characteristics and in geometry. Having many years of experience in research in the technology of manufacturing wood concrete products, it is not easy to obtain truly high-quality classic wood concrete with stable characteristics. Using the sealing method, we can say with confidence that this method is the best today. The production of wood concrete using this method will reduce defects to zero, and the geometry and performance properties of such a product will be the best.
Why is this method the most effective over another and why can’t it be produced with high quality on instant formwork. This is all due to the wood chips, which are in a chaotic state during laying, and when the block is pressed, at the moment the cement sets, the wood chips begin to return to their original volume, thereby breaking the nascent cement bonds.