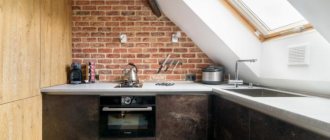
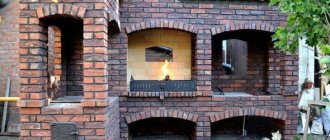
The bathhouse is a place for relaxation and restoration of health. Therefore, finishing the dressing room with block house and stone is becoming increasingly popular. This is due, first of all, to the environmental friendliness and safety of the material for the health of vacationers. Bath finishing technology has its own characteristics. To perform high-quality installation with your own hands, you should familiarize yourself with it.
An example of a classic interior decoration of a timber dressing room
Materials
The materials for building a steam room can be different, for example, brick, foam block, stone.
But one of the best is, of course, wood. The most common types of wood used in the construction of baths and saunas are aspen, linden or birch, because they do not emit resins. However, pine is often used for external walls. Typically, rounded beams are used for steam rooms. But the most convenient and affordable is profiled timber, which is resistant to various deformations.
In order to build a steam room, you need to stock up on the necessary materials that will be needed during the work process, as well as make the correct calculations.
The list of necessities includes:
- construction timber measuring 15 by 15 centimeters;
- timber for building partitions measuring 15 by 10 centimeters;
- concrete mortar;
- necessary reinforcement to install the foundation;
- second grade boards intended for formwork;
- sand and clay, if the stove is made of brick;
- refractory brick for the base of the furnace;
- crushed stone;
- materials for waterproofing;
- stones for heating;
- insulation materials (this can be tow, jute, as well as foil for vapor barrier, or mineral wool);
- lining having 12 millimeters for wall cladding;
- lining having fifty millimeters for ceilings;
- tiles, if needed;
- slate, as well as galvanization;
- antiseptics;
- lamps or lighting strips;
- switches of different formats.
Inside the bathhouse
Internal partitions are those that separate the three main rooms: steam room, sink, relaxation room from each other.
Between the steam room and the sink
It’s up to you to decide what material your partition between the steam room and the washing room will be made of - if you follow the links above, you will learn how, if possible, to completely neutralize the inherent disadvantages of each material.
So do what you like
But consider the nuances that are important to know. What is characteristic of the partition between the steam room and the sink? On the one hand, it has increased temperature and humidity, on the other hand - only increased humidity
In some cases, this is a critical difference - you cannot use moisture-resistant drywall in a steam room because it protects against moisture, but becomes brittle from heat.
But the main thing is that the walls of the steam room and sink, including the partition, are often finished in completely different ways. This could be tiles in the washing room and lining in the steam room. Of course, where the partition is made of timber or logs, this is superfluous, but for a brick or frame it is quite relevant.
There is one more nuance - even if you prefer clean wood on both sides, then in the steam room it can only be treated with oil or oil wax, but on the washing side it is already permissible to use antiseptics and all kinds of paints and varnishes. And all because the temperature is lower.
Heating the sink is another problem that needs to be solved in winter. Of course, you can keep the door open. Or you will have a partition in the bathhouse sink that easily allows air to pass between rooms (wooden on a frame, but without insulation), and at the same time sounds :). Or the partition is impenetrable, but it has holes, plugs and a fan. You can also use the diagram shown in the figure above.
Partition in the sink of a bathhouse with a rest room
What should be the partition between the wet sink and the dry rest room? First of all, impenetrable, right? Here a simple wooden shield is not suitable; something more substantial is needed.
Again, it can be made from any material, but the frame or brick wall must be insulated. A log or beam does not need insulation.
Paintwork materials are allowed in both rooms, almost any of those produced for indoor use.
ATTENTION! Compositions for facades are usually more odorous and more toxic than for interiors, so they are not interchangeable (see the section on painting a bathhouse).
Partition in a steam room in a bathhouse with a relaxation room
This can be a regular wall or a cutting wall. If the furnace firebox opens into the rest room, then the partition will be at least partially (and for some completely) made of brick. But this was discussed above.
In the steam room, vapor-proof and infrared-reflecting foil is often used as finishing. With such a finish, plus thermal insulators, any partition will conduct little heat, which, on the one hand, reduces heat loss and fuel consumption, and on the other, the question of heating the adjacent room again arises.
If you have a partition between the steam room and the relaxation room, you can use the heating method described above, but you will have to close the holes when steam is supplied to the steam room, otherwise you will significantly increase the humidity in the relaxation room. And since most often there is ordinary furniture from home, and soft furniture at that, this is not good.
Another heater is always an alternative.
Characteristics of wood
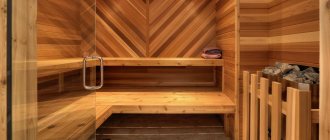
Linden. This type is familiar to practically everyone. Its positive qualities were already familiar to our ancestors, who made many household items from linden, etc. This wood does not absorb moisture, has a pleasant aroma and light color. Linden is one of the most popular materials and copes with the task perfectly. Does not swell or deform during use.
Aspen. Most consumers prefer aspen. It is durable, does not rot, and does not change its appearance for a long time. Does not contain resins or other substances harmful to health. Often used for interior decoration of saunas and other places with high humidity.
Pine. For rooms with a stable temperature, pine is used. Dressing rooms and rest rooms are lined with it. This wood does not crack, is durable with a pleasant aroma. Many people consider pine to be a harmful material because of the resins it produces. But that's not true.
Interesting to see:
Oak. Of course, this white wood is a more suitable option for interior decoration of baths. But not everyone can afford it. In the operational environment it has proven itself to have a long service life, high strength, and resistance to rotting. It has virtually no disadvantages. At high temperatures, they release favorable odors and substances that improve human health.
The variety of cladding materials opens up enormous possibilities for the consumer. Wood is easy to work with. It is quite easy to cut and performs health-improving functions well. Having chosen the right product, the steam room will have a fairly high attendance, having a great impact on the health of clients. Only natural substances are placed in these rooms.
Ventilation in the waiting room
The dressing room should be a warm room with fresh air, in which it is comfortable to stay after bath procedures. Therefore, it is usually equipped with only one ventilation hole - a hood. And to speed up the gas exchange process, a fan is often placed on this hood. The exhaust vent itself is located opposite the steam room at a height of half a meter. It is drilled in an accessible way into the wall, a plug is placed on it on one side, and a grille or deflector on the other. In case of forced ventilation, there is a fan inside, connected according to the instructions supplied with the device.
But if the furnace of the stove is not in the steam room, but in the dressing room, you will have to make sure that fresh air comes to the stove from the street. To do this, a ventilation duct is installed, most likely made of galvanized steel, which runs under the finished floor and delivers fresh air directly to the stove door. Installation of this channel is carried out until the completion of work on the floor. A pipe of the calculated diameter is inserted at one end into a hole in the wall, where it is secured with polyurethane foam and covered with a grill, and at the other end it is led out to the stove and equipped with an adjustable plug.
How to heat bath rooms
Let's take a closer look at the issue of heating rooms such as the dressing room and the rest room.
Waiting room
There are different waiting rooms. For some, it’s just a vestibule, which does not allow the cold air from the street to cool the room when people enter the bathhouse; for others, it’s a full-fledged hallway where you can undress and dress; for others, a combined room is called a dressing room - this is both an entrance hall and a relaxation room , there is both a hanger and a table, roughly speaking.
In what case should you worry about how to heat the dressing room in a bathhouse in winter? We believe that in the last two cases. Because there is no point in heating the vestibule, but it is definitely worth insulating it.
There is one heating method that does not seem to require any special costs. This is the use of ventilation. The method is simple: make a hole in the wall of the steam room, insert a plastic sleeve into it, and install a fan inside the sleeve, which drives hot air from the steam room into the adjacent room.
ATTENTION! Since this function is not always needed, care should be taken to block the air flow from the pipe. This is done using an adjustable plug. The easiest way to do this is in the following video:
The easiest way to do this is in the following video:
And this video shows a slightly more complicated version of the same thing:
That is, it is not necessary to use the simplest design; you can improve it to suit your conditions.
What is good and what is bad about this method? The good thing is that with an iron stove you can lower the temperature in the steam room; it is better to heat the stones in the heater and get a mode that is closer to a Russian bath.
Although this is not the main thing, the main task is, after all, heating the adjacent room. Well, this method copes well with heating. This is approximately the same as a heat gun - warm air that is driven by a fan. And this combination quite quickly raises the air temperature in the room.
The downside is the same as the upside - you lower the temperature in the steam room. How does this happen? Well, if you organize an outflow, then the inflow will increase, and our influx is either from the street or from the next room. By the way, if he is from the next room, then the idea is bad, because this way we will completely deplete the air of oxygen.
Lowering the temperature will increase fuel consumption. But here it is worth noting that everything depends on a subtle relationship of factors: by varying the changing parameters, you can ensure that the temperature in the steam room is the temperature you need, while in the next room the temperature rises due to ventilation. As you set it up, so it will be.
In our opinion, using ventilation for heating is a good way to achieve the goal.
In addition to this, of course, no one bothers to use additional heat sources - heaters, heated floors, etc.
Other options assume that they were taken care of during construction - this is when the stove opens from different sides into different rooms, for example, into the washing room and into the rest room.
A fireplace portal is usually made in the recreation room, bringing the firebox out there. But the same output of the firebox can also be carried out into the dressing area. However, it will take a long time to wait for significant heating. And ventilation is much faster.
IMPORTANT! The brick stove has a summer damper that blocks the passage of additional channels that take away heat. Therefore, in summer, hot air from the stove immediately goes outside
But if an iron stove is located in a steam room on one side and in another room on the other, then in the summer it will be very hot in the adjacent rooms. Still, ventilation in this sense is more humane, and besides, it is blocked.
Rest room
We have already talked about the ventilation method above. It is suitable for those whose KO is separated by a wall from the steam room. But even if there is no adjacent wall, you can connect the steam room and the CO using air ducts.
All other ways to heat a relaxation room in a bathhouse in winter assume that it will contain one or another heating devices: you can extend water heating registers there, install wall panels, or make do with portable heaters.
A heated floor option is also suitable.
Electric heating system
Electric heating is the simplest and most affordable option for organizing an autonomous bath heating system. When organizing it, it is worth taking into account the electrical wiring diagram, the total load on the network and the cross-section of the wires in order to carry out high-quality installation work.
The electric heating system involves the use of the following types of equipment:
- electric boiler;
- electric stove;
- electric convectors;
- infrared film;
- electric heating cables.
Modern low-power electric boilers are equipped with automation that can maintain a given temperature in bath rooms. To heat the bath, it is allowed to use induction, electrode and stepped boilers with heating elements.
An electric heater for a bath can be used as a main and additional source of heating. If possible, it is most convenient to use electric convectors. As with boilers, convectors are equipped with thermostats to maintain the optimal temperature automatically.
The electrical system can be operated year-round without the need for preparation and storage of fuel material. A significant drawback is the high electricity consumption.
Insulating a bathhouse made of timber: from the inside or the outside, which is better?
The answer to this question depends on what it should be better for: even after caulking, your bathhouse is so cold that no matter how much you heat it, it does not heat up to the required degree, or do you want to be able to steam in it for two days? In the first case, you need to look for the reason where the heat goes. Alternatively, insulation from the inside can help, although there is an opinion that a wooden bathhouse should not be insulated in this way at all. In the second case, external insulation will help.
IMPORTANT! No matter which side you insulate the bathhouse, there you lose control over the condition of the wood, because it is hidden from view. You can only rely on proper installation of insulation. Wood breathes, takes in and releases moisture, so when insulating you need to maintain the opportunity for it to “breathe”
This means great limitations in the materials used.
Wood breathes, takes in and releases moisture, so when insulating, you need to maintain the opportunity for it to “breathe.” And this means great limitations in the materials used.
Insulation of a bathhouse made of timber from the inside
This method has two disadvantages that are worth mentioning right away:
- A bathhouse insulated from the inside leaves the tree exposed to the cold in winter. And this leads to a shift in the dew point, which ends up on the inside of the wooden wall. It begins to get wet and then rot, plus it also becomes infected with fungus. This can be avoided with proper ventilation, but if there is a mistake, you will only find out about it when it is too late.
- When a bathhouse made of timber (which is often compared to frame buildings) is insulated from the inside, the internal usable space is reduced.
However, here is a diagram of the internal insulation of a bathhouse made of foam blocks:
Shown using the example of a bathhouse made of foam blocks, but the principles are the same.
- After caulking, a lathing frame is made on the antiseptic-treated wall.
- Insulation with or without foil is placed in the gaps.
- If the insulation is without foil, a layer of vapor barrier is added.
- A ventilation gap is left equal to the thickness of the counter-lattice.
- External finishing is carried out, for example, with clapboard.
- You can use Penotherm - foil insulation. For timber 10-15 cm thick, 5 mm Penotherm is sufficient.
More information on internal insulation in the article: We do the insulation of a bathhouse from the inside with our own hands: what and how, different bathhouses need to be insulated differently.
Insulation of a bathhouse made of timber from the outside
External insulation of walls made of timber simultaneously performs the functions of wind and moisture protection:
- First, caulking is done, and the walls are treated with an antiseptic.
- Then the sheathing is made or metal guides are attached.
- Insulation is placed in the gaps.
- The next layer is wind and moisture protection. It must be a membrane.
- A counter grille or another way to create a ventilation gap of 3-4 cm.
- Layer of finishing.
External wall insulation (shown using a block wall as an example, but this can be done to insulate any wall).
Insulating a bathhouse made of timber from the outside with mineral wool may only be necessary, perhaps, if this bathhouse is a living space. Well, or if the bathhouse is made of very thin timber and is located in the Far North and is operated in severe frosts. Outside, it is permissible to use mineral wool with phenolic impregnation.
But still, as a rule, insulation of a bathhouse made of timber from the outside is not required.
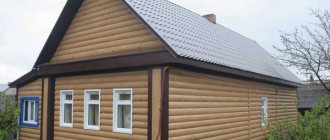
Block house
There are several types of blocks:
- natural - made from deciduous and coniferous trees;
- metal - made from galvanized steel;
- acrylic - based on polymer resin;
- vinyl - made from PVC powder.
Any type of block material is suitable for finishing. You should prepare screws and 6-7 mm clamps for fastening, mineral wool as insulation, log parts for creating sheathing, a membrane with vapor barrier properties, a waterproofing agent, antiseptic impregnation and fire retardant, which are used to pre-treat the wood elements. Cladding stages:
- Secure the vapor barrier film in a horizontal position. Secure it with staples or a construction stapler.
- Install the assembled sheathing in a horizontal position. It is attached to the wooden base with self-tapping screws and nails. It is advisable to fix it to a brick wall with dowels for frames. In the latter case, it is necessary to pre-drill the recesses.
- Lay insulation in the spaces between the beams.
- Use a stapler to secure the waterproofing material.
- Build a similar sheathing on the main frame, placing it in a vertical direction.
- Cover the outer surface with block houses. The direction of installation is from bottom to top horizontally.
- Using clamps, secure the panels.
- After completing the finishing work, hide the screw heads using sawdust paste and PVA glue. You can also use special plugs and leftover block materials.
- Place plinths in the corners. Decorate windows with slopes and doors with cash.
Blockhouse cladding
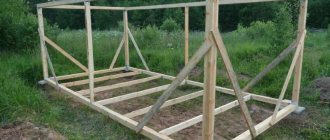
Construction of the foundation for the dressing room
Once the design work is completed, you can begin clearing space for the foundation. The first real stage is removing the fertile soil layer. Further work is as follows:
- Markings are made, then a trench is dug, 30 cm wide and half a meter deep.
- Sand is poured into it; there should be several layers of it, and each one must be spilled and thoroughly compacted.
- The formwork is installed, reinforcement is placed in it, its cross-section is up to 1 cm. Galvanized steel pins are additionally attached to the corners, to which the lower trim will be attached.
- Concrete is poured into the formwork, after which time is given to dry. In hot weather, it should be moistened periodically.
Work on the construction of the foundation ends with covering the foundation with one or two layers of roofing material.
What should be in the dressing room
When considering the question of how to install a dressing room, you should not forget about its internal decoration (read: “How to finish a dressing room - stages of work and arrangement options”).
It is imperative to place the following elements in the waiting room:
When laying the foundation, it is worth considering the option of arranging additional space for an outdoor area near the dressing room. This will expand the relaxation room, which creates additional comfort for taking couple procedures. You can also install a font for washing after visiting the bathhouse. In the photo and upon visual inspection, the dressing room will look aesthetically pleasing, like an extension to the main building.
Bottom line
The article describes in detail the procedure for installing and finishing the dressing room. To get a high-quality, reliable and safe building, you must follow basic recommendations and not skimp on building materials. You can also entrust the work to specialists who will take responsibility for all stages - from purchasing the necessary materials to their installation and putting the entire bathhouse into operation.
A good bathhouse, equipped with everything necessary for washing and relaxation, is the dream of many. But what to do if, when building a bathhouse, you did not take care of its layout in advance, but now you understand that for comfortable use, it needs to be expanded.
This will be discussed in this publication.
In a cozy dressing room you can take a break from the procedures by drinking tea or kvass.
Construction stages
- Create a project. It is necessary as for another structure. The plan should consist of a list of required materials, the layout of the internal structure of the bathhouse and the transition between the two buildings.
- Pour the foundation in the same way as the main housing.
- Make low doorways with a high threshold to retain heat.
- Waterproof the internal walls with vapor-reflecting foil and cover them with linden clapboard.
- Place the chimney on the other side of the house to prevent smoke from entering it.
Foundation
The foundation for the bathhouse extension is made without the help of professionals. The base can be made separately or combined with the base of the building. The first method is better - it shrinks evenly. The raw materials for the foundation should not differ from the main one. The method of tying two bases is determined by the presence of metal fastening brackets. The foundation of the bathhouse uses reinforced concrete piles and slabs, because its frame is lighter than that of a house.
Connection to the house and construction of the roof
The main point is the transition between buildings; it must be end-to-end. To begin with, the door from the bathhouse, exit to the dressing room, and then directly to the housing. This design retains heat better. If the transition is made as a vestibule, another room will appear, a locker room will be organized in it. It is recommended to use material identical to a brick house for the construction of the structure. The raw materials will affect the shrinkage of the new building, and cracks or crevices will appear; this situation does not threaten the main structure. It is recommended to make the roof single-pitched. The top must be attached to the brick wall and located above the main structure under the roof.
Fire safety
The first priority in building a bathhouse is its fire safety. There is a special device - a spark arrester. Install such a device on top of the pipe. Sold ready-made or made by hand. All wall joints are coated with bitumen mastic and treated with polyurethane foam. This action will help ensure proper shrinkage without damaging the walls of the main building. The dressing room and vestibule are made with windows and a door that open outward. The pipe is insulated inside with foil insulation and outside with asbestos. The raw materials are adapted to high temperatures and are non-toxic. An extension should not be built near the gas pipe to avoid fire during a leak. The completed building must be registered and inspected by the fire service.
Interior decoration of the dressing room
Floor covering in the dressing room
- On top of the waterproofing layer we fill beams 3-4 cm thick in increments of 0.3-0.4 meters.
- We treat the floorboard with water-repellent liquid and fire retardants.
- We fix it to the beams using a tongue-and-groove system using self-tapping screws near the walls, deepening their caps into the base by a few millimeters.
- It is also advisable to install additional covering, for example, rubber mats.
Finishing the walls and ceiling of the dressing room
- We put a counter-lattice on the ceiling to secure the lining.
- We fix the first element opposite the door with a nail driven into the groove of the part at an angle of 45 degrees.
- We check the evenness of the installation with a level and install the subsequent parts.
- We attach beams 3-5 cm thick to the foil insulation.
- We begin the installation of the lining from the corner of the wall, hammering in the fasteners in a hidden way, as on the ceiling.
- We install platbands and baseboards.
If you wish, you can cover the walls with clapboard vertically, horizontally and even diagonally.
Construction of frame structure
Before installing a wooden structure, all elements are carefully treated with protective and antiseptic compounds for wood.
Assembly is performed in the following sequence:
- Installation of the bottom trim from bars with a cross-section of 10 × 10 cm.
- Installation of corner posts, checking the correct installation of each element using a level.
- Installation of intermediate racks in 80 cm increments.
- Making the top trim from bars with a section of 8 × 8 cm.
- Installation of bracing strips in the outer corners to increase the rigidity of the finished structure.
- Fixing floor joists from unedged boards.
- Installation of elements under openings for doors and windows.
- The internal lining of the finished structure is made of membrane material, which provides protection from the penetration of wind and moisture.
- External wall cladding.
Choosing a ventilation system depending on the material of the bath walls
We recommend reading: “Shelves in a bathhouse”
For the construction of bathhouses we use:
- brick;
- cinder block, gas block, foam block;
- log;
- timber
In buildings made of timber or brick, vents are made in the foundation for air flow, a ventilation valve and an exhaust hood are installed to remove exhaust air.
In buildings made of blocks, air ducts made of stainless steel and galvanized pipes are installed in the form of finished pipes. Or you can make them yourself from galvanized sheets, applying sealant at the joints. They place them on top of the wall.
To avoid drafts and high consumption of firewood, a wooden building can be insulated. Then you will have to make holes in the walls for air inflow and outlet.
Peculiarities
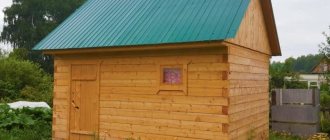
A dressing room is a room located directly in front of the steam room. Its main purpose is to be a link between the cold entrance to the bathhouse and the hot steam room. It should not allow cold air to pass through. The dressing room can be spacious or small, intended exclusively for changing clothes. More often there are dressing rooms of medium and fairly large sizes. In addition to performing their main function, they serve as a relaxation area after the bath.
Regardless of the type of bath, the waiting room must meet the following requirements:
- have good thermal insulation performance;
- be finished with moisture-resistant materials;
- characterized by environmental friendliness.
As a rule, the inside of the dressing room is insulated and lined with decorative materials. For a log bathhouse, finishing is not at all necessary. The main tasks of the owner are high-quality insulation and thermal protection of the structure.
To finish a frame or wooden bathhouse, lining is usually used; for stone construction, you can use tiles and bricks.
Rules for ventilation equipment in the waiting room
Natural air circulation is provided by window and door openings. Experts have different opinions on this issue. Some people believe that large windows should be installed for good lighting and additional ventilation. Others argue that it is better to make small windows closer to the ceiling to minimize heat loss.
We make vents using this algorithm:
- At a level of 0.5 meters near the combustion chamber of the stove, we make a hole 15*20 cm.
- We cut the wooden part to size and equip it on one side with a plate with a handle.
- On the opposite wall, diagonally from the first vent, we make a second hole of the same size. It should be located at a height of about two meters from the floor.
- We will equip a similar valve.
Ventilation plugs must fit snugly and not allow air to pass through when closed.
Alternative and mixed heating options
Alternative options for heating baths are becoming in demand. These include the following types of equipment:
- heaters – ceramic and infrared;
- boilers – pyrolysis, pellet, diesel, long-burning;
- baseboard and ceiling heaters.
In cases where the bathhouse is rarely used, a good option is to install a mixed heating system: a wood-burning stove combined with electric heating; pellet boiler with electric convectors. One type of equipment provides heating of rooms for bathing procedures, the other provides hot water supply and additional heating.
Frame material
Main raw materials:
- beam;
- metal profile.
Let's look at the pros and cons of using each material for the frame.
Wooden beam
It is often used as a raw material for the frame of houses, verandas, and baths.
The thickness (section) of the beam is selected in accordance with the load-bearing capacity of the structure, the type of heat-insulating material.
Wood raw materials are purchased, impregnated at the factory, or treated with antiseptics independently before installation. The costs in both cases are almost the same. But if you buy ready-made timber, you will save time.
The frame consists of an upper and lower frame.
Advantages of a wooden frame:
- convenience and ease of material processing and installation;
- affordable price;
- environmental friendliness of the material;
- attractive look.
The main disadvantage is the limited service life and the need for periodic maintenance of the wood. In addition, we must not forget about the high probability of shrinkage.
Metallic profile
Masters call such structures LSTK - light steel thin-walled structures.
The raw materials are profile pipes, channels, angles (optional).
The metal frame is compatible with any type of foundation. It is not used so often for arranging baths.
The key factor that affects the cost of the structure is the profile section. The larger the cross-section, the more difficult it is for the pipe to bend, so the cost of the work increases.
For the outer cladding of the frame, corrugated sheeting, siding, and PVC panels are suitable.
Among the advantages of a metal frame structure:
- Quick installation.
- Possibility to assemble the building at any time of the year. Metal is not afraid of temperature changes, while a bathhouse made of brick or aerated concrete needs to be laid out only at above-zero temperatures, otherwise the masonry mortar will lose its properties.
- Does not shrink throughout the entire period of use.
- Provided high-quality anti-corrosion treatment has a long service life.
- Light weight simplifies the process of transportation and installation.
- Low price compared to stone and brick baths.
The downside is the need for high-quality anti-corrosion treatment of the metal. Otherwise, the metal will begin to rust.
What materials should be preferred for wall insulation?
Traditionally, the walls in the bathhouse are made of wood. This is an environmentally friendly material that gives the structure a solid appearance and good quality. It is easy to breathe in a wooden room, and the steam becomes richer. But some still prefer to build a bathhouse from brick or foam and cinder blocks, the latter themselves being a heat-insulating material, having a porous structure. However, in severe winters they freeze, making the room cold and causing stains on the walls. Therefore, the walls in the dressing room can be insulated:
It is best to cover the top of the insulation with polystyrene foam; it is very durable, cannot be compressed, is frost-resistant, durable and does not rot.
Styling
When performing interior wood finishing, you can choose interior options that are similar in spirit:
- Russian - curtains with embroidery, carved wooden furniture, bagels and a samovar - a tribute to roots and traditions. On the walls there are oak and birch brooms, wooden spoons, painted mugs, and they create a unique atmosphere and coziness.
- The interior is like in a fairy tale - pieces of furniture made of driftwood, forest gifts in the form of grass bunches and berries help create the illusion of the house of Baba Yaga or Leshy. Even children will enjoy relaxing in the bathhouse.
- Ship style - wood can be complemented with chrome and metallized elements, red fur and carpet, as well as yacht paraphernalia. All this helps to feel the atmosphere of a trip around the world.
Sharing a sauna with loved ones is a special event. For this reason, the choice of style for the dressing room is an extremely important point, which is based on individual preferences.
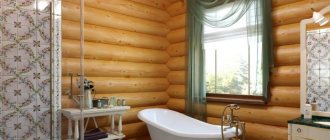
Washing compartment in a wooden bath
The washing compartment in the bathhouse must meet certain temperature requirements.
The washing room in a wooden bathhouse is the central room. This is where hot and cold water is supplied, which after use is discharged through the sewer. The size of the washing room is calculated based on the required minimum area per person (1 m2), as well as the dimensions of the benches and couch.
Washing device in a bathhouse
The installation of a washing room in a bathhouse begins with calculating the required free space. So, for two people, a washing room of 1.8 x 2 m is considered optimal. Here you can place one stationary bed (0.6 x 1.8 m) and two benches (0.4 x 0.8 m). If desired, additional space is allocated for installing a bathtub, tub or shower, where you can cool off and rinse off after visiting the steam room.
Requirements
Before building a dressing room, you need to study the requirements that the room must meet:
- There should be enough space in the room. One person needs 1.5 meters of free space.
- If the bathhouse will be used in winter, the rest room should be heated to make it comfortable to be inside.
- A high-quality ventilation system must be installed inside - natural or forced.
- The room should have furniture installed for a comfortable stay.
- The light in the recreation area should not be too dim or bright.
Often the furnace channel with the firebox is discharged into the dressing room. In this case, the area around the firebox door must be fenced off. This space should not be subtracted from the free space.