Tiles are considered popular materials that are used in the decoration of various rooms. Products differ in production technologies, materials, thickness, and length. Further operation and reliability are directly related to properly selected glue, but other nuances should not be cast aside either. One of them is the thickness of the tiles with adhesive on the wall.
Factors affecting thickness
The smaller the tile size, the smaller the layer of adhesive required. There is no specific standard, since floor covering is not a standard job. The thickness of the adhesive applied can vary from a few millimeters to a centimeter or more.
Reference! The type of cladding is taken into account. Porcelain tiles require less adhesive.
The type and quality of the floor surface matter. Concrete and plaster require a completely different amount of adhesive. The thickness of the glue should be calculated taking into account the height of the floor in other rooms, so that no thresholds are formed.
The amount of the mixture will also depend on the incoming substances. For example, cement is applied in a thicker layer. Not much epoxy is required.
Porcelain tiles for flooring
The minimum permissible thickness for ceramic tiles laid on the floor is eight millimeters; these tiles can only be laid in rooms with minimal mechanical loads. Therefore, for greater reliability, it is possible and necessary to lay tiles with a greater thickness, but here you should also not get carried away, since tiles thicker than twelve millimeters in domestic premises have no meaningful use. This will simply be a waste of your budget, since 12 mm tiles will withstand any type of household load.
Features of cladding
To calculate the thickness of tile adhesive when laying tiles, it is important to consider its dimensions:
- Small-format (10x10 cm) requires a thickness of no more than 2 mm; for very small squares (up to 7 cm), a layer up to 1.3 mm in size is suitable.
- For medium-sized and large squares, you need to apply a thicker layer. For sizes from 20x30 cm, approximately 3 mm of glue should be applied. When the cladding size exceeds 30x50, up to 4 mm is required.
- Cladding with dimensions of 20x25 cm, which is more often used for the bathroom, is glued with a layer of about 3 mm.
The type of cladding also affects the thickness of the adhesive. The tiles have strong porosity, which affects water absorption. For this reason, more glue is required. Porcelain tiles practically do not absorb moisture, so less mixture will be required.
The thickness of the porcelain stoneware is also taken into account. Heavy tiles require more adhesive. The thickness for light cladding is insignificant.
Should I calculate the thickness of tile adhesive taking into account the humidity of the room?
It is humidity that is not the decisive criterion. Whether we are laying tiles in the bathroom (where, by definition, it is warm and wet) or covering a facade (which will be exposed to rain and other vagaries of the weather), the main thing is to choose the right adhesive composition: for interior or exterior work, for wet rooms or facades, etc. . P.
Bathroom tiles, if installed correctly and the right adhesive, will last for many decades.
Therefore, a universal recipe: in order to lay tiles with high quality, without making mistakes, you need to strictly follow the manufacturer’s recommendations for choosing adhesive, its preparation and application, use only suitable tools with which you already have experience working with.
Surface type and its meaning
Each adhesive is intended for individual substrates, which can be found out from the information on the packaging. There you can also see the approximate consumption and the required layer.
Type of surface and required thickness of the adhesive mixture:
- For drywall, the layer is no more than 5 mm.
- Concrete requires a larger layer of up to 1 cm.
- For porcelain stoneware you need about 2-4 mm.
Reference! The condition of the floor also matters. If there are defects or unevenness, a greater thickness of the composition is required to fill the voids.
In the absence of visible flaws and cracks, the consumption of the product is insignificant. To work with uneven surfaces, you should choose a special leveling compound. There are products that can be applied in a layer of up to 1.5 cm. Beginners should not work with them.
It is difficult to work with leveling compounds due to shrinkage. When there are defects larger than 3 cm, it is better to close them by plastering.
Reference! When laying floor and wall cladding, a different thickness is required. In the first case, the layer is larger.
Characteristics of porcelain stoneware
Initially, porcelain stoneware was produced as a particularly durable tile for technical use in public and industrial buildings.
Surprisingly, in Europe such material is considered an ordinary tile, only in the CIS countries it was given a separate name. It is produced by semi-dry pressing under a pressure of 400-500 kg/cm2 and then fired at a temperature of 1200-1300 degrees.
Press powder is made from slip - a homogenized mixture of white-burning clay, kaolin, quartz sand, feldspars, pegmatites and water. Coloring oxides are often added to the composition, which allow the material to be given the desired shade.
Table of technical characteristics of floor coverings
Technical characteristics of porcelain stoneware floor tiles:
- Water absorption: 0.05-0.01%.
- The bending strength of imported collections is 500-600 kg/cm2, while domestic analogues have indicators of 470-550 kg/cm2.
- Hardness on the Mohs scale: 6-8 (domestic analogues 5-8).
- Degree of wear resistance: 3-5 (for ceramic tiles this indicator is 1-5).
- The number of frost resistance cycles is 3-4 times higher than that of conventional tiles: from 100 to 300 cycles at temperatures from -5 to +5 degrees.
What does glue consist of?
Different types of mixtures require different application thicknesses:
- Cement. Powder made from sand, cement and plasticizers. You can prepare such a solution yourself. It's easy to work with. The thickness should be about 3-5 mm.
- Two-component. Adhesive mixtures including resin and hardener. After mixing, a viscous composition is obtained that provides reliable adhesion at low cost. You can make a small layer up to 3 mm.
- Dispersive. One-component resin. May contain additional components in the form of polymers. Thickness – up to 2 mm.
Design
Often, to increase the visual volume of a room, tiles with dimensions of at least 40 cm2 are used. The effect is explained by the exceptional features of human perception, when the dimensions of the room are determined by the areas of 2 planes - the ceiling and the floor. It turns out that the larger the outlines of individual parts of the floor covering look, the larger the entire plane appears.
However, this approach does not always work. A similar method will be justified for a kitchen with an area of 5-6 m2. But in a small bathroom, tiles measuring 50x50 cm will simply look ugly.
Another option is to use tiles of different sizes in one room. For example, in the center of the room you can lay 60x60 mm tiles, and the outer part of the room can be bordered with 30x20 mm tiles. This combination using different colors will give the floor a special originality.
Choosing a Notched Spatula
You can evenly distribute the glue and reduce its consumption using a special spatula with teeth, which is called a notched spatula. It is selected based on the size of the cladding. The smaller the slabs, the smaller the cloves.
For square small tiles, a spatula with teeth up to 4 mm is suitable. To work with medium-sized tiles (20x20 cm), the teeth should be 6 mm in size. For mosaics, the optimal size is 2-3 mm.
Reference! If the base is uneven, it is recommended to buy several spatulas with teeth of different sizes.
A few recommendations
To ensure reliable adhesion of surfaces there are several recommendations:
- Distribute the tile mixture evenly over at least 80% of the surface of the cladding element. If the reverse side is corrugated, then the composition is distributed both on the decorative elements and on the base.
- To apply the composition evenly, use a spatula with teeth.
- The thickness of the tile mortar depends on the height of the trowel grooves. The deeper the grooves, the less glue consumption.
- Dilute dry mixtures strictly according to the instructions. After the first kneading, leave the solution to mature for 10–15 minutes.
- If the composition has thickened, do not try to dilute it with additional water. This will reduce its adhesive properties.
Minimum and maximum
The thickness of the tile adhesive can vary when laying the floor, but there are minimum and maximum restrictions. In order for the porcelain tiles to be fixed with high quality and for a long time, it is better not to step over them.
The minimum value is calculated individually, depending on the dimensions of the tile. In general, for small squares the layer thickness should be 2 mm or more. For heavy tiles, the minimum value increases to 4 mm.
The maximum thickness when facing with porcelain stoneware is 22 mm. An even larger size will lead to deterioration of adhesion, in addition, this is an irrational waste of material.
Increasing the thickness of the layer is usually associated with the desire to hide defects and level the floor. This is the right decision, but only for minor flaws. When there are significant unevennesses, special leveling agents should be used.
Determination by other parameters
When deciding how much mortar to spread, it is based on characteristics such as the moisture absorption of the base and the moisture content of the finished mortar. When laying ceramics on a wall surface, the solution should be of normal humidity, but not semi-dry. In addition, the wall material must be treated with primer.
The greater absorbency of the base entails the need to increase the thickness of the solution, on which the tiles cannot fall off. At the same time, it is not recommended to pour water over the surface, especially surfaces plastered with a cement-sand composition with a low cement content. Floor cladding allows the use of a drier mortar than for the wall. But subject to low moisture absorption by the material.
The thickness of the solution is also greatly influenced by the height of the spatula tooth for distributing the mixture. So, with a tooth height of 8 mm, the layer of solution will be 4 mm thick. That is, it is equal to approximately half the height of the spatula teeth.
Beginners often find themselves at a dead end when determining the size of the mortar layer when laying out facing elements. Taking into account all the nuances described above, the correct answer will be found without problems.
Calculation of material quantity
To determine the required amount of mixture, you need to have all the data on the material, glue and area of the working area. The calculation is carried out in several steps.
How to determine the required amount of funds:
- Determine the dimensions of the tiles, based on which, calculate the required thickness.
- Look on the packaging to see the mixture consumption per meter with a layer of 1 mm.
- Multiply these values to obtain the required amount of glue.
- Calculate the area for cladding.
- Multiply the first value by meters.
- Multiply the result by 1.1 for the margin.
On video: Laying porcelain tiles. We calculate the thickness of the glue.
Application rules
When working with cement, in order for the glue to obtain all its necessary characteristics, it is mixed with water. The liquid should be added gradually. After mixing, the solution should be left for a couple of minutes, then mixed again until a thick mass is formed.
Reference! To distribute the adhesive mixture of the required thickness, use a spatula with teeth of the required size. The solution is applied directly to the floor, and if there are uneven areas, to the tiles.
To distribute the adhesive composition on the floor, you need to start work from the far corner, moving to the exit, so as not to step on the composition. Floor tiles are usually large in size, so a trowel with large teeth is used.
When laying tiles on the floor, you need to make a thick layer. This is due to the fact that afterwards you will need to drive out the voids by tapping with a mallet. The glue will be partially distributed and its volume will decrease. Excess solution can then be removed with a rubber spatula.
Laying porcelain stoneware requires preparation:
- Checking the quality of the base. Porcelain tiles can only be laid on load-bearing concrete foundations. Use a level to check horizontality. If there are significant differences, you will need to use more glue.
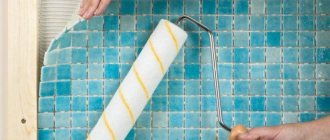
- Base primer. Can be done up to two times if the base quickly absorbs liquid. It is best to prime with a roller; the floor must first be cleaned.
Priming the surface before facing is of great importance. This increases the strength of the cement-sand base, preventing the coating from crumbling. This is also important for better adhesion. Adhesion after priming increases by approximately 20%.
The priming procedure also reduces the level of moisture absorption. Cement adhesive must remain wet for a certain time to gain strength. Before laying tiles, you need to wait until the floor is dry.
When laying porcelain tiles, you need to make sure that the glue does not protrude along its edges. This problem can be avoided if, before laying the next tile, remove a little mortar from the edge of the previous one with a spatula. The strip removed should not exceed a centimeter. If glue gets on porcelain tiles, you can remove it with a damp cloth. It is especially important to clean structured tiles before the adhesive hardens, which will simplify finishing work.
If you have little experience in laying tiles, you should lay no more than 2 layers at a time. Do not allow the glue to thicken. If this happens, you need to prepare a new portion. Do not dilute the finished thickened composition with liquid; the glue will lose its properties.
Considering all these factors, determining the thickness of the substance will not be as difficult as choosing the appropriate glue. To work with porcelain stoneware, it is better to use cement mixtures that are prepared immediately before the start of cladding.
Reference! You should pay attention to well-known companies that have already earned the trust of professional craftsmen. These are adhesive compositions from Ceresit, Knauf, Rusean, Yunis.
Manufacturers always indicate on the packaging information about the composition, consumption and nuances of use. You can also always call consultants to get answers to your questions. It is necessary to distinguish the original from the fake. Signs of the latter will be uneven, small letters on the packaging, and a careless appearance.
Correctly determining the thickness of the adhesive will allow you to calculate the required amount of glue, as well as securely fix the tiles for long-term use. You should always be prepared for the fact that some areas will require more glue and others less. You should buy adhesive with a small supply.
Calculation of adhesive thickness for porcelain tiles (2 videos)
Laying porcelain tiles on the floor (15 photos)
Equipment for laying tiles
How to install
The process of installing porcelain stoneware tiles is not difficult if you follow the entire procedure.
Before laying tiles, you need to carefully prepare them. To do this, it is necessary to determine how the installation will be carried out, the thickness of the glue, and the method of its application. The process of laying porcelain tiles occurs without a seam, end-to-end. The disadvantage of the presented method is the use of tiles of the same size, since certain of them cannot be used. In addition, it is impossible to guarantee the equal length of the seams and the uniformity of their filling.
The advantage of this installation method is the possibility of obtaining a monolithic surface and saving materials. But the most optimal method remains the classic installation method, which involves the presence of seams.
Before you begin installing the product, you need to prepare its surface. To do this, remove dust and debris from it. There is a protective wax on the surface of the tile. It should be removed with warm water using cleaning products. Paraffin can be easily removed with a spatula.
If the base on which the tiles will be installed has uneven surfaces, it should first be leveled. For these purposes, a screed is made on the surface. The surface must be clean, dry and level. If there are glossy surfaces, remove them using sandpaper. The material can be laid at a temperature of 5 degrees.
When choosing an adhesive composition, you need to pay attention to its adhesive properties. Thus, it is undesirable to use cement mortar; it is best to pay attention to glue with polymer additives. In addition, it is important to take into account the type of base and the loads at the places where the material is installed. If the load is large, then it is worth using glue that is designed for such operating conditions.
All preparatory activities are over. You need to take the glue and apply it with a spatula to the surface of the tile. Place it on the floor, press down and tap with the handle of a spatula. Finish the entire floor surface in the same way. Seal the resulting seams with finishing putty to prevent dust and dirt from forming in them.