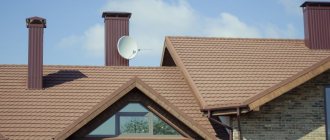
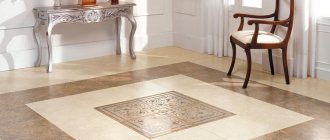
The porch of a country house should not only be comfortable, but also beautiful. In order for its appearance to be pleasing to the eye, in harmony with the design of the building’s façade and driveway, the owners decorate it with a variety of materials. Most often these are ceramic or paving tiles, stone or porcelain stoneware.
Each of these types of cladding has both its advantages and disadvantages. Their installation technologies are similar, but may differ slightly in detail. We’ll talk about what to cover the porch of a house with, as well as how to install the tiles correctly in this article.
What to consider before covering the porch
It often happens that some builders (or the owners themselves) fill the steps, and others finish them. And when facing, you have to simultaneously correct defects in the base. It would be good if during concrete work the steps were calculated taking into account the dimensions of the future decorative covering. The most common size of street tiles is 30 x 30 cm. This means that the depth of the step should be 28 cm (+2 cm is the gap, which will then be closed by the riser). Then when laying you will have to cut fewer pieces.
You can also make the step depth 31 cm. Then you need to buy tiles measuring 33 x 33 cm. But it is more difficult to find. The best option is to buy the facing material in advance and use its size as a guide when pouring the steps.
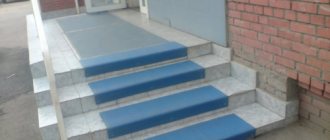
When choosing a coating, pay attention to the degree of roughness. The surface should not slip, even if it is wet.
Another nuance is color. On the street, those colors that hide dirt and traces of dust indoors work differently. For example, light gray betrays every stain of soil brought on shoes, since the soil has a brownish color. Black is covered with a light coating, which is clearly visible under the sun's rays. Your best bet is to get a few tiles of different designs and try them on your porch. Then you will know exactly how this or that shade will work in your conditions.
We learned about the flaws of the flowers after the lining. Now the housewife has to do a wet cleaning of the porch every day so that the tiles do not lose their spectacular appearance.
Clinker
We are not considering simple tiles in this collection, although they are still used for budget cladding of steps. Ceramic tiles slip underfoot and chip quickly, so they are unlikely to be worth even the minimal investment. But durable, wear-resistant clinker fully justifies the money spent, because it lasts up to 50 years.
Clinker tiles come in a variety of colors and can be quickly installed, but they have a significant disadvantage - they are unsafe in the cold season, so it is better to equip the steps with anti-slip pads.
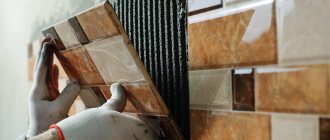
Materials and tools for laying tiles
To cover the porch you will need the following materials:
- Tiles in two colors (for steps and risers) + decor for the baseboard.
- Tile adhesive solution (25 kg bag).
- Fugue for filling joints (to match the main tile).
- Mounting tape.
- Cement for leveling base defects.
Tools:
- Grinder for cutting tiles with a diamond blade.
- Level for checking a level surface.
- Rope for marking.
- A bucket or other container for mixing the adhesive solution.
- Drill with a “mixer” attachment for mixing glue.
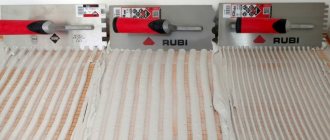
- Notched trowel for applying adhesive to tiles.
- Rubber spatula for filling joints between tiles with fugue.
- Sponge for washing off excess fugue from tiles.
- Construction pencil for marking.
- Crosses for laying between tiles and plastic wedges for risers.
- Reinforcing mesh for leveling the curvature of risers.
How to organize porch repairs in an apartment building
There are three main ways to repair a concrete porch:
- Contact the company or organization that services a particular home and write an application providing the documentary basis;
- Collect funds from the residents of the entrance and conclude an agreement on repair and restoration work;
- Carry out porch repairs on a voluntary basis on your own.
Important!
Try to establish the reasons why the partial destruction of the porch occurred. In addition to normal wear and tear, this could be a subsidence of the foundation or problems with rainwater drainage. As a result, repairing the porch at the entrance of an apartment building may require significantly more resources than previously planned.
Getting started: fitting and cutting
Since the steps are semicircular, the first thing you need to do is try out the layout of the tiles so that after laying their pattern will look beautiful. We decided to lay out the tiles so that solid squares alternated with pieces. In this situation, the edge of the step does not look like a perfect semicircle, but with small edges, but you will have to cut much less.
- Whole tiles were laid out on all 4 steps so that they were located strictly one below the other (creating straight lines from top to bottom).
- Tiles were placed between them, which will then be cut. Moreover, the whole ones should lie on top, and future pieces should be under them.
- Using a construction pencil, we marked the cut location on each tile that will have to be cut.
Important! First, we draw the cut location along the edge of the whole tile that lies on top, and then move the marking 2-3 mm to the center so that there is room for the seam.
- On the back side of all the tiles, place numbers one by one with a marker so that after cutting you do not confuse where each part should lie.
- For cutting, use a small grinder with a diamond blade.
- Before cutting, glue adhesive tape or tape along the lines marked on the tile; during cutting, the pencil is almost invisible on a gray or dark surface.
You need to cut away from yourself so as not to be injured by fragments.
Place the prepared ceramics on the steps to see if you have cut the individual tiles correctly.
Construction stages
For those who have never touched upon the manufacture of round or semicircular structures, it may seem that the process of their construction is quite complicated. In fact, upon step-by-step analysis, it turns out that there is nothing difficult about building a concrete semicircular porch with your own hands.
The main thing is to carry out the planning correctly, take care of the availability of all the necessary materials and get an accurate understanding of all construction operations.
Table of basic operations
| Construction operation | Description |
| Planning, marking, calculation
| At this stage, it is mainly determined how to make a semicircular porch from concrete, what its parameters and dimensions will be. |
| Creating formwork
| The formation of formwork for a concrete semicircular porch has its own characteristics. To get a perfect semicircle, you need to use materials that are strong but bendable. |
| Frame installation
| A monolithic concrete porch must have a reinforced frame. At this stage, its elements are prepared and fastened into a single structure. |
| Pouring concrete
| Concrete is prepared by hand or made to order - depending on the conditions (volume of the porch, abilities of the builder, financial capabilities). |
| Facing
| The finishing of the concrete semicircular porch is done when the concrete has finally hardened. For finishing, outdoor moisture-resistant materials of increased strength are used. |
Materials and tools
When building a semicircular concrete porch, you need to stock up on the necessary amount of materials and a set of tools:
- Formwork material, for example: galvanized sheets, cut into large strips.
- Reinforcement for the frame, thickness from 8 to 12 mm with a relief surface.
- Crushed stone and sand, if necessary, are added to the ground before pouring concrete.
- When making your own concrete, you will need sand, crushed stone and Portland cement, as well as a container and a mixing tool or concrete mixer.
- Boards, bars for fastening formwork.
- Finishing material, for example: paving slabs.
- Self-tapping screws, nails and other fasteners for fastening formwork.
To positively solve the problem and get an answer to the question of how to make a round concrete porch, you may need other additional equipment applicable in a particular case.
Laying tiles on round steps
The first step is to line the area near the entrance doors. They start laying from the outer edge of the area so that the pattern looks symmetrical.
The first outer row is laid out according to the markings, stretching the thread from one edge of the site to the other. The string serves as a guide for the center of each tile.
To make the seams even, crosses are used.
The thickness of the adhesive mortar layer may differ at different edges of the site if the concrete was poured unevenly. The plane must be checked with a level.
The entire site is laid out at a time only if people will not go into the house for a day.
The tiles on the steps are laid out in the order in which they were signed, starting from the top step to the bottom.
Features of the radius design
When owners decide to decorate the entrance of their house with a semicircular porch, they do it for the following reasons:
- A semicircular porch looks much more attractive than standard rectangular options. The radius shape softens the appearance of any building, regardless of the architectural design.
- There is no need to look for any special resources - you can decorate the entrance stylishly using the most common materials.
- Externally, the radius structure has a neater appearance and visually takes up less space compared to a rectangular structure of the same size.
- A round porch provides easier access to the entrance to the house.
The solution is not without its drawbacks:
- Round steps are potentially more dangerous. A person accustomed to straight lines may lose his bearings and fall; the risk increases at night.
- The design is more difficult to implement, so the requirements for professional skills increase.
- When finishing, you will have to come to terms with overspending. Traditional finishing materials have a rectangular shape, and when forming smooth lines, waste will inevitably occur.
Combination of materials: metal and tile Source dekoriko.ru
Decking
If desired, you can also equip a wooden porch, especially if we are talking about a small country cottage made of logs or timber. But wood will not last long - it rots, warps, dries out, is eaten away by insects and is affected by fungi. For feet, decking or decking boards are better suited.
WPC (wood-polymer composite) combines the beauty and safety of natural wood with the strength and moisture resistance of modern types of plastic.
Natural stone
The stone porch looks impressive and has delighted guests for decades. Granite, marble, travertine, slate, and basalt are used for cladding steps. All of them have a unique pattern and structure. Porous and rough rocks are comfortable for movement, but get very dirty. Sanded steps retain their presentable appearance better, but require anti-slip pads or coatings.
Natural stone has two disadvantages: high cost and the impossibility of arranging a porch without special tools and cutting equipment, therefore, without the intervention of professional labor.