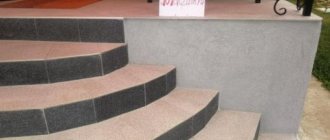
Facade tiles are one of the popular finishing materials, which are increasingly used for the exterior design of a private house or cottage. Panels for facades perfectly imitate natural stone, are durable and have good wear resistance, and give the building a unique style and neatness. In addition, facade tiles are presented in different price categories, so they are affordable to all owners of private houses. Panels for outdoor finishing are either painted immediately during the production process or sold unpainted. Each manufacturer has a certain number of product colors in its catalog. The buyer only needs to choose the shade that best suits the individual preferences of the owner of the house, as well as the general appearance of all the buildings on the site.
However, it does not always happen that the type of finishing material and the choice of colors presented completely satisfy the buyer’s wishes. A good solution would be to purchase facade tiles for painting, which makes it possible to later paint the house or cottage in the desired shade. It costs an order of magnitude cheaper than panels that are tinted during manufacture. On average, the price difference is 10-20% compared to the finished material.
Quite often, the choice to decorate a house with colorless facade tiles becomes more reasonable. Firstly, facade panels can be used for all buildings located on a suburban area. This will allow you to create a single ensemble and decorate the house, outbuildings, gazebos and other objects in the same style. Secondly, a good finish would be to use one or more shades of paint that complement each other well.
Paint for facade works
Paint for external facade works is used for different types of concrete and brick bases. It is suitable for plinths, foundations, external walls, as well as surfaces in garages and basements. Despite the versatility of paint for facade work, it must perform a number of functions and meet certain requirements.
The paint must be resistant to various temperature changes and adverse environmental influences. Heat and frost, rain and snow, as well as dust and dirt that somehow fall on the external walls of the building - all this can be withstood by paint made specifically for outdoor work in compliance with all necessary quality standards. In addition, the load on the painted surfaces of the foundation and plinth is much higher than on the remaining walls, because a neat and thrifty home owner who keeps his property clean must wash the lower part using cleaning products and brushes.
Types of paints for painting concrete surfaces
Facade tiles, used for the exterior decoration of private buildings, are a porous and fairly rough material that absorbs moisture and retains it in the top layer, so it is necessary to apply paint that has a good connection to the surface.
The paint must have increased wear resistance, withstand exposure to the external environment and the use of wall cleaning products. In order for painted surfaces to please the eye for a long time and look neat, before purchasing paint, you must carefully study the instructions and read for which surfaces it is used.
For facade work, water-borne acrylic and silicone paints are most often used. Siloxane or siloxane- and silicone-modified acrylic products are also excellent. Any structure is a breathable structure, so the chosen paint should be vapor-permeable and not impede air exchange in the walls. Before painting facade panels, as with many other works, the surfaces are primed. It is recommended to use primer mixture and paint from the same manufacturer.
Many people make their own primer by diluting the paint or enamel in the required proportion - 1:10, where one part of the thinner is to 10 parts of paint.
Methods for painting facade tiles
Decorative finishing panels can be painted in different ways: - using a pneumatic construction gun, which sprays the paint evenly and thoroughly, filling all surface pores and providing high-quality adhesion; - using construction brushes, where you will need to put in some effort, timely cleaning the brush in a solvent from particles of sand and dust, as well as meticulously distributing the paint over the surface of the wall and thoroughly rubbing it in to avoid streaks and unevenness in the painting, which will take more time and strength; - a paint roller, the use of which will not be the most effective when painting facade tiles, because the tiles are porous, often textured and uneven, and the roller is more designed for working on flat surfaces; the paint from the roller does not penetrate the pores properly, which will lead to its rapid detachment and peeling.
Advantages of terracotta tiles
The wide distribution of the tile covering in question in the decoration of fireplaces, stoves, and other surfaces of the apartment is due to:
- Unstrict geometric shapes that create a luxurious atmosphere of an aesthetically attractive interior.
- Masking defects. Cracks, deep seams and other problems with brickwork are easily hidden under the tiles.
- Updating the design, allowing surfaces to always correspond to modern trends in design art.
The durable structure of terracotta tiles can be used for a long period of time. It effectively resists the destructive effects of the heat generated by the fireplace, as well as seventy cycles of thawing and freezing. The interiors of baths, saunas and other periodically moistened rooms are decorated with a material that is unable to absorb liquids. The original color is preserved under the ultraviolet part of the radiation sent by the sun, and the natural environment is not polluted by the environmentally friendly components of the products in question. Thanks to this, the well-being of people in rooms decorated with terracotta does not deteriorate.
Installation of terracotta tiles
First, the surface undergoes preparatory measures. If it is planned to cover an outdated masonry of brick blocks with terracotta, the base is freed from accumulated dirt, settled dust, deposits and residues of greasy substances. To prevent cracking and peeling of the coating, the structure of a newly constructed fireplace should be in its final position after the shrinkage process. In baths and saunas, surfaces are freed from harmful microorganisms, covered with an antiseptic primer and dried thoroughly. Next, a heat-resistant mortar is selected that will be used to attach the terracotta cladding elements:
- Cement adhesive contains modification additives that improve the resistance of the elastic layer to high temperatures.
- Heat-resistant mastics are completely ready for use, form a stretchable layer, adhere perfectly to the base plane and completely dry four hours after application.
- Cement-sand glue is prepared by combining dry cement with sand in a ratio of 1:3. The components in the container are diluted with water and mixed to optimal density. The resulting material is supplemented with table salt (ratio 10 l:1 kg) and a small amount of asbestos. All components are mixed with a construction mixer until a homogeneous composition appears.
To make the masonry resemble brick blocks, installing terracotta tiles begins at the corners of the structure. Before its implementation, the surface to be decorated and the side of the product containing the corrugation are treated with an adhesive solution, the thickness of which is controlled with a notched trowel. Next, the material is applied to the base and, with short movements, takes on the optimal position. The correspondence of the formed rows to the axes is controlled by the building level. In order for equally wide seams to appear between the tiles, it is recommended to use plastic auxiliary crosses, which are removed the next day after laying work.
When cutting a covering element, a path is marked along which the cutting edge of the disk attached to the grinder is drawn and a piece of the required size is separated. Breakage of the porous product is prevented by careful execution of the work mentioned. The next day after installation, the seams between the terracotta tiles are grouted. To get an acceptable result, craftsmen are recommended to use mixtures that resist 400-degree heat. They are prepared according to the manufacturer's instructions and applied with a special gun.
In order for the layer to be 6–8 mm thick, the pistol nozzle is cut at a certain angle using a paint knife
Then it is inserted into the space to be treated, and the master carefully squeezes out the troweling material, moving the device along all joints until the thickness of the layer matches the level of the tiled surface. After a two-hour pause, the remaining grout is removed with a knife blade, and the seams are finally leveled with the fingers of hands equipped with protective gloves.
Sublimation coating for ceramic tiles
Few people know that ordinary factory-made ceramic tiles can be coated with a special sublimation coating, on which any design can be printed and thereby create a beautiful custom panel. For this method, you must have the appropriate equipment and adhere to a certain technology, which includes three stages:
- coating the tiles with sublimation varnish;
- drawing a picture by printing on photo paper with special ink according to the “image in a mirror” principle;
- fixing the picture on the tile;
- two-minute processing in a heat press.
Applying sublimation coating to ceramic tiles is a rather complicated process. The quality of such a coating will depend on the quality of the print: an excessively thin layer of varnish will give a too pale print, and an excessively thick layer of varnish may cause cracks.
Paint for ceramic tiles
Old ceramic tiles can be painted. Special epoxy paint is used for painting. There is nothing complicated in the method of applying it. However, it is necessary to carefully prepare the surface to be painted.
First of all, you need to clean the tiles from dirt by washing them with soapy water. Then you need to wipe the ceramic surface with a soft cloth moistened with some alcohol-containing product or a weak solution of vinegar. Clean and grease-free tiles should be sanded using fine sandpaper (zero is best for this).
Before painting, it is recommended to apply primer to the prepared ceramic surface, not forgetting about the seams, which most often do not look very neat. After applying the primer, you need to wait until it dries completely. If the surface is lightly sanded, the paint will adhere better and cling to the ground more firmly. The paint should be applied in several layers, allowing each layer to dry thoroughly. Usually a double coating is sufficient.
The tiles are used as floor coverings, walkways and sidewalks. The material is exposed to external influences and requires updating, or the structure and color may simply become boring. Wet effect impregnation for paving slabs will help solve the problem.
Painting: what to remember?
The most important, mandatory recommendations on how to paint tiles can be found on the paint packaging. It is necessary to strictly follow the information provided about the procedure, painting method, drying time of individual layers.
The room must provide certain conditions of humidity and temperature:
- humidity should not exceed 70-80%;
- the optimal temperature is 24-28 degrees.
Working conditions affect:
- drying speed;
- strength parameters;
- aesthetics of the resulting coating.
For example, if the room is too hot, the layer dries too quickly and may turn out less durable and short-lived.
Most manufacturers recommend treating the tiles with one layer of a special primer for ceramic substrates before painting. The primer gives the wall the necessary roughness, and the paintwork gets better adhesion to the base. Using a primer is especially advisable if surfaces are constantly exposed to water (kitchen, bathroom). When painting other rooms, the initial layer can be made with paint diluted with a small amount of water (up to 10%).
Instructions for applying to ceramic tiles
Before painting, wash ceramic tiles with a stiff brush and cleaning agent.
Particular attention is paid to the seams. If the surface condition is poor, the tiles can be sanded with fine-grain sandpaper
A prerequisite for successful restoration work is that each stage of decorating tiles must be completed by thoroughly drying the applied layer.
After removing dirt and dust, you can begin restoration work:
- Using a lint-free cloth and a special solvent, degrease the tile surface;
- apply primer;
- use a roller with a foam surface to paint the tiles (treat corners and hard-to-reach places with a paint brush);
- Apply a thin, even layer of protective varnish (when working on the floor, the composition can be applied with a soft cloth).
Ceramic tiles can be painted manually or using a ready-made stencil. Beautiful, highly detailed designs are obtained using reusable industrial stencils. Such forms have an adhesive base, which prevents paint from spreading and accidental shifting of the stencil.
Many people are interested in whether it is possible to paint ceramic tiles in the kitchen, where the likelihood of contamination with grease, soot and food debris is especially high, and the tiled apron is often exposed to hot steam. Experts say that this is acceptable, since the protective varnish film for ceramics is resistant to detergents and cleaning agents.
Safety precautions
Before painting and varnishing the tiles, you should study the safety precautions for performing this type of work. To avoid dust getting into the respiratory tract and eyes, you should work in a respirator and goggles during the preparatory grinding stage.
Even when using water-based paints and varnishes, it is recommended to carry out painting and varnishing:
- in ventilated areas;
- wearing rubber gloves;
- away from heat sources and open flames.
Forbidden:
- smoking during restoration work;
- Dispose of remaining paint and varnish materials into the sewer.
Paint that gets on your hands, tools and clothes can be removed using a special solvent.
Painting ceramic tiles requires the following tools and materials:
- cleaning sponges, napkins and cleaning brushes;
- liquid degreaser (solvent, industrial alcohol, acetone);
- primers;
- sanding mesh, fine-grained sandpaper;
- rubber gloves;
- respirator;
- brushes, rollers;
- special tray for paint and varnish;
- masking tape;
- stencils;
- paint and protective varnish.
Artistic painting on tiles is carried out using professional tools: graphite pencils, brushes, palette knives, airbrush (paint spray). This is a fascinating process that requires knowledge, experience and skill, so if you do not have the necessary training, it is better to order the drawing to be completed by a professional.
Protecting the drawing
Hand-painted ceramic tiles can be done before laying the tiles on the wall or floor. Also, the technique of applying paints to ceramics is popular among craftswomen in the field of hand made. Small slabs are used to make paintings and panels; they are used to decorate mirrors, window and door openings, creating original interior decor in the room.
To protect the design after application, painted tiles are subjected to additional firing for 20-25 minutes at a temperature of +160...+180 C. After turning off the oven, the tiles should be left in it until they cool completely.
Where can I buy tile varnish?
Varnish for tile coating is sold in several large companies, where you can purchase various building materials for any repair. You can contact the following organizations:
UralCementService
offers high-quality paint and varnish products for finishing various coatings. Here you can buy Keraseal tile varnish and other products that can be used when working with tiles.
- Call:
(343)3793902 - Address
: Yekaterinburg, Mamin-Sibiryaka street, building 52.
Fair sex
can offer everything for finishing floor coverings. Here you can find a large selection of varnish and paints for various surfaces.
- Call:
+73433734746 - Address:
Ekaterinburg, Montazhnikov street, building 4.
Safety precautions
When working with paints and varnishes, the following rules must be observed:
- You can only work with safety glasses and rubber gloves;
- It is recommended to wear a respirator that protects the respiratory system from harmful varnish vapors;
- storing varnish solution is usually allowed at temperatures from +5 to +25 degrees;
- It is prohibited to apply the composition near an open flame; you cannot smoke near an open container;
- the remaining mixture must not be discharged into the sewer system;
- the room where the varnish mixture is stored must be well ventilated;
- During the application of varnish, the room must be well ventilated.
Additional recommendations
For work on Tuscan tiles, terracotta, and highly absorbent coatings, it is recommended, if possible, to avoid using varnish until the adhesive has completely cured. The curing process can take months. When laying on a dry screed with cement adhesives, the curing time is significantly shorter.
Before varnishing clinker, it is recommended to first treat the seams. Then, after finishing with varnish, the surface will look perfect if you decide to varnish the tiles.
When it is not possible to replace old tiles with new ones, then using varnishes you can give the floor or wall a completely new look. If the tiles have just been purchased, then the varnish coating will help protect them from moisture, from various mechanical influences, and from temperature changes. Varnishing will give a positive effect, and if the result is not to your liking, you can paint it. The varnish is also good because it can be applied independently.
Features of indoor interior decoration
What to consider when choosing and implementing a brick wall in an apartment in the interior if you paint it with color:
- There is no turning back. It is almost impossible to remove paint from brickwork. It will never be possible to return to the natural terracotta color; it will only be possible to repaint it in a different shade.
- Preparation is an important stage of the work. If the surface is poorly cleaned or primed, the coating will quickly crumble. It is not recommended to paint wet brickwork.
- Defects and the effect of aging are different things. Large chips and cracks must be puttied and sanded. Then the final finish will look much better, and the romantic effect of the old masonry will not disappear.
- Facade paint cannot be used. At first glance, this choice is obvious. But this paint is not suitable for interior work, as it contains a large amount of harmful fumes. The best choice is interior paint.
- Smooth sand-lime brick (as opposed to decorative stone and gypsum brick) is more convenient to paint with a brush. The direction of the strokes is strictly horizontal. The roller is used only to create the effect of carelessness and imperfection of the coating.
- If the wall is not new, but old, thoroughly cleaned of plaster, and at the same time it will be used “as is,” then it must be coated with clinker oil. It will give freshness to even old brick, enhance the brightness of the color and even out the shade.
Areas of application and technical parameters
Varnishing of tiles is used for the following coatings:
- absorbent ceramic tiles (for example, Tuscan tiles, terracotta, etc.);
- cladding with seams based on cement grout;
- cladding made of natural stone or brick;
- concrete floors, coverings made of natural and agglomerated stone, as well as paving slabs, etc.
This type of varnish is usually made on the basis of acrylic with the addition of very small particles of ceramics. Also, the tile varnish may include a urethane polymer dissolved in aliphatic solvents.
After drying, the treated surface becomes glossy and much stronger, which helps prevent mechanical damage.
If you are going to varnish Tuscan tiles, terracotta tiles or any other highly absorbent surfaces, you should avoid using varnish until the regular adhesive has completely hardened. Otherwise, the tiles are in danger of fading. In some cases you will have to wait several months. If installation is carried out on dry screeds using cement-based adhesives, the waiting period is radically reduced.
The varnish must be applied in a thin and even layer. For this operation, you can use a piece of fabric. The main thing here is to prevent sagging, which is especially visible on a light-colored surface.
Unusual dyeing products
Drying oil for impregnation of gypsum coating Source kraski-net.ru
Coloring gypsum stone with rosin Source ozone.ru
Colored stain for decorating artificial gypsum stone Source insales.ru
- Drying oil. The main areas of its use are the base for paints and wood impregnation. When applied to a plaster coating, it creates an unusual effect of aged stone in warm beige-brown tones.
- Rosin and varnish. These two substances, when mixed with technical alcohol, can color light plaster into a brownish-red color, reminiscent of old ceramics.
- Stain. This compound is also commonly used on wood, but can be used just as well on plaster. The stain is available in various shades of red-brown colors.
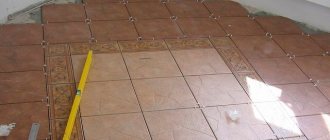
Step-by-step instructions for laying terracotta tiles
We carry out the markings starting from the kitchen doorway (if the tiles will be laid diagonally).
We nail a reinforced wire mesh to the floor, cleared of the old covering (previous tiles or linoleum). You can use a construction stapler for this.
It should be taken into account that the diamond circular saw is cooled by water (it also washes away dust), so sawing should be done in a separate room with a designated water drain.
The next day, when starting to lay the tiles, first of all, thoroughly mix the prepared adhesive. It should be remembered that the glue is first applied not to the tiles, but to the wire mesh nailed to the floor. It must be applied with even and confident strokes of a spatula until a uniform adhesive surface is formed, and since the glue dries quite quickly, it does not need to cover the entire floor at once, but small areas of it. Then glue is applied again to the dried areas of the floor surface, but unevenly, but in the form of parallel ridges. The fact is that the tiles, when placed on these strips of glue, will themselves press them into the floor with their weight. In this case, the glue will be evenly distributed under the tiles, and its excess will not protrude between the tiles. Otherwise, if voids remain under the tiles, it is possible that they may crack. To be completely sure that there are no voids left under the tiles, they should be adjusted more tightly to the floor using a rubber mallet. In most cases, when laying tiles, you have to cut individual parts or cut out shaped shapes from them. A diamond disc tile cutter is ideal for this, but as a last resort, use a hand saw with a thin blade for this. On the second or third day, after the laid tiles had dried overnight, all that remained was to begin grouting the tile joints. Gray grout seems preferable, since the seams when laying terracotta tiles are quite wide and grout of any other color on the floor will look out of place. Let us repeat the step-by-step nature of the actions we are taking. So. Terracotta tiles
We continue to do the styling.
Do not forget about precautions and compliance with safety regulations. Wear safety glasses and gloves when sawing terracotta tiles.
Before you start gluing the tiles, place them dry on the floor of the room, at least in those places that give you doubts
If, as a result, all doubts about the quality of the fit of the tiles to each other have been dispelled, you can begin gluing.
Rub tile adhesive onto an area (1 square meter) of chicken wire with the edge of a putty knife. The time it takes for this glue to set is about 10 minutes.
Take another spatula on this wavy-edged surface and apply wavy strips of glue to the already dry areas of the floor. Place the tile on this area of the floor; the weight of the tile will evenly distribute the adhesive applied in waves under it.
Tap the tiles glued to the floor with a rubber mallet to more firmly adhere them to the floor and remove voids between the tiles and the floor.
If you need to use shaped tile sizes, especially when laying diagonally, then initially you can use cardboard templates instead.
Since there are no completely flat and straight walls in houses, this can be very noticeable when laying tiles. To minimize this effect, it is advisable to lay the tiles on the floor at an angle of 45 degrees to it, and not parallel.
You should try not to apply too much adhesive under the tiles, even if you apply it in waves in full accordance with our instructions. Excess adhesive itself will protrude between the tile seams.
After the tile itself has been glued, it must be allowed to dry for at least ten hours.
Gray grout between tiles is applied using a special grout tile, which must be held at an angle of 45 degrees to the surface.
To grout narrow spaces between tiles, use the smallest plastic spatula.
No later than ten minutes after grouting, wipe off excess grout from the surface of the tile with a damp sponge. At the same time, the seams themselves should be made somewhat deeper.
The last stage of working with this tile will begin no earlier than three weeks after gluing the tile. By then, both the glue itself and the grout will have hardened to stone form. Since terracotta tiles are unglazed, they must be protected from external influences by applying a special protective compound to them.
Instructions for use
Before applying varnish, it is necessary to prepare the floor surface. It must be completely dry and free of dust or other contaminants. Any remaining cement must be removed and the seams leveled.
Apply the varnish as evenly as possible. Do not pour out all the material at once and then distribute it - this can lead to sagging and stains. Then the layer is given time to absorb - 2-3 minutes, the excess is removed with a rag.
If terracotta, Tuscan tiles and other highly absorbent materials are being varnished, the surface should be treated one more time to obtain a high-quality result. If the tile absorbs poorly, then the composition is applied only with soft fabrics to avoid streaks that can spoil the result.
These coatings can also be used for pre-treatment of Tuscan tiles and easily absorbent tiles before laying them on an adhesive or cement mixture. This will help remove the finished tiles. But terracotta should not be pre-treated - there is a risk of fading.
Preparing to lay terracotta tiles
Just as with regular tiles, this will take no more than three days. But there are certain features; after all, we are dealing with unusual floor tiles in an ordinary kitchen room. So, you should be prepared for the fact that the floor laid with terracotta tiles will rise above your usual level, since the thickness of these tiles can be higher than the usual 12 millimeters.
Therefore, the very first day of your work may be entirely spent on preparing the kitchen for tiling: removing all the furniture and household appliances, removing the furniture itself and taking the necessary measurements. Also, if you are not going to remove the wood flooring or linoleum and plan to lay tiles on top of them, then you will need to spend extra time nailing the wire mesh to the floor, as without this the tiles will not adhere well. However, if tiles have already been laid in the kitchen, they will still have to be removed, otherwise the floor level will be too high.
Old tiles should be removed to the level of a strong and hard floor; only on such a floor will the tiles hold securely and the mortar connecting the tiles will avoid cracking.
Prepare an aluminum profile in advance to take measurements and determine levels. You should immediately decide where you plan to start laying, and also find out for yourself the question of whether you will do edging along the edges of the kitchen, especially if the tiles will be laid diagonally.
In addition, do not forget to leave part of the threshold in the kitchen uncovered in case the floor in the adjacent room will end up at a different level. In this place, you will later need to install a special transition strip.
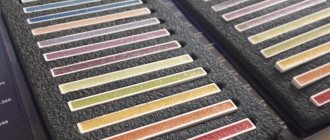
Color selection
The choice of colors and their combination determines how the tile will be perceived after painting. A color background can irritate, promote a surge of energy, or, conversely, have a calming effect.
It is recommended to avoid bright colors, even if they seem very beautiful. A bright background quickly tires, having an aggressive effect on the psyche. The best option is neutral tones that blend in with the rest of the room. Against a neutral background, the flaws made when painting the tiles are not so noticeable.
If desired, you can make the colors livelier by using several colors of paint at once. It is possible to apply ornaments and designs (for example, apply patterns in the corners of floor tiles). This is done manually or using stencils. In the latter case, even an amateur can complete the painting.
Advice! When applying several colors to a tile, you need to ensure that they are harmoniously combined. Otherwise, instead of the original colors, you will end up with a tacky daub.
Applying protective impregnation to seams
After grouting, the seams must be completely dry. Grout mixtures from different manufacturers will have different drying times and readiness for further processing.
Before application, you need to isolate the tiles from contact with the protective composition. For example, you can carefully glue it with paper tape and leave only the seams uncovered. This will be better for tiles with a monotonous or one-color pattern, on which various defects are more noticeable.
The seams between the tiles are coated with a thin brush. This method guarantees high-quality, uniform coverage. Compositions with deep penetrating ability are applied in 2 layers, since the first layer is almost completely absorbed into the grout. A double layer will provide the best protection.
Cover the material with impregnation subject to certain temperature and air humidity levels. These indicators are indicated on the label. If they are not followed, the impregnation may lose its properties and even begin to fall off. It is best to use a universal impregnating water repellent.
After applying the protective impregnation, it will be better to leave it for 1-2 days to completely dry and harden. After this, further processing can be carried out.
A few tips to help give a new look to old tile joints:
- If they are not subject to destruction or cracking, which is caused by moisture or mechanical stress, then they can simply be coated with one layer of deep penetration impregnation. It protects from destruction.
- Colored seams can be cleaned, refinished with acrylic paint, and then a layer of protective impregnation (acrylic or polymer) applied.
- Dirt is removed with a toothbrush and bleach. Treat severe stains with baking soda and vinegar. Soda is poured in, then vinegar is poured in. A chemical reaction occurs that pushes dirt out of the pores.
Products for treating tile joints (20 photos)
After some time has passed after the completion of the repair, stains appear on the ceramic tiles, they fade, scratches appear on the coating, and the seams between the tiles begin to let moisture through. This is especially true for porous coatings with a matte finish - such floors are most susceptible to mechanical stress and contamination. A good way to prevent such troubles is to varnish the tiles. Varnishing will not only protect against damage, but will also provide a higher contrast in the colors of the materials and give the floor a fresh look for several years to come.
Coating the tile with a special varnish allows you to observe its original appearance for many years.
How many layers should I apply?
You should use the information contained in the product instructions and your own wishes regarding color intensity. Between applying layers, you need to allow a drying interval of 12-48 hours (depending on the manufacturer's recommendations).
New paintwork takes much longer to cure:
- mechanical resistance is achieved after a few days;
- chemical resistance – after about a week;
- full functional properties – in a month!
You should not use the room for the first 3-4 days; you need to treat painted surfaces with care for the next few days. You must be careful not to stain the painted surface or splash it with water.
Instructions for use
The tiles must be absolutely dry and free from dust and all kinds of contaminants. All traces of cement should be removed and the seams should be leveled. Thorough cleaning of the floor is a must before starting varnishing.
Applying varnish
Paintwork should be applied using a clean piece of soft cloth. There should be no lint on the fabric. You can also use a soft brush. Consumption of tile varnish is from 100 to 200 grams per square meter. The varnish should be applied evenly. It is wrong to pour varnish onto the tiles and then spread it over the surface - this will lead to the formation of sagging and stains.
After applying the layer, you need to let the composition absorb for several minutes. Next you need to remove the remaining varnish with a rag. If the material is highly absorbent (terracotta, Tuscan tiles, etc.), it is necessary to process the tile again to achieve the desired result. On poorly absorbent tiles, the composition can only be applied with a soft cloth in order to prevent streaks that will visually spoil the floor.
The best way
12 hours after treating the floor, you can walk on it. Applying varnish to wall tiles follows the same principle as to floor tiles.
Tile varnish can also be used to pre-varnish Tuscan tiles and other easily absorbent materials before laying them with cement-based adhesive or before creating joints. These steps will make cleaning the finished tiles easier. However, pre-treatment is not necessary when laying terracotta over mortar as this will cause the material to fade.
Upon completion of work, hands, tools and work clothes can be cleaned using turpentine or other solvents.
Preparatory work - how to avoid mistakes?
Proper preparation of the base is important.
- First you need to remove furniture, appliances, and equipment from the room that are interfering with the work.
- It is necessary to thoroughly degrease the surface of the tile (get rid of greasy stains and deposits, which can lead to deterioration of the adhesion of the paint layer). You will need water with added detergent and a sponge.
- The seams need to be cleaned. All traces of mold must be removed. For cleaning, special anti-mold products are used.
- Finally, the surface is washed with plenty of water.