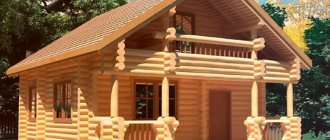
One of the varieties of aerated concrete, characterized by high strength characteristics, is called sibit. This material resembles wood in some of its properties. It is also light, breathable and retains heat well. In terms of thermal insulation characteristics, sibit is 3 times better than brick. As a result, a sibit house retains heat well in the cold season and prevents the rooms from heating up in the hot summer. In our article we will describe the features, advantages and disadvantages of this material, and also tell you how to build a house with your own hands from sibit.
Preparation for construction
Even the simplest construction begins with the design of the facility. When drawing up a plan, you must take into account all factors: the climate of the place where you live, the type of soil, the depth of groundwater. If you don't do this, your building will not last long.
If you do not have professional knowledge, then you should not draw up the project yourself, but order it from a design bureau. Professional architects will quickly and competently complete your order.
It would be a good idea to draw up an approximate construction estimate, which should include all expected costs. This will enable you to know what amount of money you need to have in order to successfully complete the construction of the house.
To keep your home warm in winter, calculate the size of the sibit blocks from which the outer walls will be built.
Purchase all the materials needed for construction from hardware stores and store them in a dry place. Next, start preparing the construction site.
Slab foundation
Buildings made of aerated concrete are usually built on a strip foundation. If construction takes place on heaving soils, there is no alternative to a monolithic slab foundation. To fill it, you need to prepare removable formwork. It can be wooden or metal, which holds the concrete well until it hardens.
At the same time, carry out waterproofing work, dig trenches, and lay communication pipes.
Dimensions
And now about the size of the sibit . Dimensions depend on the type of product:
- Wall blocks. They are divided into four different types: B2 has a ratio of 600/200/250, B3 is slightly wider - 300 millimeters, and B4 is already 400 millimeters.
- Blocks for interior walls. There are also three categories here. The smallest sizes are: 625/100/250, the largest are 150 wide, other parameters are unchanged.
- Floors. The length here will vary - from 2 to 6 meters. At the same time, the width is 60 cm, the height is 24 cm. They are very strong, they are not afraid of heavy loads, the maximum load weight is 800 kilograms.
- Jumpers. The longest are 3 places of 10 cm. As for the maximum width and height, these are 30 and 60 cm, respectively.
From 20 to 50 standard blocks are placed on one pallet.
We build walls
Principle of masonry
Start building the walls of a Sibit house 30 days after pouring the foundation; usually this is the time it takes for the foundation to become strong enough.
What you will need for construction:
- Sibit blocks.
- Adhesive solution.
- Fittings.
- A tool used for laying houses.
Note!
Start laying walls only after installing the waterproofing layer. It can be a double layer of roofing felt or waterproofing material.
To lay sibit blocks, use special glue. If work is carried out at sub-zero temperatures, then use a winter type of glue. Remember, the first row is placed on a sand-cement mixture.
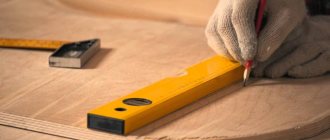
Place the first blocks on the corners of the house; they will serve as a kind of beacons; to do this, stretch a strong twine between them. Constantly use a level to monitor the quality of the block masonry.
Walls made of sibit blocks must be reinforced to make them more reliable. This should be included in the design of your home. Make reinforcement with reinforcement rods with a diameter of 10 mm, which are placed in grooves that you carefully cut in aerated concrete blocks.
Reinforcement of masonry rows
Note!
Lay load-bearing internal walls simultaneously with external ones and also reinforce them. Use reinforcement bars to strengthen window and door lintels.
Floor slabs between floors are laid on an armored belt. Do it on external and load-bearing internal walls. Hollow slabs are well suited for the role of flooring. The weight of the interfloor slabs must be distributed evenly, this must be reflected in the design.
The armored belt needs to be equipped before building the roof of the house. After its arrangement, you can install the rafter system.
Note!
The armored belt cannot retain heat like sibit blocks, so it must be thermally insulated.
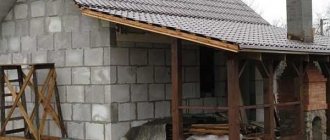
The next stage of work is the construction of the roof. Install the outer rafters, secure the ridge beam to them, then install the remaining rafters. Insulate the roof and install the roofing material you purchased.
According to your project, complete the laying of the internal partitions. For them, use thinner blocks. In the places where the partitions connect to the floor slabs, lay a sealing tape, and on the foundation - felt strips.
Installation sequence
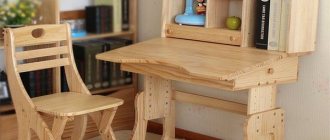
If you want to build a small house with a square plan, then a building measuring 6 x 6 m will be quite enough for a family of 2-3 people. To increase the usable area of the house to 100 sq. m., you can use a small extension in which it is better to place a kitchen and a bathroom, as well as an attic floor. If your family consists of 4-5 people, then it is better to equip a two-story house measuring 6 x 8 m, where the living area will be at least 100 square meters.
Foundation
The foundation for a house made of sibit is made according to the rules for constructing a strip foundation
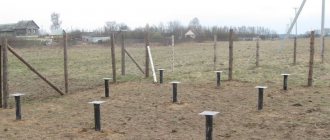
To make a strip base, you first need to prepare the construction site by clearing it of debris and unnecessary plantings. Further work is carried out in this order:
- We carry out a breakdown of the future structure on the ground.
- After this, we dig trenches or a foundation pit if the house has a basement.
- We carefully level and tamp the bottom of the trench.
- At the bottom we make a cushion of gravel and sand, which we also compact well after wetting it with water.
- After this, we proceed to the installation of formwork. It should rise above the ground by at least 30 cm.
- We make a reinforcement frame and install it in the formwork on a pre-filled and hardened layer of concrete 5 cm high.
- We pour the concrete and tamp it.
- The formwork can be removed after 5-7 days.
Walls
Before starting the installation of walls, you need to make horizontal waterproofing of the base
Before installing the walls, you need to make horizontal waterproofing of the base. To do this, we lay two layers of roofing felt on the concrete surface of the base with bitumen mastic. To lay walls, in addition to sibit and reinforcement, you will need the following tools:
- Master OK;
- wall chaser;
- rubber mallet;
- notched spatula;
- brush for removing dust;
- plane for gas blocks;
- corner;
- saw;
- cord or fishing line;
- level.
We carry out further work in the following sequence:
- The first row is laid on cement-sand mortar. The height of the mortar layer is 1 cm. First, corner blocks are laid, and then a fishing line is stretched between them, and the remaining elements are placed. The first row needs to be laid perfectly flat, so you will need a level, a cord and a mallet.
- Some blocks will have to be adjusted to size by sawing them.
- After completing the first row, you need to wait several hours, during which the solution will have time to set.
- All other rows are laid in the same way, that is, the corner elements are installed first, then the cord is pulled and the middle blocks are installed. Just remember that the blocks of the second row must be laid with a shift of 8 cm. Also in the second row, you can use special glue, not a solution, to connect the blocks. To apply the glue, use a notched trowel. This way you will achieve a more uniform seam, and the drying speed of the glue is higher than that of the solution.
- To make the binder solution lay more evenly and the adhesion to be stronger, the surface of the block can be processed with a plane, giving it roughness.
- Every 3-4 row of blocks must be reinforced. To do this, several grooves located in parallel are cut on the surface of the laid blocks. After cleaning from dust, reinforcement with a diameter of 10 mm is placed in the grooves. After this, glue or mortar is applied and the next row is laid.
Attention: it is not allowed to connect two reinforcement bars at the joints of blocks and in the corners of masonry. Mandatory reinforcement is required not only for the 3rd or 4th row of masonry, but also for the areas above the door and window openings, as well as the row on which the floor slabs will rest.
Floors
Laying floor slabs is allowed only on a monolithic reinforced concrete armored belt
Laying floor slabs is allowed only on a monolithic reinforced concrete armored belt. To make it, do the following:
- Cut the blocks to a thickness of 10 cm and lay them along the edges of the wall opposite each other. Thus, you will get a kind of permanent formwork.
- A reinforcement cage is placed inside the formwork.
- After this, the space is filled with concrete mortar.
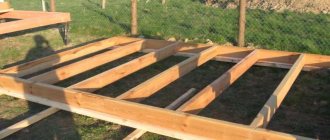
- When the concrete reaches the required strength, floor slabs are laid. The ends of the slabs are covered with ax blocks.
Tip: reinforced concrete slabs are not the only flooring option; you can use metal or wooden beams or aerated concrete slabs.
Completion of work
Brick cladding
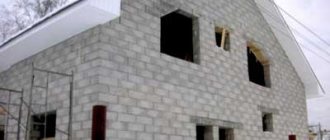
The house is built, now you can start insulating the house. Sibit itself is a material that retains heat well, so houses in which the masonry was done using cement mortar rather than special glue are subject to major insulation.
In regions with harsh climates, mineral slabs or polystyrene foam are well suited for insulating sibit houses.
You can decorate the facade of the house at your discretion. The material for this can be facing brick, vapor-permeable plaster, siding.
Note!
Plaster is the best material for interior decoration of a sibit house.
Sibit house projects
In order for the country house in the construction of which Sibit is used to be as comfortable and safe as possible, you should obtain a license to carry out all the necessary work, and also use a project developed by specialists. During housing construction, different brands of sibit should be used, which differ in the degree of thermal conductivity and strength. Aerated concrete blocks with a density of 1000 kg/m³ are ideal for creating load-bearing structures; for insulating an attic or roofless roof, blocks with a density of 300 kg/m³ are sufficient, and for partitions – blocks with a density of 500-900 kg/m³.
Pros and cons of the material
Sibit for house construction
Like any material, sibit has its positive and negative qualities.
Pros:
- Excellent heat and sound insulation.
- Sibit blocks conduct heat 4 times worse than brick, which means that a house made of sibit is 4 times warmer than a brick house. In the summer heat, the house is cool, since the sibit breathes like the buildings of their tree. This happens due to the porous structure of the material. The thermal insulation of the house is at a very high level, and this means significant savings on heating the building.
- Sibit is an environmentally friendly material. It is created from natural ingredients.
- Sibit blocks do not burn.
- Sibit is a lightweight material that can be easily processed. Its delivery and installation will cost much less than transporting bricks. A house made of sibit does not need a strong foundation, which saves concrete and, therefore, your money.
The main disadvantage of sibit is its lack of strength. If you have a desire to place a massive object on the wall, then you need to do this on a special reinforced metal mount.
Note!
Sibit houses must be finished on the inside and outside.
If you have a desire to build a house from sibit, you should carefully read this article, weigh the pros and cons, and then answer yourself whether you are ready to build such a house or not.
We recommend reading:
- frame houses - do-it-yourself construction technology;
- DIY sliding gates (drawings);
- Installing a corrugated fence with your own hands.
What is sibit?
Northern region, small budget and short construction period. If you are planning to build housing, and these criteria are the basis that influences your choice of material, then aerated concrete should be your goal. These blocks of artificial stone have dozens of pores, and this does not spoil them at all, but rather improves their quality.
Production of construction. material involves two different methods. In the first case, the composition for the production of the finished product hardens on its own, without any additional components. influences. The stone obtained in this way is called non-autoclave. If steam, high degrees and pressure are used for hardening, autoclaved aerated concrete is obtained. Both stronger and warmer - this is how builders describe this type.
Sibit building block
All over the world, hundreds of enterprises are churning out this now popular material. About 40 countries have factories on their territory. Such production was put on the assembly line in our country only in the middle of the 20th century.
Among its competitors, the Novosibirsk plant stands apart, which produces the so-called sibit (autoclaved aerated concrete). They adopted equipment from the German founder of the industry and developed a special composition, thanks to which Sibit aerated concrete is simply swept away from hypermarkets by residents of cold regions.
And it seems that the components are not original, but it’s all about their relationship. Proportions are extremely important. Thanks to its methods, the manufacturer managed to achieve lower weight of products, while increasing its efficiency in terms of retaining heat in the room.
Photo
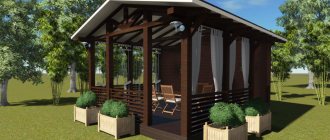
Sibit house project
An armored belt is required
Laying gables
Construction of internal partitions
Price
Let's take a brick as a guide. An inexpensive version of such a stone will empty your wallet by about 7 rubles apiece. While the price of sibit is 140 rubles per product. However, if you take twenty bricks and mold them into one whole, you will get just a standard block of aerated concrete.
So the price is equal? No, it's not that simple. After all, we must not forget about labor costs, as well as the cost of a thicker and more solid foundation that bricks need. As a result, the savings are obvious. So, we find that the sibit cube will cost us about 3 thousand 900 rubles and that’s almost 28 blocks.