5653 0 0
Merlin May 5, 2018
It is more convenient to sheathe long walls using the overlap method
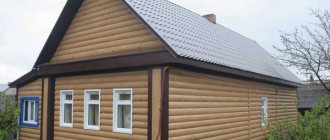
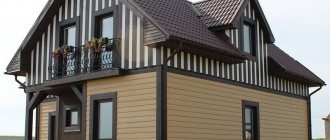
Vinyl siding is the leader in finishing small buildings. If the walls are long and the panels do not meet the standards, the cladding of the house is done with an overlap. Installation technology has its own nuances. Let's talk about styling rules that will help you avoid mistakes and get a good result.
The traditional method of installing siding
Horizontal siding is installed from bottom to top and from left to right. For simplicity, additional strips and elements are used. The traditional siding installation scheme looks like this:
Preparing the wall surface
It is necessary to remove all decorative volumetric elements from the walls (platbands, shutters, lamps, gutters, etc.). If there are traces of mold on the walls, treat them with appropriate compounds. Apply protective compounds to wooden surfaces.
Installation of sheathing, insulation
A sheathing - wooden, metal or plastic - is mounted on the prepared walls. For vinyl and acrylic siding, the latter is preferable - it is closest in its performance properties, so the facade will not suffer from sudden temperature changes.
Installing the starting bar
Siding installation begins with the installation of a special starting strip.
!
Important! It must be mounted strictly horizontally. Check and double check. The appearance of the entire facade depends on this.
Framing openings and corners
Along the perimeter of the opening, special profiles are installed into which siding panels are inserted. This could be a j-trim or finishing strip. Also at this stage, corner elements are installed.
Installing the connection strip (if equipped)
If the length of the wall is greater than the length of the siding, the panels will be connected horizontally using a connecting strip. Design where it needs to be installed (in the center of the wall or on the side). The connecting strip is installed before installing the panels.
Siding installation
Siding panels are mounted from bottom to top. The first row is inserted into the starting bar. On the sides - in corner elements, profiles that frame openings, or a connecting strip.
Installation of finishing strip
The finishing strip is installed on top.
Installing the last top panel
The last siding panel is attached to the finishing strip.
Using wood without pre-treatment
This defect is also associated with the sheathing. For its manufacture, wood or a metal profile can be used. The use of wood for the manufacture of sheathing is usually associated with savings, which sometimes go too far. Wood has disadvantages due to which it is not recommended for use by professionals.
Creating a wooden sheathing for siding.
- Shrinkage and expansion - wood is sensitive to changes in humidity and temperature, so only timber that has undergone natural or chamber drying can be used for lathing.
- Biological threats - the tree is susceptible to the proliferation of fungal microorganisms. To protect the material from this, antiseptic agents are used and applied to the bars before installation. If you miss this moment, then soon the wall will become a breeding ground for mold, which negatively affects human health.
- Flammability is a property of wood that is known to everyone. To increase the fire-resistant ability of the material, the wood for the sheathing must be treated with fire retardants.
Thus, using wood to create lathing will require a number of preliminary procedures, after which the material will not seem so cheap.
Additional elements for siding installation
Siding and additional planks on the facade. (photo No. 2)
To install siding, manufacturers have provided a number of additional elements - profiles and strips:
- starting strip - to secure the first (bottom) row of siding;
- connecting strip (H-profile) - for connecting siding panels along the length;
- j-trim strip - used as a connecting element when lining openings, as well as to replace other strips;
- finishing strip - mounted to secure the last, top panel;
- corner elements - for facing corners.
!
Panels and profiles serve to seal gaps. Thanks to them, moisture and dirt do not get under the siding, which can lead to the formation of mold on the walls of the house.
Some buyers believe that all these elements are necessary only to increase the final cost of finishing. This is not true.
In fact, panels and profiles primarily serve to seal gaps. This prevents moisture and dirt from getting under the siding, which can lead to the formation of mold on the walls of the house and other unpleasant consequences. In addition, they increase the mechanical strength of the facade. A house lined according to all the rules will last longer.
Lack of sheathing
According to American technology, it is possible to install siding without sheathing, but in many cases it is impossible to do without installing a durable frame (uneven walls, harsh climatic conditions, etc.). Lathing also provides a large number of tangible benefits.
Construction of a wall with insulation under the siding.
- Wall lining – cladding is often done on older buildings that have become dilapidated over time, necessitating an update to the appearance. The geometry of the walls of such buildings often leaves much to be desired. In this case, you can’t do without lathing. When attaching the profile directly to the wall, all the irregularities will transfer to the sheathing - the flaws will be very noticeable.
To align, the installation of the sheathing profile begins from the corners, then a cord is pulled between them, along which all other guides are installed.
- Insulation - the domestic climate is not mild, so the installation of siding is often combined with the installation of insulation in the walls.
- Ventilation of walls - lathing allows you to create a ventilated gap in the wall, which allows you to remove excess moisture that is formed as a result of the collision of warm air from the house and cold air from the street.
For this reason, installing siding without sheathing can be associated with various difficulties.
How to connect siding together using a connecting strip
Installation of the connecting strip (H-profile). (photo No. 3)
The connecting strip (H-profile) is installed before installing the siding. The process works like this:
- Mark where the soffits will end.
- Fix the profile so that the gap between it and the edge of the soffit is 3 mm, and the bottom edge is 6 mm below the edge of the starting profile.
- Check that the installation is vertical.
- Secure the profile with self-tapping screws. First from below, then from above.
- Insert the siding panels into the connecting strip.
Any connections of the H-profile with other elements must be made in such a way that there is a gap of 6 mm for thermal expansion of the material.
If the height of the house is greater than the length of the planks, use two overlapping planks. In this case, the upper profile must be trimmed so that the gap between the slats is 9 mm, and the overlap is 25 mm.
Adviсe
- Do not cut a large volume of profile based on preliminary calculations. Errors may occur. Therefore, it is better to prepare the material in parts, for each section separately.
- or screw screws through the siding panel Use only designated holes.
- When fastening panels , use nylon washers - they will provide resistance in strong winds.
Finishing with siding is the second life of a house, which has retained its strength and received a new aesthetic appearance.
How to connect siding without a connecting strip?
Connecting panels without a connecting strip. (photo No. 4)
The connecting strip ensures the tightness of the joints and also gives a neat appearance to the facade. Technologically, this is the optimal solution that ensures the integrity of the finish.
However, in some cases, siding can be connected without an H-profile. This method also has a number of advantages:
Saving on materials.
On the one hand, there are no connecting strips - there are no costs for them. On the other hand, the savings may be questionable. After all, the consumption of the panels themselves will increase.
Complete façade.
The connecting strip is striking, and the façade with it does not look complete. Without it, the house looks more harmonious.
Aesthetic appeal.
The connecting strip is not always identical in color to the siding. In such cases, it attracts even more attention.
But it’s worth considering that installing overlapping panels also has a number of disadvantages (besides the fact that this method is not airtight):
1. From a certain angle, the gap between the panels becomes visible.
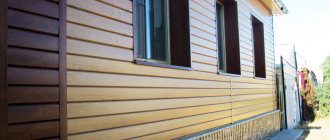
Lap-jointed siding on the front of a house. (photo No. 5)
2. As the temperature fluctuates, the cracks will become more or less noticeable.
3. If the installation technology is violated, the panels may move in waves.
To minimize these disadvantages, you need to follow several rules.
1. Siding connections along the length should be made not in one line, but in a checkerboard pattern.
The panels must be connected in a checkerboard pattern. (photo No. 6)
In the illuminated area, the joints are more visible than in the shadow. Therefore, the overlap must be done in such a way that light does not fall on the joint.
The joint should be as far as possible from the openings. First of all, doors, since strong vibration when it slams shut can cause the gap to widen and the panels to become deformed.
Conclusion
Using the overlay installation method, you can easily choose the desired color of siding panels, do the work yourself, and save money. If you follow the rules, the seams will be invisible.
In the video presented in this article you will find additional information on this topic. In the comments, share your experience and tell us about the results.
Siding is one of the most popular options for facing materials for building facades. Its popularity is explained by its ease of installation and operation, low cost and environmental friendliness. Facade cladding with siding is carried out in two ways: end-to-end and overlapping, depending on the installation conditions. If you need to achieve greater decorativeness with long walls, when standard panel sizes are not enough, use the method of overlapping siding. The technology of such cladding has its own nuances.
Overlapping siding installation technology
The process of such installation has some peculiarities. Let's look at how to overlap siding without connecting strips.
!
When installing siding with an overlap, the top panel should overlap the bottom panel by at least 25 mm.
The top panel overlaps the bottom panel by 25-30 mm. Moreover, this is done in such a way that the panel is exactly a continuation of the bottom one. They must be carefully measured and leveled horizontally.
Panel locks are cut so that there is a gap between them for thermal expansion.
The end of the bottom panel must be supported so that it does not bend. To do this, you can fill a small beam.
If the panels overlap, the siding should be installed in the warm season. At temperatures below 10 degrees, the panels shrink, and subsequently, as the temperature rises, they will expand. In this case, choosing the optimal gap size will be very difficult.
Fastening a row panel
The row panels are connected to each other with an overlap using a latch lock. One long edge (the top edge if positioned horizontally) is equipped with holes for fastening to the wall with nails. Next to them is the receiving part of the lock - the panel is curved in the form of a hook when viewed in profile.
The second edge is the mating part of the latch. In profile, it is seen as a hook, oriented mirror-image relative to the first. When attaching siding to the wall, the lower edge (reciprocal part) of the mounted panel is connected to the receiving part of the already installed panel. It is then pushed upward until it snaps into place and the top edge is secured with nails.
How to connect siding corners?
The technology for joining siding in the corners is simple, but also has certain features. It depends on whether the necessary elements are present and which corner is covered.
First, let's look at how to connect the outer corner of the siding.
Installation of external corner. (photo No. 7)
The corner strip is mounted in the same way as the connecting strip. With similar indentations from the edge of the spotlights and the starting strip. The corner elements are also increased in height in the same way as the H-profile.
If you want to save money or if it is impossible to select the required corner element, you can use two j-profiles. This solution will be cheaper, but the tightness of the structure will suffer. This problem can be solved by using waterproofing film in the corners.
Two j-trim strips instead of an outer corner. (photo No. 8)
Now let's move on to the inner corner. The installation technology is similar, with some reservations. So what do you need to know about how to join an inside corner of siding?
A special corner element or j-trim strip can be used in the inner corner
Options for finishing the internal corner. (photo No. 9)
The installation procedure and gap size are the same as for the outer corner. However, there is a peculiarity. The internal corner should not rest against the protruding plinth. The gap between them should be approximately 6 mm.
!
The internal corner should not rest against the protruding plinth. The gap between them should be approximately 6 mm.
There is another important question. How to connect siding to a façade panel? To do this, you need to mount the j-trim strip for siding together with the j-trim for facade panels. They are identical, but differ in width - since the facade panels and siding have different thicknesses.
Incorrect start profile installation
The starting profile is an additional element that is installed at the bottom of the wall, from which the laying of row siding panels begins. The evenness of the installation of the entire casing depends on its installation. Installation can be done horizontally or vertically. The most common installation method is horizontal. It is important that the starting profile is set exactly to the level. To do this, use a laser, hydraulic or bubble level. Self-tapping screws are screwed into the corners, between which a rope is pulled, indicating the horizon line.
Installing the starting profile on the sheathing.
For vertical installation, the starting profile is attached to the corner of the building.
If the starting profile was installed incorrectly, then all subsequent planks will be inclined. The slope may not be so noticeable to the eye on the first panels, but closer to the top of the wall the distortion will increase.
Gable trim
The house looks aesthetically pleasing only if the siding is perfectly vertical (if, of course, this particular cladding option is chosen). To ensure accurate geometry, J-profiles (optionally, internal corner profiles) are pre-installed along the entire perimeter of the gable. Using a plumb line and a tapping cord, draw a strictly vertical line from the ridge, which will be the axis of symmetry. Laying usually starts from the center, using an H-profile or a pair of symmetrically located starting elements. As an option - laying from the corners to the middle (Fig. 51).
To save time and increase the accuracy of installation, a template is made that follows the angles of the roof. To make a template, use a couple of pieces of siding, exactly as described in the section on covering gables with horizontal siding.
Rice. 51. Sheathing gables with vertical Deke siding: a – finding the vertical axis of symmetry; b – making a template; c – installation “from the center” d – transition from horizontal to vertical siding; 1 – J-profile; 2 – roof; 3 – roof; 4 – plumb line; 5 – template; 6 – a piece of siding attached to the slope; 7 – vertical lining; 8 – apron made of galvanized iron; 9 – starting element; 10 – edging; 11 – siding.
Installing siding from the corner First, the installation location of the first siding panel is determined. To do this, you need to measure distances along the bottom line of the pediment that are multiples of the width of the vertical panel. The measurement is taken from the chalk vertical line to the corner. The process is repeated until the distance from the corner of the J-profile is less than the width of the panel. This point is marked with a marker and a vertical line is drawn parallel to the original axis. This line will mark the location of the edge of the first untrimmed panel. The remaining distance to the edge is measured and the siding is cut.
Installing siding from the center The first operation is the installation of the H-profile, into the gutters of which the starting profiles are inserted, after which the rest of the installation is carried out.
During the installation of vinyl siding, at least every 3 panels, it is necessary to check the verticality of the installation, and when installing from a corner, you must also measure the distance to the center center line. The latter is necessary to ensure that when the installation reaches the top of the gable, the center of the panel will be in line with it. If deviations appear, it is necessary to make adjustments, for which the panels are shifted within the castle.
At the points where vertical siding enters the gutters of J-elements or internal corner profiles, Stroymet specialists recommend leaving a temperature gap, which is in the range of 1–3 mm in the upper part, and 1–6 mm in the lower part. When switching from horizontal to vertical installation, an edging profile is used (Fig. 51d).
- Color range and assortment
- Equipment and tools
- The need for additional elements, soffits
- Basic rules for installing siding
- Setting the starting profile and angles
- Installation of window and door frames
- Installation of H-profiles and siding panels
- Installation of J-profile
- Installation of horizontal and vertical siding
- Installation of soffits and J-bevel
- Arched window frames
- Vinyl siding care
Home > Installation Instructions > Siding Docke >
Types of material
There are many types of siding made from different materials and for different purposes:
- from artificial materials - vinyl, acrylic, PVC;
- made of wood - lining (traditional or euro), “American”, planken;
- made of metal - aluminum, galvanized steel, anodized or coated with polyester, pural;
- from cement - fiber cement and asbestos cement.
The first two types of materials are used for cladding walls; metal and cement types of siding are universal - they can successfully withstand increased loads in the basement of buildings and are used for cladding facades and interiors.
There is no single standard for the sizes of lamellas, as well as a method of fastening. Each manufacturer has its own size range, type and design of supporting profiles and guides.
To fasten lightweight panels - vinyl, acrylic, wood - wooden beams are most often used, although manufacturers often have special profiles. Metal siding and heavier panels made of fiber and asbestos cement are mounted on metal profiles.
All types of siding cope with the main task - protecting walls from bad weather, they differ only in durability: if cheap types of vinyl siding will last 3-7 years without changing color, and the lining will have to be dismantled after 2-5 years for impregnation with an antiseptic and protective painting, then metal , fiber cement and expensive types of acrylic panels can last up to 25 years.
What is a classic "American"
Unlike traditional Russian or Eurolining, the classic American one has a wedge-shaped shape, which facilitates installation: thanks to the profile, a constant angle of inclination of the front surface of the panel is maintained, and the amount of overlap does not affect the angle of inclination. In the upper part of the lamella there is a narrowed tenon, in the lower wide part there is a groove corresponding to the tenon. During installation, the tenon of the lower board is inserted into the groove of the upper one, thereby preventing water from flowing into the joint.
American lining is made from ordinary naturally dried and heat-treated wood; they differ in size. The width of the lamellas made of heat-treated wood is 8.5 cm, the thickness in the thickest part is 1.8 cm, the length of the panels made of coniferous wood is up to 3 m, from birch - up to 2 m. The lamellas made of raw wood without heat treatment have a thickness of 2 .8 or 4.5 cm, width 14 or 19 cm, length up to 6 m.
Installation of the “American” is carried out with nails or self-tapping screws on a wooden frame made of 4.0 x 5.0 cm timber in increments of 50 cm. Installation can be carried out either from the bottom up or from the top down.
The advantage of American products is their extended service life, waste-free production, and ease of installation. The downside is that the layout is only horizontal.
Material advantages
- Efficiency of installation, which is ensured primarily due to the light weight of the panels - they are easy to transport and install. For installation, you only need a set of simple tools, without specialized equipment.
- Wear resistance - they are resistant to mechanical damage, temperature changes, heat and even severe frost up to 40 degrees. Do not deteriorate from exposure to moisture or dampness. Resists fungi and mold. Their service life, subject to proper step-by-step installation, is up to 60 years.
- Environmentally friendly - the polymer material or polypropylene resin from which the façade panels are made does not harm the environment and is safe for people living in the house and pets.
- Decorative. They provide the facade with a beautiful appearance. They are produced in various options and colors, imitating natural materials such as stone, granite, brick and others.
- Economical. The cost of facade panels is much lower than the cost of natural materials, porcelain stoneware or artificial stone.
- Wide range of applications. The panels can be installed on any type of building: industrial, administrative and residential. They can be installed only on the ground floor or on the entire facade, at the last stage of construction of a new house or for cladding an old building. They are also used for finishing columns, fences and other structures.
Facade panels can also be mounted on a wooden frame
