Garden gazebos are a wonderful element of small architecture, especially if they are made of wood. Small architecture can be a decorative element, as well as a place of relaxation for the whole family. If there is enough space in the garden, then wooden garden gazebos made of timber are the ideal choice. You can buy a garden gazebo ready-made or designed according to your own idea. Decide for yourself which solution will be the best.
What to use for work
To build a gazebo from timber, ready-made elements are used. Each one is suitable for the job; none of them have any problems with strength. But in terms of ease of assembly and price, they differ very much. Select material:
- Planed. The simplest option, the cheapest, consists of profiled elements with a treated surface. It is better to use for open structures, as well as for frames, since it is inconvenient to connect such parts, and the appearance of the finished structure is not very good. There are many options, there are sections from 50 by 50 to 300 by 300, or even more.
- Profiled. The end parts are made using a tongue-and-groove system, so when connected, a strong joint is obtained, and the parts are perfectly aligned with each other. This option is used in the construction of houses and baths; it provides good thermal insulation and is well suited for a closed structure. They come in a variety of shapes and often have rounded corners to make them attractive.
- Glued. Made from parts that have undergone heat treatment and pressed under high pressure. Most often they sell ready-made kits that are assembled like a construction set, which is convenient for inexperienced craftsmen.
Most often the following breeds are used for production:
- Pine, spruce. They are inexpensive and inferior in strength to other options. To ensure durability, as well as to prevent the appearance of cracks and mold, it is better to treat surfaces once every 2-3 years. Pay more attention to the outside, which is more strongly affected by precipitation.
- Larch. Wood hardly deteriorates from water even without treatment; it is often used for terraces and other outdoor structures. It costs much more than pine, but lasts longer. Treatment is also necessary to preserve the attractiveness of the tree. It is better to purchase a ready-made kit so as not to process and make the joints yourself.
- Cedar. It is very strong and durable, releases beneficial substances, and being inside such a gazebo is good for health. It costs more than all the options. It is more difficult to process; cedar is harder than pine and larch.
Strengths and weaknesses of profiled timber
Dry profiled timber is characterized by a high degree of wear resistance. It withstands adverse weather conditions, temperature changes, strong winds and high levels of humidity.
When using such timber, it is possible to ensure that there are no gaps in the structures being built. This feature has a beneficial effect on the durability of the structure, since the risk of wood rotting and excessive moisture getting inside the structure is reduced. Profiled timber has a low level of thermal conductivity. Such a building will be warm even in cold weather. This is especially valuable when constructing closed gazebos made of timber.
Profiled material is characterized by its ability to evenly distribute mass and exert minimal pressure on the foundation. Therefore, for a gazebo made of such material, it is enough to equip a strip or column base.
A gazebo made of profiled timber has an unrivaled appearance. The walls of the building will be perfectly flat and smooth, eliminating the need for additional finishing.
Note! To create a reliable and durable building, the profiled timber must be well dried, otherwise such a gazebo will soon “lead”.
Profiled timber has a low level of thermal conductivity.
The disadvantages of the material include natural flammability, which is eliminated with special impregnations. After some time, a gazebo made of profiled timber may darken as a result of the negative effects of precipitation and the sun. When purchasing poorly dried timber (without using a special chamber), there is a need for constant processing of the material with special compounds.
Assembling a gazebo from timber
The entire process of assembling the gazebo takes place in several stages
Installation of the bottom trim
The strapping is the basis of the entire wooden structure. It consists of beams laid and secured to each other in the form of a future gazebo. Waterproofing is first laid on the foundation and the wood is secured with anchor bolts. Naturally, the first crown, like all other elements, is set strictly according to level. The type of joint of corners can be any; more often they use the option of a half-tree joint or a “claw” joint.
Installation of pillars
The posts are installed inside the corner of the frame or on top of the corner. The timber is attached to the bottom frame with angles or bolts. Additional fastening to the harness is possible using spacers installed at an angle of 45° on both sides of the rack.
Installation of cross bars
Jumpers are installed to increase the rigidity of the structure at a height of 80 to 110 cm from the floor, as well as to create a fence, of which there are many options.
Installation of the top trim
The bars of the upper assembly are tied together with corners, and attached to the racks from above or from the side. Sometimes there are designs with double piping (both the first and second methods of arrangement at the same time).
Installation of roof frame and decking material
The shape of the roof often depends on the configuration of the building, it can be:
- Single-pitch.
- Gable.
- Four-slope.
- Shatrovoy.
- Other options (hex-pitched and figured roofs in one or several tiers).
Another question: how to cover the roof of the gazebo. If you plan to place a stove or barbecue inside, then it must be a fire-resistant material; however, it is not recommended to use metal tiles or corrugated sheets, because in hot weather the roof will heat up, and in rain there will be a lot of noise. The best option is a flexible and lightweight soft roof; bitumen slate is in second place in popularity. Budget gazebos are covered with corrugated sheets or roofing felt.
Regardless of the chosen roofing material and roof shape, several rules must be followed:
- The installed rafters must have a slope and extend beyond the top frame by at least 50 cm.
- The sheathing pitch must correspond to the selected material.
- The roofing material can be attached directly to the rafters or to pre-laid sheets of moisture-resistant plywood attached to the frame with self-tapping screws.
- Roof waterproofing is an important stage of construction.
Gazebo floor
There are three fundamentally different options here:
- Concrete floor with or without coating.
- Wooden flooring.
- Paving slabs.
Concrete floor
Concrete floors are reliable, practical and durable. The screed is usually poured inside a strip foundation or made in the form of a screed on the ground. This basis provides the possibility of further coverage:
- Ceramic tiles.
- Clinker.
- Porcelain tiles.
- Artificial grass and other synthetic materials.
Wooden floors
They always make the room more cozy and colorful; they are great for a gazebo made of timber. There are several types of wooden flooring, all of them are laid on wooden sheathing:
- Regular board.
- Terrace (deck) board.
- DPK.
- Garden parquet.
Paving slabs
This option is usually chosen when the gazebo floor is part of a tiled yard. It should be taken into account that in winter the tiles become quite slippery, and if laid incorrectly, they end up with an uneven fit. Paving slabs should be laid strictly according to technology on a compacted bed of sand and crushed stone.
On a note! Upon completion of installation work, to improve the appearance and protection, the lumber is treated with moisture-repellent agents with fire and bioprotection, wood oil or paint.
Without a doubt, a gazebo made of timber on a site is an excellent option, but it is worth considering that its construction is quite a troublesome and time-consuming task, which, in addition to enthusiasm, will require competent preparation, certain knowledge and skills.
2cc89b76aa8c19652cb5accca2084943.jpeHow to build a gazebo: construction methods
The next stage is the installation of vertical posts made of timber with a cross-section of 100x100 mm at the corners of the future building, which will connect the lower frame and the roof of the building. They are attached to the lower crown using metal corners and screws.
There are several methods for constructing the walls of a gazebo from timber. The most popular technology is considered to be the method of cutting a log into a bowl, which is borrowed from the technique of laying logs. The beams are mounted on top of each other, as shown in the drawing of a wooden gazebo. From the end of each profiled element, which falls on the corner of the building, a notch is cut at a distance of 20-25 cm. The depth of the cut should correspond to half the thickness of the bottom edge. The width of the notch coincides with the thickness of the timber. Each subsequent row is laid transversely in cups on the previous spans.
Another option for constructing walls involves horizontal laying of beams without cutting. Horizontal elements are installed perpendicular to the vertical supports, which are fixed using tightening fasteners.
You can limit yourself to only vertical supporting elements without tie bars, which will give the gazebo an airy feel. Intermediate elements are added to the corner elements, which can be vertical or crossed. Mesh walls, which are formed crosswise and secured with thin slats, are very popular. Different options can be seen in the photos of timber gazebo projects. Prices and labor intensity of installation are determined by the selected material and the level of complexity of the work.
The most popular technology for building a gazebo is the method of cutting a log into a bowl.
Note! The strongest wall should be built at the location where the stove or bench is installed.
Choosing the type of gazebo - fresh air or comfort?
Gazebos made of timber for a summer residence are a broad concept. Here you can fit very light arched structures over a couple of benches, and houses closed from all winds, in which you can not only relax, but also live with all the amenities. On the Internet you will find hundreds of photos with different designs.
Construction of a gazebo for a summer residence
To simplify the choice, we will divide all summer cottage structures into three types:
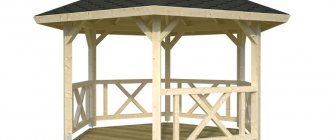
- Open – small architectural forms with a simplified design. Support posts, a roof and a low perimeter fence are characteristic features of open gazebos. It’s good to spend time under such a canopy in the summer, but in other seasons the holiday can be ruined by cold winds, precipitation or insects. Most often, open-type gazebos are constructed from metal or lumber. It is completely impractical to use timber for such a simple design - you will get a minimum of comfort by spending a decent amount of money.
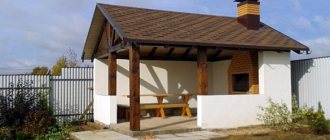
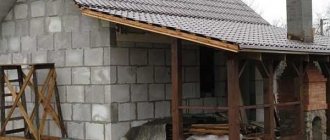
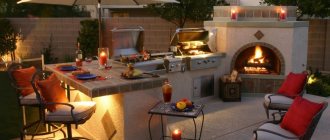
- Semi-open - gazebos for summer cottages that have one or two solid walls. Often these are structures with a grill or barbecue, kitchen counters and a minimum of necessary plumbing. Solid walls shelter vacationers from gusts of wind and precipitation, but at the same time they still have access to fresh air and a view of the landscape. This type is quite convenient and practical; it can be used all year round, with the exception of severe winter frosts. Often a gazebo is attached to an existing wall, as in the photo. Logs, stone or brick are used for construction.
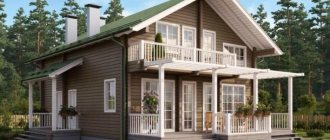
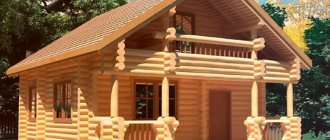
- Closed ones are the most comfortable gazebos in which you will feel cozy all year round. Such cottages are distinguished by large panoramic windows and the presence of a fireplace or barbecue. The use of timber for the construction of closed gazebos seems to be the most reasonable - the structure will be warm and cozy, filled with the aromas of wood. Its construction will not take much time, which cannot be said about building from bricks or stone. In addition, timber gazebos can be built on a columnar foundation.
An enclosed structure with panoramic windows.
The choice of a gazebo is also influenced by the size of the area that you are willing to allocate for the building. If there is enough space, then you can build a large closed gazebo, which can easily accommodate a large company. If the area near the dacha is limited and building a large gazebo is problematic, then it is better to make an open or semi-open option, as in the photo - this design will avoid the feeling of cramping with a large number of guests, and in good weather the table and chairs can be moved outside the gazebo.
Roof
The gazebo needs to be covered thoroughly. The structure is strong and requires a roof as reliable as the frame itself. This approach provides both load balance and aesthetic combination.
The rectangular frame of the gazebo can have a roof with a different number of slopes, while a hexagonal building can have only 6. The elements of the rafter structure are the same as those of any roof of a private house.
The choice of roofing is influenced by the reliability of the timber frame, financial base and personal taste. The stronger the gazebo, the heavier the covering can be. For the combination, it is possible to use the same roofing material as that of the main residential building on the site.
Do-it-yourself wooden gazebos: photos, drawings, diagrams
Here is a small gallery of wooden gazebos made by yourself. Of course, you can collect more photos, because there are millions of options. Each gazebo, made not according to a template, but with your own hands, even according to standard drawings, is still a work of art. Here you can find relatively simple designs that can be done by anyone with little experience. There are, of course, examples of industrial products that may be useful.
56d20ddab83d4edd915d6590eb5a42c5.jpe 097c60a2011365f063e69cfd20eb80d7.jpe 6a8eb579ac78750e6efab7587503f5a4.jpe
Another gazebo option: step-by-step adjustment instructions
The construction of the gazebo consists of two parts. The first stage is preparatory actions, and the second is the actual construction work. Each of these actions is considered an important and integral part of the work in the construction of a gazebo from boards.
Preparatory robots
Preparation involves completing the following steps:
- selection of boards;
- preparation of materials and tools;
- drawing up drawings and marking the territory.
Board selection
The technical characteristics of the finished gazebo largely depend on the material itself. Boards can be selected from different types of trees, but resinous species, such as larch or spruce, are considered the best option. This choice is due to the fact that this wood, due to its composition, is able to repel moisture and also prevent the process of rotting.
Did you know? Architect Minnie Evans installed an original gazebo in a Wilmington park. Thousands of bottles form unusual ornaments and artistic compositions on this element of landscape design.
When choosing boards, you need to pay attention to their texture. You should understand which design they will fit best into.
A gazebo in a natural rustic style looks great from unedged boards. For a more sophisticated structure, it is better to choose the tongue-and-groove option.
The size of the boards also varies. To build a gazebo, you can use this material with different parameters or use the same size.
As a standard, craftsmen choose 50×150 mm boards for the entire structure, but you can also take the raw materials in question 50×100 mm and 25×100 mm.
Many experts are inclined to believe that this material should have different sizes to build one gazebo. For example, for floor joists, rafters and trim, boards of 50x150 mm are taken, for roof sheathing - 25x100 mm, and the best option for the floor is 50x100 mm.
Required Tools
Before starting work, you should prepare the necessary equipment, materials and other devices necessary to create a gazebo.
To perform construction work, the foreman will need:
- Devices for marking the territory: level, tape measure, pencil or marker, cord.
- Wood saw.
- Antiseptics, fire retardants and the necessary equipment for their application.
- Fasteners: nails, angles, self-tapping screws.
- Screwdriver.
- Material for waterproofing.
- Hammer.
- Wood putty.
- Electric drill with drills.
- Varnish or paint.
Preparing boards and other materials
To construct the landscape design element under consideration, it is recommended to choose the following tree varieties: spruce, cedar, larch, pine, and birch. If the material is wet, it must be dried. The wood should also be treated with special preparations designed to protect the building from mold, parasites and rot.
7f1b6960cc0925d121d9c54c350ce1ae.jpe
b24a7e553e1299b16b3c8cbd0394d60e.jpe 1a287bef4749e4cf0d95fda791edde2a.jpeImportant! To level the area, it is recommended to remove the top turf layer of soil 10–15 cm thick.
The main materials are timber 150×150 mm, boards 50×150 mm and bitumen shingles. To build a foundation, it is also necessary to prepare concrete, consisting of cement, crushed stone, sand and water.
Drawing and site marking
Drawing up a project of the required structure is necessary in order to have an idea of the appearance of the gazebo, as well as to understand how much material needs to be prepared
The drawing will help the master pay attention to all the nuances even before the work begins. The project should contain several schematic images illustrating the appearance of the gazebo from all sides, as well as the dimensions of the elements of the future structure.
The next step in the preparatory work is the arrangement of the site and its marking. The selected area must be cleared of debris, stones, and plant roots. Marking is carried out using stakes and cord.
To determine the locations intended for corner pillars, it is necessary to perform precise markings, as a result of which the diagonals of the quadrangular figure must be identical and the corners perpendicular.
Flooring
The floor in the gazebo must be protected from precipitation, rotting, frost-resistant, and resistant to mechanical damage. In the same time:
- look aesthetically pleasing;
- be safe;
- cause pleasant tactile sensations from touch.
Stone is a cold, heavy material, wood requires periodic, painstaking care, and expensive composite decking boards are extremely fragile in the cold and are often made from low-quality polymers.
Note!
Often, wooden gazebos use floorboards made of pine, spruce or larch.
Floorboard sizes vary from manufacturer to manufacturer, the most common are:
- length from 3 to 6 m;
- width 8-13.5 cm;
- thickness 28-40 mm.
Wooden floorboards can be tongue-and-groove, edged or decked:
- A tongue-and-groove board means that it has a special “tongue and groove” fastening at the ends. By joining the ends along the entire length and forming a reliable lock, the connection is tight and without cracks.
- Deck or deck board is a wooden flooring with a variety of surface shapes that can be smooth or grooved.
- The difference between an edged board and a regular one is the absence of a wane (part of the side surface of the log that remains after sawing it). In other words, edged board is an ordinary unplaned board from a sawmill.
May be interesting Frame shed - an excellent do-it-yourself household building Do-it-yourself fish pond: tips for arranging a reservoir How to design and build an extension to your house with your own hands
There are four ways to attach tongue and groove floorboards:
- on nails, followed by filling the heads with textured wood putty;
- fastening with self-tapping screws into the groove of the board;
- fastening with clamps (fastening brackets intended for hidden installation);
- use of nails with decorative heads.
There are two ways to attach larch deck or terrace boards:
- using special hidden fasteners;
- using special self-tapping screws for stainless steel terraces.
After installing the boards, antiseptic treatment of the wood is carried out. If necessary, grind the surface and then coat it with varnish or paint.
Gazebo made of timber and slats
To build an open frame-type wooden gazebo you will need:
- timber with a section of 80x80 mm;
- slats 20x40 mm;
- plumb line;
- screws and nails;
- hammer;
- screwdriver;
- antiseptic primer.
When installing the floor of the gazebo, the lower beam frame was already laid. Now it is necessary to install vertical supports and sheathe the walls of the building. For vertical supports, dry, even timber 80x80 mm is used. First, the corner posts are mounted, secured with temporary spacers and aligned strictly vertically. The racks are nailed to the bottom trim or secured with metal plates and bolts. Intermediate ones are installed between the corner supports, at a distance of 1-1.25 m from each other.
When all the vertical supports are mounted, they should be secured with the top trim. The same 80x80 mm timber is used as the strapping; it is laid on top of the corner posts, leveled horizontally and nailed down. All elements of the top trim must be in the same horizontal plane. At the end of the installation, the temporary spacers are removed and the walls are sheathed with slats.
Fastening roofing material
Each roofing material has its own installation characteristics. Installation of roofing shingles involves the use of:
- copper or galvanized nails;
- copper drainage products and sheets.
Copper matches the color of the roofing shingles. Reed involves attaching sheaves to a solid base made of waterproof plywood, sheets:
- chipboard;
- Fiberboard.
DIY rectangular gazebo
Building a rectangular gazebo with your own hands is not that difficult, and it will certainly add beauty to your space, but it is a little more complicated than a square-shaped structure. Always plan to shape everything at the very beginning if you want to get a good result. Plus, proper planning can prevent many costly mistakes.
Select materials with great care, making sure all parts are straight and in good condition. Building a rectangular gazebo is a little different than building a square one, but anyone with average carpentry skills can easily handle the task.
We will not describe the process in detail, all steps are shown in the diagrams, more detailed information can be obtained on the website, link under the photo with drawings.
The second part shows how to make a roof for a rectangular gazebo. Building a roof for a rectangular gazebo is a difficult task as it involves many cuts and measurements. In addition, you will definitely need an assistant. To ensure everything turns out beautifully and reliably, follow building codes and select high-quality materials. It is also necessary to use weather-resistant lumber that is of good quality and free from defects. The sequence of work is shown in the pictures in the gallery; details of the construction stages can be read on the source’s website.
Another option is how to make a rectangular gazebo with your own hands. If you have the financial means, then of course it is better to buy high-quality wood, such as cedar, pine or mahogany. Also make sure that the material used is suitable for the climate conditions. According to this project, if all the materials are available, the gazebo can be built in one day.
How to build a gable roof for a rectangular gazebo
The first stage is the manufacture and installation of the top ridge and rafters. As you can see in the picture, you need to cut the ends of the rafters to the required size and secure them to the upper crossbars with screws. Make sure the top ridge is horizontal, otherwise the roof will not be symmetrical. The next stage is the installation of rafters on both sides of the roof. You must place the beams in the center. Trim the rafters to the required size (45°) and shape and install them in place. Drill holes and secure them with galvanized screws. Attach the rafters to the front and back edges of the rectangular gazebo. Install the side rafters. Secure the roofing sheets. In order to protect the gazebo from precipitation, it is recommended to cover the roofing sheets with roofing felt.
Attach the slats to the rafters, it is very important to cut the ends of the slats at a 45º angle if you want the roof to look nice
How to assemble a gazebo
The most convenient way is to create step-by-step instructions for yourself and follow them step by step. Then it is impossible to confuse anything or make a mistake. In this review we will look at how to assemble a gazebo from 100x100 timber with your own hands, but the work is the same for all options. There are several stages, if you look at each one separately, then everything is simple and clear.
Prepare a project
It’s better not to just take pictures or photos; it’s impossible to evaluate all the design features from them. It is worth preparing a full-fledged drawing or sketch; there is no need to create an ideal project; a diagram with detailed dimensions of all parts will suffice. If you buy a ready-made kit, there will be drawings with parameters; all you have to do is study them carefully. If you draw on your own, remember the following:
- Determine the type of structure. The open one is used in the summer for outdoor recreation. Semi-open is used if it is necessary to limit the view from the road and neighboring areas. It is possible to relax indoors both in summer and in the off-season, or even in winter, if you install a stove or special heaters inside.
- Choose a place on the site. Find the area on which to build the structure. There are several important points to consider. Firstly, ensure convenient access, secondly, select dimensions that will ensure comfort, thirdly, take into account the parameters of the lumber. Usually they come in lengths of 3, 4.5 and 6 meters, so that there is no waste, it is better to choose a project with these dimensions.
- Prepare a drawing indicating all important points. In addition to the type of construction, as well as dimensions, take into account the height, think about what to make the roof from, and what kind of floor to lay. If there are additions, such as a hearth or stove, create a safe area, protect the wood with trim, or lay out a portion of brick.
- Make a foundation project separately. Pay attention to the places under the support pillars if the structure is columnar or made of concrete foundation blocks. Consider the depth of the bookmark. If you build a hearth, then make a separate base for it, not connected to the base of the gazebo.
When purchasing a ready-made gazebo, you still need to assess the location on the site, take measurements and determine the appropriate parameters. If you do not measure the space, it may turn out that the purchased gazebo will clutter the space, make it difficult to pass through, or shade the beds.
Manufacturers can make a gazebo project from timber according to the buyer’s request. Drawings and dimensions are individual, made in one copy, this option is 30% or more more expensive.
Prepare the site and make the foundation
When choosing a site for construction, take into account the type of soil, the depth of groundwater, and the height of the site. It is better to place the gazebo on a hill so that the base is not flooded by water in the spring. Leave a passage for the car, if necessary, think about how to lay a path to the gazebo. Carry out the work like this:
- Measure the area and figure out where it is best to place the structure. Remember about the indentations - you cannot place them closer than 1 meter to the fence of the site. It is better not to place it near other buildings or under a large tree, since moss will form on the roof there from constant shading and dampness.
- Place pegs in the corners of the future building. Drive in pegs for guidance and stretch construction cord or simple twine between them. Check the diagonals to make sure the markings are straight. If the sides are long, add pegs in the middle to keep the cord tight.
- Dig a trench or holes for the foundation. Dig a trench to a depth of 20 to 40 cm, taking into account the type of soil, as well as the weight of the structure. Dig holes under the posts in the place where the vertical supports will be located. For reliability, add several supports in the middle; then it is convenient to lay floor joists on them.
- Place the formwork, it should be no less than 20 cm above ground level. If blocks are placed, then display the appropriate height. Stones or broken bricks can be poured into the foundation as filler to save concrete. On soft soils, it is better to install a reinforcement cage to prevent the base from cracking.
- Leave the concrete to gain strength. Allow at least 2 weeks before starting the next part of the work. It is better to cover the surface with film so that the water does not evaporate and the material dries evenly.
Important!
If you prepare a solution from 1 part cement, 3 parts gravel and 3 parts crushed stone, then you do not need filler in the pits.
When pouring, be sure to pull the cord horizontally for guidance. Otherwise, you will then have to add some supports, and some, on the contrary, will have to be cut off in order to place the structure on a level base.
Secure the bottom trim and joists
Make the base from a strong beam, it will support the weight of the entire gazebo. Typically, elements with a cross-section of 150x150 mm are used, and the same material is chosen as for the rest of the structure. They can be pre-treated with bitumen or mastic on the bottom and inside to protect them from dampness. Carry out the work like this:
- Make cuts along the edges of the beam to half the depth along the width of the elements. That is, cut the upper part in one part, and the lower part in the second, to connect tightly at the junction. Try it on and, if necessary, modify the joints. Be sure to measure diagonally to make sure the harness lies evenly.
- Fasten the parts with self-tapping screws or special screws, they are called wood grouse. Drill a hole 2-3 mm smaller than the diameter of the fastener and tighten the joint in 2-3 places. Add perforated corners on the inside for additional rigidity, screw them in with thin self-tapping screws.
- Prepare floor joists. Use a beam with a cross-section of 150x50 mm, measure the length and cut pieces of the required size. Place no further than 80 cm from each other. Make an indent of no more than 30 cm from the edges. They must be laid perpendicular to the location of the floor board.
- Secure the joists. They use different installation options: either regular nails, which need to be driven in diagonally, or self-tapping screws, which also need to be screwed in at an angle. But it’s easier to buy steel beam supports or use corners, they are much more convenient and stronger. When laying, control the plane; the easiest way is to pull the cord in 2-3 places.
Do not forget to treat all lower parts with an antiseptic. The easiest way is to apply it with a brush in 2-3 layers. But it’s best to make a hole in the ground, cover it with oilcloth, pour antiseptic into it and dip the timber. The composition will be absorbed much deeper, so it will protect the tree for decades.
Assemble walls or install supports
If the gazebo is closed or semi-open, then build the lower part according to the instructions. Select elements according to their markings and place them one on top of the other. An open structure needs to be assembled differently: install vertical posts, then fasten them. Features of the work:
- When assembling walls from timber, study the instructions, find the parts with the indicated markings, and arrange them so that you can quickly find what you need. Lay out in order, align the ends, fasten from bottom to top. In a closed gazebo, be sure to seal the joints with tow or special tape.
- When installing racks, install one element at a time. Work together to simultaneously check the vertical with a level and fix it in the desired position. Use steel angles on both sides. Secure the supports with braces and remove them after installing the top trim.
- Carry out work on days without rain. There should be no water in the joints, otherwise the material will begin to rot in a couple of years. If it starts to rain after assembly, it is advisable to cover the frame, if this can be done.
- Use self-tapping screws for fastening; they are stronger than nails; the connections will not loosen over time. For installation, it is better to pre-drill holes, especially if the fasteners are long.
When assembling walls from simple timber yourself, it is important to cut even pieces. The most convenient way is to make a pattern from a lath, then measure with it. When installing vertical posts, it is advisable to measure the diagonals; if there is a difference, it is easier to correct the inaccuracy at this stage.
Install the top trim
Make the base for the roofing system separately, do not place it on the top beam of the wall. When assembling the open version, use a beam of the same cross-section as for the lower trim. Prepare it in the same way - cut the ends in half to connect the parts at the corners. The step-by-step process looks like this:
- Carefully place all four elements on the structure. Check the diagonals with a tape measure, correct the position if there is a run-up. Make sure that the beam lies well; if somewhere the surface is uneven, correct it so that the parts fit snugly against each other.
- Drill holes from top to bottom for cap screws. Choose a length so that the fastener enters the base no less than 10 cm. Choose a recess at the top so that the screw head does not protrude beyond the surface. Tighten carefully so as not to turn the fastener into the wood at the end.
- Add 1-2 corners at each corner to strengthen the structure. Screw them in with self-tapping screws no less than 5 cm long.
Important!
You can get by with just the corners. But in this case, you need to choose elements with a width of at least 100 mm and a thickness of 2 mm or more.
Build a roof structure
Make the roof slope at least 30 degrees. Then the water will drain well, and the snow will not linger and create a load in winter. Choose a design that is easy to assemble, especially if the master is a beginner and has little experience in the work. Remember the following:
- It is easier to connect spans on the ground. Make one element first, make sure it fits properly, then prepare the rest. If the roof is hipped, then you need to assemble it locally and prepare the parts below according to size.
- Secure the rafter structure with angles and steel plates. Set it exactly, level it, then fix it. Make sure that the part does not move during installation.
- Lay a sheathing of boards or slats with a thickness of at least 25 mm. Make a small distance between the parts so that the flooring is rigid. Use self-tapping screws for installation.
- Cut and secure moisture-resistant plywood or OSB board if soft roofing will be installed. When installing, leave a 2-3 mm gap between the sheets so that they can expand during temperature changes.
- Lay roofing material. It is most convenient to use bituminous shingles, lay them from bottom to top according to the instructions on the package. Cover the skates with special elements.
It is better to lay the roof on a warm, clear day. Choose fasteners recommended by the roofing material manufacturer. It is advisable to install a drainage system so that when it rains, water does not flood the entrance and prevent you from entering inside.
Gazebo-pavilion for a summer residence
This, of course, is not the easiest project, but a gazebo pavilion for a summer house is an ideal place for a summer dining room. You can always change the size and design of the pavilion to suit your needs and budget, but it is better to use the instructions and tips provided on the diagrams. A gable roof will improve the appearance of the structure, but it will require large investments and a lot of materials. If you want to build a simple pavilion for an enjoyable meal with family and friends, there are several options you can choose from. On the one hand, you can build a gazebo or a simpler structure, like this wooden pavilion. It is possible to do it yourself, but you must plan every step of construction from the very beginning. It is recommended to buy the best materials you can afford. They should be weather-resistant, such as pressure-treated wood, pine or cedar. Carefully take accurate measurements before adjusting sizes. Pre-drill holes in the pieces before inserting screws to prevent the wood from splitting. All stages of construction are shown in step-by-step diagrams, detailed instructions are on the website.
Finishing the gazebo
The final stage is covering the outside of the gazebo, as well as painting it. In some cases, it is preferable to do the latter first, so as not to stain the finishing materials.
If the structure is supposed to be open, then only the lower part is sheathed. For this you can use, for example, clapboard or boards. Some people like OSB, but this material must be painted or varnished. Otherwise, OSB boards can quickly turn black from water and lose their appearance.
We decided to make a completely enclosed gazebo, it turned out something like a summer kitchen. Board was used for cladding
Want to do something more unusual? Look how beautiful a gazebo with a hipped roof looks. It's a little more difficult to build, but it's worth it!
DIY outdoor gazebo
Here we show you how to build an outdoor gazebo with your own hands from wood. The design, as you can see, is solid. The main building material will be wooden beams, the volume and quantity will depend on the size of the structure, the author does not provide numbers, so you will have to select it yourself. The second necessary material is metal rods of two types: T-shaped and L-shaped. You will also need screws, very large screws, twice the thickness of the beams. Don't forget about a ladder, preferably a strong one, it is the main tool in this project. Concrete is another necessary material for building your gazebo, it will be used as the base and anchor for the entire structure. Once you make the drawing, you will be able to see what dimensions are needed for all the wooden parts. If you have the tools, you can cut all the components yourself. This is the cheapest option. If you don't have the skills or tools, you need to find someone who will do it...
The first step is to build the foundation.
- Prepare the area and pour the required size slab. If you want more strength, add metal reinforcement to the concrete.
- Next, install the wood beams and metal supports into the concrete at a 90-degree angle.
- If there are gaps between the metal and wood portions of the supports, use tar and silicone to fill them and create a watertight seal.
- Repeat this step for all supports. Typically four posts are installed, but if you choose a different design, more posts may be required.
- Next step, install the wooden slats onto the supports, remember to measure all sides and make sure they are equal. Then secure them in place with screws.
- The next step is to attach the side rails to the ones you installed on the posts.
- Then you need to make a triangular structure that will support the roof. The triangular shape of this part of the design is designed to distribute weight down towards the supports, which will be especially useful if you live in an area with high levels of precipitation, especially snow.
- Use metal rods to securely hold the diagonal pieces in place. Run a metal rod through the two pieces of wood to make sure they are held firmly in place.
- Now install the top crossbar where the roof will be attached. This may require the use of rope or additional help to hold the pieces together.
- Now it's time to install the roof supports to help support the weight. Place supports approximately every 55 cm. Secure the supports with screws.
- Cover the roof with sheets of plywood, this layer must withstand a lot of weight, it must be secured very securely.
- After this, attach the waterproof layer. There are different types of roofs, you can choose which one you prefer, but laminated tiles are a popular and effective choice.
Material selection
The reliability of any design directly depends on the quality of the material used. You can find several types of timber on sale, all of them are suitable for building a gazebo, but each has its own characteristics. For the most part, timber means pine. It is quite durable, easy to process, can withstand significant loads and has a beautiful texture.
Profiled timber
A special feature of profiled timber is the presence of cuts and grooves on two opposite sides. The shape and number of grooves may vary, but in any case they should ensure ease of installation and reliable fixation. The material features:
- simple installation;
- no cracks;
- strength of the finished structure;
- uniform distribution of mass and minimum pressure on the foundation.
A gazebo made of profiled timber is the best choice for a novice builder. Thanks to the grooves, construction of any level of complexity will not be an impossible task.
Note to the master! There are machines that allow you to profile timber at home. This is a good help for the home craftsman, but such a device is expensive and will definitely not pay for itself on the construction of one gazebo.
The material also has disadvantages, but they arise solely from the characteristics of wood. It is flammable and requires protection from weather conditions and rodents. Nowadays, all this can be easily solved with the help of special impregnations.
Glued
It is irrational to make timber from a solid tree trunk, which is why you can often find laminated veneer lumber on sale. This is the same timber, but it is glued together from several boards. The presence of glues does not affect the appearance, and in terms of strength characteristics, laminated veneer lumber is not only not inferior, but even superior to its solid counterpart. Material:
- allows bending;
- has an attractive appearance;
- Rodents and insects like it less.
It is worth noting the ease of working with the material and the minimum time required for its cutting and processing. You can assemble a gazebo made of laminated veneer lumber with a barbecue in just a few days.
Rounded
A rounded log is a timber or round timber that is given the shape of a regular cylinder. This is one of the most common materials for the construction of small gazebos and full-fledged residential buildings. Its advantages:
- attractive appearance of the building;
- abundance of design options;
- durability and reliability of the structure.
Among the disadvantages, one cannot fail to mention the obviously large mass of the assembled structure, caused by the large cross-section of the material. A reliable foundation is required for the gazebo.
Mini beam
Another popular material for constructing gazebos and more is mini-timber. This is an edged board with a thickness of 45 and a width of 145 mm. As a rule, boards with tongue-and-groove elements on the side surfaces go on sale.
The use of the material provides:
- ease of assembly;
- small mass of the finished structure;
- durability due to reliable locking connections;
- aesthetic appearance.
Mini-beams have obviously lower strength; to build a full-fledged gazebo, a supporting frame of beams with a cross-section of 100 x 100 or 100 x 150 mm may be required.
DIY wall gazebo
No matter how small a free-standing gazebo is, it still takes up enough space. The ideal option for a small yard is to make a wall-mounted gazebo with your own hands. Indeed, there are many advantages to this option. Firstly, savings, because less materials are needed. Secondly, compactness, because the space needed is half as much as for a free-standing gazebo. Thirdly, it is very convenient, you don’t have to go far, that is, it serves as a veranda and, most importantly, such a gazebo can serve for different purposes, for example, you can put a workbench, here’s an outdoor workshop for you. Sleep on a stuffy night, organize a summer dining room. Moreover, building a wall-mounted gazebo is even easier than a regular one. Here are step-by-step diagrams showing how to do this, and you can read step-by-step instructions on the website.
How to make a gazebo with your own hands (drawings)
In this section we will analyze the simplest version of a gazebo - a rectangular one with a pitched roof.
Drawing
Before starting construction, it is necessary to draw, if not a drawing, then at least an approximate diagram of the future gazebo. Based on this diagram, you can prepare all the necessary material in the required quantity. It will also become clear to you which tool to use.
This is just an approximate diagram that you can use as a guide. The dimensions depend, first of all, on the size of the site on which it will be built. The functionality of the gazebo also plays an important role: is it just a place to relax, or is it a place for barbecue.
Another assembly diagram:
First stage
First you need to choose a location for the future gazebo. It is desirable that this be a corner of the site. In other places, the gazebo may simply get in the way. Also, when choosing a location, you should pay attention to the lighting. If the gazebo is in the shade, it can be cold in cool weather.
The area of the gazebo, height and shape - it all depends on the needs of the owner. If you plan to use the place for large and noisy gatherings in a company, you should take care of sufficient area to accommodate a table and benches. Appearance is a purely individual decision. There are practically no restrictions in this matter, except for financial and area restrictions.
The last aspect when choosing a location is the landscape. Be sure to select an area without bumps and with relatively flat soil in order to avoid additional work.
Other DIY wooden gazebo options
On the site we often write about the construction of a wooden gazebo, as it is very popular. We try to use structures of different sizes and shapes in our articles. I would like to give you several links where you will find other options for building wooden gazebos in the same way as the construction described above was done.
Dimensions of the proposed building
How to make a gazebo with your own hands: photos, videos, projects - the construction process from Vasily Popikov is shown. This is one of the most popular videos on the Russian Internet on this topic.
As we publish articles, we will add even more links here so that you are not limited to just a few options for wooden gazebos.
If you have any examples of your own, where the construction of such gazebos is shown in a high-quality and interesting way, leave your comment, we will definitely consider it and comment on it.
Dimensions of timber for the construction of garden gazebos
The beam is a beam of square cross-section, where there may be grooves on the edges. Wooden products have the same shape and size, making the process of constructing any structure easy, simple and convenient. Such a structure, made of high-quality material, will delight its owners for many years.
The timber is made from coniferous wood. It can be spruce, pine, fir or larch. Pine is most often used, since the tree has a smooth surface without knots, is easy to process, can withstand significant loads and is characterized by a beautiful texture. Wooden blocks have an affordable cost, which is much lower than that of other types of similar material.
The most popular and cheapest option is a gazebo made of 100x100 mm timber. The material has good load-bearing capacity, thanks to which the structure can support a massive roof. A self-made gazebo made from 100x100 mm timber will be distinguished by its strength, reliability and durability.
The material can be used both for the construction of garden buildings with simple shapes and for creating more complex configurations. The latter option involves a more labor-intensive process, which is associated with the dimensions of the material. The cost of m3 of wood (there will be 16 elements of 6 m each) is about 10 thousand rubles.
The most popular and cheapest option is a gazebo made of 100x100 mm timber.
The maximum level of strength and reliability will be higher for a gazebo made of 150x150 mm timber. The material looks more massive and solid. The structure created from it has a presentable and stylish appearance. 1 m3 of forest contains 7 pieces of timber, 6 m each. You can buy it for an average of 15-18 thousand rubles. This is quite enough to build a gazebo with your own hands from 150x150 mm timber with dimensions of 3x3 m.
On a note! To reduce the cost of constructing a garden gazebo, you can use timber measuring 150x50 mm to construct the floor joists, rafter system and top crown.
Design
To decorate wooden buildings in the country, use elements that match the style:
- grilles made of wooden slats installed instead of glazing;
- carved details;
- elements imitating an aged surface;
- thin curtains for draping open openings.
Particularly attractive are buildings with ceiling chandeliers located in the center of the room. They are usually placed above the dining area. Summer houses are often decorated with hanging and wall sconces. Lamps that imitate antique wood or metal are very good. In a small summer building, large decor and pompous details are inappropriate. They take up too much space and overload the space.
Usually, in summer country buildings, a barbecue area or barbecue is installed. The choice is made in favor of simple models made of ferrous metal or brick stoves. They combine well with wooden furniture. When decorating a summer house, the space is not overloaded with decorative details and proper lighting of all areas is organized.
A summer building made of timber decorates the yard and makes relaxation at the dacha more comfortable. The correct shape of the building material makes the gazebo aesthetically pleasing, durable and comfortable. It combines well with any landscape design. It takes very little time to build it.
Gazebo 4x3 with barbecue
To set up a compact and high-quality gazebo, equipped with a barbecue or barbecue, you need to take care of fire safety and smoke exhaust. When arranging a building with the possibility of cooking over a fire, consider the following recommendations:
- locate the cooking area at the opposite end from the rest;
- do not decorate the wooden elements of the gazebo in a place close to the fire with flammable materials;
- protect the wood with special fire-resistant impregnations;
- sew up the barbecue segment with cement-asbestos or other heat-resistant materials;
- arrange a hood;
- close the work area from the wind to prevent the fire from fanning;
- use grills with the ability to remove coals after cooking.
For the chimney and hood, use stainless steel sheets. Place a protective casing on the end of the pipe that goes outside to prevent precipitation from entering the structure. Next to the barbecue, make a small counter equipped with shelves below, on which you can cook and store dishes and skewers below.
DIY octagonal gazebo
Three stages of construction are shown here - the main part, the roof and the railings. An octagonal gazebo is a more complex design compared to a rectangular or square shape, as it requires more materials and more complex operations with wood. However, this is no reason to give up on construction if you use the right drawings for the job and plan every aspect of the project. According to the plans presented, you can build an octagonal gazebo with your own hands in 2 - 3 days. I won’t write detailed instructions, you can read them on the website, but here are a few tips.
- The first step is marking. The easiest way to lay out an octagon is to make a square and trim the corners until you get the shape you want.
- Install the middle beams using the template shown in the pictures.
- Use a good saw to make corner cuts, this is essential for creating tight seams.
- Use waterproof joint adhesive to strengthen the bond.
- Check that the main beams are perpendicular using a carpenter's square.
- When installing the decking, be sure to countersink the screws and leave a small gap between the boards for drainage.
- When installing the top rails, cut the ends of the top bars at a 67.5º angle. Install a wooden strip between the posts and secure with galvanized screws.
- When installing a new component in place, check each support with a plumb line.
Shapes of gazebos
Classic rectangular glazed gazebo
At the drawing development stage, it is necessary to take into account what season the gazebo will be used. Open forms are relevant for summer and off-season. As a rule, such structures are decorated with openwork forging and a canopy. The semi-open type involves the presence of 2-3 polycarbonate walls. The closed version is essentially a small house with a stove on which you can cook treats.
Shapes of gazebos with glazing:
- Rectangle - designs are easy to manufacture and distinguished by functionality. Manufacturers produce ready-made solutions in the form of a tent or awning, which is stretched over metal struts.
- The circle is a classic version of the gazebo. Construction requires experience and certain skills. The use of welded workpieces, including bases, is allowed. Thanks to its shape, the structure can be placed anywhere in the garden.
- A polyhedron is an analogue of a round structure, but assembly is easy. An elegant and practical option. Installation of the structure involves the use of timber, logs and openwork gratings.
- The winter option is a place for year-round recreation. However, it is necessary to build a foundation, insulate the walls and roof, and install windows and doors.
- Summer gazebo - an area with a veranda and a canopy for protection from inclement weather.
- A heated gazebo is a structure that can be used at any time of the year. It can be heated through a fireplace, convectors or stove.
Before ordering or self-manufacturing, it is necessary to develop a project, determine the dimensions and material of construction. If you plan to close the structure, you should consider the arrangement of the ventilation and exhaust systems.
Sketches of gazebos with drawings and dimensions
Available sizes can be proportionally increased or decreased
It is important that you understand that with a significant increase in size, the frame requires a more powerful one. Don’t forget about this, and everything will work out for you: a gazebo made by yourself will be beautiful and reliable
Simple wooden gazebo
Almost the same project, but with different dimensions: the top point of the roof is raised higher, which makes it seem visually lighter. The gazebo is also quadrangular, the roof is hipped
When installing such a roof, the most problematic are two places (nodes).
Large gazebo on the foundation
Before you build this gazebo, you need to make a strip foundation. Its parameters depend on the soil, the material you are going to use for the frame: metal or wood, and what you are going to use to glaze it. In general, the width of the tape is about 20 cm, the depth is 20-30 cm deeper than the level of the fertile layer. On heaving soils it is better to make a pile foundation.
Drawing of a gazebo-swing
The swing gazebo requires special attention: it is fastened very firmly so that the resulting variable loads do not loosen or overturn the structure. To do this, you can extend the legs downwards, dig a hole under them, fill them with crushed stone, compact them, and then fill everything with liquid concrete mortar. If you make the frame from a pipe, no questions arise; for wood you can use “U”-shaped fasteners with a pin mounted in the lower part. Here you can bend it and fill it with concrete.
For even greater reliability, crossbars are attached to the legs, which are slightly recessed into the ground. They are nailed in with U-shaped staples.
Features of using rounded timber for a gazebo
The rounded beam is represented by a wooden element of a regular cylindrical shape. It is often used when implementing timber gazebo projects for suburban areas. Such an element, thanks to a special material processing technology, has a flat, smooth surface. The products have the same diameter, which can be 180-250 mm. There is a groove in the lower part of the rounded beam, which facilitates quick and easy installation of the elements. When they are laid on top of each other, a tight and reliable connection is formed.
The rounded timber has the same diameter, which can be 180-250 mm.
Thanks to the correct shape of the wooden products, the erected gazebo will have an aesthetic appearance. The building does not require additional finishing. This structure is characterized by a good level of air exchange, low thermal conductivity and durability. The material is also characterized by its affordable cost.
To extend the life of a gazebo made of rounded timber, it should be treated with special compounds that protect wooden elements from moisture, sun, insects, rodents, fungus and mold.
Among the disadvantages, the significant mass of the timber should be highlighted, which is associated with the large cross-section of the material. Therefore, when constructing a gazebo frame from timber, it is necessary to arrange a reliable foundation. In addition, it is worth taking into account that over time, gaps may appear between some elements.
Large do-it-yourself wooden gazebo
This large gazebo can be called more of a pavilion. Not a bad option if you have a large yard or enough space on your property. It’s not a bad project in the sense that in the future, under such a canopy you can install a grill or barbecue, or even organize a stationary summer kitchen. To build such a gazebo you need a columnar foundation, but perhaps the most difficult part is the roof. To do this, the upper contour of the gazebo needs to be installed with horizontal ties. Then secure them with self-tapping screws to the supports.
For reliability, the screeds must be secured with metal strips. Then secure all other parts. Finally, saw off the central support flush and lay the sheathing.
Please note that the sheathing is made in different ways, depending on the roofing material; if it is slate, it can be either single-layer or two-layer. But this is a separate topic.
cfb4fa12618d4f73fadc299d5c111646.jpe
3ef1745a5e70fdbe627ddc9aa85da2f1.jpe 316a75ffdbd92e97c15e143d20a3df55.jpe
Roof construction
The roof of the gazebo must be made of high quality from reliable modern materials. It is this that protects the inside of the gazebo from snow and rain. It is better if it matches the general style and image of the building. The roof can take the form:
- Shed - an inclined plane (slope), which rests on load-bearing walls located at different heights.
- Gable - a roof with two slopes inclined to the outer walls.
- Hip - with four slopes, and the end slopes have a triangular shape.
- Multi-gable - made of several gables (gable elements with ridges).
- Hip or pyramidal - an elongated roof resembling a pyramid.
- Conical and domed - for round buildings. Such a system can be erected only after careful calculation of all technical parameters.
- Vaulted - with a round or parabolic shape.
The rafters are secured by notching, secured with nails on both sides, or fixed using corners.
| The step with which the rafters are installed (cm) | Rafter length (meters) | ||||||
| 3 | 3,5 | 4 | 4,5 | 5 | 5,5 | 6 | |
| 215 | 100x150 | 100x175 | 100x200 | 100x200 | 100x250 | 100x250 | – |
| 175 | 75x150 | 75x200 | 75x200 | 100x200 | 100x200 | 100x200 | 100x250 |
| 140 | 75x125 | 75x175 | 75x200 | 75x200 | 75x200 | 100x200 | 100x200 |
| 110 | 75x150 | 75x150 | 75x175 | 75x175 | 75x200 | 75x200 | 100x200 |
| 90 | 50x150 | 50x175 | 50x200 | 75x175 | 75x175 | 75x250 | 75x250 |
| 60 | 40x150 | 40x175 | 50x150 | 50x150 | 50x175 | 50x200 | 50x200 |
Each roofing covering has its own technological and operational characteristics. Depending on the type of roof, it is necessary to set the desired angle of inclination of the roof.
| Roof material | Minimum roof slope angle (degrees) |
| Shingles, wood chips, reeds | 40 |
| Piece tiles, bitumen-polymer, slate tiles | 27 |
| Rolled bitumen based | 5 |
| Roll roofing sheets glued to hot mastic. Metal tiles, corrugated sheets. | 11 |
| Slate | 19 |
| Roofing sheet steel with flared joints | 17 |
The rafter system is the first part of the roof frame. In addition to this, you still need a lot of material to make the sheathing - a solid or lattice flooring, which will be the basis for attaching the roofing material.
On a note!
The choice of the type of sheathing, its pitch, the materials used and their dimensions can be selected and calculated according to building codes, rules of SP 17.13330.2011 “Roofs. Updated edition of SNiP II-26-76"
You can inquire about the technical requirements for organizing a roof from the supplier of a specific roofing material.
Do-it-yourself gazebo for a summer residence made of wood
Here we show how to make a square garden gazebo with a hipped roof, not in diagrams, but in visual step-by-step photos. For construction, standard materials were used - boards, timber, roofing felt. The only non-standard solution was to use a sewer pipe with a diameter of 125 mm to build the foundation for the support pillars. The photo shows all stages of the work, from marking and pouring the columnar foundation to attaching the roof. In my opinion, an excellent option for a summer house, light and simple design without any special complaints.
Photo source usamodelkina.ru/8593-legkaya-sadovaya-besedka-svoimi-rukami.html
Gazebo base
The beams for the future foundation are attached to the installed supports Around the perimeter, blanks made of 100 by 100 mm timber are used. The logs for the floor will be thinner timber - 50 by 100 mm. The distance between the logs should be approximately 40 cm. The greater the distance between the beams, the less rigid the base. The fastening will be ordinary screws and metal corners, which can be purchased at any hardware store.