Home » Building a house » Headings » Floor
Floor
Alexander Korovaev 04/30/2020
4361 Views
SavingSavedRemoved 1
Over time, any, even the most durable boards become covered with fungus and rot. Floors in a house on the ground, that is, in the form of a monolithic concrete base, are free from this disadvantage.
Design Features
Layer order
When constructing a strip foundation or a foundation with a grillage of small height, it is possible to use floors on the ground - a structure consisting of the following layers:
- sand-crushed stone cushion designed to stabilize the concrete layer and protect it from underground moisture
- screeds (concrete preparation, footing): according to the recommendations of SNiP, in central Russia it is enough to arrange a layer 5 cm thick
- roll waterproofing
- insulation layer
- concrete underlying layer 1 cm thick
- clean floors: you can use, for example, tiles, linoleum or laminate; It is also possible to use a classic base in the form of wooden floors on joists
Unlike a slab foundation, the screed in floors on the ground in a private house is not made too thick. After all, it must withstand the load only of the weight of furniture, household appliances and other things in the house. 2 layers of screed: rough, laid immediately after the pillow, and finishing, top, will be quite enough. Such a foundation is made only after the construction of the structure itself.
Floating screed
There are two types of ground floors. They can:
- tie to a tape base;
- be manufactured in the form of a floating screed not connected to the foundation
Each of these designs has both advantages and disadvantages. With a rigid connection to the foundation, the screed lying directly on the foundation shrinks less and therefore does not crack. But when the foundation subsides, it can simply “hang” in the air. Although with high-quality reinforcement of the base this is not such a big problem. Backfilling, not with soil taken from the pit, but with specially imported non-metallic materials, sand and crushed stone, will help prevent the slab from sinking.
When using a floating screed, when the base shrinks or the soil moves, stress will not be transferred to the concrete slab, and cracks will not occur in the floors. However, it can “play” on its own, which often leads to defects - cracking or the appearance of gaps between them and the wall. Therefore, when pouring a floor over a foundation, the strength of the concrete solution and the use of high-quality reinforcement are essential.
Advantages and disadvantages
There are many advantages to concrete floors on the ground in a private home. Let's list the main ones:
PROS:
- Can be used on most soil types
- minimal concrete consumption and, as a result, low cost
- sufficient resistance to frost heaving forces
- Thanks to careful insulation in a house with such a foundation, it is easier to maintain positive temperatures in winter, since a screed with a heat insulator installed inside can accumulate heat well, resulting in reduced costs for heating the building; It is enough just to insulate the base and blind area well
- such floors do not require ventilation and annual drying
- unlike wooden floors, they do not require periodic replacement of rotten beams
MINUSES:
- The disadvantages include the difficulty of repairing communications. Therefore, it is imperative to lay duplicate sleeves in the concrete, in which additional sewerage and water supply systems are located. They can be connected quickly and without problems in case of clogging of the main communication systems.
- Another disadvantage of such foundations is the lack of a basement floor. However, the underground floor in a private house can be organized in another utility room.
Some developers advertising their own services claim that under such floors it will be constantly wet. But if high-quality drainage, storm drainage and removal of flood and groundwater are installed, moisture accumulation can be completely avoided.
Floor installed on the ground
Geotextiles, widely advertised in recent years, under a layer of sand cushion will not only be inappropriate, but also harmful. It will not allow the soil to compact properly, as a result of which the effectiveness of floors on the ground will be reduced to zero. The drainage properties of this material are useful only when laying communications.
It all starts with the foundation
Aerated concrete differs from other building materials in that it has too low resistance to bending loads. This leads to the fact that even with slight movement of the foundation, cracks appear in the walls. Therefore, an important step in the construction of a house made of aerated concrete is the choice of the type of foundation, and then, based on the characteristics of the foundation, the optimal design of the first floor floor is selected.
Main types of foundations
Taking into account the characteristics of aerated concrete, the number of suitable types of base is significantly reduced. The foundation for an aerated concrete house must be well reinforced and as stable as possible. These include: monolithic slab, strip and columnar structures.
When groundwater passes close to the surface of the earth, it is necessary to provide a high-quality ring or wall drainage system, which will significantly increase the cost of work, as well as perform high-quality waterproofing of the base, or choose another material for construction.
Drainage system
The best option when constructing a small-sized building would be a monolithic strip foundation. Prefabricated structures are not recommended. It is possible to install a pile foundation. In this case, to prevent cracking of aerated concrete walls, a solid reinforced concrete grillage frame must be constructed.
The best solution for an aerated concrete house is a monolithic reinforced concrete slab as a foundation, despite the fact that the cost of such a foundation is much more expensive. In this case, the slab will serve as a rough foundation.
Soil requirements
Groundwater location diagram
Unfortunately, such a base cannot be used on all types of soil. After all, when the soil moves and heaves under the floor of the house, damage to the concrete is possible. Laying such a foundation is permissible only when groundwater is located below the level of 0.5-0.6 m from the surface.
It is not recommended to install floors on the ground or on too loose, mobile soils. On heaving soils and soils with a high degree of freezing, the thickness of the footing should be increased to 15-20 cm.
Polyethylene film instead of vapor barrier
The waterproofing layer serves to protect the screed from moisture suction from the soil, but waterproofing alone is not enough. When the temperature in the house is above zero, moisture from the soil begins to evaporate, turning into steam. As the steam rises up the structure, it condenses inside the floor “pie,” which can lead to the destruction of the reinforcing elements. For this purpose, steam-waterproofing is used. Sometimes polyethylene film is used as a cheaper alternative.
Another task of vapor barrier in ground floors is to protect against radon entering the lower floors of the building. It is a radioactive gas that is released when uranium and thorium decay. The spread of radon is typical for individual regions; we discussed the radon problem in more detail in a separate section https://www.sdvor.com/articles/ugroza-radona-na-polakh-po-gruntu-pravda-ili-mif/
Such a film is often used in screeds that are made on floors, and in this case such a vapor barrier is sufficient, but not in the case of floors on the ground. The main disadvantages of the film are that it does not fit tightly enough to the base, folds and air bubbles form on its surface, and it is difficult to achieve uniform installation. In addition, the film is easily damaged during the installation of subsequent layers, as a result of which the tightness of the insulating layer will be compromised.
Main stages of construction
Zero level marking
It is better to begin work on installing the floors of a house on the ground in the summer, after the construction of the building, walls and roof have been completed. Since when digging a pit for a strip foundation the depth of the hole is significant, it is covered with the same soil with layer-by-layer compaction.
1 To determine the lower point of the mark, mark a point at the bottom of the door threshold, called the zero mark. It is from here that the countdown for deepening into the ground begins. On average it is 30-35 cm
2 You can outline the highest (zero) point of the floors using nails and a cord driven around the perimeter of the structure
3 In ground floors, be sure to carefully prepare the base. The ideal backfill for them is sand. It is compacted in small layers with a height of no more than 15 (or even better 10) cm. According to SNiP, the total height of the layers is 60 cm
4 Each of them is first compacted dry, and then spilled with water and pressed again. A jet of water can wash away the layers, so such work should be carried out through a nozzle with a sprayer. There is no need to oversaturate the sand with water - it should be sufficiently moist, but not wet. They pour it with a hose and pass it with a vibrating plate twice, changing the direction of movement.
5 It is more convenient to control the height of sand filling using wooden pegs with a mark. They are located in the corners. After filling the next layer, the stakes are removed and new ones are placed.
6 To further compact the layers, coarse crushed stone is poured on top. When compacting it, thanks to the strong pressure of the stones, even the lowest, deepest layers of sand are well compressed
Sand-crushed stone pillow
7 The next layer is screed. As we have already indicated, its greater thickness is useless. 5 cm is enough
8 In a rough screed (concrete), the heaving load on which is small, the use of reinforcement is not necessary - it is only required for the construction of the last concrete layer - the finishing screed. Reinforcement of the concrete base is advisable only in the presence of soils with increased frost heaving or when there is a significant mass of structures in the house
9 To fill this layer of screed, it is allowed to use lean concrete mortars with a minimum percentage of cement. At high loads on the floors, its amount in the solution can be increased. In these cases, it is also recommended to use cement with improved strength characteristics
10 The third layer is waterproofing. To create it, you can use a fairly thick plastic film. Recommended thickness 150 microns. It is necessary to lay the film on the base with an overlap on the walls and the layers overlap each other by 15-20 cm. Each of the seams is carefully glued or fastened with a construction stapler. It is advisable to lay waterproofing in two layers rather than one
11 You can replace the film with bitumen roll materials. They are fused onto the concrete layer with an overlap of 2 layers.
12 As a heat insulator, it is better to use not rolled, but slab material, which has greater compressive strength
13 The ideal insulation for house floors on the ground is a layer of extruded polystyrene foam. You can also use regular foam (although working with this fragile material is a little more difficult). Both polystyrene foam and polystyrene foam completely retain their heat-shielding properties even when wet
14 When using materials that absorb moisture well (for example, mineral wool or expanded clay), they must be additionally waterproofed. Otherwise, their thermal insulation properties will decrease
15 Insulation boards are laid only staggered (in a checkerboard pattern). All joints should be filled with polyurethane foam. The thickness of the layer depends on the area of residence. It can be 5-20 cm
Floor insulation with polystyrene foam
16 When laying expanded polystyrene in 2 layers, the slabs are positioned so that the seams of the second layer run through the center of the slab of the lower layer
17 It is advisable to protect the porous heat insulator with film. Otherwise, moisture from the concrete will go into its smallest holes, and the strength of the concrete will decrease
18 When pouring the top, finishing screed, M400-500 cement is used with the addition of sand without clay impurities (preferably quarry or river) and crushed stone of a fraction of 5-10 mm. The strength of concrete must be at least M150
19 Reinforcement of the finishing screed is carried out using a 100x100 metal mesh or a 3-4 mm rod. The compressive strength of fiberglass wire is much worse, so it is used for reinforcement only in soils that are not prone to movement
Reinforcement of concrete screed
20 To avoid rust, the reinforcement must be in the center of the concrete screed, so it is laid out on plastic stands 20-30 mm high
21 When using a net, stretch it between driven metal pegs. It is undesirable to use wood that is susceptible to rotting for these purposes.
Additional waterproofing to protect against capillary moisture can be achieved using a layer of carefully compacted clay placed under a sand-crushed stone cushion.
The right “pie”: layer-by-layer guidance
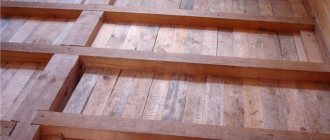
If wooden subfloors do not require much effort - a sand backfill with a layer of geotextile is enough for them, then for a concrete screed you will need to create a more multi-layered “pie”.
Experts advise reinforcing the finishing layer, as this helps prevent cracking after hardening. In the finishing layer you can place communications of the “warm floor” system.
Experts recommend following this technique:
- The first layer is compacted sand.
- Next, a gravel cushion is poured.
- A reinforcing mesh is installed, which can be made of either fiberglass or metal.
- A ten-centimeter layer of concrete mortar is poured.
- A waterproofing layer is created.
- A layer of insulation is laid, for which expanded clay or penoplex, or other insulating materials can be used.
- Another layer of waterproofing is laid.
- A clean concrete screed is poured.
The last layer of the “pie” can hide any utilities, for example, sewerage or water supply, but it is recommended to provide a backup system that will help avoid destruction of the concrete layer when repair work is required.
Recommendations for concreting
Finishing layer of concrete screed
Formwork is prepared for pouring the screed. In order for the floating screed to be located at a certain distance from the walls, it must be leveled with a building level. To make it easier to remove the formwork, the wood can be pre-treated with oil.
To avoid the appearance of cold bridges, the mortar is poured in one stage to create a monolithic screed without seams. You should work as quickly as possible so that the concrete does not have time to set.
Its mixing proportions directly depend on the brand of cement (see table). In order for cement and sand to be evenly distributed in the solution, you must first thoroughly mix the dry components, and only then add liquid.
Table of ratio of cement, sand and crushed stone
Mixing the solution in large quantities without using a concrete mixer in this case is simply unrealistic. If this is not available, it is better to purchase a ready-made solution, mixed mechanically, from a trusted manufacturer. To fill the concrete base, it is advisable to use cement of a grade not lower than M200-300, which does not crack when hardening.
Work begins from the far corner. A vibrator is used to remove voids. Level the concrete using a special construction tool in the form of a long metal strip - rules. After filling all the areas between the beacons, they are carefully removed and concrete is poured into the resulting holes. In order for the solution to dry evenly, the surface is covered with film and left to dry. During the first week, the concrete should be periodically moistened with water. It takes at least a month to finally gain strength. All work started before this time can lead to a weakening of the strength of concrete.
You can achieve a perfectly flat floor using a self-leveling mixture. It is poured over the rough concrete layer only after complete drying.
Foundation, preparation and leveling
A level will help determine the future volume of upcoming work. You can use both a laser level and a regular optical level for these purposes. Using a level, the zero and the boundaries of the finishing screed are determined.
The bottom of the doorway will serve as a “zero” for us, which needs to be moved around the entire perimeter of the room. This is done simply. From “zero” we mark 1 m upward and follow this mark along all the walls. Then, from the drawn line, we go back down 1 m.
The resulting mark will serve as the boundary (extreme point) of pouring concrete. To make it easier to see, you can use a rope (cord), which we pull over the nails, after hammering them in the corners of the room along the intended line.
Let's start leveling the surface. You need to start from a size of 35 cm. This is the layer that will take up the entire concreting with reinforcement, insulation and waterproofing. Therefore, if in some places there is less than 35 cm from the established “zero”, then you need to remove a layer of soil more than required and add sand.
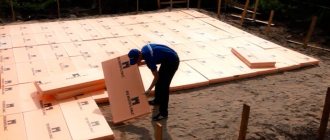
Floor preparation
The entire area is carefully compacted. With very loose soil the situation is a little different and you will have to add crushed stone. The main task of this procedure is to compact the soil as hard as possible, because the longevity of the floor will depend on this. After all, suddenly the soil subsides, this will cause deformation of the concrete surface.
Features of the arrangement of floating floors
Floating floor
How to make floating floors on the ground in a private house? The principle of creating both structures - floating and rigidly fixed floors - is similar. To ensure the mobility of the base, a damper gap is provided between it and the foundation, with the help of which the linear expansion of concrete is compensated.
A special tape is used as a damper layer. It is laid along the entire perimeter of the foundation. The insulation (expanded polystyrene) is laid on the edge along the entire height of the screed.
Which type is built faster?
When pouring a concrete strip or slab, you have to let the concrete sit for a certain amount of time. This greatly slows down construction, but in this case it is impossible to speed it up. When creating a prefabricated strip or laying ready-made reinforced concrete slabs, construction time is significantly reduced.
In addition, pouring concrete is possible only in the warm season, which significantly limits the possibilities of creating monolithic slabs or strips, while prefabricated structures, with some restrictions, can be built at any time of the year.
Therefore, the speed does not depend on the type of base, but on its design.
What should load-bearing walls be supported on?
Strip foundation
Since this type of foundation is not load-bearing, resting heavy stoves, brick partitions and massive stairs on it is highly not recommended. In these cases, a strip foundation is used as a foundation for the internal walls.
When constructing partitions, the following method can also be used to avoid concrete fracture:
- Stiffening ribs are installed underneath them - reinforced concrete purlins that rest on the foundation; when the foundation moves, they will act as elastic inserts, dampening such deformations
- a gap is made in the thermal insulation layer and a reinforcement frame is installed into it, which is connected to the main floor frame; if the thickness of the insulation layer is insufficient, to avoid the appearance of cold bridges, you should go down 20-40 cm
In areas with severe frosts, concrete with the addition of cement of at least grade M400, which is frost-resistant, is used for pouring. Cement of similar brands should also be used for pouring screed on wet soil. This material also has higher water-repellent properties.
What is their service life?
The service life of a monolithic slab is estimated by experts as very long - some sources estimate it at 100 years. At the same time, contractor companies give a guarantee for the stove for about 15-30 years, which makes one doubt the long service life.
The reasons for this discrepancy may be differences in technology, operating conditions and other factors affecting the material and design. Accurate and confirmed data is not yet available, since the technology appeared relatively recently and statistics have not been collected.
For strip bases, the service time is determined much more specifically. For prefabricated brick belts, 30-50 years are allotted, and for FBS - 50-75 years. Monolithic concrete strips have a design life of up to 150 years.
Dry screed technology
“Pie” screeds
The Knauf company proposes to replace concrete in the floors of a house on the ground with a dry expanded clay screed. The first three layers in them are similar to the previous version - cushion + concrete screed + waterproofing.
- Next, beacons are placed in the form of a metal profile, which are fixed motionless with a solution
- A layer of expanded clay is scattered between the beacons and carefully leveled
- Two-layer GVL slabs are laid on top. Fastening is carried out using adhesive and self-tapping screws
A company engaged in the production of soundproofing panel systems called ZIPS offers its own version of arranging a dry screed. In this case, it is proposed to replace expanded clay with mineral wool, which is glued to gypsum fiber sheets.
Insulation with mineral wool
Before covering the concrete floor in a house with fiber insulation, it is necessary to prepare the base - it must be clean and dry. Irregularities are removed and depressions are filled. It is necessary to lay a vapor barrier material on the concrete floor, the joints of which can be connected using tape.
Important! The width of the slabs is selected based on the distance between the logs. The presence of gaps between the insulation and the joists is unacceptable. The height of the slabs is selected according to the height of the logs.
On top of the slabs, another layer of hydro- and vapor barrier is laid to prevent the formation of condensation and damage to the insulation.
The installation of a finishing decorative coating in the form of laminate or linoleum is carried out after installing the subfloor in the form of chipboard panels or boards attached to the joists. These materials will serve as additional thermal insulation.
Basic mistakes
Base insulation with polystyrene foam
The most common mistakes when creating a floor screed include:
- Laying floors with high groundwater levels or soils with high levels of freezing. In this case, you should choose a different type of base
- Using wooden blocks that are susceptible to rotting as leveling beacons and leaving them in the screed. When wood is damaged or deformed, concrete may sag
- Small layer of footing and lack of reinforcement with increased load on floors over 200 kg/sq.m. m
- Lack of damper tape around the perimeter of the foundation, which can lead to cracking of concrete due to temperature changes
- Laying insulation below the zero level, which is fraught with freezing of the floors
- Lack of thermal insulation of the base and blind area
Advantages and disadvantages
Arranging the base in this way has its pros and cons. Among the positive properties, the following can be noted:
- A wide range of insulation materials helps prevent heat loss from the structure.
- The temperature of the soil located under the multi-layer floor structure never drops below zero.
- The load is distributed on the soil base - there is no need to make complex calculations.
- No dampness or mold.
- The resulting subfloor can be covered with any flooring material.
- Excellent sound insulation properties.
- Fast and uniform heating of the room when water or electric coolants are installed inside the screed.
There are also disadvantages:
- Dismantling a structure for the purpose of repair, especially when underfloor heating pipes are damaged, is a labor-intensive and materially costly process.
- It is impossible to install such a floor when groundwater flows close to the surface of the earth and soil is loose in composition.
- The construction of such a structure is expensive and takes a lot of time and effort.
- Significant reduction in the height of the room.
Layers of construction
Laying heated floors
If desired, heated floors can be provided in the floors of the house along the ground. To do this, it is enough to lay pipes made of polyethylene, metal-plastic in the upper (finishing) screed or install electric heating elements into such a base. Since any pipe connections in the screed are unacceptable , the contours of the heated floors are designed to be continuous.
Types of laying heated floors
The pipes are laid on top of the wire mesh reinforcement just before the fill layer. Naturally, the thickness of the screed will automatically increase. Before starting work, you should draw up a detailed diagram indicating the location of the control and monitoring of the underfloor heating system, as well as the method of laying out the pipes and the distance between them.
The thickness of the top layer should be 50 mm. Testing the performance of heated floors on the ground in a private house and connecting them is carried out only when the concrete strength has reached at least 70%, that is, 3 weeks after pouring.
As you have seen, installing ground floors in a private home is not that difficult. The most important thing is to strictly adhere to the recommended technology.
The author of the following video talks in great detail about each of the stages of their creation:
Replacing fiber reinforcement
Recently, fiber has become widespread - these are small polymer fibers (12 - 18 mm), which are added to the solution to reduce cracking. It may seem that reinforcement performs the same function, but this is misleading. The reinforcement combines the entire screed into a single monolithic slab. Thanks to this, the floor absorbs loads over the entire area. Fiber reduces local cracking, that is, in fact, the fibers prevent small shrinkage cracks from opening too much.
Deformations of the insulation under the screed are small, but they still occur; reinforcement helps reduce the negative effect of these deformations.
If the screed on the floors between floors in most cases does not experience strong temperature deformations, so you can limit yourself to fiber, then in the case of floors on the ground, reinforcement is mandatory, while adding fiber to the solution is also desirable.
Points to consider
The floor design is selected depending on the operating conditions. There are several leading factors:
- Level of operational loads. If they are over 200 kg, then the reinforcing mesh should have a rod diameter of 4 mm; if the load is less than the specified value, then 3 mm is sufficient.
- The distance from the surface of the earth at which groundwater flows. It is recommended to take the highest value into account (during floods or seasonal snow melting).
- The purpose of the design is with coolants (warm floor system) or conventional. A floor with water or cable coolant involves creating a 2 cm gap around the perimeter of the room between the finished concrete coating and the wall. The lower layers are adjacent to the walls.
Now there are several types of “warm floors” on the construction market. They differ in the type of coolant and operating efficiency. How to choose a heated floor? We'll tell you in our article.
Polystyrene foam as insulation
Question answer
Table 2. Most popular questions
| Question | Answer |
| Are broken bricks and construction waste suitable as a replacement for crushed stone in the bedding layer? | Crushed bricks will not cope with protecting the slab from moisture. They are also not suitable as leveling bedding due to the difference in the sizes of individual elements, which cannot be compacted well and do not ensure the normal operation of the entire floor structure. |
| Is it possible to abandon the mesh for reinforcement and replace it with untied rods? | Reinforcement will “work” correctly only when using rigidly fixed rods that form mesh cells of 10 x 10 cm. |
| Is it possible to use expanded clay in bedding instead of crushed stone? | Expanded clay is not suitable as a material that protects the floor from below from the capillary action of moisture, since it itself absorbs moisture and is modified under its influence. Although this lightweight, inexpensive material is quite suitable as a leveling layer in dry soil and can replace crushed stone. |
| Is it possible to do watering instead of installing a concrete footing? | If the purpose of laying crushed stone and sand is to create a layer that prevents the passage of moisture, then spilling will prevent the crushed stone from coping with its function. |
| Can polyethylene under a rough screed replace a waterproofing layer? | No, since this layer is technological, protecting the backfill from cement laitance. |
| Is it possible to refuse screed reinforcement? | No. This process can only be abandoned when constructing a concrete footing. |
| Is it possible to refuse to make a concrete base and lay the waterproofing and insulation layer directly on the base? | Lay the waterproofing layer on a flat, solid base - this allows you to extend its service life. The same applies to the installation of insulation, which must be fixed motionless and not provoke the formation of cracks on the floor surface. |
Features of heat and waterproofing
The role of the thermal insulation layer is as follows:
- To reduce or eliminate heat loss.
- To protect the structure from moisture coming from the ground.
- Soundproof the room.
- To exclude the process of vaporization.
- In creating optimal microclimatic indicators.
Thermal insulation and mesh reinforcement
When installing a simple floor on the ground, it is possible to use ordinary polyethylene film. The process goes like this:
- When laying polyethylene (150 microns) on a finished, compacted base, the film sheets are laid overlapping (15-20 cm) and the joints are carefully taped with tape. The edges around the perimeter of the room are placed on the walls to a height of 10 - 20 cm. To be sure of the reliability of the waterproofing layer, the procedure for laying the film can be done twice, carefully fixing the material each time.
- The thickness of the insulation (foam or expanded polystyrene) should not be less than 10 cm. Due to the fact that foam is susceptible to moisture, it is protected on both sides using the method described above.
- A reinforcing mesh with cells of 10 x 10 cm and a wire diameter of 3 mm is laid on top of the insulation.
- After this, the screed is poured to a height of 5 cm.
Floating screed with penoplex
Important! Do not neglect the external insulation of the foundation, blind area and organization of water drainage from the base.
This method of organizing the floor has its pros and cons. Among the positive qualities, the following can be noted:
- Suitable for most soil substrates.
- High-quality insulation of the foundation increases its resistance to loads during frost heaving of the soil.
- The solution consumption is less than when installing a slab foundation.
- This flooring is durable.
- There is no need to perform additional insulation of pipes and other communications running in the floor structure.
- Suitable for laying finishing material.
- There is no need to create high-quality ventilation of the underground space.
The disadvantages are that the cost of work may increase when constructing a high base.
Floor reinforcement
The location of the reinforcement in the screed mass depends on the presence of coolants in it. If it is a warm floor, then the reinforcing mesh is placed above the pipes and about 3 cm of screed layer is provided on top. In a regular floor, the mesh is placed approximately in the middle of the screed array (3 cm to the top).
Regular floor screed
Warm water floor screed
Construction conditions
A reinforced monolithic concrete slab, which is a ground floor system, is made on a compacted sand-crushed stone base. The ballast fill forms the base and covering of the required height and transfers the load from the slab to the ground.
The cost of measures to protect the slab from moisture depends on the depth of groundwater. At a depth of 3 meters or more there will be no problems.
Method for eliminating the cold bridge
A layer of heat and waterproofing laid on a supporting base allows you to protect the structure from below from moisture and heat loss. The soil can be protected from frost heaving by cutting off the cold bridge that causes moisture to freeze. To do this, the base of the house is insulated from the outside using sheet foam.
What foam density should I choose?
Requirements for the height of the floor relative to the strip foundation
There are no special requirements for choosing the height of the floor structure relative to the foundation strip. The only parameter that needs to be taken into account is the location of the entrance door and the zero level of the floor relative to it. It is important to avoid a serious difference in height between the level of the porch and the floor of the interior, having provided for this nuance at the design stage.
Options for positioning the floor system relative to the foundation
If the doorway is correctly manufactured at the stage of pouring the strip support, the manufacture of the floor on the ground comes down to the fact that its top, taking into account the finishing layer, must coincide with the level of the threshold.
Recommendations for the location of the floor relative to the doorway
In the process of pouring a strip foundation, it is already necessary to have an idea of the location of the doorway and its parameters.
Selection of materials
A rough screed about 8 cm thick is poured over a layer of polyethylene film, and two more overlapping layers of polyethylene are laid on top of it to create waterproofing. At this stage, it is necessary to ensure the tightness of the connection between the polyethylene sheets.
A rough screed does not require special qualifications of the builder, but, nevertheless, involves a large number of works associated with its creation. You will find the features of the device and a calculator for calculating the amount of ingredients for a floor screed solution in our article.
Multilayer construction involves sequential laying of layers: sand, and on top crushed stone or expanded clay. After this, a footing, protective layers and a finishing screed are formed, which will serve as the basis for the finishing material. If the soil is too wet, then it is recommended to refrain from using expanded clay due to the material’s ability to absorb excess moisture and change its shape under its influence.
Sand and crushed stone in this design protect the room from moisture. In this case, both layers are carefully compacted, and the crushed stone is treated with bitumen mastic.
Waterproofing the floor with roll material
The thermal insulation layer is created using the following materials (optional):
- extruded polystyrene foam;
- mineral wool
- foam glass;
- Styrofoam.
Foam glass
At the final stage, a reinforced finishing screed is laid. It is important to make it as even as possible, so the solution is poured along the beacons, controlling the process using measuring instruments (level).
Requirements for the type of foundation
The presence of a foundation does not affect the properties of the floor on the ground; only the nature of its interaction with the main structural element of the building changes.
Universal foundation
Depending on the type of foundation - strip or columnar, the method of joining the floor system depends.
Tape support
Columnar supports are arranged in such a way that the floor is in contact with the grillage if it is low or located under it.
Connection with low grillage
When the grillage is high, the resulting gap between it and the floor is closed during the pouring process using boards and left inside the structure.
Connection of the floor structure with a high grillage
As for the slab foundation, it is a floor structure resting on a soil foundation. The installation of a floor on the ground, subject to the existence of a strip foundation, is carried out in such a way that the floor is adjacent to its inner wall.
Types of structures
Regardless of the type of floor construction on the ground, it consists of several main layers.
Table 1. Floor design
| Floor design | Laying process |
Groundwater passage above 2 m | 1. Compact the soil base. 2. Pour a sand layer. 3. Pour a crushed stone layer. 4. Lay a layer of polyethylene. 5. The concrete base is poured. 6. Lay a waterproofing layer of roofing felt. 7. Lay a layer of insulation. 8. Fill in the finishing screed. 9. Lay the finishing coat. |
With low groundwater flow and backfilling | 1. Compact the soil base. 2. Pour a sand layer. 3. Pour a crushed stone layer. 4. Lay a layer of polyethylene. 5. The concrete base is poured. 6. Lay a layer of insulation. 7. Pour in the solution. 8. Lay down the finishing material. |
Low groundwater flow without footing and bedding | 1. Compact the soil base. 2. Pour a sand layer. 3. Pour a crushed stone layer. 4. Spill liquid concrete mortar on top. 5. Lay a layer of insulation. 6. Pour in the solution. 7. Lay the finishing material. |
Low groundwater flow without backfill with concrete base | 1. Compact the soil base. 2. Lay a layer of polyethylene. 3. The concrete base is poured. 4. Lay a layer of insulation. 5. Fill in the finishing screed. 6. Lay the finishing coat. |
Design with a “warm floor” system | 1. Compact the soil base. 2. Pour and compact the sand layer. 3. The crushed stone layer is poured and compacted. 4. The concrete base is poured. 5. Lay a waterproofing layer of roofing felt. 6. Lay a layer of insulation 7. Fill in a clean reinforced screed (without a gap) with coolants. 8. Lay the finishing coat. |