One of the alternative sources of heating a house or apartment is an electric underfloor heating system. Due to ease of installation and ease of use, cable flooring is rightfully one of the most popular among consumers.
Before considering how to make an electric heated floor, we suggest that you familiarize yourself with the advantages and disadvantages that this system contains.
Electric heated floor - advantages and disadvantages
Pros:
- the ability to be used both as the main and as an additional source of heating for housing;
- uniform heating of the entire area of the room;
- unlimited installation locations. Availability for installation in both living rooms and offices;
- compatibility with most floor coverings (laminated boards, ceramic tiles, linoleum);
- the ability to adjust the temperature regime - both throughout the apartment and separately in each room. The system on/off time is also set at the discretion of the users;
- no need to install additional equipment (as, for example, in the case of a water heated floor);
- relatively simple installation technology;
- aesthetics. The system is installed under the finished floor, this eliminates any restrictions when designing the available space;
- long service life.
Minuses:
- significant cost of using the system. This type of heating can hardly be called economical;
- danger of electric shock. Which puts forward special requirements for the calculation and installation of the heating element in all rooms, and in particular in the bathroom;
- the presence of an electromagnetic field created by the heating element (cable);
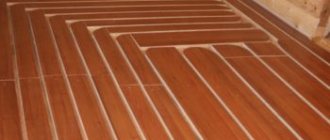
- The use of natural wooden flooring is excluded (laying under parquet or floorboards is not possible), because under the influence of temperature changes, the wood will dry out, as a result, cracks and creaks of the floor will appear;
- reducing the height of the room by installing a subfloor with a heating system;
- additional requirements for the power of existing electrical wiring.
Professionals and users who have installed electric heated floors themselves note that compliance with installation requirements and competent design make it possible to eliminate most of the listed disadvantages.
What affects energy consumption with cable floor heating
Factors affecting the energy consumption of an electric heated floor system
- climatic zone in which the house is built (private or multi-apartment);
- volume of the room (area);
- type of floor (type of floor covering);
- level of thermal insulation of the room (degree of fatigue);
- the state of the warm circuit (windows, doors) and the level of heat loss through them;
- purpose of the premises (living room, industrial facility);
- purpose and period of operation. Is the electric floor used as a primary or secondary heating system? Constantly or periodically;
- the degree of heat perception by people living in the room.
According to reviews from those who already use electric heated floors - when using the system as the main heat source - its power is 170-200 W/sq.m., as an additional one - 100-150 W/sq.m.
Surface preparation
First step. We dismantle the old floor covering and screed. When laying a film heated floor, the old screed, if it is in good condition, does not need to be dismantled. If you install a cable system, you will have to get rid of the tie. Thoroughly clean the surface from dust and dirt.
Dismantling the floor screed
Second step. We lay a layer of waterproofing material. Traditionally, polyethylene film is used, but you can choose other insulation if you wish. It is important that the moisture-proof material extends approximately 100-120 mm onto the walls.
Floor waterproofing
Third step. We attach a damper tape to the wall along the perimeter of the base. Thanks to it, it will be possible to compensate for the thermal expansion of the system during heating. We carefully trim off the excess waterproofing and damper tape.
Film and damper tape
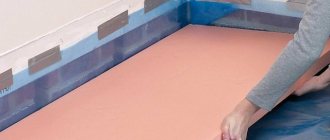
Fourth step. We lay a thermal insulation layer. Thanks to it, loss of thermal energy through the base will be eliminated. Choose insulation taking into account the location of the room, the type of base and the intended purpose of the heating system.
Floor insulation with polystyrene foam
If you plan to use the system as an addition to the main heating, thermal insulation can be done using polyethylene foam equipped with a reflective foil layer. Additionally, the material will take on the function of a substrate for a heated floor.
Foamed polyethylene in a heated floor system
If there is a heated room on the lower floor, it is best to install thermal insulation using expanded polystyrene sheets. The thickness of the material is 2-5 cm. Another insulator with a similar thickness will do.
When installing a heating system in a previously unheated room, for example, on a veranda or balcony, the thermal insulation layer must be more thorough. For example, 10 cm insulation with polystyrene foam or mineral wool of similar thickness is suitable.
Insulating the loggia floor with mineral wool
Fifth step. We lay a reinforcing mesh on the insulation. If desired, you can add microfiber and plasticizer to the screed solution. This improvement in the composition will make it possible to do without additional reinforcement.
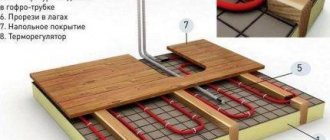
A reinforcing mesh is laid on top of the insulation and beacons are installed for pouring the screed
Installation of electric heated floors - errors
Here are a few typical mistakes that, as evidenced by reviews from home craftsmen, are very common:
- buying extra material. The error is due to the fact that in the calculations the user is guided by the total area of the room, and not by the area that will serve as the basis for the heated floor. The calculations do not take into account the area occupied by furniture and heavy household appliances (refrigerator, washing machine);
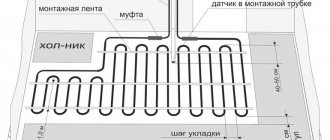
- The cable used in the heating mat must not be cut. You need to choose a laying pattern in order to use the mat completely. It is better to leave part of the floor surface uncovered;
- You cannot turn on the floor heating system until the screed is completely dry, because this can lead to uneven drying of the layer and the appearance of cracks and voids.
- The cable must not be laid on an unprepared surface. It is better to treat the surface of the subfloor with a primer to eliminate dust, which can cause air pockets to form around the cable and cause it to overheat;
- the temperature sensor is placed in a corrugation, so it can be dismantled and repaired if it fails;
- Resistance measurement is an important stage of pre-operation testing of an electric floor; it should not be ignored. In case of significant deviations, you need to make a decision to correct the situation on your own or involve professionals;
- The cable laying diagram will be useful when moving furniture and performing repair or maintenance work. The easiest way is to photograph the installed floor before pouring the screed.
Electric heated floors are easy to use, reliable (if you choose good components and install them correctly) and will last a long time.
Fill the screed and lay the finishing coating
Filling the screed
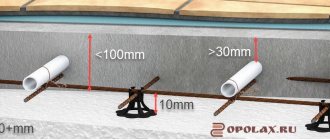
The screed is best made from a special ready-made mixture. The packaging of this composition will indicate that it is designed specifically for use in combination with heated floors. Prepare the mixture according to the instructions. Sufficient layer thickness is 40-50 mm.
Approximate table for calculating the power and length of the heating cable
Spread the mixture evenly over the surface using a spatula. Make sure that there are no air pockets under the cable body. Because of them, the quality of heating will noticeably deteriorate. Let the screed dry completely.
Summary table of requirements for specific and linear power depending on the purpose of the room and type of heating
Important: infrared and heated floors require different “holding” times after installation. You can use the film floor after 2-3 days (if the screed has not been poured). The cable system must be allowed to settle for 3-4 weeks.
We lay the finishing coating in accordance with the installation technology of the selected material. Most often, tiles and laminate are laid on top of a warm floor. You can also lay parquet and even linoleum. If desired, you can use another coating. Focus on your preferences, the interior of the room and your available budget.
Approximate values of energy that should be emitted by a heated floor in domestic premises
Good luck!
Prices for various types of screeds and self-leveling floors
Screeds and self-leveling floors
Which wires are not suitable?
There are product options that are strictly prohibited from being used for laying electrical networks, even in the most extreme cases. These include the following types of products.
Product #1 - PVS wire
Copper connection element having a PVC sheath and insulation. It has a stranded design with 2-5 conductors with a cross-section of 0.75-10 sq. mm.
The wire, designed for a voltage rating of 0.38 kW, can be used to connect household electrical appliances to the power grid and for making extension cords.
PVA is not suitable for laying wiring for the following reasons:
- It has a multi-wire core structure, so it requires tinning and soldering to connect the ends, which requires a lot of time and a lot of experience.
- The product creates a fire hazard: the wire strands cause the cable to heat up more, causing the insulation to wear out faster, which can lead to a short circuit.
- PVA cannot be laid in a bundle, whereas almost all cable models are suitable for this. Due to the fact that the wiring lines must be at a certain distance from each other, you will have to make grooves in the wall for each of them.
Thus, even the low price of such wires cannot compensate for the high installation costs, and the quality of the installed electrical network will not be too high.
Product #2 - SHVVP, PVVP wires
Cords or cables having single or multi-wire copper cores can be used to connect household appliances and electrical equipment.
However, they are not suitable for fixed electrical communications because these products do not have non-combustible insulation.
Although a flat cord with polyvinyl chloride sheaths (SHVVP) is not recommended for laying electrical networks, it is quite suitable for organizing low-current lighting up to 24V, namely for laying wiring from a transformer to LEDs
In addition, the service life of SHVVP and VPPV is quite short, and the multi-core design requires processing of the ends and soldering during installation.
It is also worth mentioning PUNP (universal flat wire), which was banned for laying electrical networks in apartments back in 2007.
This outdated product has poor insulation and low power, making it unable to withstand modern loads
Setting up the thermostat
Common thermostat models are equipped with a software module that sets the required floor temperature indicators for any time period. The touch screen allows you to carry out this procedure with a few taps.
The “up” and “down” keys set the desired temperature manually after turning on the device.
The automatic adjustment settings will take some time.
Setting the date and time.
There is a “book” button on the panel; you must hold it pressed for 5 seconds simultaneously with the “up” arrow. A menu opens in which you can set both the hours and the days of the week (indicated by numbers from 1 to 7). The "power" button saves the selected option.
Heating adjustment by day and hour
The settings menu is activated using the “book” icon, which you need to press for 5 seconds. In the basic time interval settings, weekdays come first. Options are selected by pressing the “book”, time is selected by the “up” and “down” keys. The settings cycle is repeated in the following sequence: day of the week – time – temperature. You can configure it by dividing the day into 6 segments:
- climb;
- left home;
- returned at lunchtime;
- left from lunch;
- returned in the evening;
- night mode.
Service menu settings
They are activated when the device is turned off when the “power on” and “book” buttons are pressed. Using the service menu you can configure:
- Sensor calibration;
- Switching sensors or turning them on simultaneously;
- Temperature limitation;
- Adjusting the temperature step (by default, the step on/off the floor is 1 degree);
- Minimum heating mode;
- Maximum heating;
- Reset.
Kids mode
The thermostat screen can be protected from accidental pressing by connecting a lock. Simultaneously pressing the “up” and “down” keys for 5 seconds ensures reliable protection of the controller from unauthorized switching.
Laying infrared film
Finally, let’s look at how to install infrared-type heated floors.
The installation operation is not particularly difficult, but before installation it is necessary to carry out preparatory work.
It will be necessary to lay a thermal insulation layer on the floor surface. In this case, the layers of thermal insulation are secured to each other with mounting tape.
Next, an infrared film is spread on the surface of the thermal insulation.
If necessary, pieces are cut off; this should be done only in the places indicated on the film.
In this case, a distance of 4-5 cm must be maintained between the two strips of film.
Also, the film does not need to be placed in furniture locations; it should not come close to the walls or other heating elements of the house.
Table of approximate power of electrical appliances
To independently calculate power consumption, the voltage value and source strength are important.
Power indicators (P) in this case are calculated by multiplying the current strength with the mains voltage indicator.
Average power of the most common energy-dependent household appliances
| Device | Power, kWt) |
| Water heating equipment | 1,2-1,5 |
| DVD player | 0,3 |
| Pump equipment | 0,25 |
| Video recorder | 0,04 |
| Grill | 1,2-2,0 |
| Halogen light source | 0,1 |
| Drill | 0,15-0,8 |
| Razor | 7.0 W |
| CD player | 7.0 W |
| Mobile phone charger | 0,025 |
| Oven | 1,0-2,0 |
| Air conditioner | 1,0-3,0 |
| Record player | 0,01-0,03 |
| Game console | 0,01-0,03 |
| Coffee maker | 0,6-1,5 |
| Incandescent lamp | 0,02-0,25 |
| Fluorescent gas-discharge light sources | 0,25-0,6 |
| Freezer | 0,7 |
| Microwave | 1,5-2,0 |
| Table fan | 0,042 |
| Music Center | 0,05-0,5 |
| Heater | 1,0-2,4 |
| Laptop | 0,08 |
| Personal Computer | 0,28-0,75 |
| Soldering iron | 0,025-0,12 |
| Vacuum cleaner | 0,4-2,0 |
| Printer | 0,35 |
| Scanner | 0,015-0,1 |
| Mixer | 0,18 |
| Heat fan | 1,5 |
| Washing machine | 4,0 |
| Iron | 0,25-2,0 |
| Toaster | 0,6-1,5 |
| Hairdryer | 1,0 |
| Fax | 0,6 |
| TV | 0,07-0,2 |
| Fridge | 0,15-0,6 |
| Electric jigsaw | 0,4-0,8 |
| Electric heater | 0,2 |
| Electric kettle | 1,0-2,5 |
| Electric stove | 1,1-6,0 |
| Energy saving light source | 0,08-0,1 |
Approximate power indicators of a volatile device are represented by the product of current and voltage, so the standard simple formula P = I × V is used for calculations.
Operating principle of ETP
In the case of heating wire and mats, the conductor is heated under the influence of the electric current flowing in it. The wire heats the screed, which in turn heats the finish coating. Heating occurs by convection.
In the case of using infrared film, heating occurs by thermal radiation of the carbon layer, which occurs under the influence of electric current. This radiation heats the finish coating and objects located close enough to the floor. They heat the air in the room by convection.
Temperature regulation is carried out using a temperature sensor and a thermostat through which the heated floor is connected.
Types and design, as well as features of heating elements
A single-core wire or a two-core cable is most often used as an electric floor heating element. The first option is notable for its low cost, but the increased background EMR imposes restrictions on its use in residential premises. The heating cable has two cores, one of which plays the role of a regular conductor, and the second - a heating element. This design can significantly reduce electromagnetic radiation, but increases the cost of the product.
Design of heating wire (A) and Teplolux heating cable (B)
More detailed information about the above heating elements can be found on the pages of our website.
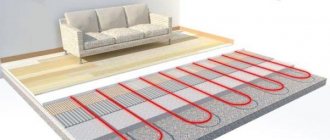
Installation can be greatly simplified if you use a heating mat . This design is nothing more than an ordinary thermal cable laid with a certain step width on a reinforcing mesh. As a rule, the width of the mats is about 0.45-0.5 m, and the length can vary from 0.5 to 12.0 m (accordingly, the maximum heating area for one segment is limited). There is no standard for mat sizes, so they may vary slightly from one manufacturer to another. The electromat, like the thermal cable, is a solid structure, the footage of which cannot be changed arbitrarily.
Heating mat Devi
Rod structures are considered a subtype of electric mats. They use special carbon rods with the addition of copper and silver as heating elements. Heating elements are connected in parallel with a certain step. The main advantage of this design is self-regulation. That is, if the temperature on any rod has increased due to poor heat transfer (for example, furniture has been placed), then the heat release is reduced. Thanks to this property, you can lay the mat over the entire area of the room.
Rod electric mat Energy Mat
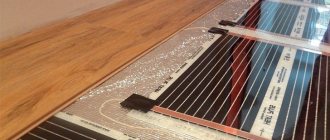
Infrared film . This heating element became widely available relatively recently, literally at the beginning of the century. The term “infrared” used in the name is a marketing ploy aimed at distinguishing this product from a number of other heating elements. As you know from a school physics course, infrared emitters are also called thermal, therefore, any heating device can be classified in this category. The design of the film infrared heating element for a heated floor is shown in the figure below.
Heat Plus film heater device
Designations:
- A – coating made of film based on polyethylene terephthalate; this material is a good heat conductor.
- B – copper bus.
- C – silver tire.
- D – carbon strip coating.
- E – thermal insulation based on polyester.

