Tell me, is peeling plaster a reason to panic or not? For non-professionals, this situation can become stressful. Professionals will say that inconsistencies can be corrected. Moreover, even an amateur can eliminate plaster defects. And beginners will find useful information on how to avoid problems and give the building a respectable appearance.
Failure to comply and/or violation of technical standards and ignoring the recommendations of dry mix manufacturers can lead to defects in the plaster. When carrying out preparatory work for plastering, as well as when preparing mixtures, applying layers to the base, improper operation and when the structure settles, defects may appear on the treated wall. We will talk about them in detail in the article. For complete clarity, let's divide the problems into two categories:
- Technological defects.
- Problems arising as a result of operation.
Defect table
To find out the essence of the occurrence of defects, a table is provided with possible problems and the reasons for their occurrence, as well as methods of elimination.
| № | Defects | Possible reason | Remedies |
| 1 | Cracks |
|
|
| 2 | Swelling, peeling (flaking) |
| The peeling plaster is chipped off, the walls are dried, and the mixture is applied again. |
| 3 | Dutiki | Using quicklime | Areas are wetted, scraped and reapplied with plaster. |
| 4 | Peeling |
| After peeling, the areas are chipped off, the base is prepared and replastered |
| 5 | Efflorescence | Adding salt to the solution or from groundwater | If rinsing with water does not help, then treat the stains with an efflorescence cleaner purchased at a hardware store. |
| 6 | spotting | Protruding greasy stains or unevenly dried surface | Remove with solvents, dry with a hairdryer or naturally |
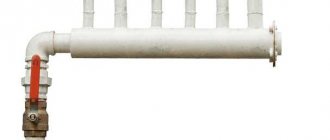
| 7 | Rust |
| The wall is being tapped, the beacons are removed, the pipes are replaced, the caps are painted, the painted plaster is removed |
| 8 | Surface roughness | Incorrect installation of beacons, levels were not used - it was done “by eye” | Bring the work to perfection using bubble and laser levels |
| 9 | Curvature of corners, slopes, openings, pilasters | Alignment occurred without the use of perforated corners and a plumb line | Install the corners and level the surface under them |
| 10 | Insufficient strength | Lack of binders in the solution, contaminated sand |
|
Repair technology
Stains, lumps of swollen material, cracks - all this will have to be eliminated if you want to get a beautiful ceiling at the end of the work.
The easiest way is with small cracks - they are slightly expanded with a spatula and filled with a solution specially developed for this purpose, sold in hardware stores. It has the words “crack filler” in its name. After the crack is filled with it, the surface is rubbed and leveled into the same plane as the rest of the ceiling. If the damage is more serious, you will have to tinker.
In all places where defects were found, the old coating is removed with a regular spatula. When determining the area of damage, the area around it is tapped. A dull sound indicates that detachment has occurred in this place as well. The entire damaged area is removed, extending about two centimeters onto the hard surface.
The surface is cleaned either down to concrete or to a depth of one centimeter, provided that the base is held firmly. If this is not the case, then it is worth cleaning right down to the concrete.
Priming the cleaned surface will be the next step. The soil is selected based on what material will serve as the base and the humidity of the room. Betonkontakt is suitable for concrete; for other materials, a different primer will be required. The strength of subsequent layers depends on its quality and compliance with the material of the surface on which the primer will be applied, so you should not save money here.
After the primer layer has dried, you can begin to eliminate defects. As a rule, several layers are applied. The starting mixture is applied first. It has a coarser structure, but allows you to get a thicker layer on the surface.
Quite often, instead of the starting mixture, the composition that was previously plastered on the ceiling, diluted to a more liquid state than usual, is applied.
For lime coatings, it is lime mortar that is used, and for cement plasters, only cement mortar is used.
The base is moistened with water, and about five millimeters of liquid solution is applied to it. When it has thoroughly set, a cross is made on its surface - crosswise, with a spatula or trowel. This is necessary for better adhesion of the finishing coating to the applied layer of solution. You can make several passes with this mixture until the desired thickness is achieved.
After the starting layer has set, the final, finishing material can be applied. It is applied in a thinner layer, usually not exceeding five millimeters. After application, the surface is rubbed with a special felt float until a uniform surface of the repaired area is obtained.
The restored part is ground in such a way that it forms a single plane with the undamaged areas.
If the plaster has dried out during the repair process and is not rubbing well, it can be lightly moistened with water from a spray bottle.
When the surface has been restored, you should wait until the area dries and carry out the final painting.
Main types of plaster defects
The causes of defects arise as a result of non-compliance with technology when diluting and laying plaster, incorrect choice of mixture for wet rooms and facades, and expiration of the service life.
The causes of plaster defects are divided into technological and operational
Technological
To control the quality of plastering work, SP (code of rules) 71.13330.2017 and SNiP (building codes and regulations) 3.04.01-87 for insulating and finishing coatings are used. These documents indicate the maximum volume and magnitude of defects. There are two groups of possible damage: defects on the surface and the quality of the layer, distortion and unevenness of the walls.
Operational
They focus on the following causes of operational problems:
- use of plaster for purposes other than its intended purpose - gypsum or polymer latex mixture was used in wet rooms, to decorate facades or open verandas;
- mechanical impact - shocks, pollution, abrasion;
- exposure to natural phenomena - rain, other precipitation, frost, direct rays of the sun, winds;
- shrinkage of structures;
- wear.
Operational defects in plaster occur as a result of wear and tear.
In order to prevent operational defects, before using the plaster, familiarize yourself with the area of its application and repair it in a timely manner.
What to do if the wall cracks again?
- Cracked cement plaster needs to be carefully but thoroughly cleaned using a hammer and chisel. Any area that looks unsafe should be cleaned.
- Then thoroughly rinse the crack to remove any remaining material, dirt, or dust. Wait until everything is completely dry. At the same time, you can prepare the solution. Before application, the crack should be moistened from the inside and covered with a new solution.
- Next, attach the reinforced paper tape and wait and see what happens.
- Then you can plaster the tape. Afterwards it should be sanded and then finished.
- A crack that is less than 5 mm wide is covered with assembly adhesive before applying the finishing putty.
How to repair cracks in the wall if the cause has been eliminated, but many small cracks remain on the surface?
First you need to seal every crack, and then attach a reinforced mesh. Sealants can be used, but the sealant must have such properties that it can be applied to a lime wall.
If the wall is made of concrete, then initially you need to lubricate the crack inside with PVA glue, and then cover it with a cement mixture.
Causes and remedies for the main types
The same defects arise for different reasons. To eliminate flaws, the causes of their occurrence are removed.
Dutiki
These air spots are caused by poor quality lime plaster that continues to fade after it has been applied to the wall. This coating is fragile. For kneading, take slaked fluff, which is first diluted with water and poured through a sieve.
If dummies do appear on the wall, the application is removed and plastered again using a well-mixed mortar.
Ducts appear when using poorly prepared lime
Cracks
Cracks can be small or deep, and they arise for various reasons.
Large on walls and ceiling
A very common cause of deep cracks is weakened support. If, at a distance of 4-6 meters from the common rib, cracks of 2 mm appear, stretching from the eaves to the base, then the reason is the resistance of the support. The occurrence of cracks from the foundation to the roof is provoked by the freezing of groundwater, which affects the volume of the soil, it swells and deforms the foundation.
If there is reinforcement, the mesh breaks in the same places where the base cracks. If hardening is not applied, the finish peels off in layers. The crack on the base is not visible, but is covered by the peeling layer.
Cracks in plaster are a common defect in plaster that occurs for various reasons.
Solving problems depends on how serious the reasons are:
- carry out drainage if the reason is wet soil, and allow 1-2 years for shrinkage;
- undergo general or local repairs to the foundation if it is damaged.
If there is a crack measuring 1.5-2 mm in the base area, then the base is definitely damaged, and the cause is frost heaving.
Small on a painted surface
The main causes of small cracks:
- load on the upper floors, if it is a high-rise building;
- shrinkage of new buildings;
- poor quality masonry.
Violation of plastering technology is manifested by a fine mesh on the painted surface.
Correcting this defect consists of several stages:
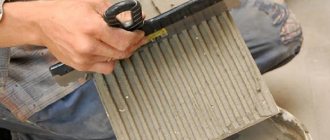
| 1.Outline the outline of the crack with a painting knife. | |
| 2. Use a chisel to clean off not only the paint, but also the plaster. | |
| 3. Expand the contours of the crack, clean it with sandpaper and prime the problem area; if the crack is very deep, moisten it with a spray gun. | |
| 4. Fill the gap with a solution using a construction gun; there should be no air left in the hole. | |
| 5. Level the surface with a spatula and allow to dry. | |
| 6. After a day, start sanding, then priming. | |
| 7. Reinforced with construction non-woven fabric. | |
| 8. Apply putty in several layers on top of each other |
It is not so easy to paint the prepared area, because freshly applied paint is brighter than old, faded paint. Therefore, the wall is not painted locally, but entirely in one layer.
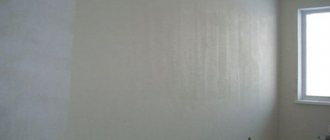
Blistering and peeling
Peeling of plaster occurs for two reasons:
- excess moisture;
- applying plaster to a dry base.
Swelling of plaster layers occurs due to wetness of materials
This defect is eliminated by dismantling and new plastering.
Cracks in the husks
The junction of two walls or a wall with a ceiling is called a husk. Cracks appearing in these places indicate the following:
- heterogeneity of materials at joints;
- the wooden base was initially overdried, but after plastering it swollen and increased in size;
- the body plates are not firmly fixed;
- lack of adhesive substances in the solution.
Cracks in the husks may appear due to insufficient strength of the solution
To eliminate cracks on dissimilar walls, the joints are secured with perforated corners. Wooden slabs are wetted before plastering. Loosely fitting sheets are rigidly attached to the frame with dowels. The solution is bought from trusted manufacturers, or prepared at home, not forgetting to add a sufficient amount of binding components.
Efflorescence
In building masonry, there are efflorescences that arise from excess moisture:
- leaching of salts from building materials, including plaster;
- waterproofing violations;
- absorption of moisture from damp rooms by walls;
- wetting of masonry from groundwater.
White stains appear on plastered surfaces made of brick, concrete, wood, and metal. More often than not, these stains do not react chemically with the surface. But this doesn't always happen. When efflorescence interacts with the material, its texture changes properties.
Efflorescence occurs as a result of high room humidity
First, they find out the reason for the water flow and eliminate this problem. To remove white deposits, special solvents are used.
Rust spots
Particularly troublesome are red spots or streaks that look like rust. The reasons for their occurrence:
- metal objects were not coated with oil paint or other insulating materials before plastering;
- metal beacons were not removed;
- communication pipes leaked;
- the roof is leaking (stains on the ceiling);
- interaction of oil and soot with the wall (near the kitchen stove the walls may take on a dirty yellow color);
- mold (some types have a rusty color).
Rust stains on plaster can be caused by metal beacons left in the coating
The most difficult thing is removing the beacons, because you will have to ditch the wall and re-plaster the damaged area.
Where rust has appeared from the dowel heads, drill all the way into the fastening, which is painted, cleaned and sealed. Communication pipes are repaired or replaced. Spots near the stove are degreased with “Whiteness” or a special compound, primed and painted with white paint.
Defects on facades
Very often, defects occur on the facades of buildings, which are more susceptible to moisture and other natural phenomena. To protect the walls, they are treated with water repellents. This mixture has water-repellent, airtight, frost-resistant properties. A facade treated with this product will extend its service life to 10 years or more. Damage also occurs due to leaking drainage pipes and roofing.
Defects in plaster on building facades occur due to moisture and other natural phenomena.
Causes
To protect yourself from such unpleasant surprises in the future, you need to understand what caused the plaster to lag behind the surface and eliminate the cause.
Most often, falling off plaster is a consequence of a violation of its application technology. If the work was carried out by builders, you can try to force them to eliminate the shortcomings, but, as practice shows, this is extremely rarely possible. Usually, getting them to redo the work is very problematic. If you laid the composition yourself, then you should blame yourself for what happened, since something was done incorrectly.
Sometimes the material is of poor quality, but this happens much less often than violations in technology. However, to avoid this, you should purchase all materials only from trusted places.
Quite often, the reason lies not even in violation of plastering rules, but in improper preparation of the base. If a solution was mixed next to a surface prepared for plaster and primed, it could easily become dusty, which led to further peeling of the material.
Major construction work, such as chiselling or drilling holes in the same room where the plaster was applied, could also lead to cracks and pieces of plaster falling off. There is no consensus on when such operations should be performed. But, in order to protect yourself, it is better to carry out all such work before the final finishing of the surfaces.
Well, the last option for the reason that led to the appearance of cracks in the coating or its peeling may simply be shrinkage of the house. If it was built recently, it is quite possible that there may be some deformation of the ceiling slab or walls, which caused such an unpleasant phenomenon.
How to identify defects
Initially, the surface is inspected visually to see if there are, for example, depressions or scratches. Unlike external damage, internal defects are not easy to detect:
| The wooden handle of some instrument is used to tap the walls. If a dull sound occurs, there is a possibility of finding internal voids. | |
| Flimsy plaster will fall off on its own with a slight blow. | |
| The surface is checked for evenness with a verified two-meter strip or bubble level. |
If nothing of the kind is found, the work has been done efficiently.
Operating at the wrong temperature
It is recommended to plaster walls at a room temperature of +5 - +25 degrees Celsius. If, for example, the temperature is too high, then the water from the solution will dry out too quickly, and the gypsum will not be able to harden correctly, according to technology.
Low temperatures are also dangerous as the material will crystallize too slowly.
Tools and materials required for repairs
To repair damage, you will need to prepare the following tools and materials:
- chisel;
- putty knife;
- container for mixing and washing tools;
- perforator;
- electric drill with kneading attachment;
- Desktop;
- a tray, a roller with a long handle and 1 cm pile;
- work clothes, hats, gloves, closed shoes;
- plaster, putty, primer.
Mixtures, solvents and other accessories will be needed depending on what defects need to be eliminated.
Working tools for plaster repair
Poor quality of working mixture
There is a rule - when mixing a solution, water is first poured into the container, and then the mixture itself is added.
If you do the opposite, then no one can guarantee the quality of mixing dry material into a mixture of the required consistency.
Even a good mixer may not cope with this task. If the plaster contains poorly mixed components, lumps, pebbles, then it will not allow the master to work normally and will begin to fall off at the first opportunity.
Wall alignment errors
When forming walls, the following mistakes are often made:
- applying a layer in excess of established standards;
- lack of reinforcing material;
- non-compliance with technology when diluting the solution;
- curved joints and corners;
- large differences on the walls.
To level the walls you will need both plaster and putty. It must be remembered that the coarse-grained composition is applied in a layer of 5 mm to 2.5 cm. Above this, reinforcement is used. Further treatment with putty depends on how level the surface is.
The maximum layer of plaster without using a mesh is from 5 mm to 2.5 cm
The difference between plaster and putty is that the latter has a viscous texture and does not change volume, does not produce bubbles or cracks, so it is used for the finishing layer and is applied with a thickness of no more than 5 mm.
When forming corners, a perforated corner is used, which is installed strictly vertically. If differences are detected on the walls, the beacons are installed incorrectly. They should be removed from the wall and reinstalled using a level or plumb line.
Why do walls crack after plastering?
If you cover a wall with a plaster composition without following the technology, it will definitely crack:
- Aerated concrete is vapor permeable, which is why the plaster applied to aerated concrete must also be vapor permeable. It is even better if it has stronger vapor permeability than aerated concrete, otherwise steam will accumulate in the coating and it will crack.
- You also need to remember that finishing must be done in one day. Otherwise, the next day the air temperature and humidity will be different, they will change the conditions for the mixture to solidify, and the wall will crack.
- If moisture gets on and under the plaster during work, it may crack.
Useful tips
To prevent defects from appearing on the walls, listen to the advice of professionals:
- It is not recommended to prepare the solution yourself - there is a possibility of making a mistake in the proportions;
- purchase plaster only from well-known manufacturers;
- when purchasing mixtures, look at the production time; plaster produced no earlier than two months ago will be considered fresh;
- remove efflorescence and mold thoroughly with chemicals; washing with water will not solve the problem;
- If even minor defects are discovered, they should be eliminated immediately - just put them on hold, which means doing a major overhaul in the near future.
It is recommended to purchase ready-made plaster mixture
The main thing is not to get upset, but to accept what happened as a given. Not everything is as tragic as it seems at first glance. Without losing composure, you need to painstakingly bring the walls to perfect condition.
Have you ever had problems with plaster on your walls? What kind of? How did you solve the problem? Share your experience in the comments.
How to restore the integrity of plaster
Grinding the old layer will extend its shelf life. It is necessary to perform this technical action regularly. It can be combined with changing wallpaper, for example, or with complete plastering of the walls. The process involves grouting the old layer with the preliminary removal of old paint or wallpaper. The new plaster mortar is prepared using cement and sand with small fractions.
Finally
Knowing about the problems, you can effectively deal with them. But repairs should not be taken to extremes or delayed. It is important to regularly inspect the condition of the plaster and respond promptly, remember this.
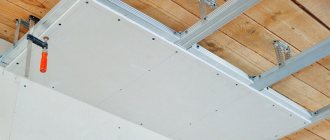
Where to start repairing walls using drywall
Leveling walls with plasterboard sheets is becoming an increasingly popular solution for apartment renovations. Its appeal lies in the absence of wet operations. The master does not need to waste time waiting for the next layer of materials to dry. At the same time, much less dirt is formed in the premises. In addition, there are situations with wall repairs when drywall work is indispensable:
- if necessary, insulate walls from the inside;
- if the wall is too uneven;
- in order to close pipes and other utilities;
- if the apartment renovation design project includes the arrangement of complex structures: arches, columns, etc.;
- with limited time to carry out wall repairs in the apartment.
Repairs using plasterboard structures should begin by identifying points for attaching heavy pieces of hanging furniture and decorative elements. In such places it is necessary to provide additional reinforcement of drywall. After this, they begin to install the frame for attaching the plasterboard sheets. It is equipped with special profiles. It is quite possible to perform such an operation on your own.
For guides, a profile with a width of 2.7 cm is usually used. For the remaining elements of a plasterboard structure, a profile with a width of 6 cm can be used.
If you want to repeat the renovation seen in an interior magazine, you need to understand that the arrangement of figured elements made of plasterboard requires high skill and special skills.
To prepare places for attaching heavy hanging furniture and massive decorative elements, you need to make and strengthen horizontal bridges between the profiles. A profile with a width of 6 cm and a length of 60 cm is suitable for them. Using self-tapping screws, it must be installed at the required height. To strengthen the profile, a wooden beam is inserted into it. To make the structure even more reliable, in addition to the horizontal jumper, you can also strengthen the vertical profiles to which it is attached.
The same jumpers should be installed at horizontal joints of plasterboard sheets.
If the renovation design project involves finishing plasterboard walls with tiles or other heavy materials, then the profiles should be installed at intervals of 40 cm. This will make the structure more durable. In this case, the joints of the sheets will precisely fall on the profile.
Please note that the spacing between profiles is measured not along their edges, but along their central axes.
Step-by-step instructions for eliminating defects
Dismantling old plaster
You can repair a wall with fallen pieces of plaster yourself. The work is not difficult. You just need to follow the instructions. Alternatively, you can completely remove the layer and apply a new one. But it is more profitable to plaster the damaged areas. It all starts with an inspection. It is important to identify areas that need repair. You will need a wooden mallet. You will have to lightly tap the wall. If a dull sound is heard, then the train has moved away.
Then the sequence is as follows:
- After the inspection, you need to remove the old plaster. We do not touch the places where it holds well.
- Next, the seams are cleaned if it is brickwork. The surface is cleaned of debris and dust.
- A primer is applied to the wall. It is needed for better grip.
- After the surface has dried, the wall is slightly moistened and the solution is applied. If a large part of the wall has peeled off, you will have to use beacons and a rule. This is the only way the surface of the wall will be perfectly flat.
- For minor damage, the plaster is removed in the shape of a square or rectangle. The area is processed according to the previously described method, and the recess is filled with the prepared composition. It is important to adhere to the proportions so that the mixture has the correct consistency.
- Another restoration option is restoration with corks. In the right places, a hole is drilled to the base, primed, filled with mortar and plastered.
Note! For wooden walls, use limestone mortar. However, it is not suitable for wet surfaces. It is better to resort to a cement mixture. It is recommended to treat corners with gypsum plaster, as it sets faster.
Repairing plaster
If your plaster has fallen off, the first thing you need to do is remove the old plaster. To do this, you will need a sharp tool that will be convenient for scraping it off the walls. It should be remembered that in addition to cleaning the problem area of the wall, you need to capture a little more space around it.
Basic operations to be performed:
- Cleaning the damaged area from the old plaster coating using the tapping method, as a result of which the plaster will simply crumble;
- Cleaning the seams of the exposed masonry from the plaster to a depth of at least 1.5 cm. Then the part of the wall to be treated should be removed from dust and moistened with water;
Cleaning plaster joints
- Preparation of liquid cement mixture and applying it to the wall;
- Preparation of lime mortar and applying it to the already dried soil layer. To speed up the drying of the wall, you can add gypsum dough to the solution at the rate of: one part of gypsum dough to six parts of solution;
Sealing plaster joints
- Apply the resulting composition to the treated area of the wall and grout it with a trowel. The boundaries between the old and new coating should be treated with an adhesive composition and rubbed over;
- Carefully smooth the joints to avoid the appearance of depressions and bumps on the wall.
Finally, you need to walk over the treated area with a damp sponge or brush.
Removing cracks
Removing cracks on the surface is much easier. Repair of plaster walls in this case consists of two stages: surface preparation and plastering. To begin with, the wall with cracks is cleaned of old facing material and dirt. After this, a primer is applied to the surface. When it dries, you can start cleaning it to give the wall a smooth finish.
Section of wall reinforced with mesh
Next, the plaster is mixed and applied to the surface in a thin layer. The composition is leveled using a spatula. If there are large cracks, it is better to strengthen the structure with reinforcing mesh. With it, the plaster layer will be much stronger and will not crack.
Sources used:
- https://otdelkasten.com/shtukaturka-sten/esli-treskaetsja-shtukaturka
- https://wikipotolok.com/s-potolka-otvalilas-shtukaturka-pochemu-takoe-proishodit-i-chto-delat/
- https://amstafkomanda.ru/remont/pochemu-mozhet-otvalitsya-shpaklevka-na-stenah-i-kak-eto-ispravit.html
- https://strir.ru/vnutren-otdelka/shtukaturka/remont-shtukaturki-otdelnymi-mestami
- https://kak-peresadit.ru/ogorod/buhtjashhaja-shtukaturka-chto-jeto.html
Where to start wall repairs during exterior work
Facade painting
The simplest and most inexpensive option for facade repair involves the use of plaster compounds. The technology for their application does not differ from that used for interior work. After plastering, the walls can be puttied and painted. For such repairs, special putty and paint for facade work are used.
The disadvantage of the repair described above is the fragility of the coating. This facade will have to be repainted in a few years.
Restoration work
Plaster repair also involves removing stains from the wall surface. They appear during operation and can be caused by grease, soot or rust. It also happens that the stains formed before the finishing work. In this case, you will have to solve this problem before you start gluing wallpaper or laying tiles. Restoration work is as follows:
- For greasy stains, use a two percent hydrochloric acid solution. The entire surface with stains is treated with the composition until they disappear.
- As for rust stains, copper sulfate or a two percent solution of hydrochloric acid will help to deal with it.
- If the stains are deeply ingrained into the plaster and cannot be cleaned, then you will need to seal the area with dye or white.
Advice! Whatever surface you're cleaning, it's important to clear it of dirt and dust first. Only after this other manipulations are performed.
The restoration of the surface under the tiles requires special attention. The procedure is as follows:
- using a rubber mallet, tap the surface of the wall. This is the only way to identify a peeled or poorly fixed area;
- When the area is found, you need to knock harder so that the tile falls off. If it is not removed in this way, then you will have to act radically - break it. The process requires accuracy: the tile is broken from the center so that the adjacent one is not damaged;
- If after removal there is a strong layer of plaster left, then it is not necessary to knock it down. The new tile should be glued more securely using a special glue;
- when the plaster falls off, the area is cleaned, primed and plastered again. After drying, a new tile is glued.
How to remove yellow stains and mold on the ceiling
Often the walls of a room are given more attention than the ceiling. However, the design and decoration of the ceiling play a vital role for its comfortable use.
Firstly, if necessary, the walls are much easier to repair. Secondly, in an emergency, almost any problem can be covered with furniture, which cannot be done with the ceiling. Thirdly, the position of the ceiling is more conducive to shedding and leaks.
In this regard, questions arise about how to make a ceiling correctly, what to consider in different rooms, and how to fix a damaged ceiling.
How to remove yellow stains on the ceiling
One of the most common ceiling problems is removing stains caused by flooding.
Many residents of apartment buildings are familiar with “water procedures” from neighbors above. Residents of private houses and top floors suffer the same consequences during melting snow or heavy rains.
There are many tips to fix this defect. One way is to use bleach to clean the stain. However, rust stains that appear as a result of water seeping through the slabs and onto the fittings are not always removed with its help.
Other means that can eliminate yellow spots on the ceiling are vinegar, citric acid, copper sulfate and even household chemicals aimed at removing rust.
When treating stains on the ceiling, do not forget about eye protection. First, the ceiling is cleaned - the area of damaged finishing is removed, then blotted with any of the above products and left to dry. After drying, the surface is thoroughly primed and painted.
It is best to repaint the entire ceiling to avoid stains. However, once you get rid of stains, you cannot guarantee that they will not appear again.
Therefore, one of the universal solutions is a suspended ceiling, ceiling tiles or a ceiling covered with plastic. This ceiling finish will not allow any leaks to spoil the repair.
Photo 1 - Yellow stains from leaks on the ceiling
Mold on the ceiling
The question “how to remove mold or mildew” is even more serious than the previous one.
IMPORTANT!
Mold on the ceiling and walls is a serious enemy of human health. The first step to eliminating mold is to control the indoor humidity. The precursor to mold is dampness.
Therefore, if such problems occur, it is necessary to check the ventilation. If it is a bathtub, take care of forced ventilation and install a powerful hood in the kitchen.
If mold appears in other rooms, you also need to take care of drying them - if possible, open windows and doors. If the ceiling is plastered, then it is necessary to clean the affected area and the area around it down to the concrete. The affected area must be treated with an antiseptic.
In extreme cases, bleach or vitriol will also work to combat mold. However, to get rid of mold, it is best to use special anti-fungal products, for example Caparol's Capatox, Antisept and the like.
Photo 2 - Black mold on the ceiling
First, the moldy area is treated with a solution using a sponge, brush or spray, and after a while it is cleaned, washed and left to dry.
Subsequent finishing must be done with primers, plasters, putties and paints that have antifungal additives and are resistant to moisture. The area treated with the antifungal agent is thoroughly dried and then primed several times with a deep penetration primer with the above additives.
Then plastering, putty and painting or putty and painting are performed. The main thing in the fight against mold is not to allow moisture to accumulate and to dry each layer of finishing well.
If mold has infected a plasterboard ceiling, then cleaning and washing off the mold from the plasterboard board is a disastrous task.
It is necessary to dismantle the damaged sheet and replace it with a new one. In wet rooms, you should use only moisture-resistant plasterboard and do not neglect waterproofing agents and sealants even when finishing the ceiling.
Photo 3 - Antiseptic against mold and fungi Kapatox from Kaparol
The ceiling collapsed
Yellow spots and mold are nothing compared to the next problem. If the ceiling has collapsed, you cannot do without the intervention of specialists. The action plan depends on the type of premises and the scale of the collapse.
If the building is an apartment building and as a result of the actions of the neighbors above, a through communication with them through the ceiling has formed, then it is urgent to involve housing and communal services and negotiate with the neighbors. Amateur activities are not welcome here.
Specialists must inspect the site of the “incident” and assess the situation: how damaged the slabs are, what’s wrong with the reinforcement, whether the walls are affected, especially load-bearing ones, whether there is a danger of further collapse, and carry out strengthening and repair work.
The same goes for the unexpected sky window in the ceiling. If the ceilings are intact, or part of the finishing has collapsed, then there are two options: clean the collapsed area and repair or completely redo the entire ceiling.
When the plaster falls, you need to tap entire sections to find out how firmly they hold.
If it is strong enough, then you can plaster only the collapsed area. Although the best option is a complete repair of the ceiling, since the collapse of one part of it is the “first sign,” so to speak. This already indicates that the adhesion force of the plaster to the ceiling has weakened and you can expect further troubles.
When redoing the ceiling, everything should be done in accordance with the technology of plastering or drywall work, follow the instructions for the materials used and do not neglect primers, as they will serve as a guarantee of the strength of the ceiling.
Photo 4 - Collapsed plaster on the ceiling
Ceilings in different rooms
Having decided to completely change the finish of the ceiling after a collapse, you want it to not collapse again and to ensure that its installation is quick and inexpensive, and the final version is aesthetically pleasing. Of course, such an ideal option is unlikely to work out. The combination of “high quality” and “inexpensive” is very rare. But, to achieve the best result, you can take into account several recommendations.
The ceiling in the toilet and bathroom should be made of moisture-resistant materials.
You can use a suspended ceiling, but this will be very expensive compared to other types of finishing. When choosing which ceiling to make in the toilet, you can pay attention to such options as regular painting, gluing ceiling tiles and plastic sheathing.
What to do?
If the cement-based plaster has come off from the aerated concrete, then you need to completely clean it off and reapply it.
First, it is advised to finish the walls inside the room, and only then finish the facade.
The plaster may come off due to constant changes in humidity. You need to find the source of the increase or decrease in humidity and correct it.
If this happened due to a mixture of poor quality or an old composition, then you can only completely remove the old finish and apply a new one.
The problem should be carefully studied; perhaps this was due to subsidence, which appeared due to the fact that the plaster preparation time specified by the manufacturer was not followed. Then just redo everything.
When applying the mixture in hot weather, it is necessary to slow down the drying of the walls. To do this, they are moistened from time to time.
But if cracks do occur, then the walls are rubbed with mortar or gypsum dough. If the gaps are too large, they are widened, cleaned, moistened and plaster is applied.
Try placing paper tape over the peeling plaster area. If the tape breaks, you will have to start all over again.
Sealing cracks in plaster has its own algorithm of actions, filled with some subtleties that require careful study.
Subtleties of sealing cracks:
- It is advised to buy a mixture of the same brand that was used previously.
- You cannot work at air temperatures below +5°C and at humidity levels above 80%.
Methods for sealing large through holes
Sealing through holes
They can be divided by size - large and small.
Large holes will require a significant amount of work.
Most likely, in this case you will have to finish the entire surface of the wall in order to hide it again.
Fixing a small hole in a wall is much easier.
Here you can limit yourself to finishing work on a local scale.
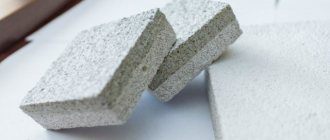
For large holes, it is necessary to fill the hole using stone materials.
How to repair a hole in this type of wall? Best of all is what the wall was made of before. For example, for a brick wall, brick sealing is suitable; for a wall made of aerated concrete, you can use aerated concrete. For a tongue-and-groove wall, take a piece of a tongue-and-groove block. For a concrete wall, take a brick.
Deep penetration primer
If the shedding is superficial and when you tap it with a hammer, huge pieces do not fall off the wall, then the situation can be corrected with the help of a deep penetration primer. It is easily absorbed by the plaster, penetrating deep into its layer, increasing adhesion to the wall.
The sequence of actions is as follows:
- We remove all small pieces from the wall in the crack area.
- Use a brush to clean problem areas.
- We take a primer with maximum adhesion rates (sold in cans ready for use).
- Stir the mixture intensively and pour it into the pan.
- Using a roller, apply first to problem areas, then to the remaining wall.
- After the primer has been absorbed, it is applied with a second layer.
- After 2-3 hours, problem areas can be puttied.
- Next, the wall is leveled using finishing plaster and prepared for final finishing.
There is no point in applying primer where the plaster is coming off in large areas. It is impossible to stop the destruction in this case, so it would be advisable to dismantle it.
Advantages:
- Quickly and deeply absorbed;
- Dries well;
- Does not cause softening of the plaster structure.
Flaws:
- Suitable only when the plaster crumbles in small quantities at the crack stage.
There are a lot of manufacturers of primer mixtures and they are all quite good. When choosing the best option, you need to take into account the air permeability indicator, as well as density. The more liquid the composition is, the faster it penetrates into the plaster layer.
Options for wall decoration
Repairing a wall in an apartment can be done using various materials. The most popular of them are:
- wallpaper of various types;
- frescoes;
- decorative plaster;
- dye;
Wallpaper for walls
Some people believe that wallpaper is a long-outdated way of covering walls, but this is not so. The possibilities of such coverage are simply enormous. Canvases with a variety of designs and patterns are updated every season. The most commonly used types of wallpaper are:
- paper or non-woven;
- vinyl;
- washable.
A variety of coatings will allow you to choose an option according to personal preferences. Non-woven fabrics are of high quality and density; they can hide small unevenness in walls due to their thickness. Paper coatings are inexpensive, but their strength is quite low. It is highly not recommended to use them for tiling in the kitchen or bathroom, since they are not protected from moisture.
A good solution for cladding walls in a home would be vinyl and washable wallpaper. They have an average cost, but are of good quality and moisture protection.
Use of fresco
Fresco is a handmade work that involves covering walls using water-based dyes on wet plaster. The only drawback of this treatment is the high cost, but its appearance will fully cover all costs. The fresco is perfect for creating almost any style, especially for bohemian interiors.
Decorative plaster
Decorative mixtures are a more modern method of cladding. The composition of this plaster includes the following components:
- marble stone chips;
- synthetic additives;
- nylon fibers or cellulose.
The effect of cladding with decorative plaster Various additives can significantly change the result of cladding walls in an apartment, so the composition of the solution must be taken into account during the purchase.
Painting the walls
Apartment renovations are rarely complete without paint. The combination of painted surfaces looks attractive and stylish. Designers often experiment with a palette of colors, creating unique interior pictures. The most popular options are highlighting one wall with an unusual shade or painting the surface using a stencil.
As can be seen from the article, wall repair is an extremely important procedure. The possibility of further surface finishing will depend on the quality of this work. With the help of the photos used in the article, it will be possible to see in practice each stage of the work.