Choosing the type of plasterboard ceiling
The choice of the type of plasterboard ceiling depends on its purpose. The technological diversity of plasterboard structures allows you to create the following types of ceilings.
- A flat single-level plasterboard ceiling, with the ceiling level lowered by 100-1500 mm.
- Two-level ceiling with possible lighting.
- Two-level ceiling with figured elements;
- Curved ceiling on several levels;
- Other types of ceiling.
The appearance options for a plasterboard ceiling are very diverse and are limited only by the imagination of designers and the technology of plasterboard construction.
Decorating a plasterboard ceiling
Finishing a plasterboard suspended ceiling can be done in a variety of ways. The market offers a wide range of different materials and solutions that can be used to decorate a ceiling structure - and not all materials are intended for decoration.
The variety of options suggests that decorating a suspended ceiling is a purely individual matter, which is worked out personally by the owner or a hired designer. In addition, the selection of the most suitable decorations largely depends on financial capabilities - budget decoration is made from completely different materials than expensive decor.
For some situations, plaster molding may work well, while in others, simple foam moldings will be appropriate. The finishing of the ceiling surface is also important - in one style, wallpapering will be quite appropriate, but for other cases, more complex and expensive solutions will be required, such as an elegant handmade pattern applied to the ceiling by an artist.
When designing a ceiling design, you also need to take into account the characteristics of the room itself, as well as the entire home. Will all the rooms fit into the general style, or will they be completely different from each other? This question needs to be thought through as early as possible, so as not to end up with incompatible design solutions.
Plasterboard ceiling - two designs
There are two fundamentally different designs of plasterboard ceilings.
- The first design is mounted on a frame made of a special profile, which is called a profile for plasterboard, also known as the ceiling profile PP 67/27 and the ceiling guide profile PNP 28/27. Ceilings are made on a metal frame more often in city apartments and stone houses.
- The second design, plasterboard ceilings, is made on wooden beams. For this design, any dry construction timber with a width of 60 mm and a height of 30 or 40 mm is used. Ceilings on a wooden frame are most often installed in wooden houses, houses with wooden floors and attics with a rafter system.
Drywall installation - what you need to know
Installation of drywall is carried out in several ways:
- Apply strong special glue to leveled surfaces. Next, you will need a finishing finish, for example, dry plaster. It is not recommended to use it to make wood surfaces even.
- On a pre-prepared frame. With a similar installation, it can also be used for wooden floors. The frame can be made of either metal or wood.
Wooden bases are cheaper, since only blocks of wood are required for execution. Metal ones are made from galvanized profiles, special hangers, and connecting elements. This is a more reliable and durable option.
Before starting installation, you should familiarize yourself with several rules:
- The joints of the sheets are placed strictly on the frame and fixed with self-tapping screws.
- The seams must be taped with joining tape.
- External corners are closed with special corners.
- Interior partitions are mounted in two parallel layers.
Purchase of materials for plasterboard ceilings
Plasterboard ceiling material can be divided into three groups:
- Material for the ceiling frame and its fastening (suspension) to the rough ceiling;
- Plasterboard sheets;
- Fastening and additional material for the structure.
Material for the ceiling frame and its fastening
Consider the option of a ceiling in an apartment using a metal profile for plasterboard.
A special profile for the ceiling is called a ceiling profile. Correctly, such a profile is called and labeled as follows:
- PP ceiling profile PP 60/27,
- PNP ceiling guide profile PNP 28/27.
The dimensions of the profiles are such that when assembling the structure they can be inserted into one another. The profiles are secured to the structure using special screws called “bug” (“bug” is a screw type: LB) or a special tool called a cutter.
Installation of drywall - finishing
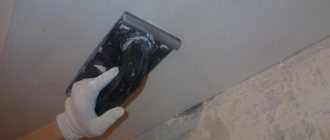
After the putty has dried well, the entire surface is primed with a regular paint roller. Next, the base layer is applied using a pair of spatulas: small and large. The first mixture is taken from the container and smoothly distributed along the edge of the second. The surface is already treated with a large spatula.
Next, you must sand the drywall. It will become completely smooth. On such surfaces you can easily glue wallpaper or apply paint, but only after another layer of primer.
Floating and hard plasterboard ceilings
Pay attention to this section. There are two technologies for installing a gypsum plaster ceiling on a metal frame.
The first technology is tough. She assumes that the plasterboard ceiling is simultaneously attached to the sub-ceiling and to the walls. The frame of the suspended ceiling is attached to the rough ceiling using special PP hangers (straight hangers) or clamps with rods. Direct suspension will allow you to lower the ceiling to a height of no more than 200 mm. Suspension with traction allows you to lower the ceiling by 300-1500 mm.
Note: It is worth paying attention that when choosing the type of ceiling, you must understand how much the ceiling will lower and from this make a choice of types of suspensions.
The second technology is floating. She assumes that the ceiling frame will be attached to the sub-ceiling, but will not be attached to the walls. This ceiling is made only with PP profiles, without using PNP profiles. This ceiling design is used in new buildings in the first years of completion, houses near highways and railways.
I described in detail an example of a ceiling with direct hangers in the article: Suspended ceiling with direct hangers. Here, for a variety of examples, we will consider the installation of a single-level floating ceiling on rods with clamps.
How to glue drywall
The sheets are attached to flat surfaces using specialized glue. This is the easiest and fastest installation method. But it is only suitable for leveled surfaces. A difference of no more than 20 mm is allowed. This takes up less room space. There are two ways to fasten sheets:
- On clean and primed walls.
- On strips of Perlfix glue 10 cm wide.
Drywall should be fixed only after the wires have been laid and sound insulation has been thought out. Glue is applied around the perimeter and in the middle of the sheet. To ensure uniform application, use a notched trowel. After the glue has hardened, you can strengthen the structure with dowel nails.
You can also attach drywall to polyurethane foam. In this case, the sheets are attached to long screws, and the gaps are filled with foam.
Material for single-level ceiling
To determine how much and what material you need to purchase, you must first draw a diagram of the future ceiling design. We draw the room where the ceiling is planned, with dimensions.
Ceiling hangers should be installed with a pitch of 600 mm and a distance from the walls of 250 mm (see photo). Draw the planned hangers on the drawing of the room based on the required gaps between them, and get their number. An example of the arrangement of profiles can be seen in the figure from the article Marking a single-level suspended ceiling.
When making a hard ceiling with your own hands, you would need a guide profile (PNP 20/27) around the perimeter of the room. Its length can be calculated by the length of the perimeter of the room plus 10% margin. This profile is not needed in this floating ceiling design.
The main structure of the floating ceiling frame is a kind of grid of ceiling profiles (PP 60/27). Some of these profiles will be attached to hangers (they are called main). The second part of the profiles will be attached to these profiles (they are called load-bearing). The name is load-bearing due to the fact that sheets of drywall will be attached to these profiles.
In technologies for working with plasterboard, intersecting ceiling profiles can be connected in one level (end-to-end) or in two levels, overlapping one on top of the other.
- The first connection is called a single-level connection of ceiling profiles and it is made with special “crab” type fasteners.
- The second connection is called two-level and it is made with a special two-level profile connector.
In the design of a floating ceiling, only a two-level connection of profiles is used!
I repeat and this is important . In the design of the plasterboard ceiling frame, two types of profiles are clearly separated. Some profiles are called main, the second are called load-bearing (load). The main profiles are attached to the sub-ceiling, and the load profiles bear the load from the weight of the drywall attached to them.
Important! In a two-level frame, the main profiles are located at the top of the structure, and load-bearing profiles are attached to them.
Materials and tools
Before starting installation work, prepare the tools that will be needed during work and calculate the amount of material for installing the structure. Among the tools you need to have:
- screwdriver;
- reforator;
- roulette;
- special knife for cutting plasterboard;
- scissors for working with metal;
- level.
Force majeure may occur in the process, which will require additional tools, but in most cases, this set is enough to install the structure. The same list of tools is used to create a standard or stretch ceiling.
Before purchasing material, you should carefully calculate the required quantity. Firstly, this will help you save money, and secondly, it will help you avoid the inconvenience associated with additional trips to the hardware store. Materials needed for installation:
- Metal profiles (60x27 and 27x28):
- Suspensions;
- Dowels and screws;
- Putty.
You can include LED strip and baseboards in this list, but this relates more to finishing and are not materials of primary importance.
Floating ceiling with light trim
DIY plasterboard ceiling - marking
- When making a plasterboard ceiling with your own hands, it is important to make the markings correctly. You need to start work by cleaning the old ceiling and top of the walls from old building material. If necessary, the walls are strengthened with building mixtures.
- We begin work by marking the ceiling. Marking is best done using a laser level.
- We apply the lower level of the ceiling along the perimeter of the room.
On the ceiling we mark the places for attaching the suspensions, taking into account the distances from the outer profiles to the walls (at least 100 mm) and the distances between the main profiles (at least 600 mm).
For accurate marking, we mark the location (fastening) of the suspensions on the marking lines. To mark, we use a construction marking cord and, with the help of an assistant, we put the markings on the ceiling.
Installation of drywall on walls - technology
It can be noted that the sequence of installation of gypsum boards on surfaces made of various materials is approximately the same:
- the frame must be leveled;
- the guides are attached specifically to the wall surface with the same pitch;
- racks are used as load-bearing components;
- the frame can be supplemented with guide profiles to increase reliability;
- frame elements are placed at a distance of 0.4-0.6 m;
- A gap of 1-1.5 cm should be left from the floor and ceiling.
Video: installing drywall on walls
There are a number of differences in fastening drywall, taking into account the material of the walls:
- The sheets are attached to the concrete wall using a hammer drill and 60 mm dowel nails.
- The correct installation of drywall to a brick wall is carried out in the same way, but the quality and strength of the masonry should be taken into account. For old buildings and those made of hollow bricks, dowel-nails with a length of more than 80 mm are used.
- The frame is mounted on foam blocks using pancake screws without preparing holes.
- If the wall is made of wood, then fastening occurs with nails or self-tapping screws. A frame must be built on curtains with a stroke of up to 6 cm.
Installation of hangers
- According to the markings made, we install the suspension rods using dowels with screws or other fasteners.
- On the installed rods, at the same level, we attach clamps with hangers for the profiles.
Making wiring for lighting
Before installing multi-level plasterboard ceilings, it is necessary to make wiring for lighting.
Attention: before wiring, you should calculate the cable cross-section. To do this, add the power of all lighting fixtures and determine the load on the line.
Do not take the wire cross-section end-to-end. Make allowance for the increase. The wiring must have additional margin.
If you plan to install 12 W elements, then you will need to install a step-down transformer in the line.
Choose a location so that you have easy access. Before installing lighting, you should turn off the lighting on this branch. Don't tempt fate!
We insert the wire into the corrugation and attach it to the ceiling surface with clips.
To connect the wires, we use terminal blocks - they will ensure reliability. At the locations of the lamps, make a wire outlet. Do this with reserve; Connect the lamps and turn on the power supply. We look at the distribution of light in the room.
Make sure to do this. If you make mistakes, you have the opportunity to freely correct the shortcomings. After fastening, this will be much more difficult to do.
Attention: When wiring, avoid twisting.
Use terminal strips. After installing the ceiling, it will be difficult to get to the wiring in case of malfunctions. Use high-quality material and do everything conscientiously.
Ceiling frame installation
We begin installing the ceiling frame with our own hands by installing the main profiles. They are secured with a suspension as follows.
- We attach load profiles to the main profiles. We connect them to the main profiles with a two-level suspension.
- We maintain technological distances between profiles.
Important! When making a plasterboard ceiling with our own hands, we constantly measure the horizontality of the profile levels. If necessary, adjust the level using clamps on the rods. In the photo, this adjustment is shown with arrows.
Upon completion of installation of the frame, we once again check the horizontality of the entire structure in different directions.
What will you need to make your own suspended ceiling?
Before starting work, you need to prepare tools and materials.
Tools you will need:
- impact drill or hammer drill;
- metal scissors;
- screwdriver;
- tape measure, level, construction cord;
- a knife with a sharp blade end, a hammer;
- spatulas of different sizes;
- sanding mesh or fine-grained sandpaper.
Materials you will need:
- plasterboard sheets;
- guide profile 28x27 mm;
- ceiling profile 60x27 mm;
- pendants, crabs;
- dowel-nails, self-tapping screws;
- metal perforated corner;
- reinforcing tape, fiberglass;
- primer, gypsum putty, paint.
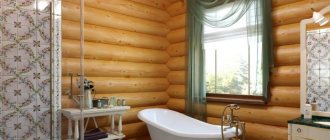
In addition to standard and moisture-resistant plasterboard, there are gypsum fiber sheets, as well as moisture- and fire-resistant gypsum plasterboard. To make a suspended ceiling in dry rooms, standard plasterboard is suitable. In rooms with high levels of humidity, for example, a bathroom or kitchen, you should use moisture-resistant plasterboard. Other types of plasterboard for home suspended ceilings are rarely used.
Covering the frame with plasterboard
Gypsum craton sheets are attached to the load profiles with TN self-tapping screws with a pitch of 150 mm. You will need an assistant or device to support the sheets. You can make a device for supporting sheets with your own hands, for example, a T-shaped support made of wooden slats.
The joints of the sheets on the ceiling should be made in the middle of the profile so that they do not hang in the air. The screw caps need to be recessed by 2-3 mm.
We have a single-level floating ceiling, so we retreat from the edge of the walls by 5-7 mm.
The joints of adjacent rows of plasterboard sheets should be offset, as in brickwork.
How many layers of gypsum plaster should be in the ceiling?
For apartments, that is, rooms that are quite small, the ceiling is made of plasterboard in one layer with sheets of 12 mm thickness. When using thinner sheets, the sheathing is done in two layers.
Drywall: scope
Drywall has long gained popularity as a flexible and versatile material for construction and repair. Installing drywall is not as complicated as it may seem at first glance. It is enough to understand some rules and nuances.
Drywall is a sheet made from gypsum. It can be in size 1.2*3 m or 2.5*1.2. The material is covered on both sides with thick cardboard. Because of this composition, it is considered environmentally friendly. But during manufacturing, additives can be used to impart certain qualities to the building material: moisture resistance, heat resistance.
When performing repair work, plasterboard can be used for the following purposes:
- Insulation of premises.
- Construction of partitions, walls, niches, various complex structures.
- Leveling surfaces. It is worth noting that this is a fairly economical and fast method.
For a two-level frame you will need
A two-level plasterboard ceiling will require more material and its amount depends on the ceiling pattern. All curved edges of the structure are made from guide profiles (PNP 28/27), and how to make a two-level ceiling in detail is in the next article here.
©Gipsokart.ru
Articles on the topic
- Selecting and installing a chandelier on a suspended ceiling
- Suspended flow frame with single level connectors
- Plasterboard finishing of attics
- Suspended ceiling with direct hangers
- Suspended ceiling with a two-level frame
- Plasterboard ceiling for narrow rooms
- Plasterboard ceiling on a wooden frame
- DIY plasterboard ceiling: single-level floating ceiling on rods
- Ceiling profile for plasterboard
- Marking a single-level suspended ceiling made of plasterboard
Wooden or metal?
There are several options for making lathing for attaching gypsum boards to the ceiling.
It can be made of wood or metal profile. The main advantages of a wooden frame are environmental friendliness, availability of material and ease of assembly. But there are also many disadvantages:
- As a rule, such a frame is used only with a flat base surface. Using it to level walls or ceilings is a real pain.
- Before assembly, all structural elements must be thoroughly treated with an antiseptic solution. Otherwise, their long service life cannot be guaranteed.
- Wooden lathing is not used in rooms where humidity exceeds 12%. At high rates, structural elements will swell and warp.
- During installation, it is necessary to leave gaps between the wall and the bars, compensating for the displacement of the geometry of the latter under the influence of temperature and moisture.
- A wooden frame is considered less durable than a metal profile structure.
The metal frame does not have these disadvantages. It is resistant to the external environment and microorganisms, durable and practical. If you have minimal construction skills and the necessary tools, it is not difficult to assemble it yourself. Installation of a profile frame will require careful calculation of the required material and various auxiliary elements: hangers, crabs, connectors.