Rules for the location of pipes on the roof
When designing the passage of a chimney pipe through the roof, you should be guided by the current rules and regulations, fire safety requirements. The following should be taken into account:
- The recommended location for installing the chimney is at a distance of no more than one and a half meters from the highest point of the roof (ridge). In this case, the upper cut of the pipe should be located at least 50 cm above the ridge.
- If the pipe is 1.5–3 meters from the ridge, its upper part can be located at the level of the ridge. When the chimney is removed by more than three meters, its height above the roof is calculated depending on the height of the ridge. The upper cut of the ridge should fall on an imaginary line drawn from the ridge at an angle of 10° relative to a horizontal line passing through the same point.
- The place where the chimney pipe passes through the roof should be located between the rafters at a distance of at least 25–30 cm from the wooden elements of the roofing system. If part of the rafter is removed, a special structure is installed so that the roof frame can withstand operational loads.
- A gap of 13–25 cm should be left between the chimney pipe and the edges of the roof covering, which is not resistant to fire (soft roofing, roofing felt), if the roof is made of sheet metal, natural or cement-sand tiles, slate, this distance can be reduced to a minimum.
Pipe in the valley area
It is not recommended to install a chimney pipe in the place where the valley of a complex roof is located. Precipitation flows down it, which flows here from two slopes, in addition, snow masses will accumulate near the chimney and melt. Increased load inevitably leads to depressurization of the joints between the penetration and the roof; they will have to be regularly checked and repaired.
Passage through the roof of a round pipe
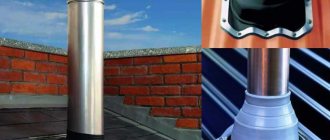
The passage unit for round pipes through the roof can be either metal or soft - rubber or silicone.
Metal roof penetrations are made of galvanized iron; sometimes they are coated with a protective coating, similar in color and composition to the coating of metal tiles. Often, metal tile manufacturers offer special penetrations: this is the same sheet of roofing material to which an elastic rubber cap is attached, which serves as an excellent insulator.
For other roofing materials, flexible penetrations can be used as a roof penetration unit. There are many of them on the market today. Different colors, compositions, for different roof angles, straight penetrations, with different types of fastening (for self-tapping screws, with an adhesive composition, etc.).
Among all the flexible penetrations, Master Flash has the best recommendations. It is quite easy to distinguish: in addition to the printed company name, on the back side of the roofing penetration there are additional corrugated grooves that increase the degree of adherence to any roofing material. On the outside, the base along the edge has a metallized coating, with which it is easy to achieve any desired relief.
Roof penetrations for round pipes
To install a flexible penetration, part of the outer cap is cut off - the diameter of the resulting hole should be less than the diameter of the pipe. The penetration is pulled onto the pipe with force. To reduce resistance, you can coat the surface of the pipe with soapy water. After the penetration is tensioned, the lower flange is given the required configuration. On the back side it is coated with sealant, then pressed against the roof and fixed with self-tapping screws. This method of sealing a round pipe is not very labor-intensive, but quite reliable.
Silicone and rubber penetrations are used at pipe temperatures up to 100 o C. If the chimney temperature is higher, you will either have to make an additional layer of insulation between the penetration and the pipe or, more likely, use a metal skirt and glass. The following video shows what they look like and how to attach them. Everything was done there not entirely correctly, but the installation principle is clear.
Roof sealants
In order to seal the joints of different parts of the bathhouse pipe passage through the roof, you need to use not just a roofing sealant, but always a heat-resistant sealant. It is advisable to use a neutral silicone heat-resistant sealant.
If Master Flash is installed on a metal roof (metal tiles or metal profiles), then it is necessary to use silicone sealant that does not contain vinegar (non-acetic sealant). This is necessary so that it does not enter into a chemical reaction with the metal and does not destroy it.
Roofing silicone sealant retains its properties in the range from -50°C to +300°C, which is sufficient for all weather conditions and is quite suitable for sealing a chimney.
Roof sealant must be neutral and heat-resistant
But you need to remember that the surface to be treated must be clean and dry. The time for complete hardening is indicated on the packaging, usually 24 hours.
Fighting joint leaks
To create the maximum possible tightness of the junction of the roofing material and the pipe at the points of contact, an internal apron is made using the lower strips.
Installation of a chimney passage through the roof.
To make an internal apron, you need the following tools:
- marker;
- long metal ruler;
- grinder with a disk 2 mm thick;
- pliers;
- hammer.
In order to do this, the plank is applied to the walls of the chimney pipe, making marks for the top of the plank. The next step is to punch a groove along the previously marked line.
Installation of the inner apron should start from the bottom wall. The edge of the apron is inserted into the groove, after which it is installed on the remaining walls. The overlap should be 15 cm. Then the edge of the film inserted into the groove is sealed. Having trimmed the lower strips, they are installed and then secured with self-tapping screws.
After installing the lower apron, you can begin installing the tie, which is a sheet of waterproofing material placed under the elements of the inner apron from below. The main function of a tie is to drain water.
After completing the installation of the tie and apron that protect the joints, the roofing material is laid. Then the outer apron is installed. To do this, use the upper abutment strips.
The installation of the apron on the outside is similar to the installation of the apron on the inside. The difference is the absence of a groove and the upper edge is fixed directly to the chimney wall.
Important: today the building materials market offers products that are designed specifically for chimneys with a round cross-section. They are roofing passages that consist of a base (flat steel sheet) and an apron cap
A circular chimney is installed inside the passage.
Consequences of poor installation
When organizing a penetration through the roof for a chimney, it is important to provide good protection from moisture. Therefore, you need to follow installation technology and use high-quality materials. Inadequate pipe insulation increases the fire hazard. In addition, it causes the following negative consequences:
- the brickwork is destroyed due to weakened mortar, smoke enters the home;
- Moisture accumulates inside the chimney, and fungus appears in the summer;
- heat losses increase, which forces you to spend more fuel on heating;
- sections of the roof adjacent to the pipe are destroyed by ice.
If the circulation of air masses in the space under the roof is disrupted, humidity increases, and wood parts begin to rot. There is a need for overhaul of rafters. Therefore, it is important to carry out the excavation work correctly.
The final stage of installation
The design of the unit is completed in the following stages:
- Remove the protective film from the sandwich pipes. It is highly undesirable to free parts from polyethylene earlier - they may be damaged during transportation or installation.
- Seal the joints properly with sealant. Ideally, the composition should withstand temperatures within 1000 degrees.
Which areas need to be coated with sealant:
- seams at the junction of internal sandwich pipes - the plane located on the outer part from above;
- joints of external pipes - the entire outer surface area;
- the junction of sandwich pipes with other components of the system - the entire area or diameter, if we are talking about round pipes.
Do not rush to use the new chimney right away; first check that it is working correctly:
- Turn on the heating device (boiler, stove or fireplace) at low power.
- Now inspect the device to see if it is leaking smoke in the wrong places.
- Check for excessive heating of components of the entire system, especially in the wall or roof transition area.
What is good about a chimney made from sandwich pipes? It looks aesthetically attractive and provides the fireplace with a modern style; even a beginner can assemble it. And also, if installed correctly, it will last a long time and will delight the owners with uninterrupted operation.
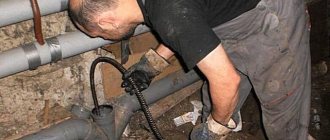
Pipe passage through a chimney without a factory passage unit
It is possible to remove the chimney without a passage device. In this case, the edges of the hole in the ceiling are also sealed with a fire-resistant heat insulator, and metal strips are placed on top of it. A protective plate made of non-flammable material is put on the sandwich coming from the oven, in which a hole of a suitable diameter is cut, and holes are drilled along the edges for fasteners. Traditionally this is a sheet of metal. Next, the sandwich is passed into a hole in the ceiling and fixed there using some non-flammable guides. For example, you can use drywall profiles or something similar. The main thing is to securely fasten the pipe and observe the basic rule of fire safety: there must be a distance of at least 36 cm from the edge of the pipe to the flammable material.
You can make a passage through the ceiling with your own hands
Important! When installing and securing the chimney, keep in mind that the pipe changes its size due to thermal expansion. It must be secured so that it can move relative to the roof
Then the pipe is lined with non-flammable material from below (from the ceiling). From the attic or second floor side, the voids formed in the groove are filled with a heat insulator. The requirements for it are still the same: tolerance to high temperatures. Expanded clay may be the most budget-friendly. Actually, this completes the exit of the chimney pipe through the ceiling.
You can make a passage through the ceiling with your own hands
Algorithm of actions for the device
The chimney is installed and fixed in the base area.
During the construction of the canopy, it will be necessary to dismantle the pipe canopy, if it was already attached to it.
Next, perform the following steps:
- The size of the ring on the penetration is determined. It should be 20 percent less than the diameter of the chimney. Using a sharp knife, cut to the desired size. If the gap is unsuccessfully cut, do not rush to throw away the Master. You should try to correct such a flaw using a tightly installed clamp;
- The prepared Master pulls himself onto the pipe and with force lowers himself to the roof level. To make sliding easier, you can use soapy water as a lubricant;
- In the case of making a roof covering from ondulin, tiles, slate and other covering materials laid overlapping, the upper section of the base of the otter must be moved under the adjacent, outermost component of the insulation. This will create conditions for free drainage of water regardless of sealing;
- A moisture-resistant sealant or bitumen is applied under the base, and the flange is secured with self-tapping screws with a large press cap to the roof and sheathing. The distance between the screws should be maintained at 3.5 cm.
Expert advice: you should not screw in a large number of screws, since over time the sealant will gradually begin to lose its insulating qualities, and moisture will begin to enter through multiple punctures from the screws.
It is not recommended to screw self-tapping screws into depressions in the roofing material through which water flows. The flexible, sealing element can be easily bent to fit the roof profile and attached with minimal gaps. This completes the installation process.
In rare cases, a tight fit of the roof to the pipe is not observed. In this situation, the edges of the seal should be tightened with a clamp. This state of affairs serves as proof that the Master Flush was not selected accurately or the installation was carried out with errors.
Such auxiliary parts can be easily completed and installed with your own hands, or can be purchased at specialized construction stores. Such a “plate” is simply strung on the chimney on top of the otter. The size of the metal pad must be accurately selected to prevent it from oscillating due to wind.
The maximum operating temperature of Master Flash shows that the gasket cannot be used on every chimney. The otter will behave well if the chimney is insulated with a sandwich or on a chimney without insulation, which will heat up to no more than 100 degrees.
Expert recommendation: to avoid unpleasant situations - ignition or melting of the “master” during soot burning in an uninsulated pipe (temperature can reach 500-600 degrees), it is necessary to first perform thermal insulation work on the chimney.
For this purpose, basalt fiber is used, which is coated with galvanization.
According to numerous reviews, the widespread use of Master Flash roof seals is due to the convenience and speed of installation. Important advantageous factors are the affordable price, reliability of insulation, and long service life.
And there is no point in attracting highly qualified specialists or additional workers, since the instructions for the seals clearly and clearly describe the installation process, which any layman can handle.
Watch the video in which the master explains how to properly install and secure Master Flash for a chimney:
Node of passage of a chimney through a flat roof
When installing a chimney on a flat roof, it is important to remember that its height above the roof surface must be 500 mm in accordance with SNiP standards. A round pipe, a rectangular chimney duct, or a brick chimney itself can be discharged through a concrete floor slab.
The round pipe passage unit will be considered separately, and for other cases two basic installation principles are used.
Features of arranging a passage through a pitched roof
How to fix a chimney on the roof? On the chimney pipe on the inside of the roof, it is necessary to mount a flange that is rigid enough to absorb the loads from the sheathing - the chimney outlet forces the dismantling of part of the purlins, and without installing the flange, the structure will remain suspended.
The flange is usually a steel sheet with stiffeners welded to it. The sheet thickness should be at least 2-3 mm. A non-flammable heat insulator – basalt cardboard – should be placed on the flange. This will prevent heat transfer from the chimney to the sheathing. If the chimney structure is not reliable enough to take on part of the load on the roof, a rafter structure or additional racks are installed around the perimeter of the opening so that the load is transferred to the attic floor.
Around the pipe, all layers of the roof must be cut into a gap that complies with the standards specified in SNiP (depending on the type of pipe and the degree of its heating). The resulting gap must be filled with a non-flammable heat insulator - basalt or glass wool, basalt cardboard.
The principle of sealing the junction of the roofing material to the chimney pipe depends on factors such as:
To ensure that the chimney exiting through the pitched roof is not damaged when snow melts, it is recommended to install snow guards higher up the slope. If the width of the chimney (across the slope) is over 800 mm, above it on the slope a special structure should be installed to divert the water flow.
Output through the roof of a pipe with a circular cross-section
It is very difficult to waterproof the junction of the roof to a round pipe without the use of special roofing penetrations. The construction market offers a wide selection of pipe assemblies, differing in diameter and material of manufacture.
A universal option is an aluminum flange equipped with a silicone or rubber corrugation. These elements are available in several standard sizes, so you can choose a penetration for a chimney pipe of any popular diameter. The working surface of the flange is covered with a material similar to the corrugation material and is equipped with grooves for filling with sealant. The top of the corrugation cone is cut to the required diameter, after which the penetration must be pulled onto the chimney. The flange must be coated with sealant and attached to the roof with self-tapping screws, which are included in the kit. If the roof covering is not made of metal, the flange is attached with dowels or long screws directly to the sheathing.
For roofs with different slopes, penetrations are offered in which the corrugation is located at different angles to the flange. You can purchase a detachable design, which is used if it is not possible to stretch the corrugation onto the pipe due to the presence of protruding parts or the large height of the installed chimney. This penetration is equipped with clamps, thanks to which the corrugation is tightly pressed around the pipe.
Fastening the chimney to the roof can be done using penetrations in which a hinged segment is used instead of corrugation. This is a universal option for roofs with any slope angle: the surfaces of the connecting elements are spherical in shape and can be fixed relative to each other at any angle.
Manufacturers of roofing materials often offer ready-made chimney penetrations with a flange pre-formed to match the appropriate roofing covering. This penetration is attached to the roof sheathing with the necessary overlap. To achieve matching diameters, the apron cone is cut off. Penetrations from roofing manufacturers have several standard angles of inclination. To seal the joint, a second conical apron is installed, overlapping with the first.
Fire safety
The wooden rafter system and some layers of the roofing pie (waterproofing, vapor barrier) cannot withstand heat and can ignite or melt. The safety of system elements that are not fire resistant is ensured by installing a special box around the perimeter of the hole in the roof.
Violation of safety rules
The box is mounted from a wooden block; it should be located flush with the sheathing, on the outside of the roof. Along the perimeter of the box, on the outside, the edges of the vapor barrier are fixed - a carpet made of roofing felt or other waterproofing material, as well as the edges of the vapor barrier membrane on the room side, if we are talking about an insulated roof. In both cases, a cross-shaped cut is made in the panel and triangular fragments of material are tucked inside. For fastening, nails with wide heads or staples are used, and sealant or adhesive tape allows you to achieve a tight seal between the materials around the perimeter of the wooden box.
The passage through the roof of the chimney provides for thermal insulation of the chimney with basalt wool or other non-combustible materials. If possible, an air gap of 5–7 cm wide is left between the insulation layer and the chimney itself.
Box insulation with basalt wool
If the installation of a chimney involves the use of a special element - a penetration, when choosing it, first of all, make sure that the element is made of a material that is resistant to temperature changes.
Please note: do not use materials that are not designed to withstand high temperatures, such as pipes and roof penetrations for ventilation ducts.
Chimney box
In order to properly remove the chimney through the roofing pie, you should install your own rafter system around the pipe. It must be separated from the chimney at the distance specified in SNiP. The structure consists of side rafter legs and horizontal transverse beams at the bottom and top, which are made of timber of the same section as the rafters.
To insulate the structure, it is necessary to use non-flammable heat-insulating materials, such as glass wool or stone wool - it is stuffed between the pipe and the wooden structural elements.
When passing a chimney through the roofing pie of a roof in use, the vapor and waterproofing is cut crosswise, like an envelope, the edges should be tucked in and attached with nails or staples to the rafter system.
Waterproofing a chimney on a roof requires special attention. When installing a duct for a pitched roof chimney, the vapor barrier and waterproofing membrane are fastened as follows: the edges of the films are folded up and tightly fixed with brackets to the duct; in addition, the fastening points should be additionally sealed using sealing tape or some other adhesive material. On the outside, protective elements are installed on top of the roofing covering to prevent moisture from entering the joints between the box and the roofing pie.
It is important to consider that installing a duct can negatively affect air exchange in the under-roof space. To avoid deterioration of moisture removal, you can install additional ventilation systems, for example, roof tiles, roof aeration grilles, etc.
If the width of the chimney exceeds 800 mm (perpendicular to the rafters, along the outer dimensions), then higher up the slope it is necessary to perform a slope.
The slope is a small roof of its own that drains water and snow from the pipe. Its installation is quite complicated, since the slope includes all layers of insulation; in addition, it must be properly combined with the main roof using shaped elements. To avoid installing a bend, it is worth making a smaller pipe.
Using ready-made kits
Standard modular chimneys (“sandwich”) can significantly simplify the process of running a pipe through the roof. A wide range of materials are used for the manufacture of structures, including
:
The choice of a modular chimney depends on the fuel used, since they differ significantly in their technical characteristics. The advantage of such systems is the ability to install the pipe not at a right angle. This is especially true when installing a chimney in a building in use and allows you to choose almost any place to install a fireplace, stove or automatic boiler.
A modular chimney passes directly through the roof, consisting of parts such as
:
- deflector (a device that increases draft in the chimney by using a flow of hot air);
- clamp for guy wires (allows you to additionally secure a tall pipe on the roof);
- skirt (an element protecting the place where the pipe exits through the roof);
- roofing passage (an element with a fixed apron, which is directly mounted into the roofing pie).
Modular chimneys have an attractive appearance.
Steel chimneys can be installed if the temperature of the exhaust gases is no more than 500 °C. Prohibited for installation on coal-fired stoves. For asbestos-cement pipes, this parameter is 300 degrees; such chimneys are also unsuitable for coal stoves.
If the chimney is made of concrete or brick, or a prefabricated passage is installed, the structure should not be rigidly attached to the roofing system. Under the influence of external factors, the roof may be deformed, and these forces will be transferred to the chimney, which may lead to its destruction. When the chimney exits through the roof, all connections between the chimney and the roof are made using flexible elements.
Fire safety precautions when using MASTER FLASH
MASTER FLASH made of silicone can withstand temperatures up to +300 degrees Celsius. This is quite enough to seal a sandwich pipe and, in many cases, a chimney made of asbestos-cement pipe.
The passage through the metal tile is sealed using a Master Flash penetration. Additionally used bitumen tape
As for the metal mono-pipe, in these cases it is possible to use MASTER FLASH in cases where the length of the chimney from the stove to the passage through the roof is at least 3 meters. As a rule, in this situation the temperatures will not be critical, but if not, then thermal insulation of the area that passes through the roofing pie is necessary.
Master flush
This penetration can be applied to any type of roof - slate, tile, metal roof, asphalt or tile.
Ideal for sealing stove and fireplace chimneys.
Used for straight roofs and for sloped roofs.
This type of product is an excellent combination of price and quality.
Master Flash is distinguished by high professional reliability and functionality - this is achieved through the use of high-quality materials for use.
The main feature of this penetration is the use of reinforced polymer rubber, which can withstand heavy loads (temperatures up to 138 degrees).
Polymer rubber does not become more flexible due to heat.
How to cover a roof with ondulin, installation details
Much has already been written about how to cover a roof with ondulin.
There is nothing complicated here, it is only important to follow the rules, fasten according to the instructions and have a little skill in construction
But often after roofing, problems arise due to improper coating. Understanding such issues, it can be noted that the problem lies in the incorrect fastening of additional elements and other nuances.
You should pay no less attention to subtleties, because small mistakes can later lead to big problems
Passage of a ventilation or chimney pipe through ondulin
Of course, every home has a basic kitchen hood. A private house is also equipped with a ventilation system, which is vented through the roof.
“Cutting” holes for such pipes is labor-intensive. Moreover, at the point where the ventilation pipe comes into contact with the ondulin, a gap will appear through which moisture will enter. In the future, this can lead to flooding of the room.
Ondulin manufacturers took care of their customers. They offer customers a special ready-made ventilation pipe. It is attached to the roof with nails and there will be no leaks.
Sometimes people, trying to save money, do not resort to such additional elements. They lead a regular ventilation pipe through the roof and leave it in such a state, which is strictly prohibited.
In this case, it is necessary to use a covering apron. But attaching it is much more difficult than a finished ventilation pipe.
When there is a fireplace or stove in a house or bathhouse, it becomes necessary to also bring the pipe to the roof through an onduline. To do this, using conventional technology, lay out a brick pipe and cover the roof with the given roofing material.
To avoid leakage, you must use the same covering apron. It is attached to the ondulin with special nails.
Installation and dimensions of an ondulin ridge
The ridge is an important detail in the roofing of an ondulin roof. It is designed to decorate the roof ribs, as well as to protect against excess moisture.
Skates are purchased ready-made among other additional elements. Before fastening, it is worth finding out from which direction the winds prevail. Installation begins on the opposite side from the direction of such winds.
The skates are also laid with an overlap of a width not exceeding 1.5 cm. The skate is nailed with special nails to the upper wave of the ondulin sheet lying underneath it. In this case, the nail must be of such length that it is fixed into the sheathing bars.
Covering apron for ondulin
Other additional elements that are necessary to cover a roof with ondulin include a covering apron. With its help, joints are sealed.
It is used at the point of contact of the sheets with the chimney, for aesthetic design, as well as to protect the joint between the ondulin sheet and the vertical wall from moisture.
In the case of a pipe, the covering apron is attached at the bottom and nailed to each wave of the ondulin sheet. Next, using sealing tape, seal the joint with the wall, side joints and the top of the pipe.
To do this, the tape must be laid at least 10-15 cm higher to the vertical surface. The covering apron and tape are attached with a metal strip.
In addition to sealing pipes and vertical walls, a covering apron must be used to install the ridge element. To do this, it is installed with an overlap of 4 cm on both slopes.
In this case, the upper edges of the apron should be at least 2 cm apart. This measure is necessary for better air outlet. Skates are mounted on top of the attached aprons.
Sealing rectangular and square pipes
To ensure the reliability of the roof in the areas of valleys and junctions, a tie made of metal parts (junction strips), which are inserted 150-200 mm under the covering, will help.
The junction of the apron with the corrugated sheet around the chimney is sealed with roofing sealant. Eaves outlets are installed at the bottom and sides, directing the flow of precipitation onto the roof slope.
Before applying corrugated sheeting, it is necessary to seal the passage of the riser with a membrane.
- A cross-shaped cut is made in the material and glued to the walls of the chimney at a height of more than 5 cm.
- Self-adhesive “Vakaflex” tape is attached under the upper junction bar: from below, from the side, then from above.
- Sometimes a chimney is installed in a finished roof, cutting a hole in the corrugated sheeting with a margin of 1.5-2 cm. To do this, the metal sheet at the junction of the rectangular pipe is bent, a waterproofing membrane is glued and a lower and then an upper sheathing is installed, tightly pressed against the roofing pie and the chimney.
Safety precautions when installing a chimney must be strictly observed
Plastering a pipe
To avoid the formation of a thick layer of plaster, you should know how to properly insulate pipes:
- First, seal all existing irregularities in the pipe with cement mortar;
- Then cover the walls with reinforcing mesh;
- The final stage is applying plaster.
Important! Before covering the first layer, bring the solution of lime, cement and slag chips (or sand) to the consistency of sour cream, spray without leveling. The second coating is denser; it is applied with a trowel, rubbing until a smooth surface is obtained.
The reinforcing mesh will allow the plaster to adhere well to the pipe and not crack when drying
Strengthening the pipe with asbestos cement
Lining a chimney with asbestos cement requires the use of a cement-lime mixture applied to the surface of the slabs.
- The chimney is reinforced with mesh and the first layer of solution is sprayed.
- A new layer of the mixture is applied to the insulation sections and attached to the surface of the chimney.
Asbestos contains carcinogens that are dangerous to humans, so experts do not recommend using it in residential areas.
Sheet iron cladding
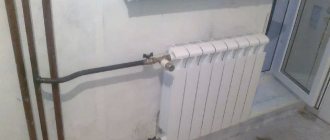
When insulating a metal pipe, you should maintain a distance of 60 cm from the chimney to flammable materials.
- The structure is wrapped in mineral wool 5 cm thick, overlapping, and clamped with steel wire. The top is wrapped with a metal sheet.
- Rivets are inserted into the previously prepared gaps, and the heads of the clamps are closed with a special tool.
What is the goal?
When preparing drawings, it is important to provide for the direct location of the pipe coming from the furnace.
- The maximum heating temperature of the outer wall of the chimney should not exceed 50 degrees.
- Waterproofing a brick chimney on the roof allows you to comply with established standards, and metal elements will require additional insulation to prevent the formation of condensation.
After installing the pipe, it is enough to carry out plastering followed by laying millite silica, thermal insulation wool MKRR-130 or rolled felt MKRF-100.
If the outer part of the pipe is 2 meters or more in height, it is strengthened with additional braces
How to seal pipes with protective aprons
In addition to rubber caps, aprons made from other materials are often used. When waterproofing pipes with a round cross-section, products made of galvanized steel are often used. In this case, a steel clamp is installed where the passage meets the roof, and the gap is covered with sealants and adhesive tape with metal reinforcement.
The pipes on the roof are sealed using corrugated sheets using an apron, which consists of several elements:
- The vapor and waterproofing material of the roof, remaining after the passage to the roof, is fixed with construction tape to all sides of the apron.
- Using a machine, a groove (small groove) is made around the perimeter of the pipe.
- The upper edge of the junction strip is fixed in the groove with silicone sealant.
- The apron consists of 4 parts - for each side of the rectangle. The lower part is tightly attached to the passage, maintaining a 10-centimeter overlap, using self-tapping screws for working with corrugated sheets.
- A waterproofing element such as a tie is placed under the lower apron, which prevents water from entering the house.
- The top and side aprons are fixed in the same way and, as a result, a one-piece protection structure is created.
The process of waterproofing pipes on the roof of a household is not as complicated as it is important. Correctly sealing the joints is necessary to create a high-quality roof.
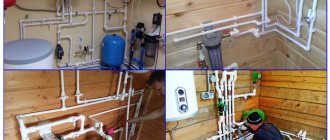
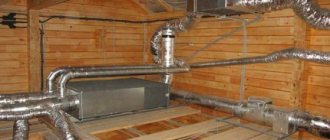
Sandwich pipe design
Everything related to heating equipment is associated with the risk of fires, especially in wooden houses. Statistics say that more than half of fires occur because homeowners did not install the chimney correctly with their own hands. To facilitate this task and protect the house from fire, sandwich chimney pipes are used. At first glance, they look like ordinary stainless steel products, but in fact they have a three-layer structure:
Sandwich pipe design
- Inner circuit. A round cylinder made of high-strength stainless steel with a thickness of at least 1 mm with the addition of zinc or molybdenum. The inner pipe is made of a sheet of metal, using welding to obtain a sealed seam. Due to its high anti-corrosion properties, alloy steel is not damaged by interaction with water.
- Insulating layer. Between the inner and outer contours there is an insulating layer that performs two important functions: it “locks” the heat inside the pipe, preventing it from heating the surrounding materials, and it does not allow the smoke to cool down while passing through the pipe, so that soot does not settle on its walls. As thermal insulation, fibrous materials with the highest fire resistance class with an operating temperature of up to 700 degrees are used, for example, basalt-based mineral wool. The insulation layer between the contours is 40-60 mm, and the insulation density is 12o kg per cubic m.
- External casing. The outer shell of a sandwich pipe is made of stainless steel or another type of metal. The seam of the casing is made using laser welding, which does not damage the galvanic layer of stainless steel, which protects it from corrosion. The cost of brass and copper pipes greatly increases the cost of laying a chimney, and the installation is justified by its spectacular appearance.
Additional elements of a double-circuit chimney
Sandwich pipes consist of additional elements: straight sections, bends, tees. The diameter of the products depends on the manufacturer, so it is necessary to buy all the parts of the chimney from the same company, which are ideally suited to each other.
Choosing a location for the chimney on the roof
The pipe should be located near the highest point of the roof
When organizing a penetration for the chimney, it is important to correctly select the location for the outlet channel on the roof. The pipe should be located near the highest point of the roof. In this case, a number of fire safety requirements must be observed:
- cross-sectional dimensions and height are selected based on the advice of the manufacturer of the heating equipment used;
- you need to remember the direct correlation between the height of the chimney duct and the resulting draft force of the unit;
- the channel should end 0.5-1.5 m above the roof ridge;
- in order not to damage the rafter system, the outlet is placed between its components;
- if the pipe will be located low on the slope, you need to make it long to fit into the recommendations regarding the elevation above the roof elements;
- the structure is made up mainly of vertical parts of tubes (horizontal lengths are no more than 1 m).
Passage units should not be placed near attic windows, otherwise the wind will blow fuel combustion products into it. At the junction of the slopes that form the internal corner, this is also not worth doing. It is difficult to achieve a good connection to the pipe there. In addition, in winter, snow accumulations appear in these areas. The chimney structure must not be rigidly fastened to the roof: if the latter is damaged, the pipe may collapse. It also increases the likelihood of a fire.
Features of this design
Sandwich is a good option for a chimney pipe with insulation. Insulation provides you with the following advantages:
- the possibility of functionality of the chimney pipe when located in a zone of low temperature conditions;
- provides the pipe with the necessary fireproof properties (inside the building).
Standard versions of such chimneys have an external galvanized coating. There are also options made of stainless steel, as well as painted in any color suitable for you.
Existing versions of sandwiches made of stainless steel are covered with a special protective film on the outside. The main thing is to remember to remove it before using the chimney for its intended purpose. There are also special adapters on sale that you will need when connecting the boiler and pipe. Be careful when choosing elements for a sandwich chimney.
Scheme of a sandwich pipe.
The necessary tools for work are:
How to assemble a chimney from sandwich pipes
In order not to be interrupted during the installation process, you should prepare all the components for subsequent assembly into a single device in advance.
The advantage of the sandwich structure is that its production uses technology that greatly simplifies the process of installing a complete unit. The edges of sandwich pipes are processed with a smaller diameter compared to the main component. The narrowed part is connected to another pipe, the strength of the connection is ensured by a clamp. Craftsmen advise treating the seam area with a sealant that copes well with temperature loads.