“We looked at the photos at the beginning of construction and thought: what a monster! But in the end, the house is very good, in some places it’s just really cool!” they wrote on FORUMHOUSE about the house of a user with the nickname Domiron. He built his house for 15 years “in one helmet,” constantly taking out loans, but without lowering his standards and, as he says, “investing everything he has for himself and his family, so that he could then live happily in one place until retirement.” And in most cases he describes the philosophy of his construction with one phrase: “I don’t argue, it’s a pain in the ass to build – but it’s cheaper!” We invite you to get to know this house better, the house and its owner.
Perfectionism and the lion-knocking Flight foundation and ground floor Walls of the first floor Ceilings and loans Septic tank, temporary windows, potbelly stove Heating, partitions, electrics, moving Second floor and roof Break for the grill Designer's plaster Construction does not end!
Perfectionism and the lion knocker
«This is a story for those who do not have their own home and money to buy, but have a dream of their own home,” this is how Domiron began his report on FORUMHOUSE.
You can understand everything about the house and its owner with one glance at the homemade front door with a lion knocker. Domiron searched for this lion for a long time, barely found it and was not entirely satisfied: it turned out a little differently than he wanted.
For a custom arched door they asked for a refreshingly large amount of money - Domiron “sent everyone far away, welded it himself in one day, and covered it with wood and installed it the next.”
DomironFORUMHOUSE user
I selected the texture of the wood with a metal brush attached to a grinder. I cut the boards one by one, sawed them out curvilinearly and placed them into the door frame, maintaining some symmetry. In the future I plan to put forged rods-branches in the seams between the boards.
So we entered this story through the door with the lion knocker; Now let's go to the very beginning. And at the very beginning, the family of the professional finisher-builder Domiron did not have their own home, but they successfully purchased a plot of land within the city with electricity and a summer house. After thinking and carefully calculating everything, he and his wife realized that building a house in stages would be the cheapest way to solve the housing problem. We discussed the layout for a long time, Domiron drew a sketch, and the construction epic began. He built with only a helmet, and only when there were no orders at work.
Facing the base with stone
Let's start with transforming the base. But before installation it is necessary to do some preparatory work.
The walls of the lower part of the building need to be strengthened, reinforced, and the ebb linings must be additionally secured. Only then can you read the lining. All this will help avoid further problems with the building.
A little hint: the material for finishing the plinth should be taken a little darker than for the main part of the building, then they will be harmoniously combined with each other.
Flight foundation and ground floor
The hole for the strip foundation was dug manually and only on weekends, so it was slow. But in the next construction season, a 6x8 m lentoa, connected by reinforcement to a similar foundation for a 3x6 m extension, was ready.
DomironFORUMHOUSE user
The foundation turned out to be shallowly buried with a difference in ground level of up to 1.4 m.
The next stage is the brickwork of the basement floor, because reinforced concrete concrete is expensive, and reinforced concrete blocks are not monolithic. Domiron also did this work himself, sometimes hiring a helper for the solution.
In the corners of the house he placed a “cut” and a net every six to seven rows. I covered the ground floor with void slabs and...
Finishing the house with construction profiled sheets
A very simple and cheap option. Requires virtually no installation effort compared to other options discussed earlier.
Also, the profiled sheet does not require special care conditions; it can easily withstand strong temperature changes, high humidity, fire, and much more. Except that in appearance it cannot be compared with natural stone at all.
First floor walls
...proceeded to the walls of the first floor. This is the design:
- The formwork on one side is half a brick;
- The formwork on the other side is a metal sheet;
- On the outside there is a 16 cm indentation for future insulation;
- Homemade expanded clay concrete was poured into the formwork;
- Reinforcement d=12 mm was placed in the corners, “vertically and along the perimeter, below, in the middle and at the top.”
The result was walls 2.8 meters high with nests for floor beams.
Overlap and loans
Domiron looked for a 100x250 mm timber for a long time, found it, installed it. To attach the flooring under the sound insulation, I filled a 40x40 mm block.
DomironFORUMHOUSE user
On a span of 5.65 m it didn’t turn out great, it bent a little from 2 to 6 cm. I would now make a large span into a truss or as a roof covering.
The floor beams were sheathed, insulated and sewn up, temporary beams were placed under the flat roof, roofing felt was laid and covered with 18 mm DSP.
The work was going hard and slowly - in a good way, it would be necessary to hire a helper for it, but there was no money for it, and by this moment it became clear that it was impossible to save for construction - there were either a lot of orders, sometimes empty, prices were jumping... Loans poured in one after another.
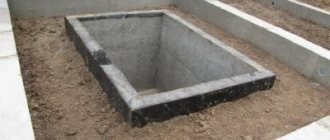
Septic tank, temporary windows, potbelly stove
While working on the walls, Domiron managed to simultaneously make a septic tank and lay water supply and sewerage pipes. I installed temporary wooden windows and a door. The house began to take shape, but what shape! FORUMHOUSE commented on this stage of construction with restrained skepticism: “Yeah... really, it’s non-standard.”
By the way, small windows are a Siberian solution that helps save heat. And since each room has several windows, there is enough light in them. And through some windows you can see the great Siberian Ob River!
Winter came, Domiron put an old iron stove, bought on the cheap, in the basement and came to work in his house every free minute.
Casa de Pinedo, Portugal
0
Source:
Casa de Pinedo, also known as the "cobblestone house", is an architectural monument located in the mountains of northern Portugal. The building, supported on four sides by giant stones, was built in 1974 as a hotel, but now houses a museum dedicated to the house itself.
×
Heating, partitions, electrical, moving
In the new season he had a lot to do, and he managed:
- installed internal partitions,
- did all the electrical work
- threw out the wooden windows and installed permanent plastic ones, plastered the walls,
- built a monumental stationary shower,
- made the heating wiring (gas boiler + aluminum radiators),
- To heat the floor in the living room, kitchen, shower room and hallway, I laid small “snakes” of metal-plastic pipes.
He also made the shower entirely himself: he laid it out of brick on edge, plastered it, waterproofed it, installed a drain, lined the floor and part of the wall with marble mosaics of his own production and welded the door.
DomironFORUMHOUSE Member
There have been no problems with the shower over the years, only the marble on the floor was polished with heels to a shine.
But here it is impossible not to say that later on the second floor Domiron will build a “more interesting option” on a wooden floor, lined with eurolining, covered with deck varnish.
We moved into the house before the New Year, by which time almost 5 years had passed since construction began. The family now has its own roof over its head, the rest is just trifles. The renovation of the first floor was completed all winter, and in the spring Domiron first began insulating the walls.
It was possible to take a hollow brick, but it would not fit into the space left, and I also didn’t want to overload the foundation. And this is what came out in the end:
- Stone wool slabs – 50 mm;
- ventilation gap 1-2 cm;
- Foam blocks 70-80 mm.
The second thing he did was insulate the foundation above ground level with penoplex and began laying the walls of the second floor from autoclaved aerated concrete. I tried to hire workers from the south, but immediately parted with them:
DomironFORUMHOUSE Member
Blocks are sculpted into five points. You have to do everything yourself.
Masonry, how to lay natural stone with your own hands
Fence made of natural stone
In construction, there is a gradation of masonry stones into artificial and natural (or natural). Artificial ones are made from concrete or ceramics. Natural ones are obtained by crushing or sawing various rocks.
Of course, the technology of masonry from crushed stones will be more complex, if only because of their different shapes and sizes, and even sawn blocks are quite rough. Despite this, natural stone is in demand in construction.
Reasons for the popularity of natural stone masonry:
- Aesthetics of natural stones. The natural texture of natural stone compares favorably with mass stamping, even of high quality.
- Economical. If you use inexpensive rubble stone (such as is used for foundation construction), natural stone materials are cheaper than artificial ones, and even taking into account the higher labor intensity, masonry from it is often more economical.
- Excellent performance characteristics. Over thousands of years, builders have selected the optimal combinations of stone materials, learned how to lay stone with their own hands so that structures made from it best meet climatic and operational requirements.
House walls made of natural stone
Do-it-yourself stone masonry is done using various types of binding solutions or “dry”. The second method is much more complicated, requiring labor-intensive, scrupulously precise cutting of stones. After all, only gravity “holds” such a wall together. Dry masonry blocks are usually of considerable size and weight. Currently, such masonry is in little demand. However, small auxiliary structures (sheds, retaining walls, → fences - the link tells you how to build a fence) in villages are, and in our time, built from small flat stones (“plasters”). For stability, such masonry is sometimes sprinkled with ordinary sand or dry clay.
The more common method of masonry is using masonry mixtures, or masonry mortars, which are usually based on cement. Contrary to popular belief, the task of masonry mortars is not to connect, not to interlock individual masonry stones with each other, but to ensure their tightest fit to each other. We can say that masonry mortars are used instead of undercutting to level the places where stones touch. From the above, a practical conclusion follows: it is pointless and even harmful to produce a mixture for masonry that has a strength higher than the strength of masonry stones.
Alas, amateurs often try to make the solution “stronger” by using high grades of cement and a minimum of aggregates. The masonry does not become stronger, but even weakens, since, along with other reasons, “extra-strong” mortars create additional stress in the body of the masonry when setting.
Second floor and roof
This family got a difficult plot of land, with a dead ravine on the edge, and it turned out that the house stood on a slope. It was necessary to level the land with a slope and break down levels with terraces, and strengthen the slope in front of the ravine. Then they counted: during the entire construction period, 25 Kamaz trucks of soil, crushed stone and ASG were delivered.
Domiron worked like this: in good weather he laid walls and landscaped the site, even laid out beds, and in bad weather he finished the house from the inside. At that time, a computer was working in his head without turning off - Domiron was calculating the radius roof. And this was the most difficult stage of his long-term construction.
At first, Domiron thought about making a flat roof, but after much calculation, he realized that the most budget-friendly would be a radius roof: optimal area, minimum dead zones and attic spaces, less wall height and load, and less maintenance. The hero of our story had no experience as a roofer, but he installed the roof almost single-handedly.
There was very little information about such a roof on the Internet; I had to ask colleagues and acquaintances and “be smart about it myself.”
DomironFORUMHOUS Member
I’ve never worked on roofs, but little by little things started to work out.
And now he has already erected the walls to the finish line, calculated and placed marks along the future radius of the roof, hired helpers from the south for a couple of days and poured an armored belt around the perimeter of the house. While the armored belt was hardening, I went around all the bases and found a 280mm I-beam. It was mounted with a tap, and he had already welded the second, smaller one himself from two pipes with gussets. I also installed it myself, without equipment.
And then he did everything alone: the trusses for support, the rafters, and the sheathing. Only a friend helped to sheathe the roof with OSB. The invited roofers covered the roof with a roofing carpet within a day; With this we went into the winter.
In the spring, Domiron bought a soft roof, and predictably decided that he would save money and do it all himself.
DomironFORUMHOUSE Member
Slowly but surely I did it in a couple of weeks. Let's continue playing.
Here is the roof pie from the inside out:
- water-based varnish;
- eurolining 14 mm;
- kraft paper;
- cork backing for laminate 2 mm;
- ecowool;
- windproof material;
- attic space 100-400 mm;
- frequent lathing 25 mm;
- OSB 10 mm;
- roofing membrane for flexible tiles;
- flexible tiles.
Flexible tiles are the only expensive material that was used in the construction of the house; all other materials are budgetary.
Domiron FORUMHOUSE Member
I’m surprised that people don’t make roofs like this, the cheapest roofs that you can do yourself, without fancy roofers.
raised flower bed
The installation of a raised flower bed on a site must begin with the construction of a foundation. To do this, dig a trench 25 centimeters deep. The soil is compacted, covered with crushed stone and compacted.
The elements that make up the outer walls must be secured with mortar. An important point is the slight inclination of the outer walls inward. This is necessary for additional strength of the masonry.
After finishing the stone laying work, all gaps are filled with cement mortar.
When all the walls are ready, a layer of drainage should be poured inside the flowerbed, and then fertile soil. After this, you can start planting flowers.
Grill break
So much work has been done, and so much more remains to be done! Domiron decided that he fully deserved a rest, and he rested like this:
Domiron FORUMHOUSE Member
To make work more fun, I made a major barbecue.
After such a barbecue break he:
- dismantled the rough roof of the first floor;
- converted the working street staircase to the second floor into an internal one,
- installed windows
- made a roof lining from corrugated sheets,
- made partitions on the second floor from gypsum plasterboard and gypsum fiber board on a metal frame,
- I insulated the ceiling there and covered it with clapboard (“it’s long and dusty, but I’m happy with the result”);
- did the plumbing and electrical work there;
- carried out heating;
- laid the floor.
They moved to the second floor 13 years after construction began.
Author's plaster
For the facade, Domiron invented its own method of applying plaster - “checkered plaster”. I planned to achieve a 3D effect, it didn’t turn out quite like that, but it’s still very cool.
But don’t try to repeat this at home, this technology is for people with strong nerves:
- For a little texture and shine, you need to add 500 grams of marble sand to the façade plaster;
- Prime the wall with a diluted product with a moisture protection effect;
- Apply plaster to the wall with a one hundred and twentieth spatula;
- Draw the plaster into squares, checking the level.
DomironForumHouse Member
One led horizontally, the next vertically, I tried to apply uneven force to the spatula so that at the beginning of the square the layer thickness was 2-3 mm, and at the end 6-8 mm. To avoid narrow inserts near the windows, I slightly changed the size of the squares.
Decorating the house with stone panels
To decorate the facade of the house, you can use special facade panels, also made of stone. This will make the task much easier and also allow you to create a more modern style.
Panels can be not only stone, but also plastic, imitation stone or other materials.