What can you do for your dacha with your own hands? This question is probably asked by every owner of a summer cottage. And this is not without reason, because a dacha is not only a house and several acres of land surrounded by a fence. For many, this is a vacation spot where they spend a lot of time and where they even move for the whole summer. Therefore, summer residents often strive to decorate their corner in order to enjoy peace and tranquility away from the bustle of the city.
An interesting design option for a relaxation corner in the countryside
Of course, today you can order a dacha design with your chosen design style on a turnkey basis, but this will require a lot of financial investment. But if you show a little imagination and approach the process creatively, you can decorate even the smallest garden plot so that it not only looks unusual, but is also comfortable for living and spending time. Finding original ideas for a summer house and garden is the main task of this article .
Often, when bringing interesting ideas for a summer house to life, various improvised means are used: damaged things left over from the construction of boards, old car tires, various natural stones, driftwood and even tree branches left after pruning.
Flower beds made from old wooden boxes
Weaving
Beautiful weaving does not require special skills or financial investments . Weaving of shoots and branches of flexible tree varieties frames flower beds and flower beds, paths and beds, and fences around the site. It looks very cute and natural.
All you need to do is drive a few pegs of the desired height into the ground around the perimeter and weave thin branches like a basket. For this you can use willow branches, vines or even raspberries.
Advice! If desired, you can use old irrigation hoses, ropes and wires. This weaving can be decorated by covering it with colored paints, painting, or hanging flower pots on pegs.
Do-it-yourself wicker fencing for walkways
Ponds and reservoirs
In fact, it’s not so difficult to create a neat pond on your garden plot. This can be done from improvised means, an old bathtub or a large vessel. In specialized stores you can purchase everything you need to create an artificial pond with your own hands .
DIY artificial pond:
- To make a simple pond, first dig a hole of the desired size and depth.
- Then a vessel is immersed in the bottom of the pit or lined with several layers of tarpaulin, pressed down with stones and a layer of sand is poured.
- The covering material can be painted pale blue or light green, and large stones, tiles or bricks can be placed around the edges.
- You can plant any moisture-loving plants nearby. You can decorate the pond with water lilies, duckweed, watercolor and bagel. A felted iris will feel good near an improvised pond. A great idea would be a small waterfall.
Such a pond will perfectly complement the recreation area. It will look harmonious near the gazebo, or you can install a bench or canopy opposite.
Having a beautiful pond in the garden is the dream of every housewife
An artificial pond at the dacha will become the center of everyone's attention
Alpine slide as a design solution for a garden landscape
The Alpine slide appeared in landscape decoration relatively recently. The basis of the composition is made up of stones and low-growing plants, laid out in the form of a hill with the presence of mountain elements: peak, slope and base.
By following the basic rules, you can easily create an original garden decoration with your own hands.
At the initial stage, it is necessary to create a sketch of the slide; it is better if it is made to scale. This will help determine:
- Required number of stones;
- Tiered number of slides;
- Amount of drainage and soil required;
- Number of flower seeds.
When choosing a place to install a rock garden, you should remember that this is a decorative element created to please the eyes. It would be optimal to create a slide near a recreation area or barbecue, with adjacent paths.
You should also take into account the needs of the plants planted on it: sufficient sunlight and warmth.
Otherwise, the flowers will wither. The optimal time for installing an alpine slide is autumn. This way the soil between the stones will settle over the winter, and by spring it will be possible to make adjustments to the rock garden before planting flowers.
Dry stream
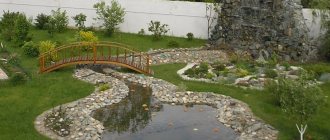
If the idea of creating an artificial reservoir does not run out of imagination, then it can be supplemented with a so-called dry stream. This stylish solution will refresh the landscape of an ordinary dacha and make it a bright center of the overall composition.
A meandering stream can be any length or width, bend in any direction, or even run throughout the entire site. To give it more elegance, a dry stream can be supplemented with a decorative bridge and a fountain made of stones.
How to make a dry stream yourself:
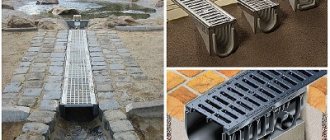
- First you need to dig a shallow channel, then fill it with sand, stones or pebbles. Large stones are placed along the edge, flowers are planted, decorations and garden lamps are installed.
- The design depends on the chosen style, capabilities and imagination of the master. A decorative bridge spanning such a stream will add a special flavor to the area.
- Some individual large stones can be painted in pastel colors or create bright spots in the composition.
Stones and soil are all you need to create a dry stream in your country house with your own hands
Style
Having decided on the main functional elements, it’s time to move on to style.
A classic garden is an abundance of flowers, straight lines and angles, and a minimum of decor. Materials imitate natural ones. The focus here is on plants, not decorations.
The ground garden is reminiscent of Italian and French flower beds of the 16th century. Here the flower beds are arranged in fancy patterns, light decor, colored sand and gravel are used.
Rustic style is deliberately simple, ideal for a summer residence. Stairs, paths, careless old-fashioned decorations and colorful chaos in decoration are appropriate here.
Themed gardens are the most interesting ones to decorate. This includes Oriental, Scandinavian, Moorish and other directions. There are also fun and entertaining themed corners dedicated to your favorite works, cartoons or movies. Pay attention to this option if you are planning to install a playground.
Photo: podelunchik.ru
Photo: vse-otoplenie.ru
Types and varieties of roses: photos, names and descriptions (catalog)
Garden decor
To give your space a personal touch, garden decor is just what you need. Various crafts can be made from anything, the main thing is that they fit well into the overall landscape.
Having “golden” hands, a couple of hours of free time and the necessary materials, you can make incredibly beautiful designer products and decorations of any theme. Having practiced on simple crafts first, then you can move on to more complex ones.
Human figures are an incredibly stylish decoration for the garden
This decor will look appropriate in any garden
Even ordinary things can be turned into garden decor that is pleasing to your eye.
You can find interesting garden ideas to create a warm atmosphere in the garden even if you are not a creative person. The photos, pictures, tips presented in the article will become a source of inspiration for you.
Cute and cute
You can create incredibly beautiful jewelry from metal.
Picturesque craft for the garden
Mailbox-house
Decorating a mailbox to look like a house is easy.
If it is a purchased iron or plastic box, it is enough to paint it with paints of the appropriate type (paints for metal or plastic or universal acrylic, etc.).
A mailbox made of wooden slats is a simple and cheap product; making it yourself is not a problem for those who know how to hold a saw, hammer and screwdriver in their hands.
You will need:
- wooden slats are not wide;
- 2 planks - for the lid and bottom;
- metal corners;
- screws;
- paints.
The work is elementary, we focus on the photo.
Overhead windows and doors are made of thin slats. It's tempting to make slotted windows, but this will complicate the job. If you still decide to take this step, attach pieces of glass or transparent plastic to the windows, otherwise water will flow into the box when it rains.
Old dishes and garden tools
Breathing new life into old damaged dishes and other utensils is a great idea for a summer house, especially since you don’t need to spend money and old trash won’t accumulate.
A damaged teapot, bucket, container, watering can, wheelbarrow, barrel and anything in which you can plant flowers, with minimal decor, will become wonderful decorations for your dacha .
Cute hanging flower pots
With the right approach, even an old watering can become an unusual art object
New life for an old teapot
It is convenient to decorate such equipment with flowering annuals. You can plant petunias, pansies and other low-growing annual plants in them. With such decor, even the most unkempt area will acquire its own style.
Advice! Small vessels can be placed on the porch around the perimeter of the house, barn, gazebo, bathhouse and other buildings. Improvised pots and flower beds go well with figurines of animals and fairy-tale characters.
Cheerful pig
Plaster figurines as garden decoration
To make such an owl you will need carpentry skills.
Walking through the garden with such figures will always be fun and pleasant.
Some summer residents even adapt old shoes to flowers. Sneakers, boots and boots, with herbaceous and flowering annuals planted in them, will no longer be trash, but will become a bright detail of landscape design.
Stylish, unusual and very beautiful decor for the garden
Anything will do to decorate your dacha, even an old pair of shoes
An unusual solution for decorating the front door of a house
A broken bicycle can be supplemented with baskets and flower pots. Even broken vases will help decorate your garden plot. Flowers are planted in them and arranged like a florarium, installed near ponds and among stones.
Old barrels made of wood and other materials filled with flowers also look original, especially if you do not place them, but put them down, fill them with earth and plant flowers inside the container and next to it, creating the feeling of a flower stream. The composition looks as if the flowers spilled out of a barrel and scattered across the lawn.
Interesting installation made from a dilapidated bicycle
Never throw away old things, someday you will definitely need them
A thrifty owner never wastes anything
Cute flower bed made from a sand wheelbarrow
Types of Jewelry
How and with what to improve your site depends mainly on the preferences and taste of the owners and the size of the territory. In any case, it should be remembered that the original idea must correspond to the purpose - either functionality coupled with beauty, or only the aesthetic significance of this or that element decorating the landscape.
Functional objects include:
- fences;
- paths;
- lighting;
- bird houses;
- decorative ponds (in cases where they serve as a kind of water reservoir for irrigation).
A purely aesthetic function will be performed by flower beds, garden sculptures, miniature figurines of animals, gnomes, waterfalls and fountains.
Paths and paths
As mentioned above, paths can be decorated with a low wicker fence. The path itself can also be made original by laying it with stones, tiles, colored glass and even a cut of wood treated with a special compound.
The path paved with large tiles looks beautiful combined with green lawn grass breaking through it. This original path design will help transform the look of the entire site.
The process of creating garden paths from wood cuts
Car tires
Flowerbeds and sculptures made from car tires have already become classics of the genre. Craftsmen make swans and various animals out of them, swings, chairs, tables, or simply cover them with paint and plant flowers in them.
You can create a multi-level flower arrangement from old tires by placing them on several floors and filling them with soil. At the very top you can plant ground cover or cascading plants, which will decorate the corner with a green waterfall. Flowering annuals can be planted on the lower tier.
Bright flower beds made from old car tires
Fence
Climbing plants are best suited for landscaping a fence:
- girl's grapes;
- ivy;
- roses.
A wrought iron fence entwined with fragrant flowers will look most elegant.
An undoubted decoration of the site of a private house will be a dividing arch or net, also entwined with hanging plants.
Glowing stones
Another original country idea is to strew the edges of the paths with stones coated with fluorescent paint. In general, such stones can be placed anywhere: placed in flower beds, scattered near a pond, or decorated with some individual small elements. At night, when the stones begin to glow, they not only illuminate the space, but also give the area a fantastic, fairy-tale look.
With this decoration in your garden you will look forward to the evening every day
Flowerbeds
When talking about ideas for a summer house, one cannot ignore flower beds . As mentioned earlier, they can be made from car tires, old dishes, containers and garden tools, framed with wickerwork, stones and whatever your heart desires. Craftsmen build vertical and multi-level flower beds.
At the same time, it is very important that the flowers chosen for landscaping these small corners are selected not only according to color scheme, but also according to lighting and moisture preferences. For example, the space in the tree trunk circle can also be filled with bright flowers. To do this, it is worth choosing exactly those varieties and varieties that prefer to grow in the shade, since the openwork foliage will cover them from the sun.
Of course, flower beds are beautiful , but constant weeding can tire anyone. Then the top layer of soil can be covered with small colored pebbles, covered with mulch or pine cones.
Flower garden from an old suitcase
The watering can has become a new home for living annuals
Flowers can be used to decorate any corner of the garden.
Placing a small basket of flowers on the fence is a great idea.
Step-by-step instruction
The entire process of making a swan will require only six steps. Actions are performed in the following sequence:
Step No. 1. We use the bottle as the “body” of the bird and use wire to shape the neck, head and tail.
Step No. 2. Having cut the isolon into narrow strips, we wrap it around the frame and secure it with tape.
Step No. 3. The polyethylene film is cut into long strips.
Step No. 4. The strips are attached to the silhouette of the swan, thereby giving the bird a voluminous, curvy shape. It is most convenient to start the process from the tail.
Step No. 5. The swan’s wings are “made” in the same way.
Step No. 6. A luminous image can be achieved in two ways: place an LED strip along the contour of the bird or place a flashlight inside the bottle.
All that remains is to place the swan near the reservoir, where the waterfowl should arrive.
Rest zone
We must not forget that interesting ideas for a summer residence are essentially limitless. After all, a dacha is not only a piece of land on which you have to work, but also a place where you can take a break from city life, so a comfortable and beautiful recreation area that will succinctly fit into the overall design is very important.
Of course, you can buy hammocks, armchairs, tables and benches for your garden in special stores, but even without special skills, just desire and imagination, it’s easy to create something special with your own hands.
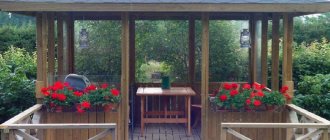
Setting up a comfortable relaxation area in the garden with your own hands is not difficult at all.
Balloons in landscape design
In addition to the standard use of balloons, they can be used for original garden decor ideas. In winter, you can use balloons to create original ice decorations. The easiest way is to fill the ball with water with dyes of different colors and put it in the freezer or take it outside.
After the water freezes, you need to remove the shell from it, and place unusual multi-colored balls of ice on the garden plot.
Another idea for using a balloon is to use it as a basis for creating an original ball from yarn or threads. To do this, wrap the inflated ball with thread soaked in PVA glue. After it is completely dry, burst the ball.
The resulting elements can be used as decoration on trees in the garden, or you can create an unusual composition from them.
So, without any special financial costs, you can create a unique design for your summer cottage and garden with your own hands. The main thing needed for this is imagination. And then, using available materials, you can turn your dacha into an oasis of comfort and tranquility.
Hammocks
Hanging a hammock is the simplest option for decorating a vacation spot in the country. You can place it on the porch or between strong trees and relax after a hard day, read a book or just sleep in the fresh air.
Simple hammock
The simplest hammock can be made from fabric 3 * 1.5 m and two strong ropes of 3-4 m each. Thick fabric, such as tarpaulin, burlap or lining fabric, is used as a base.
Manufacturing sequence:
- The edges of the fabric are folded over and loops are made for the rope and stitched.
- Thread a rope from each end and tie knots.
- The free ends of the rope are wrapped around the support and tied tightly. The hammock is ready!
A simple DIY hammock made of thick fabric
Hammock on slats
Having in your arsenal a piece of fabric 2.5x1 m, 32-36 eyelets, 2 slats 1 m long, 2 steel rings, 2 ropes 10-15 m, 2 ropes 3-4 m or 2 straps for ties 1-1.5 m , you can build a simple and comfortable hammock, in which you can relax on a warm summer day.
For this you need:
- Fold the narrow edges of the material 5-10 cm and stitch. Cut holes and attach eyelets to fabric.
- Use a drill to make holes in the slats at the same intervals as on the fabric. The rope is threaded into the ring and a free end of 30-40 cm is left, which is then threaded into the rail, then into the grommet from the outside.
- From the inside of the hammock, the rope is threaded into the next eyelet, then again into the rail and ring. The free edges of the ropes are tied tightly to the ring. Do the same on the other side of the hammock.
You can lie in this hammock all day long.
Hammock chair on a hoop
This chair does not take up much space, it will look great on the balcony, veranda and in the garden. It can be decorated with pillows and placed at table level as an original seat.
Required:
- Sintepon;
- Hoop 95-100 cm;
- Fabric 300x20 cm;
- Square fabric trim 1.5x1.5 m;
- 4 tie straps, 3 m each.
Step-by-step technology for making a hammock:
- A strip of padding polyester 20 cm wide is wrapped around the hoop and tied with thread.
- A strip of fabric is wrapped around the padding polyester so that it is not visible, pinned and sewn.
- The hoop is applied to a square piece of fabric and a circle is cut off, leaving 20-25 cm in reserve.
- Symmetrical notches are cut out on four sides of the fabric blank, which are needed to hang the hammock.
- The hoop is placed evenly on the fabric so that the edges left for allowances are equal on all sides, the fabric is folded and sewn to the hoop.
- A belt is threaded through the remaining recesses and sewn up so that a loop is formed around the hoop. The remaining 3 belts are sewn in the same way. The hammock is tied to the supports by straps at an angle
You can hang several of these hammocks at once, placing them opposite each other. In such a recreation area it will be pleasant to sit with friends or family, drink tea or have a snack.
Hanging hammock chair
Tips for landscaping
When landscaping a site with your own hands, it is advisable to consider the following:
- in the middle zone it is better not to plant trees and tall shrubs near the house;
- you can arrange flower beds under the windows;
- It is not recommended to plant the area densely;
- When planning a site, consider the location of wells and pipes necessary for watering all vegetation on the territory.
For landscaping, it is better to choose unpretentious plant species, for example, phlox, garden chamomile, rhubarb, lettuce, and currants. Marigolds, nasturtiums, daisies, calendula, and petunia remain decorative for one or two seasons. These flowers are easy to care for and suitable for most climate zones.
It is also important to consider the size of the yard, the design of the site, and lighting. A good option for different styles is coniferous plants. They are suitable for both small areas and large yards. Spruce, pine, thuja, and juniper are used to create green compositions, multi-level flower beds, and hedges. They are planted in rocky gardens and mixborders. For landscaping your yard, it is better to choose low-growing varieties of conifers.
DIY coniferous flowerbed
Juniper is suitable for horizontal compositions, thuja and yew are trimmed, giving them a cylindrical or other shape.
1. Medium juniper Old Gold 2. Spiraea japonica Golden Princess 3. Thuja occidentalis Danica 4. Spiraea japonica Goldflame 5. Barberry Thunberg Golden Ring 6. Juniper rock Skyrocket 7. Thuja occidentalis Yellow Ribbon
Cone-shaped crowns can be made from mountain pine, and spherical crowns from dwarf spruce. For the flowerbed you need to prepare loose soil without weeds and with good drainage properties. It is better to use sandy loam; add sand and peat to clay soil, and dilute sandy soil with turf.
The procedure for arranging a flower bed:
- Using a pre-drawn plan of the flower bed, transfer its borders to the ground, decorating it with crushed stone or stone.
- Make holes 60-70 cm deep for low-growing trees, and 20 cm less for shrubs.
- Place crushed stone, sand and fertilizer at the bottom of the holes.
- Place the seedlings vertically in the hole and pour soil, compact it, then add it until the hole is completely filled.
- Water the seedlings.
- Level the soil, and then mulch - sprinkle with wood chips, small crushed stone or sawdust.
DIY benches and sofas
Using pallets, you can make benches, sofas and even beds that will not only be comfortable, but also beautiful, at minimal financial cost. The main thing when working with pallets is to sand the wooden boards and fasten the parts together.
Supplemented with pillows, mattresses and upholstered in fabric, old and unnecessary pallets will turn into real design solutions, and if you screw legs on wheels to the bottom of the product, you can easily roll them into a shelter when it starts to rain outside. Gaps in structures can be turned into storage compartments or small drawers.
A pleasant corner where you can relax
Simple soft stool
This is a very simple option that will look very original. To do this, simply stack several pallets on top of each other and place a pillow on top. We must not forget about wood processing and fastening of parts, then the product will last a long time, maintaining its beautiful appearance.
You can make a full-fledged chair from a pallet that will fit perfectly into a country garden. To do this you will need one pallet, a hacksaw, nails and a hammer.
DIY pallet chair
Corner sofa
This design is a little more complicated, but the basis is still the same - several pallets stacked on top of each other. Such sofas can be made of any length and height, with or without a back, the main thing is to supplement them with mats, pillows and mattresses so that it is comfortable to sit on them for a long time.
The role of the backrest in such a seat can be performed by the same pallet . It will be more convenient to place it at a slight angle. Similar to the corner sofa, you can easily assemble a regular sofa or bench. A little imagination and pallets and you won’t have to spend money on expensive garden furniture.
Furniture made from pallets is a great option for those who love and know how to save
Pallet tables
From simple pallets you can build low coffee tables or a full-fledged dining table. A little paint and a beautiful glass or wood table top will complement the design and make it complete.
Coffee table
You can use one, two or even three pallets stacked on top of each other as a basis. Then a low coffee table will perfectly complement the soft seating area . The main thing is to fasten the pallets together well, and fill the space between the boards on top or cover it with a table top.
The table can be given any color or design, the main thing is that it matches the overall design of the corner or cottage. This table can be left without legs or wheels can be screwed onto it to easily move it and place it in the right place.
This furniture “invention” will make your garden look completely different.
High table
A full-fledged dining table can also be made from pallets. In this case, one pallet is positioned horizontally, and the other two are nailed perpendicularly at the edges and act as legs.
Drawers can be screwed into the gaps in the tray that is used for the countertop, which will then provide storage space for knives, forks, spoons and other cutlery. The table is well sanded and complemented with boards, glass or plywood so that the tabletop is level.
To make such a table from pallets, you will need 2-3 hours of free time.
Awnings
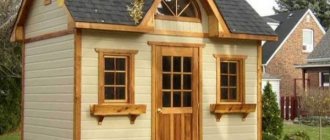
Sheds are a very useful extension option. It will protect from bad weather and the scorching sun. There are an infinite number of design options, just like the materials from which you can make a canopy with your own hands. You can use polycarbonate, wooden beams, boards, metal beams and much more.
Before erecting a canopy, it is important to first prepare the site by clearing it, leveling it, and marking places for supports. It is also important to think through the scheme in advance and make a drawing of the future building.
Building a canopy according to a drawing is always easier and faster
Of course, if you have the skills of a builder and carpenter, you can build a real capital canopy that will not need to be disassembled and taken away at the end of the summer season. The canopy can be ordered, and experienced workers will make it in a short time. But the simplest structure can be built even if you have 2 PVC pipes, 2 shower curtains, braid and strong threads in stock. Such a canopy will perform its functions no worse than its more expensive “colleagues” throughout the summer.
You can make a canopy for your dacha yourself according to the following scheme:
- Curtains are sewn into one sheet.
- The braid is cut into 40 identical pieces, from which loops are made.
- Loops are sewn to the fabric at equal distances on both sides.
- The pipes are threaded into loops.
- The places where the pipes will be inserted are marked on the ground.
- The pipes are buried in the ground. The canopy is ready!
Simple open canopy tent for a summer residence
Children's zone
Children at the dacha should not be bored either, and while adults are working in the garden beds, they can have fun. There are a huge variety of solutions for organizing various children's areas; it is only important that the play areas are not only beautiful, but also safe.
What can be done for children at the dacha:
- hang a tire swing;
- equip a play area with slides and climbing frames (the main thing is that it is safe);
- install a pool or trampoline;
- make a board or allocate an area for drawing with crayons;
- build a simple sandbox where even the smallest children will play enthusiastically.
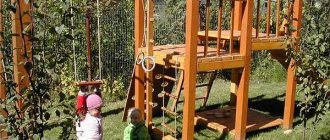
If you do not want to spend a large amount of money, make a playground from available materials
Children's swing made of boards and strong rope
It is better to supplement the sandbox with an awning or a fungus so that children do not overheat in the sun and do not get sunstroke; the structure also needs shelter to protect it from precipitation, animals and birds.
Craftsmen make special covers from old furniture and boards; for example, cabinet doors can be turned into flaps that will close the sandbox while no one is playing in it.
The easiest way to cover a sandbox is with a tarpaulin or other covering material on which a load is placed so that a gust of wind does not carry it away.
It is recommended to change the sand for the sandbox 2-3 times during the summer. It needs to be refilled periodically, as it will crumble around. It is best to use fine quarry or river sand, sifted to remove large inclusions and debris.
Children's sandboxes in original designs
The simplest sandbox made from a tire
A big old tire can easily be turned into a beautiful sandbox without the need for elaborate plans. You can make a sandbox from a tire yourself according to the following scheme:
- A place is marked on a flat area.
- The tire can be slightly deepened and secured with metal pins.
- Cover the bottom with tarpaulin to prevent insects and other living creatures from crawling in.
- Decorate the tire.
- An awning or beach umbrella is installed nearby.
- The sand is filled in and the children can be let out to play.
A child will have fun in a sandbox made from a car tire, but there will not be enough space for two or more children. If you need a larger sandbox, you need to look at other options, such as a plank sandbox.
Sandboxes made from car tires
Wooden sandbox
For a wooden sandbox you will need to make a drawing and prepare a foundation. To do this, lay a layer of hollow bricks on a flat area. For the sandbox itself you will need an edged board 20-30 cm wide and 4 pegs. This box can be made of any shape and size.
It will be convenient for children if the sandbox is equipped with sides and corners on which they can sit, put a bucket or other tools for sand creativity.
Wooden sandboxes will last for years
Decorating a summer cottage is a labor-intensive creative process in which even the most unexpected things can be involved. Often, old trash that has been stored for a long time, with the desire and imagination of the owner, takes on a new life and becomes not only useful, but an irreplaceable element of decor or part of furniture .
Author of the article: Nitievskaya Alla Igorevna
- Related Posts
- Original decor for wall decoration (photo): ideas, tips, master classes
- Original crafts from plastic bottles - as a source of inspiration for country creativity
- Do-it-yourself birdhouse, from which you can make a cozy house for birds
« Previous entry
