So that children at the dacha or near the house do not explore the beds or other places where they should not be, they need a corner that is interesting to them. As a rule, parents come to the idea of the need to create a playground or a sports corner - it depends on the age and desires of the children. A self-made playground is good because during its construction you can provide for the possibility of its gradual transformation. After all, what suits 2-3 year olds no longer appeals to 5-6 year olds, and even more so to older children. And besides, a do-it-yourself playground is often built not so much for reasons of economy, but rather out of a desire to please the child: who knows better than the parents what your child likes... Some people need a pirate ship, and others need their own, real house with a porch, a door and all the necessary attributes.
DIY Danish playground - a place for your favorite offspring to play in the country or in the yard
Deciding on the content of the site
What play and decorative elements to install on the playground depends on many factors: the age of the children, their number, personal preferences. And also from the place where it is equipped. This could be a spacious courtyard of your own house, or a small piece of lawn at your dacha, or the territory of a kindergarten, for which parents are often asked to come up with something interesting.
For example, here’s what you can do on the playground with your own hands in a kindergarten, if there is already a gazebo and a sandbox there:
- swing-balance;
- play transport - cars, trains, boats with benches for several children;
- obstacle course;
- animal figurines.
The materials used for decoration were pieces of plywood, old tires, plastic bottles and a barrel Source znamyatryda.ru
Ordinary swings, climbing walls and other similar structures would be inappropriate here, since it is difficult for educators to keep track of a large number of children and ensure their safety. But they can be installed on personal territory, be sure to think through ways to protect the child from possible injuries.
These methods include personal supervision, creating a soft covering on the playground, and providing a free zone around the swing or enclosing net on the trampoline. Much depends on the age of the children, their physical and mental development. In general, each case is individual.
But before you build a playground for your baby, you need to think about the future: he will grow, and his abilities and preferences will change. Other children may appear in the family. The children of your friends and acquaintances may come to visit your child. It is advisable to make it interesting for everyone, and game elements can be added or replaced.
Play complex for children of different ages Source babushkinadacha.ru
Choosing a location
It will be a difficult task to solve. Firstly, it is desirable that the playground be viewed from the house, and from the room in which someone is located most of the time. Ideal if the site is visible from several rooms or points. Secondly, it should be located away from outbuildings with “aromas”, if there are any. Thirdly, it is advisable to take into account the fertility of the soil: an infertile area or one with complex geology can be allocated for the play complex: there is no need to dig into the ground, at most - bury the swing posts 30-40 cm deep.
When choosing a location, it’s a good idea to place a children’s play corner near a wall or a permanent fence. These zones can be fully used, and in this case they can be used for games. For example, make a mini-climbing wall on the wall, attach rope ladders, a slate board and other devices no less interesting for children. You probably know what your children like, and if you don’t know, you can find out: there are enough fences and walls, place different devices in different areas and observe where your child lingers longer. So, find out which games he is more drawn to, and you will know in which direction to move next.
A slate board on a fence is fun for children and develops fine motor skills.
Climbing wall for children on the fence
Training area for little climbers on the wall
Lighting also needs to be taken into account. The place where children play should not be constantly in the shade, but the sun is also not needed. Approximately 2/3 of the area should be in the shade (sandbox, swing), and 1/3 in the sun - a pool, if there is one, an active games area. If there is no shade on the site, you will have to come up with a canopy or put up a large umbrella.
At the same time, please ensure that there is no constant draft in the area of the proposed site. Children, of course, need to be hardened, but not in this way. When choosing a place for a children's play area, pay attention to the fact that there are no electrical appliances or any shields, machines or other similar devices located nearby. Children are curious and inventive, so it's best not to take risks.
What is better to buy
If you wish, you can do a lot yourself. But when it comes to how to make a playground with your own hands at the dacha, then it is better to buy some things. This applies to both individual game elements and their components:
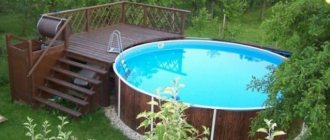
- Swimming pool for kids. For small children, it is better to buy a small inflatable pool. It is safe - even if you fall on the sides, it is impossible to get hurt. The water in it warms up quickly, and it can be changed and washed frequently.
- Slide. This is one of the most difficult structures to make yourself with many elements: a slope, stairs, platform, fences. The most difficult thing is to make a safe ramp with good sliding properties. Plywood, even treated with varnish, quickly becomes unusable in the open air, metal gets very hot in the sun, and linoleum, which is often used to cover an inclined plane, wears out and spoils the appearance. Therefore, it is advisable to install a special plastic ramp. It can have different lengths and configurations, so the dimensions of the entire structure are initially adjusted to it.
Wooden slide with a plastic slope Source 1090983.ru
- Trampoline. This rather traumatic equipment, so beloved by children, must withstand a certain load, which is impossible to calculate on your own. Trampolines should be purchased with a fencing net or special handrails.
- Climbing wall hooks. They must be durable, easy to grip, with a rough but not traumatic surface, and high-quality fasteners. For inclined low climbing slides, it is allowed to make homemade holds from wood or other suitable materials. But for high vertical walls it is better to buy them.
Homemade climbing wall with wooden hooks and notches Source sport-marafon.ru
Sometimes it can be difficult to decide how to make a children’s playground in the country if the area is small and it is not possible to place everything that the child dreams of. In addition to play structures, children usually want to have their own secluded corner - a house in which they can store treasures, hide, and relax. But it is he who takes up a lot of space.
This problem is solved by making a house not on the ground, but on a tree or on high supports, under which a sandbox is built. But such a complex design requires experience and a decent set of tools, which not everyone has. A children's tent, which can be folded and put away if necessary, would be an excellent solution.
Game tent-house Source logikasporta.com
You can do everything else yourself or hire a specialist and give him a clear plan - where everything should be located and what it should look like.
What area is needed
A little about the area that needs to be allocated for a children's playground. Small children don't need much space - a sandbox, a few very simple equipment, a small pool if you think it's possible. It's nice to have a lawn or a flat, smooth piece of land with some suitable covering where you can lie around to your heart's content. That's all. An area of 4-5 square meters is enough for all this. meters.
Small children need a small play area
For small children, it is advisable to fence off the area. This will give you the opportunity not to be constantly nearby, but to do your own thing nearby: your children will be visible and safe. The fence can be anything - it’s a matter of your imagination, desire and capabilities. The main requirement is that it must be safe and durable or completely inaccessible to children. For example, like the chain-link mesh you see in the photo above. It comes with a plastic coating in bright colors and does not look as harsh as the usual one.
Chain-link mesh with PVC coating is a good option for fencing playgrounds
If for some reason you don’t like this option, you can put up a picket fence that will be about the height of the children’s shoulders; the distance between adjacent planks should be such that their heads cannot fit through it. Pickets can be painted with different colors.
Picket fence - a familiar fence in an unusual design
Just make sure that the tops are rounded and do not have sharp corners, and that they are well processed: splinters are very frustrating for children. The picket fence must be secured firmly. With the expectation that children will definitely hang on them and jump.
Rope fencing is rarely used, but it looks good and performs its functions perfectly: durable, safe, and aesthetically attractive.
Rope fence for a playground - durable, inexpensive, reliable and safe
For older children, the fence is a relic. For them, the field of activity is the entire site, and only something truly interesting can distract them. More space is also needed here. If possible, give children under 7 years old 8-9 m2, from 7 to 12 years old - up to 12 m2. There is already a more serious set of shells, which is why larger areas are required.
Basic designs
Having decided on the content of the site, you need to choose a suitable place for it. It should be:
- clearly visible from home so that children’s games can be monitored;
- safe, located away from wells, reservoirs, and electrical equipment. And also from the beds that kids can trample in the excitement of play;
- spacious enough to accommodate everything planned.
If there is not much space, the gaming complex is made compact by combining several elements into one. For example, you can build a house on high supports, adding a ladder on one side, installing a slide on the other, and making a sandbox under it.
Advice! This arrangement of the sandbox will solve two more problems: it will protect the sand from rain and excess dampness, and the kids from the scorching sun. In any case, its long-term exposure must be limited by arranging this element in the shade of a tree, equipping it with an umbrella or canopy.
Sandbox-ship with a canopy Source domnomore.com
See also: Catalog of family house projects
Sandbox
This is the simplest design that anyone can do. The traditional option is a square or rectangular box made from boards. With a little imagination and changing the shape, the sandbox can be turned into a boat, a car or a house.
There are several nuances in making this game element:
- Having marked the place for the sandbox, you need to remove the fertile layer of soil from it so that weeds do not grow through the sand;
- so that water does not stagnate in the sand, the area is deepened to 20-30 cm, a pit is made in the middle and covered with gravel, and the bottom of the sandbox is made with a slight slope towards the pit;
- it can be covered with geotextile or film, having previously made slits in it for water drainage.
The easiest way is to connect the sides of the sandbox using corner bars. Additional rigidity of the structure will be given by triangular gussets at the corners, which will also serve as comfortable seats for children.
Homemade sandbox from boards Source koffkindom.ru
When thinking about how to make a playground with your own hands from scrap materials in the yard, you don’t have to use new building materials to make a sandbox. For this purpose, log cuts left over from the construction of a bathhouse, or old car tires are suitable.
Hemp treated with protective impregnation is simply dug in around the perimeter of the sandbox and tied along the internal contour with tarpaulin or plastic tape.
Sandbox made from wood cuts Source cs8.pikabu.ru
Tires are used differently depending on the size. If you have a large wheel from a tractor or truck, just cut off the inside of it and sand the cut or put a garden hose cut lengthwise on it.
A tire painted in bright colors is impossible to recognize Source b-online.ru
See also: Catalog of companies that specialize in equipping playgrounds and manufacturing decorative forms
Tires of small diameter are cut crosswise into 2 or 3 parts and dug into the ground vertically or laid in the shape of a flower, fastening the individual elements to each other. The result is soft sides that are pleasant to sit on and on which you cannot get hurt.
Advice! Children's sandboxes often become a latrine for their own and neighbor's cats. Therefore, you need to build a cover for them or sew an awning.
Swing
If there is no mature tree on the site with thick branches on which to hang a swing, supports with a crossbar are built for them. The material for them can be steel pipes, wooden beams with a cross-section of at least 10x10 cm, or logs of the same or slightly larger diameter.
The main thing is to ensure the stability of the supports, for which they are buried 50-80 cm into the ground and concreted.
U-shaped support for a swing Source moydomik.net
Making supports
Pre-prepare a project for the future complex. On the drawing, indicate the desired overall dimensions of each element of the system. Consider the size of the existing construction site.
Making a children's playground
Next we do the following:
- we cut the timber into pieces for arranging support posts and crossbars;
- sanding wooden elements;
- saturate the sanded wood with an antiseptic.
The average length of supports is 900-1150 mm. About 80-100 cm of each support will be dug into the ground, about 10-15 cm will remain above the ground.
Beams for supports
Beams for supports
Bars for making platform parts
We lay out the supporting elements on the site in accordance with the project and form a frame - two side parts of our future complex. For connection we use screws with a diameter of 8-10 mm. We embed them into the wood. We close the holes with plugs.
Sandbox prices
sandbox
We place the sides on supports, fixing them in previously prepared recesses. At this stage, we enlist the help of 1-3 people. We set the sides according to the level. It is recommended to first lay bricks under the bottom of each support for better stability of the site. We fill the installed supports with 10-15 cm of crushed stone and fill them with concrete mixture.
We connect the exposed supports with transverse beams. We leave the fill to gain strength.
The wood is processed and wrapped with roofing felt
Supports
The racks are dug in
The racks are dug in and connected by a cross member
Video description
There is another option that is suitable for baby swings with a small swing amplitude - these are triangular supports with a crossbar and spacers that ensure structural rigidity.
Their production is shown in the video: A swing seat can be bought or made from a variety of materials, not just wood. For example, from the same old car tires, a plastic chair without legs or a steel hoop. The easiest way is to braid it with strong ribbons or belts. And for the little ones, it’s better to make a soft seat by wrapping the hoop in several layers of foam rubber and sewing a fabric cover.
Swing made of steel hoop, canvas slings, foam rubber and fabric Source i.ibb.co
The swing is hung on chains, slings or a strong rope. To prevent them from fraying and squeaking, carabiners are attached to them, which are attached to rings or hooks on the crossbar. This fastening will allow you to remove the swing during rain and winter and bring it into the house, hanging it from a hook in the ceiling, a horizontal bar or in a doorway.
Balancers and spring rockers
Children sometimes build such rocking chairs themselves by simply laying a board across a log lying on the ground. The design turns out to be quite inconvenient and unstable, but it “works”. And if you are already deciding how to make a playground with your own hands from scrap materials at the dacha, then improve it by making a support of a suitable height and securing the board to it using a hinge or an ordinary long bolt threaded through the holes in the support and a block screwed to the board below.
Making the base for swings and manholes
Making the base for the swing and manhole
At this stage we will assemble and install the support structure for the swing and arrange the manhole. We make the support for the upper beam crosswise - it’s more stable. We first make a selection for convenient joining of the beams and additionally tighten them with bolts. We lay a cross beam on top of the supports and press it with a clamp. We screw it to the support.
Making the base for swings and manholes
Digging holes for racks. We install supports in them, carefully checking each level. At the same stage, we screw spacers to the posts - they will prevent the supports from moving during the concrete hardening process. We fill the holes with the posts with a small layer of crushed stone and concrete them.
Pits for racks
While the concrete pour is gaining strength, we make a manhole. We make the slope almost vertical. We arrange steps and cutouts at our discretion. We cut out the holes using a jigsaw. We make the hole itself from OSB and attach it to a frame made of 5x5 cm timber and 5x2 cm crossbars.
Installation of racks
Installation of racks
We are installing a balcony on the top floor. To do this, we lay and secure the crossbars, lay the floor and erect a roof the length of the stairs. On the side of the slide we attach a wall made of OSB sheet. To make it more beautiful, we cut out a small window in it. We make railings on the balcony.
Wall
Wall
Wall
Wall
We sand all the wooden elements installed at this stage. We round off sharp corners and ends. We cover everything with varnish.
We attach protruding bars to the hole. We tie the rope in a convenient place.
Attaching boards to the roof of the house
House cladding
Video description
An example of such a rocking chair, made from several short bars and a long board, is shown in the video:
Something similar can be made from a short board attached to half a tire. Depending on its diameter, you will get a rocking chair for one or two children. The main thing is to sand the wooden parts well and make comfortable handrails for the child to hold on to while riding.
Rocking balancer for two Source i.ibb.co
Making the floor and railings
The floor of our play complex is laid out from 15x2.5 cm boards. The total length of the floor is approximately 2.5 m. Before laying the floor, we attach stiffeners to the frame of the complex. A 5x10 cm beam is suitable for their manufacture.
At the same stage, we construct a vertical ladder from the end. To assemble it, we use 2x5 cm planks. At the end of the work, we will hang a rope near this ladder. Recommendations for arranging railings have already been given earlier. We follow them. On the side of the steps, instead of railings from boards, we install 5x10 beams to create a manhole.
Video description
Look at what a complex and interesting obstacle course can be made from the simplest materials: construction pallets, logs, rope and bars:
Don’t forget to install benches on the site for relaxation and quiet games. A small table wouldn't hurt either. This furniture is also easy to make from boards or stumps of different diameters and heights.
Those who like to draw with crayons will love the smooth sheet of plywood, painted with chalkboard paint and fixed at a convenient height. Targets nailed to a tree or fence will allow you to practice your accuracy when shooting with a bow, a pistol, or even a slingshot.
Take care of yourself too - find a cozy place for a sun lounger near the playground, where you can sit with a book or knitting, without letting the children out of your sight.
Making a staircase
Making the stairs
While the concrete hardens, we are busy arranging the stairs. Cut the timber to the required length. The design of the staircase is extremely simple: 2 stringers and steps. We make the steps not too high - the playground is still for children.
We tighten the stringers using hairpins. We fasten the steps into the recesses and additionally fix them with self-tapping screws.
Making stairs
We dig in support pillars for the future staircase. We maintain the required slope. Let's make it not too cool. The procedure for arranging the supports remains the same as in the previous section.
Making stairs
Let's try on the stairs. We level it, attach it to the base and fill the supports with concrete. Painting the stairs.
Making stairs
Next we make the railings. To do this, we set up vertical posts made of timber, attach them to the stairs, and then secure the handrails. We make the top handrail from a board and fasten it at a height of about 90 cm, fix the second handrail approximately in the middle between the top railing and the stairs. To make it, we can use timber 5x5 cm, 5x2 cm or another similar section.
Finished ladder
Layout
To properly design a playground for children, draw its approximate plan. Think carefully about what you want to place on it.
Remember that the child will grow up and the old designs may become small and uninteresting for him. Therefore, leave some space for placing other objects.
Also try to take into account the wishes of the child, this will make the street children's complex a real wonderland for the baby.
Sculptures made from trash
Sculptures will help you create a unique design. The master chooses fairy-tale creatures or fantastic animals, aliens or cartoon characters as prototypes. The frame of the sculpture itself is made of wire, which is coated with clay, plaster or cement.
Since it was decided to make a playground and its top (roof) with your own hands from scrap materials, bright small details are stuck on top of the figures: take caps from yogurt or mineral water bottles, parts of broken toys, checkers and buttons.
Scattered parts from the Lego constructor will also be used.
Even fragments of dishes can be put to use: they will become material for decorating a sculpture. However, you should be careful here: they need to be immersed deep enough in clay or cement so that the sharp edges cannot injure.
- Old basins are easily transformed with paint into strange turtles. And the bowls, mounted on tree stumps, imitate giant mushrooms.
- Metal dishes laid out in the grass or along paths, painted red and covered with black circles, will become fantastic ladybugs.
- And plastic bottles make cute piglets and hedgehogs, funny and amusing.
Where to place plastic containers?
This is a fertile material for exciting games, competitions and structures on the playground, built with your own hands without fabric. The straight wooden bridge will certainly be appreciated by young bowling fans. To do this you will need a dozen white plastic bottles filled with water or sand.
It is not necessary to knock them down with special heavy balls; a football or basketball ball will do just fine.
Another idea for developing coordination and accuracy is to cut the containers to half. They can be hung on wire and thin rope or nailed to a wooden fence. The essence of the game is to hit these containers with a small ball. Not only plastic bottles will do, but also old mugs and tin cans.
Options for decorating the area
A children's corner can be decorated in completely different ways, everything also depends on you and your child, on your wishes, creative ideas and imagination.
The area around the perimeter can be planted with flowers or you can create some thematic figures and place them in different places of the site, the bright color of the main buildings will also be a decoration, they can be covered with different bright colors or with a coating in the same style, there are no boundaries.
Crafts from car tires
Tires or old bald rubber are an opportunity to build a system of playground objects with your own hands.
The easiest way is, as a rule, to build a small sandbox for one child from unnecessary rubber from a “heavy truck”. It is better to place it in the shade, since there is nowhere to place the “mushroom” or canopy. You can shade the descent with a fabric awning or an old beach umbrella, changing the location depending on the shade.
Step-by-step instructions for creating a sandbox:
- prepare a site for a sandbox (it is better to build on a prepared base - paving slabs or lawn grass);
- mark a circle almost the size of the tire and remove the turf layer;
- you need to secure the tire to the ground with stakes or slate nails;
- Cover the bottom of the resulting reservoir with a tarpaulin and fill the level with sifted sand;
- paint the outer surface of the sandbox in a bright color with harmless, quick-drying paint;
- To monitor the sandbox, arrange a lid to cover the sand from rain or the ingress of cat and bird excrement (you can get by with oilcloth with weights at the ends). They are very reliable.
Art objects made from tires are an original decoration for a children's playground. In combination with plywood boards, this is the most affordable material for placing recognizable figures in the form of:
- animals and birds;
- fairy-tale characters;
- favorite toys;
- cartoon characters.
The most popular tumbler walls are made from two tires of different sizes, which are completely mounted one above the other. For health reasons, voids are filled with plywood. Using paints, they paint the sundress and the face of the toy.
Like a tumbler, there is a way to make, repair and decorate a matryoshka doll or a teddy bear, and place a barrel with the inscription “Honey” next to it. There can be several objects of different sizes. For example, three different bear figures, as in the fairy tale “The Three Bears”. “Masha and the Bear” is a good plot for crafts made from tires, but other ideas are also suitable, it helps develop imagination.
No less popular themes are white swans, which can be cut out of turned-out tires and covered with white paint.
On the edges in the center you need to make wings (or leave them without cuts), and on the wrapped end they draw a bird’s face, as in the photo on the site.
- You can make a turtle out of tires by covering it with green and brown paint. One tire is needed for the base of the sculpture, the other is cut into 4 parts to make the legs. It is better to cut the head out of plywood and secure it near the base. This way nothing will happen to her.
- Bald rubber is an excellent material for fencing a playground or constructing all kinds of labyrinths and galleries, cars, tents. If you cover a covered gallery made of tires with a camouflage net, you will get a good training ground for little scouts who love such games.
Children's playground safety requirements according to GOST
So, the requirements that GOST imposes on children's playgrounds are as follows. First of all, the distance from busy roads and, especially, highways. Parking lots for vehicles must be located at least 10 meters from the existing site. Garbage cans and other solid waste collection points are 20 meters away.
The entire territory is necessarily fenced, and the space itself is not accessible. Children are strict about where they are allowed to play.
In addition to places illuminated by the sun, shaded areas are necessary. This reduces the likelihood of children overheating, because they always have the opportunity to hide from direct light.
Particular attention is paid to the maintenance of sandboxes. If you remember the playgrounds of the Soviet period, no one controlled them. Sand might not be imported for years, and what remained became completely unusable. Now this is not allowed. All sandbox contents are updated annually and are confirmed by a certificate of compliance with safety standards. No impurities, including earth, are allowed. In bad weather, as well as in the off-season, the sandbox is covered with a special polymer material.
The site offers various options for children's sandboxes. They are quite deep and create a comfortable playing area. You can choose based on color, design or size.
Finally, one more requirement: buildings must be divided according to age and delimited by zones. This way, kids won’t interfere with older kids and vice versa. This will make the site even safer.
It is important! You can become more familiar with the GOST requirements used for equipping children's outdoor play spaces by studying the documents: GOST R 54847-2011, GOST R 52167–2012, GOST R 52168–2012, GOST R 52169-2012, GOST R 52299-2013, GOST R 52300-2013, GOST R 52301-2013, GOST R 55677-2013, GOST R 55678-2013, GOST R 55679-2013, GOST R EN 1177-2013, GOST 33602-2015.
In general, modern playgrounds are quite safe and well-thought-out play spaces intended for boys and girls of different ages. Moreover, older children can stay there without constant adult supervision. But kids need control, this has already been mentioned several times above.
TOP 10 most unusual playgrounds in the world
In conclusion, we share with you bright and original playgrounds from all over the world. Sometimes adults approach with uncontrollable imagination the arrangement of places for the younger generation to play. And then truly unusual creations are born.
- A giant playground located in a former shoe factory, St. Louis, Missouri, USA (officially the City Museum)
- Inflatable water playground, Croatia, Bol village
- The original Gulliver children's park, Valencia, Spain.
- Fairytale Chinese labyrinth. Guangdong forest
- A bronze man with very small bronze men on it. It’s exciting not only to climb on it, but also to look for these “babies” scattered all over the surface. Manhattan Boy is located in New York, USA.
- Forest Discovery Park, Memphis
- Narrow mesh “skyscraper”. Venue "Valhalla", Purmerend, the Netherlands.
- Children's playground... for adults! A unique outdoor gym that lights up at night thanks to the energy generated by people exercising on the machines. Green Heart, Kingston upon Hull, England.
- Knitted crocodile playground, Sao Paulo, Brazil.
- Dancing houses from the company Monstrum, whose creations are also in Russia (Gorky Park, for example). This site is located in Copenhagen, Denmark.
Wooden
Popular due to the environmental friendliness of the material. Suitable for outdoor entertainment only. They are quite durable, but require careful care, especially after winter cold or spring rains.
Such weather provokes deformation of the structure and the formation of mold. However, if you follow the operating conditions, the wooden slide will delight more than one generation of little summer residents.
We recommend reading:
Alpine slides in landscape design on a small plot: the best ideas and stages of implementationHow to make a country washbasin: examples of building a simple and convenient washbasin with your own hands (90 photos)
Beautiful houses for a well - 115 photos of design ideas and examples of well design
The slide is a universal attraction
Playing on a children's slide is always a fun and interesting leisure activity, as well as an opportunity to physically strengthen and improve the health of a child. This is training the baby’s vestibular apparatus, developing his motor skills and coordination.
If you install a slide at your dacha, the baby will no longer want to sit at home, but will spend all his time in the fresh air and sunshine, which is what parents actually achieve by taking him to the dacha.
Play area fences
Of course, it is not necessary to fence the playground, but a small fence will only make it more beautiful. You can make a fence from available materials. Even ordinary plastic bottles can decorate a space. You can make beautiful animals out of them or paint them in different colors.
A wooden fence will look unusual. Paint each block or log a bright color. Make a beautiful door. Entrust your child with creating drawings that will decorate your entire area. How to make a playground with your own hands?
A difficult question to which you will definitely find an answer. Create a play corner for your baby and he will say “Thank you!”