One of the most effective and easily accessible fertilizers in the country is compost. It is free, contains many substances useful for plants, improves the structure of the soil, and is done, although it takes a long time, but without much effort. To ensure that the fertilizer is correct and can be used for its intended purpose, you need a suitable compost box, which is easy to build with your own hands.
- 2 Options for compost structures: how and from what they can be made
2.1 Board compost bin2.1.1 Video: how to make a compost bin with your own hands from boards
- 2.2.1 Video: how to make a compost box from corrugated sheets with your own hands
Criterias of choice
If the model and type of composter are determined by the user, then all that remains is to select:
- manufacturing material. Composters can be made:
- made of plastic. Plastic models are distinguished by their low weight, ease of installation, use and maintenance, low cost, and durability;
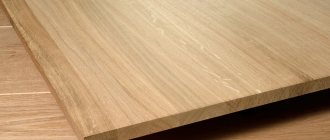
- made of wood. Wooden containers are more aesthetically pleasing and environmentally friendly. However, a short service life, especially with improper care, and a higher cost reduce the level of demand for these structures. As a rule, do-it-yourself composters are made from this material, since wood is easier to process;
Wooden compost bin
made of metal. Metal containers are characterized by high cost, but also the longest service life.
Metal tank for composting
capacity volume. The parameter will be determined depending on the size of the plot, seasonality of use and user priorities. Some gardeners prefer to install several small-capacity containers in their dacha, others prefer one, but larger ones. The most popular are composters with a capacity of 600 l and 800 l; inlet and outlet dimensions
For ease of use, it is important that the gardener can freely place, for example, large armfuls of mowed grass into the composter and remove the finished fertilizer with a pitchfork or shovel; presence of additional elements. For example, the presence of a metal mesh installed at the bottom of the tank is essential, since it prevents rodents from entering the composter and, as a result, eating the substances to be processed.
Feedstock for creating organic fertilizer: which components should not be added
Any plant or food waste can be used for composting, but it must be limited, understanding that:
- fresh feces contain helmite eggs. To destroy them, microbial treatment is required - exposure to air for about a year;
- thick branches and bones will not have time to decompose during composting by microorganisms;
- plants treated with chemicals will be harmful: they will change the composition of humus not for the better;
- Potato and tomato tops affected by late blight will become the cause of infection of garden crops in the future;
- Grass mowed with seeds will serve as a source of weeds. But if you plant it for the next season after winter, the seed pods will most likely open up and become empty. In addition, birds and various rodents will work on them.
Naturally, any garbage of inorganic origin, and this is plastic, polyethylene, synthetic materials, rubber, will simply clog the prepared fertilizer.
Important nuances of composting
The compost is laid horizontally in even layers. Periodically these layers are mixed with manure. Lay without compacting, so as not to block the access of air and not to interfere with the work of bacteria responsible for the formation of fertilizer.
Do not allow this mass to dry out; water it periodically with water, especially during the dry period. And it is impossible to over-moisten what is contained in the box, because in this case the necessary bacteria may die.
It is necessary to water the resulting compote with EM (effective microorganisms) preparations more than once a season. Do not pour the entire bottle into the box. Such a bottle (0.5 liters) must be divided into five buckets of water, and 100 grams of candied jam should be added to each of them. This sweet supplement will come in handy for the bacteria to start working.
Let these buckets sit for a while, then this liquid should be poured evenly onto the compost. The effect of this technique has been proven - the fertilizer ripens much faster.
Manufacturing from pallets
A special feature of the product is the absence of fastening screws. The connection is made through slots in the pallets.
For manufacturing you will need materials and tools:
- pallets;
- hammer;
- roulette;
- assembly adhesive;
- gun;
- level.
The work consists of the following steps:
- At the first stage, all the pallets are disassembled and slots are made in the boards using a jigsaw.
- Then they gather again. One side is installed at an angle. This is necessary to remove fertilizers.
- During assembly, you should constantly use a level to prevent distortion of the structure. All seams are coated with assembly glue.
- At the end, the product is coated with an antibacterial solution.
How to build a compost bin with your own hands
By and large, the process of making a compost box at the dacha with your own hands is not that difficult. It can be represented in the form of the following sequence of work.
- We remake pallets and make panels from them. You will need to completely disassemble the source material (pallet) - it needs to be divided into boards and beams, rearranged a little and everything reassembled. The timber must be moved to the very edge of the boards, and the distance between the boards must be reduced to a maximum of 20mm - gaps are needed, since the process of rotting grass requires oxygen. You also need to think about installing shields - the boards should not reach about 300-400mm to the bottom of the beam. Thus, the useful height of the compost box will be approximately 600-700mm - if this is not enough for you, then you will have to specially purchase timber and use it to assemble panels of the height you need. You need to collect three such shields.
- We install the shields in the holes and connect them at the top with other planks from the pallet. For now, we connect them only along the perimeter, after which we fill the holes and at the same time carefully compact the soil, spilling it with water. 3. The next stage of work that will need to be done in the process of deciding how to make a compost box with your own hands is the design of the box on the back side - in fact, here you will need to fill the board in the same way as was already done in the process of making panels. Only the back wall of the box is done this way; the front is designed a little differently.
- The front must be removable. Otherwise, it will be inconvenient to get compost out of it. For this purpose, you will need profile trims for UD drywall - they are sewn on slightly at an angle. The result should be some kind of blinds, the slats of which are inserted into the ud profiles - when the need arises, one or two boards can always be removed and at the same time free access to the compost. Alternatively, such blinds can not be made along the entire height of the box - it will be enough to build them in the lower half, and assemble the upper part according to the principle of the sides and back wall.
In principle, this is the entire proper compost bin. The only thing that can be added here is to build a lid, which will turn out to be a very useful addition - at least a compost bin equipped with a lid looks aesthetically pleasing. You understand that without it it will be an ordinary pile of garbage, even though it is folded in a wooden box. This is optional – if you don’t want a lid, so be it.
And in conclusion to the topic of how to make a compost pit with your own hands, I will say a few words about finished products of this type. If time does not allow you to build such a structure yourself, almost exactly the same box can be purchased at a hardware store. At the same time, it will cost twenty times more - when making a box with your own hands, all you need to buy are screws and antiseptic protection for wood. Everything else can be obtained absolutely free.
How to decorate a container?
A compost bin made from rough-hewn boards does not look very aesthetically pleasing. Therefore, if desired, it can be painted in any color or covered with drying oil or stain. Have your kids decorate it with pictures using a spray can. A bright container will only decorate the area.
You can assemble an unusual decorative structure and close the box with it from thin wooden slats assembled crosswise in the form of a lattice. Plant climbing plants on the sides. Such a structure will be an excellent decoration for the site.
Selecting a location
A number of conditions must be met
It is very important to decide on a location. We do not recommend organizing a compost bin too close to a house or other residential premises, at the very entrance to the site or near entrance roads, etc.
However, anything can be seen. The owner will explain this by saying that he does not want any specific place to disappear. In fact, it is recommended to organize the box in a secluded place, for example, in the corner of the plot, in the shade, and not in the sun (the compost does not need to dry very much).
It is also necessary to make it convenient to approach the compost bin, for example, make an ordinary path, because you will have to walk there constantly (with weeds and buckets of unnecessary waste from the kitchen). In front of the box itself, it is advisable to make a platform with bricks so that you can come up with a cart when the time comes to pick up the compost.
Space for a compost bin. The illustration for the article is used under the standard license ofazende.ru
What can you throw in the pile?
Compost includes household waste and plant residues from the garden. The decision to equip such a structure on your site will bring double benefits: get rid of various garbage and get excellent fertilizer for the beds.
You can send into the dug hole:
- leaves fallen from trees;
- weeds without seeds, grass;
- branches, wood waste and sawdust, rhizomes of shrubs;
- tops of vegetable plants;
- all kinds of peelings from: potatoes, apples, beets, cabbage and so on. Table scraps are also suitable for producing humus;
- unnecessary paper, cardboard.
All components placed in storage must be thoroughly crushed beforehand, especially for wood, paper, and cardboard products. No varnishes, paints, or any fats should be included with the waste. It is advisable to protect the top of the formed box from the sun so that the mixture does not dry out and from precipitation, in order to avoid waterlogging. Sheets of slate and black film will come in handy here. For convenience, it is worth attaching the block to the edge of the polyethylene, then it can be easily opened and closed.
Note. In the natural environment, the compost pile matures within two years.
Slate box
The most inexpensive and reliable box can be made from slate, because it does not rot. It can be used to make back and side walls, as well as partitions. It is recommended to reinforce the slate with boards so that it does not crack due to overcrowding.
It is best to build the front of the box entirely from boards (the front wall is constructed based on the fact that the finished fertilizer could be conveniently removed from the box). At half height, the front part can be made standard, and then assembled from boards that lie exactly horizontally. The boards are fastened in such a way that they can be removed to the required level. You will understand how convenient this is when you take out the finished fertilizer.
Shiver option
Rules for filling and operation
And so, you can put all household biological waste into the composter: garden and kitchen. There are exceptions - more on that below. Raw materials are conventionally divided into green (freshly cut grass, weeds, food) and brown (dry leaves, thin branches, earth). When laying, alternate green and brown material in a ratio of approximately 1 to 5. The bottom is lined with coarse stems for drainage.
What can you put in compost?
- Weeds, tops, grass, straw, leaves, branches, pine needles;
- food waste: peelings, cores, fruits, vegetables, shells, husks;
- sawdust, newspaper, paper, cardboard, tea bags;
- earth, ash, lime, manure.
What not to put in compost
- Infected tops, including potato tops;
- cabbage root affected by clubroot;
- any plants affected by diseases;
- apples in large quantities;
- plants treated with herbicides;
- horsetail, horseradish, wheatgrass, hogweed;
- meat, fish, bones;
- leftover prepared food: cereals, soups, gravies, salads;
- fruit seeds;
- excrement.
When the contents are acidified, if, for example, you put a lot of apples, add phosphate rock or dolomite flour. Bones do not decompose for a long time. Meat and fish products cause an unpleasant odor and attract birds, cats and rats. The same with ready-made food.
Whole bananas with peel are a source of potassium and phosphorus and are a welcome component of compost infusion. Be sure to bury the overripe fruit deeper in the pile so that it does not tempt forest thieves.
Operation of the compost pit
A properly organized compost pit does not require special care. All processes there proceed on their own. Two indicators you need to pay attention to are humidity and air permeability.
The optimal humidity for compost is 70%. If you squeeze such a mixture in your fist, it will be compressed, but will not produce drops of water. To maintain the required consistency, the pit is spilled with plain or herbal-infused water. Automatic watering is very convenient.
Organic waste piled up in layers is gradually pressed and caked. Deprived of oxygen, the inner layers stop “breathing” and rot. A putrid smell appears, and a swarm of flies circles over the heap. To avoid undesirable developments, the contents must be shaken from time to time. Or just pierce it with a pitchfork in different places.
Review of popular models
Based on consumer reviews, experts compiled a rating of composters. The most popular products are those made by:
Finnish company Kekilla.
The plastic composter of the Globe model is made of high-quality material that is not exposed to the negative effects of direct sunlight and freezing temperatures.
The design of the tank does not have sharp corners, which is important when there are small children. If necessary, the container can be supplemented with separate rings to increase the volume;
Finnish model 160 l
Graf Thermo King (Germany).
The container body is made of foam plastic, which is not exposed to the negative effects of ultraviolet rays, and also perfectly maintains the temperature.
The equipment user can independently select the operating mode in accordance with the time of year. A nice addition is the design of the structure. The composter can be installed in any part of the garden as a decorative element;
Compost container from a German company
Russian.
The container, made in the shape of a cone with wavy fins, is made of propylene, resistant to low and high temperatures, as well as chemical reactions.
The composter is not equipped with a bottom, so you need to additionally purchase or make your own bottom mesh to protect against rats and mice.
The container is convenient for storing waste and removing compost. The only negative is that the top lid of the container opens when exposed to strong winds.
Russian Volnusha cone-shaped
The description of the Volnusha composter is presented in the video.
To obtain high-quality compost, it is important to install the composter on the ground (without any support) and in a shady sector. Additionally, regular mixing of waste and watering in dry weather is required.
For the winter period, it is recommended to switch the container to a special operating mode (if such a function is available), wrap it in insulating materials or remove it.
Types of pit
There are several types of composter, which allows you to choose the most optimal option.
Regular
This hole, despite the technical requirements, is dug directly in the ground. This is done so as not to incur the cost of purchasing materials. As already mentioned, it is better to build a composter above the ground, but this option can also be used. The main thing is not to cover the recess with film, so that excess liquid does not accumulate inside and so as not to limit the worms’ access to waste. The top of the pit is covered with a lid. You can use black film.
The main advantage of the pit is accessibility. Flaws:
- low efficiency;
- the difficulty of mixing the contents;
- poor heating, which can lead to rotting of the material or increased cooking time.
Compost pit dug in the ground
Compost pile
Another simple way to make compost. To do it, proceed like this:
- Choose a free space on the site. Clear it of unnecessary debris.
- All dacha waste is piled on top. The pile is turned in a timely manner to ensure oxygen access inside.
- The compost is regularly replenished with fresh waste. The finished product is taken from below with a shovel.
- The pile is covered with black plastic wrap.
To prevent the pile from spreading across the site, you can build a fence.
Compost pile
Wooden box
Old pallets are used to make it. Step-by-step instruction:
- Take 3 old pallets. Each is treated with an antiseptic to protect against rotting. Waiting for the pallets to dry.
- A layer of turf is removed from the area. Its dimensions must correspond to the dimensions of the pallet.
- Pallets are placed on edge so that the side with the boards is on the inside. They are nailed together to prevent the structure from collapsing.
- Slats are attached to the free edges of the pallets. Boards are inserted into the grooves. This wall can be easily disassembled, which allows you to quickly remove finished compost from the box.
- A covering material is fixed to the walls, which allows air to circulate. It will securely hold the contents inside the structure.
Wooden compost box, drawing
The box is covered with black film or a lid is attached. You can make partitions inside or install two composters to separate the finished product from the new material.
This design is short-lived, since the boards are subject to rot. After 4-5 years the box will have to be updated.
Concrete composter
This is a stationary, reliable, durable design. To do this, proceed as follows:
- A pit is formed on the site, dimensions 2x3 m, depth 0.5 m.
- Install the formwork.
- Concrete is poured. Waiting for the composition to harden.
- The formwork is removed.
- Install the cover.
Such a composter will last for several decades without the need for updating.
Compost concrete structure
Ready made plastic container
It is not necessary to set up a composter yourself. It is enough to buy a ready-made plastic container. It is equipped with holes for ventilation, a lid, and a lower door for removing the finished product. Container advantages:
- availability;
- aesthetics;
- long operational period;
- ease of use;
- ease of maintenance.
Ready-made plastic container for compost
Punch
The principle of operation of the country option
In order to obtain organic fertilizer the following can be used:
- Fallen leaves
- Cut grass
- Food waste
- Feces
But for the process to proceed correctly, a container such as a composter is needed. It should have holes to remove excess moisture and allow air to enter the collected mass.
Watch the video, expert advice, principle of operation:
Moreover, the waste must be placed in layers, each of which must be sprinkled with peat, sawdust or ordinary soil from the site. This is necessary for the development of microorganisms leading to the decomposition of residues and their transformation into compost.
What can be composted
Country composters can contain all types of biodegradable waste, that is, waste that undergoes aerobic decomposition with the participation of microorganisms. These include:
- kitchen waste - unused leftover fruit and vegetables, tea bags and eggshells (but be careful with the peels of fruits and vegetables that are treated with chemicals for long-term transport, such as citrus fruits);
- garden waste - grass clippings, hay, straw (in small quantities), remains of wilted plants, dried perennials, remains of fruits and vegetables, roots, branches, cut shoots and leaves of trees and shrubs (however, leaves of walnuts, oak and alder should not be composted , because they contain substances harmful to other vegetation);
- sawdust and wood ash;
- silt taken from a pond or pond;
- pet feces;
- cardboard boxes and paper towels - but only in small quantities.
Cyclic use of compartments
You can fill one compartment first, leave the other compartment free. Next spring, when last year’s fertilizer has melted, transfer the top, which has not had time to ripen since the fall, into the second compartment, to the bottom. And during the summer period, put the compost materials there.
But you can use the black substrate, which is already ready (about one-half of the first compartment), on the site, so you will gradually free the compartment completely. If during the spring period you do not have time to use all the fertilizer from the first compartment and spread it around the site, do not be lazy to keep the supplies in bags; you will need them in the fall.
Such situations are extremely rare. There is always a use for fertilizer. Everything will happen again next spring.
The illustration for the article is used under the standard license ofazende.ru
Is it possible to dig up immature compost?
It is not at all necessary to wait until the plant residues have completely rotted and turned into brownish crumbly humus. It is enough for the mixture to decompose at least half. Moreover, adding unripe compost is more beneficial for gardeners.
Compost is spread over the area before digging
There are several reasons for this:
- semi-decomposed plant fibers make the soil looser and allow plants to create convenient passages for roots
- such a fertilizer is “long-lasting”, that is, it, while continuing to rot in the ground, supplies the sprouts with nutrients gradually, over one or two seasons
- unripe compost is food for soil fungi and earthworms, which will loosen the soil
If the fibers are too coarse, they must be crushed with a shovel. Although it is better to chop large plant stems before adding compost.
Ready-made humus, which looks like ordinary brown soil, is used more often as an emergency measure on severely depleted lands or when planting depleted plants to better strengthen them.
In the latter case, it is brought directly into the hole and mixed with soil. Moreover, it is undesirable to store humus - over time, some of the nutrients and nitrogen in it are lost.
Optimal sizes
The dimensions of the compost bin depend on certain conditions:
- the size of the area that will be processed, multiplied by your efforts to maintain order;
- number of people using the site.
If this is a large family with regular guests, this is one thing, completely different if this is an old retired grandmother. The amount of kitchen waste directly depends on this indicator.
The amount of time spent at the dacha (all summer or come only on weekends).
We advise you to be guided by these conditions when designing your box. Height is its constant value (should be no more than one and a half meters). At higher altitudes, the compost formation process may be slower.
It is recommended to divide the inside of the compost bin into at least two compartments. It has been proven that the third compartment will also not be superfluous; it will be useful for storing compost.
A box that has only one compartment will not be convenient in any case. You will only get fertilizer from such a box after a couple of years, when it is already completely ready. From a box with two sections, you can receive fertilizer every year in a continuous cycle.
The illustration for the article is used under the standard license ofazende.ru
Features of caring for a compost heap: recommendations from experts
Having figured out what can be put in the compost pit and what cannot, all that remains is to familiarize yourself with the rules for caring for waste in order to ensure that it rots as efficiently as possible. Moreover, the duration of the period during which the compost will be formed directly depends on the correctness of the care:
- Humidity is the most important indicator that affects the rotting of waste and the formation of compost. In order to maintain the desired level, it is recommended to periodically water the pile with a watering can. In this case, it is important that the end result is moist, but not wet, since the abundance of water will negatively affect the viability and activity of bacteria;
- Once a month you need to carefully stir the pile, thus ensuring access to oxygen. This allows the waste not so much to rot as to burn out. At the same time, if it is not possible to completely dig up everything, you can use a pitchfork and pierce the pile in as many places as possible;
- To speed up the process of compost maturation, the addition of nitrogen is required, which is found in large quantities in the green parts of plants, as well as in slurry.
In order for the compost creation process to proceed correctly, you should carefully select a location for the composter.
It usually takes 1-1.5 years to form high-quality compost. During this time, almost any waste and residues will fully decompose. You can tell when the compost is ready visually and by smell. The finished mixture is a crumbly brown mass and has the smell of forest soil.
What is it and where is it used
Modern devices for processing biological waste, as a rule, look very aesthetically pleasing, and also provide optimal conditions for composting. They are usually made of plastic in the form of boxes or barrels, and some models can be used even in winter. There are also metal structures painted with sun-fading-resistant powder paint.
Standard compost device
Although these garden products differ in many respects, they have the same function - processing waste into a nutrient mixture. Moreover, they are equally well suited for processing food and plant residues, as well as waste from dry closets, making the composting process effective and safe for the environment.
Basic rules for bookmarking
To speed up the fermentation process, do not dump all organic waste randomly. Otherwise, they may become blocked and become covered with fungus. Wet and dry layers (for example, straw) must be alternated. To speed up ripening, large plants are crushed to a size of 20 cm.
An ideal compost should contain a layer of about 20 cm of plant residues, 5 cm of manure and 15 cm of kitchen waste . That is, plant residues should be about 70%. To speed up the process, some gardeners alternate them with 5-7 cm layers of soil.
Plant waste can be used as an excellent fertilizer
Both excess moisture and lack of it are very dangerous for compost. It should feel like a wrung out sponge. Optimum humidity 45-70%. Dry biomass decomposes very poorly; too wet biomass becomes too dense, and the components stop interacting with each other.
Excessive overheating is also dangerous - favorable development of microorganisms occurs only at temperatures up to +60 C, after which they die. Therefore, you should not make compost bins that are too large.
If the compost bin does not have a bottom, prepare drainage from tree branches before laying the main mass. It is advisable to shed the pile with infusion of manure. Hay or straw is poured on top. In the winter, to protect from the cold and prevent the leaching of nutritional components, the compost is covered with film or an old carpet.
Compost Bin Options
Waste can be placed on a pile or buried in a pit. Options that do not require material costs. Take a shovel as your assistant and the “container” is ready. But, this option is suitable only for the first time. It is best to make a box that will hide the contents of the heap from view, which, you will agree, is not aesthetically pleasing.
Compost bin
Some use factory-made plastic or metal compost containers. Others have gotten used to storing waste in barrels with holes drilled for air access. But with a little effort, you can make a compost bin out of boards with your own hands. But first, let’s look at the requirements for homemade boxes.
What should a compost bin look like?
When making boxes for compost maturation, the following requirements are taken into account.
- The need for an influx of oxygen, which will be provided by ventilation holes on the sides.
- To prevent precipitation (rain, snow) from washing away beneficial substances into the soil, make a cover. This way the value of compost-biofertilizer will be preserved.
- Some summer residents cover the box with film, having previously fixed it. But this is not always convenient. The cover may be blown away by the wind. And such a box looks unfinished.
- Given that the lower layer of compost matures earlier, free access to it is necessary.
Check out the diagram for a simple standard compost bin. (Rice
1)
Options for simple box boxes
What size the box will be depends on you. They knock down a two-section structure, like a variant of a compost bin, where the front boards are also removable. (Fig. 2)
Another solution to the problem would be a simple opening structure that uses rubber strips instead of hinges on the boards. They are also made from any elastic material. (Fig. 3)
Economical project: compost bin made from wooden pallets. (Fig. 4)
If you are interested in the idea of building on a summer cottage, let's build a functional greenhouse together using the Mittlaider method.
Making your own compost container
If you have time and money, you can approach the issue of a compost bin on your personal plot thoroughly. We make a 3-section compost bin with our own hands step by step.
First stage - columns
We prepare the columns - 8 pieces. The lower part, located in the ground, is treated with fuel oil, drying oil, motor oil or tar.
You can dig all eight (4x4). If possible, we attach 4 posts to the fence for the back of the box. The process will be simplified; there is no need to dig four holes under the supports. (Fig. 5)
Stage two - preparing the boards
Organic materials decompose in a compost bin. These include wood. Therefore, the boards must be treated with non-toxic means - these are special deep penetration impregnations. They will protect the wooden structure from moisture, rot, and insects. Protective drugs can be purchased at hardware stores.
When the boards are processed, we begin to paint them. We wait for the first layer to dry, and only then apply the second. This procedure will protect the paint from precipitation and temperature changes.
The third stage - partitions
We nail the prepared boards so that there is a gap between them for ventilation. We trim the front part up to half the height. This will give us the opportunity to equip two compartments with doors. (Fig.5)
One board is nailed down in the third compartment and a large door is installed there. (Fig. 6)
Stage four - cover
We strengthen the upper end parts of the partitions, the front wall and the back with crossbars. We hang the door lid on its hinges. We also equip the front part of the box with three doors: 2 small, 1 large.
For convenience, we attach latches and handles. The compost bin is ready.
Video tutorial on how to make a compost bin
We have not introduced you to all the options for compost bins. But the essence is the same - to make your own valuable fertilizer from properly prepared compost.
By following the recommendations, you will achieve success in this matter.
Features of making a box
When building a compost bin at your dacha, you need to remember the following requirements:
- Availability of ventilation holes. Oxygen penetrates into the compost through them. It is necessary for the development of microorganisms.
- Below is the bottom, which consists of a sand cushion or small brushwood.
- A lid is placed on top of the compost bin. It protects fertilizers from precipitation so that beneficial substances do not go into the soil.
- A door is formed at the bottom. It is necessary to make it easier to get compost, which ripens faster in the lower part.
- It is necessary to place the waste box in a shady part of the dacha and provide an approach to it in the form of a garden path.
To save time, you should install several containers in different parts of the garden.
Where to start making compost pits
The pits should be as far as possible from residential buildings and located on the leeward side, since organic waste has an unpleasant appearance and smell. The recommended distance is at least 30 m from housing.
Do not place pits close to drinking water sources. The optimal distance is 25 meters.
Consider the terrain features. Pits should not be placed on high ground: along with precipitation, its contents will be spread throughout the area. You should not choose places on the slopes: excess water reduces the fermentation rate. A flat piece of land is best.
Pay attention to the trees next to the holes. Alder and birch will be good neighbors, but it is better not to place holes next to evergreen trees.
To maintain the correct moisture content of the compost, choose an area in the shade.
Don't forget about ease of access to the pit and choose the most suitable location for you.
What and why is compost watered?
Various liquids that are used to moisten and shed piles contribute to faster formation of compost and improve its properties. They come in both natural and artificial origin, and are a kind of catalysts that contribute to the rapid heating of this biological firebox. The simplest means used to speed up composting is plain water. The pile is watered with it throughout the entire storage period. It helps to soften all the elements of the substrate, which helps accelerate the decay process, so it is advisable to water the pile at least once a week.
To quickly prepare compost, various organic catalysts are often used. For example, a solution of sugar and yeast, which is generously poured over a newly formed pile. This mixture helps to quickly warm up the compost heap and speed up the processing of organic matter.
A cheaper starting solution for the first stage of composting at home is nettle infusion. To prepare it, you need to fill ¾ of a bucket of nettle with warm water, add a packet of dry yeast to it, and leave this mash in a warm place for 3-5 days. After this, only the formed compost pile is watered with this composition.
The fastest-acting accelerators, allowing you to obtain mature compost in a short time, are various biostimulants. For example, drugs such as Baikal-M (according to instructions), TAMIR (10 ml per 1 liter of water).
Capital construction options
To build the box you will need new thick boards. Compost is created with the help of bacteria that process waste; this is an aggressive environment for any organic substances (the boards with which the box is built can decompose). That is why you need to choose reliable boards, treat them with a special compound to prevent rotting, and you can paint them well.
Between the boards you need to leave gaps, the width of which should be several centimeters. This is necessary so that the compost can receive a sufficient amount of air, this is a prerequisite!
Compost bin option. The illustration for the article is used under the standard license ofazende.ru
Design selection
Before starting production, it is necessary to determine:
- design;
- dimensions;
- manufacturing material.
Varieties by type
How to make your own compost bin? The following manufacturing options are available:
- single-section (picture above). The simplest design, characterized by small size and minimal cost. Can be made from various materials. A significant disadvantage is the impossibility of continuous production of biofertilizer, since with the constant addition of waste to the pit, processing will be much slower;
- two- and three-section. More convenient designs that allow you to add waste gradually and obtain ready-made compost every year. Manufacturing requires more materials and time;
Three separate chamber design
barrel boxes. The structures are small in size and cannot continuously produce fertilizer, but the increased speed of compost production and a more interesting appearance attract a large number of gardeners.
Compost barrel
The compost bin can be:
- open type. Such designs are easy to manufacture, but they have a high probability of spreading unpleasant odors, like from a cesspool;
- closed type (supplemented with a top cover). The almost complete absence of odors and the possibility of additional decoration are positive aspects of this design. But self-production requires more materials and time, respectively.
Open type boxes are manufactured and installed in large areas, as they are large in volume. Closed structures are recommended for use in small summer cottages, which additionally solves the problem of lack of free space.
Sizing
After choosing the design of the composter, you need to determine its dimensions. When selecting dimensions, you should consider:
- dimensions of the plot;
- amount of waste to be processed;
- sanitary standards and rules for the location of the compost heap.
According to the rules, the composter must be installed at a minimum:
- 10 m from a residential building, which will eliminate the possibility of the spread of odors;
- 25 m from natural bodies of water located on or near the site;
- 50 m from the site’s water supply source;
- 5 m from the road, neighbor’s fence, toilet or outdoor shower.
Rules for choosing a location
Manufacturing materials
The materials used for manufacturing may include:
- wooden boards or pallets (wooden pallets). A wooden box will be environmentally friendly, pleasant to look at, and, if the wood is processed correctly, durable;
- slate. The material is durable, but it will not be possible to achieve an aesthetic appearance of the structure;
- metal sheets or barrels. The metal is known for its strength and durability, but also for its higher cost;
- concrete and concrete rings. Concrete is the strongest, but the heavy weight of the structure does not allow manufacturing and installation without the help of special equipment. In addition, the choice of this material is limited by the high price;
- plastic barrels or panels. Plastic boxes can fully match the landscape design and not stand out against the background of trees, shrubs and other plantings. However, when exposed to sunlight, exposure to chemicals or low temperatures, the plastic can become deformed, which reduces the life of the structure;
- brick. The material is expensive and is used extremely rarely for compost pits;
- metal grid;
- corrugated sheeting and so on, that is, you can make a box for receiving compost from any materials available.
How long does it take to prepare?
With aerobic maturation without the use of special preparations, it can take from 1 to 2 years before the plant residues completely rot and humus is formed from them. The resulting mass differs from ordinary soil in color.
It is a dark or light brown wet substance that, when squeezed by hand, sticks together into a lump and does not stick to the palm. It should have a pleasant earthy smell. Upon closer inspection, small undecayed inclusions are visible in it.
Humus formed as a result of compost overheating
In warm weather, ripening occurs faster. It also speeds up with frequent stirring of the heap. Much depends on the type of plant residues. For example, it is better to plant autumn foliage separately. After all, it contains tannins, which are difficult to decompose substances.
Such compost matures much more slowly - it may take 2-3 years to obtain humus from it. Any type of feces will take a couple of years. Grass freshly cut with a lawnmower can rot in 3-4 months.
The top layer of compost usually does not completely rot. It can be recycled again or used as mulch to keep out weeds. It turns out from unripe remnants of vegetation and is a good bed for cucumbers, pumpkins or zucchini. Grass piled up will continue to decompose, generating heat.
It is advisable to add slightly dried grass and tops to the compost. Otherwise, the decomposition process will take longer.
Types of composters
The first thing you need to determine before choosing is the type of equipment. There are different types and models of tanks.
Model types
Modern composters are divided into two main types:
- open tanks;
- closed containers.
Open composters are different:
- low cost;
- light weight, which allows you to move the container from one area to another and put it away for the winter;
- large volume of collection container.
The only significant disadvantage is the possibility of spreading an unpleasant odor (similar to a cesspool) resulting from the decomposition of organic substances.
The simplest open compost bin
A closed composter (a fairly airtight container equipped with a lid) is different:
- small volume. On average, manufacturers produce closed containers with a capacity of 200 - 1000 liters;
- the possibility of obtaining compost in a shorter time, since waste processing occurs much faster under the influence of temperature;
- Possibility of year-round use.
The negative aspect when choosing a closed type composter is the higher price compared to the previous type.
Container with lid for quick compost production
It is recommended to purchase open-type composters if you have a large garden plot with a large number of plants. Closed types are optimally suited for dacha plots of 4 - 6 acres in size.