The car needs protection from adverse environmental factors, such as precipitation, direct sunlight, temperature changes, etc. If the car is stored in a garage, its service life is significantly longer. Therefore, many motorists, after buying a car, think about purchasing a garage.
If you have your own plot of land or you live in a private house, then you can easily build a garage from aerated concrete with your own hands. You just need to have basic knowledge of construction. If this is not about you, then you can use garage construction services
Types of projects
Although the garage is an accessory building, its construction must be based on a professional design. Only a qualified designer will be able to correctly calculate the foundation so that it does not turn out to be too expensive, but at the same time has sufficient strength. It will be able to provide the garage building with the necessary security, which is especially important when arranging garages attached to the house. There are many more important nuances - high-quality ventilation, insulation, communications.
There are two ways to get a project for building a garage - purchase a ready-made standard architectural design or make an individual order to an architect. Standard designs are more popular. They are inexpensive and are offered by design organizations in a wide range. Individual projects, specially created for a specific customer, are necessary in cases where it is necessary to build a non-standard complex garage. For example, if you plan to build on a site with a strong slope, or if you need a garage with a utility block of a certain unusual layout.
Garage on a site with a slope Source hqroom.ru
See also: Catalog of projects for garages made of aerated concrete blocks presented at the “Low-Rise Country” exhibition.
Why aerated concrete?
Any building needs a reliable supporting structure - a foundation. A garage made of brick, concrete and other heavy building materials requires the preliminary construction of a foundation with high load-bearing capacity. This creates many difficulties:
- it is necessary to carry out a large amount of excavation work;
- pouring the foundation takes a lot of building materials;
- curing of the filled tape requires at least 1 month with daily watering and other measures.
If the garage walls are made of lightweight material - aerated concrete, you can do without a permanent foundation. In such cases, a shallow strip foundation or a simpler supporting structure on bored or screw piles is sufficient. This provides many advantages:
- construction occurs several times faster;
- there is no need to carry out a large amount of excavation work, which is undesirable close to a residential building;
- You can do the work yourself and save money.
Aerated concrete blocks are relatively lightweight, which makes it possible to do without construction equipment. Ensuring the access of heavy vehicles to the site is one of the most difficult tasks, and building a garage made of foam concrete allows you to remove this issue from the agenda.
Garage size
A garage can be designed for one or more cars. Usually a garage for one car is built and an open parking space with a canopy is installed next to it. However, recently, two-car garages are being built more and more often. If it is necessary to build a garage for three or more cars, individual projects are used.
To determine the room parameters for one car, it is necessary to take into account the dimensions of the car, as well as the dimensions of all equipment and inventory that will need to be placed next to the car.
The minimum garage size is calculated based on the vehicle parameters and without taking into account the placement of equipment. In this case, 0.5 meters are added to the length, width and height of the car, and thus a minimum size is obtained. However, such small buildings are usually built from lightweight materials. The result is cost-effective portable structures. But solid buildings are erected from aerated concrete, in which everything is provided for comfortable operation.
Dimensions of a garage for 1 car Source drevolog.ru
The standard dimensions of a garage for one car are as follows: 6 meters long, 4 meters wide, 2.3 meters high. This standard is used in the construction of standard garages and satisfies the needs of all car enthusiasts. In any case, for convenient use you need to have a height of about 40 cm above the head of a standing person and 50 cm on all sides from the car to the walls or shelves.
For two cars, calculations are made in the same way. In this case, it is necessary to provide a distance between two cars of at least 1 meter. When designing a double garage, there is often a separate entry for each vehicle. In some cases, a general entrance and one wide gate are provided.
Dimensions of a garage for 2 cars Source moydom.net.ua
What is needed for construction, calculation of materials
When starting to build a garage, it is worth preparing the necessary tools in advance:
- Bulgarian;
- scrap;
- hammer;
- building level;
- ladle.
To work with the material, you cannot do without a wall chaser. The adhesive solution is diluted in a separate container. The thickness of the block depends on the selected project. If you choose the 600x300x200 (5x8 meters) option, you won’t need much material.
Laying options:
- in 1 block;
- in 2 different blocks;
- in 2 identical blocks.
To calculate the number of blanks, it is worth knowing the volume of the garage by multiplying the length, height, width, and estimated wall thickness.
The easiest way is to use an online calculator, where data is entered into columns.
It is still recommended to take aerated concrete with a margin of 15%. Even experienced builders sometimes send workpieces to waste; force majeure has not been canceled.
Video description
Tips for locating a garage on the site:
SNiP standards
Formally, a garage is an outbuilding, and when placing it, you must adhere to the regulations relating to such buildings. So, for example, a distance of at least 6 meters must be maintained from the garage to the buildings on the neighboring site. This distance can only be reduced if there is written agreement on this issue with the neighbors.
If the garage is planned as a separate structure, there must be a distance of at least 8 meters from it to other stone and concrete buildings. If there is already a wooden building on the site, then the garage should be placed no closer than 10 meters from it. You need to step back at least 3 meters from the house.
If you plan to set up an entrance to the garage directly from the roadway, it should be “sinked” into the depth of the site by 1 meter. This is necessary so that when opening the garage door, passage or driving along the fence is not difficult. These and other standards must be carefully studied. But it is better to consult with specialists involved in drawing up master plans for private households.
Variant of the master plan with a cottage and attached garage Source vyda.kanorecybu.ru.net
Fire safety
Most of the standards included in SNiP are necessary to ensure sufficient fire safety for a garage building. It is worth noting that with strict adherence to all fire safety rules, it is possible to build a garage closer than provided for in the regulations. But this only applies to unheated automobile buildings.
Garage attached to the house
If in a detached garage fire safety is achieved primarily by observing standard distances to neighboring objects, then an extension garage requires the use of additional measures. In addition, the extension must be designed taking into account the layout of the house. Therefore, projects for attached garages are drawn up more carefully.
Advantages and disadvantages of gas silicate
It is difficult to find the ideal building material. Each of them, perhaps even for subjective reasons, will have properties that characterize it both positively and negatively.
Gas silicate
Pros:
- Low price relative to building materials of the same class and purpose. Construction of a garage from gas silicate blocks will cost significantly less than from brick.
- Light weight. This quality seems useful from the point of view of the labor intensity of construction. The large size of the blocks and their lightness allows even one person to lay the walls in a relatively short time. This parameter also simplifies the transportation process, and in addition allows the use of a less solid foundation in the structure, in particular for a garage. This in turn also leads to cost savings.
- High strength material. It is enough to build load-bearing walls of low-rise buildings from gas silicate blocks.
- The porous structure of the material suggests the presence of air voids in the blocks. Air is known to have very low thermal conductivity. Thanks to this, excellent thermal insulation qualities of gas silicate blocks are achieved. Plus, their design itself assumes the presence of voids, which further enhances thermal insulation. In this parameter, they are 3 times superior to brick and approximately 8 times superior to concrete. All this allows you to significantly reduce heating costs and maintain a comfortable temperature in a gas silicate building.
- The relatively low weight of the block indicates a low average plane of the material in it. The denser the medium, the more favorable it is for the propagation of sound waves. Due to their low density, gas silicate blocks have soundproofing qualities that are an order of magnitude superior to brick.
- Gas silicate has excellent resistance to high temperatures. It is absolutely not subject to fire. This parameter is very important when building a garage. Due to their purpose, flammable substances are often stored in garage buildings. In addition, garages are sometimes heated using wood stoves.
- The mixture underlying the blocks is absolutely safe for health. Contact with them cannot lead to any diseases.
Minuses:
- High hygroscopicity. Porosity, in addition to its positive qualities, also has a negative effect. The accumulation of moisture in blocks contributes to the formation of fungal formations (mold). High moisture content is especially dangerous during frost periods. Since water tends to expand when it freezes, the water accumulated in the gas silicate will exert mechanical pressure on the blocks from the inside. This can lead to their rapid destruction. In this regard, when constructing buildings made of gas silicate, moisture-proofing treatment of the walls is a prerequisite.
- They have low bending and compressive strength, which can result in the appearance of cracks during shrinkage of the building.
- A prerequisite for the construction of walls made of gas silicate blocks is their reinforcement. As a rule, the operating manuals for this building material recommend reinforcing every third row of the wall.
It is obvious that the advantages of this building material outweigh its disadvantages. Well, when constructing a garage, such a disadvantage as low bending and compressive strength practically loses its relevance, since the dimensions and total weight of such a structure are relatively small.
Video description
Houses with attached garages:
It is advisable to have an attached garage in a cottage project. However, it is possible to add a room for a car to an already built house. To do this, a lightweight foundation is built next to the façade, which according to the design has no windows.
Houses with attached garages are designed according to certain rules. The garage extension in most cases is adjacent to the right or left facade of the cottage. Sometimes, when a house is designed for a narrow plot, the garage can become an element of the main facade. Often the entrance to the garage and the entrance to the house are combined by a single porch with a common canopy. In many projects, an internal entrance to the garage is planned from the house. For maximum security, the entrance to the garage from the residential part of the building is decorated with a protective buffer zone. This could be a walk-through boiler room or pantry, or simply a separation vestibule.
It is very important to take into account building codes in the project. It is mandatory to maintain a distance of 5 meters from the attached garage to the neighboring area. There must be at least 2.5 meters from the entrance to the garage to the nearest window or door. There must be at least 2 meters from the ridge of the garage roof to the window of the house.
Option for a house project with an attached garage Source ukrasheniyedoma.com
Exterior finishing
Aerated concrete has exceptionally high vapor permeability. If the garage is not heated and is used only for its intended purpose, this factor can be neglected: there are simply no sources of moisture in it. But in a garage with habitable premises, or in a house with a garage made of aerated concrete, the vapor permeability of the exterior finishing should be at least not lower than the vapor permeability of the wall material.
Reference: the humidity in an inhabited heated room is higher in the cold season than outside. If the vapor permeability of the exterior finish is lower than that of the walls, moisture will condense underneath it. Damp walls deteriorate faster and lose more heat.
In order for a wall to be dry, its vapor permeability should not decrease from inside to outside.
That is why, for the exterior decoration of aerated concrete buildings, the following are used:
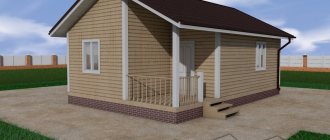
- Ventilated facades (vinyl and metal siding, corrugated sheets, etc.);
Garage exterior with vinyl siding
- Plasters with increased vapor permeability, designed for gas and foam concrete blocks.
Vapor-permeable plaster for aerated concrete
Built-in garage
A built-in garage is one that is located on the same foundation as the house and is its structural part. This architectural solution has its advantages and disadvantages. For example, a separate foundation for a garage made of aerated concrete may be less complex and expensive than the foundation of a house. Therefore, the extension is cheaper. On the other hand, the garage as part of the cottage turns out to be warmer, it is easier to connect all communications to it, and it is initially included in the layout of the first floor.
Layout of the first floor of a cottage with a built-in garage Source stroydom-taldom.ru
Armopoyas, reinforcement frame
To fill the armored belt (in particular, under the mauerlat - a beam that serves as a support for beams or roof rafters) and install lintels over openings, so-called U-blocks are used. They are placed on the glue with the tray facing up. Since the standard length of the U-block is only 500 mm, the future lintel will have to be fixed in the openings with temporary spacers.
U-blocks. Depending on the size, the price varies from 200 to 380 rubles per piece
Then a reinforcement cage is placed in the tray, and it is filled with concrete with obligatory bayoneting. Excess concrete is removed flush with the edges of the tray.
Please note: an armored belt with U-blocks allows you to avoid the appearance of cold bridges. The low thermal conductivity of aerated concrete prevents freezing of heavy concrete.
The armored belt is made using U-blocks
A reinforced frame will also be needed if we are building a garage from aerated concrete with at least two above-ground floors. Installation of the reinforced frame looks different:
- The walls are laid with gaps in the corners and gaps in long straight walls under reinforced concrete columns;
- On the outside of the corners, on both sides of gaps in the walls, and along the top of the walls, formwork is assembled from boards;
- In the formwork, a frame common to the columns and armored belt is knitted;
- The formwork is poured and bayoneted.
Attention: the columns are concreted with gradual assembly of formwork to a height of no more than a meter and layer-by-layer pouring of concrete with bayoneting of each layer.
Pouring reinforced frame columns during the construction of an aerated concrete cottage with a garage
Garage in the basement
The ground floor is the technical part of the building, no more than half buried in the ground. The ground floor rises no more than two meters above the ground floor. Building a basement is not cheap. But you can fit all the technical premises in it, including the garage.
Designing a garage in the basement is complicated by the fact that you need to calculate an inclined ramp for entry, as well as a reliable drainage system, without which the garage will flood during precipitation and melting snow. In addition, the car room must be provided with the most reliable ventilation system, and the walls and ceilings must be especially carefully protected from fire.
Sometimes, instead of a ramp, special lifting devices are built, which allow one to avoid an inclined drive, but require the use of rather complex and expensive equipment.
Sequence of work
The construction of a garage is carried out in a certain sequence:
- construction project, calculation of materials and marking of the territory;
- foundation installation;
- walling;
- roof installation;
- installation of window and door openings;
- gate installation;
- insulation, waterproofing;
- final protective and decorative finish.
Let's look at all the stages in more detail.
Construction of a garage from aerated concrete
First, material calculations are made based on the design. It is better to entrust this to professionals, since mistakes when purchasing building materials usually lead to additional material costs. It is also better to choose aerated concrete with the help of a specialist in order to protect yourself from purchasing low-quality material or aerated concrete of a different type than that provided by the designer.
Types of aerated concrete blocks Source classical4u.ru
It is very important to carefully consider the design of the foundation at the design stage. In order to correctly determine its depth, it is necessary to take into account all the features of the soil on the site - the depth of groundwater, heaving of the soil, freezing depth, etc. All this data is needed primarily when building a house, so at the time of constructing a garage, the homeowner usually has it. If they are not there, you must first consult with specialists, and only then draw up a garage project.
The construction process begins with markings. It is performed using threads and stakes. Marking is necessary to ensure that the corners and walls of the future garage have the correct geometry. After applying the markings, the construction of the foundation begins. Since gas blocks are a lightweight material, a garage can be built from them on a strip foundation buried 40-50 cm.
For a strip foundation, dig a trench of the required depth and width, focusing on the marking threads. The bottom of the trench is covered with sand and crushed stone, then wooden formwork is installed, a reinforcement frame is laid and concrete is poured.
Roof construction
In many garages, the floor is the roof. The simplest version of the roof looks like this - you mount a plank sheathing over metal beams. It is necessary to ensure that the beams rest on monolithic sibit blocks. Lay the beams across the garage.
Having laid them, you begin to construct the ceiling. Lay roofing material across it. After this, put a layer of insulation on top. Then make a concrete screed on top of this entire pie. Try to make it even. The waterproof layer that you place on it will help protect the screed. For this you can use the same roofing material.
Video description
Construction of a strip foundation for a garage:
In areas with complex soil characteristics, the strip foundation is not used. Instead, a monolithic slab is constructed. A slab foundation allows construction in areas with loose or moving soil, as well as in areas with high groundwater levels. This type of foundation is carried out in two stages. First, a reinforcing mesh is laid under the entire building, after which the site is filled with concrete. After the concrete hardens, this structure will become a solid monolithic slab, which will not allow the building to move or deform. The thickness of a slab for a garage made of aerated concrete ranges from 10 to 60 cm. If a simple one-story building for one passenger car is being built, a minimum thickness of 10 cm is sufficient. In all other cases, you need to rely on the architect’s calculations.
At the next stage, walls made of aerated concrete are erected. The blocks are usually laid on a special adhesive solution. To make the structure more reliable and durable, walls are reinforced with reinforcement. Construction must be carried out in strict accordance with the design documentation.
A gas block garage under construction Source koon.ru
Once the garage box is completed, the roof is installed and the gate is installed. Then the garage is insulated, if this was provided for in the project, all elements of the ventilation system are installed, communications are connected and finishing work is carried out.
A separate stage is the arrangement of the inspection pit. It can only be done in a garage with a strip foundation. The pit requires especially careful waterproofing of the bottom and walls. It must be lined with high quality, reliable materials that can withstand high humidity and sudden temperature changes.
The interior and exterior decoration of a vehicle can be made from any facing materials. The main thing is that they are non-flammable and non-toxic. The easiest way is to plaster a garage made of aerated concrete blocks, both outside and inside. This is the most practical and economical method of cladding, allowing you to choose any color scheme for the interior and exterior of the building.
Garage lined with plaster Source hi.decorexpro.com
Walling
After the base has hardened, begin building the sibit walls. Special glue is used to hold the blocks together. It is applied in a thin layer. You can also use cement mortar, but then cold bridges will form at the junction. Sibit is easy to cut with a hacksaw; you won’t have any problems processing the blocks.
Lay the first row on a layer of waterproofing, make it from roofing felt. For masonry, use the chain method - the seams of the top row cover the joints of the bottom row.
To make the masonry better, lay out the corners first. Stretch a string between them and use it to lay out the rest of the blocks. During laying, do not forget to check its verticality - with a plumb line, horizontality - with a building level.
Lay out the end walls at different heights. This is done so that the roof has a slight slope after construction. When it rains, water will flow onto the soil.
Note!
After erecting the walls, it is necessary to plan time for the glue to dry completely. Before this, the walls cannot be loaded.
Options for aerated concrete garage projects
Aerated concrete blocks are a universal building material from which you can build a warm and reliable garage, complemented by a full-fledged utility block. Often, aerated concrete garages are built with terraces, summer kitchens or bathhouses. In addition, this material makes it easy to construct garages attached to the house.
Garage project with utility room
Below is a project for the simplest garage for one car. The building is complemented by a convenient utility room. Such a garage can be built as a separate structure. But it can be attached to the house. The second option involves an internal entrance to the house from the garage itself and from the utility room. When choosing such a project, you should pay attention to the fact that the utility room is designed separately from the garage, with a remote entrance. It can be used as a boiler room, pantry or storage for garden tools. At the same time, the parameters of the car room allow you to install racks along the walls on which you can place all the tools for servicing the car.
Garage with separate utility room Source foamin.ru
Spacious garage project
The next project is the basis for a car room that is as easy to build as possible. There is no separate storage, but there is enough free space to accommodate everything you need. This type of garage is ideal for motorists who spend a lot of time in the garage. Free space can be equipped with comfortable furniture.
Spacious garage for one car Source drevolog.ru
Two car garage project
The following project is designed to accommodate two cars. There is a utility block here, which is connected to the car room by an internal entrance. In addition, the utility room in this development is a walk-through, and if you attach such a garage to the house, you can turn it into an entrance to the house. The drawing shows a carport for one car to the left of the utility room. It can be located to the right of the building or just before entering the garage. In any case, the canopy increases the functionality of the entire structure.
Garage for two cars with utility room Source tr.decorexpro.com
Project of a garage with a bathhouse
Aerated concrete blocks allow the construction of buildings of any complexity. Therefore, some homeowners, having enough space on their site and a little additional funds, build not just garages, but entire multifunctional complexes from aerated concrete. The garage can be combined with a summer kitchen, a terrace for relaxation or, as in this example, with a bathhouse.
In the presented version, the garage room along with the utility unit occupies the right wing of the building. In addition to the bathhouse, the building will include a boiler room. It is worth paying attention to the fact that in this project the exit from the garage leads through the rest room of the bathhouse. For more convenient use and increased safety of the bathhouse part of the building, it is better to consider an exit to the street through the boiler room, and not to create a door from the garage to the recreation room at all.
Garage with bath complex Source medike.ru
Project of a cottage with an attached garage
The following example demonstrates the most common design option for an attached garage with an internal entrance. The house is connected to the car room through a buffer zone, the role of which in this case is played by a compact laundry room. Instead, a boiler room or simply a walk-through pantry can be installed. For maximum protection of the residential part of the house, the exit from the garage is also separated by a hallway. If separating buffer rooms are not designed, then car odors and fumes from flammable substances, which are often stored next to the car, will penetrate into living rooms.
The garage must be reliably isolated from the main room Source tuzhizhijia.com
Gate installation
Before starting to build the walls, it is important to install the gate. They will be partially embedded in the wall. Before installing them on the foundation, it is necessary to lay a layer of roofing felt waterproofing in 2-3 layers. Weld pieces of reinforcement 40 cm Ø12 mm to the gate frame. On each side you need to weld 4 pieces. The rods must be positioned so that they fall on the seam of the foam blocks. And before installing the gate frame, they should be painted with a preliminary primer. Gate installation must be carried out strictly level. Therefore, in this process it is necessary to use a level and plumb line. You can fix the gate using wooden blocks, installing them diagonally.
Tools and materials needed for work
After creating or purchasing an individual project and calculating building materials, you need to prepare everything necessary for the work.
Tools:
- Hacksaw suitable for cutting aerated concrete;
- Brushes of different sizes;
- Wall chaser;
- Notched trowel suitable for applying glue;
- Trowel;
- Shovels;
- Plumb;
- Rubber mallet;
- Level;
- Dishes for preparing and possibly storing the working solution.
Materials:
- Aerated concrete blocks;
- Coarse sand;
- Cement not lower than grade 400;
- Crushed stone;
- Boards for making formwork;
- Reinforcing mesh;
- Reinforcement (used to create strapping);
- Adhesive intended for aerated concrete blocks.
Attention! In any preparation for construction and the availability of the necessary tools, it is necessary to take into account the timing of the start of garage construction.
It is advisable to start building a structure in warm weather . In addition, possible completion dates for construction work are taken into account. The construction period depends on the qualifications of the master. For experienced specialists, the required time takes on average about 2 months (this period does not include the period of interior finishing of the building).
Foundation preparation
Creating a foundation for a garage is the initial stage in the independent construction of an aerated concrete building. To decide what type of foundation to use, you need to analyze several parameters:
- The height of groundwater on the site. If the moisture rises no higher than 2 meters from the soil surface, the soil is dense and homogeneous, then you can use a light strip base, laying it no deeper than 50 cm;
- A monolithic foundation is necessary if the soil on your site is heaving. The reason is that gas blocks are not able to withstand bending loads - in this case they begin to crack and collapse;
- A pile-strip or deep strip foundation will allow you to build a garage with a cellar or inspection pit on soft soil. When using a monolithic base, their installation is impossible.
Work on the foundation is carried out in the following sequence:
- Using pegs and a cord, marking the base of the garage for future construction sites;
- Preparing a foundation pit;
- Creating a sand cushion at the bottom of the trench. After filling the sand, the layer is spilled with water and compacted;
- Installation of reinforcement cage (use a rod 6-8 mm thick);
- Installation of formwork;
- Pouring the formwork with concrete mortar;
- Moistening of poured concrete for 1.5 months.
Inspection hole
It’s not difficult to build a convenient inspection hole if you prepare before work:
- Prepare a hole of the required depth and width - most often 1.8-2 m long, 80 cm wide and 1.5 meters deep are enough;
- Pour and compact a layer of clay onto the bottom, and make a sand cushion 10-15 cm thick on top of it. Cover the resulting layer with rolled roofing felt and make a concrete screed about 10 cm thick on top of it;
- Lay out the walls of the pit from brick, it is advisable to use a material suitable for arranging damp rooms (make masonry half a brick thick);
- A waterproofing layer is created on the walls of the inspection pit using bitumen mastic. Before work, the material must be heated and the walls treated with a roller or wide brush;
- After creating a waterproofing layer, electrical wiring is carried out along the surface of the walls (if necessary) and plastered;
- If desired, the walls are painted with oil paint;
- Place a frame welded from the corners along the upper edge of the pit. Reinforcement or thick wire is welded to it - it is needed to secure this fence into the concrete floor screed;
- Make and attach a cover to the pit; it will save people from accidental falls. Additionally, it will protect the pit from moisture and prevent the loss of small objects in the pit;
- Build a convenient staircase out of brick or wood.
Calculation
Accurate calculations of the required materials will allow you to save additional money due to the fact that you will not buy extra material.
Calculations need to start with the following:
- Have a ready-made building project;
- Find out the actual dimensions of the garage (height and length of load-bearing walls, dimensions of the gate opening);
- Select aerated concrete blocks of the appropriate size.
These figures differ for each garage.
To understand the calculation sequence, it is advisable to start with a building with average characteristics: a rectangular garage with dimensions of 4 m wide and 6 m long with a height of 2.4 m.
For this structure, taking into account the parameters of the blocks, it is better to use material with dimensions of 20/30/60 cm.
Volume of required material
Those who do not want to perform detailed calculations for all walls can use a special formula: (L x H - Sp) x 1.05 x B = V, where in meters L is the length along the perimeter of the walls, H is the height of the walls, Sp is the area of all openings of the building, 1.05 is a special coefficient, B is the thickness of the blocks, V is the volume of aerated concrete blocks.
The calculation result is increased to an integer. This is suitable both for calculating the piecemeal quantity of material and for calculating the volume of blocks for construction.
The volume is calculated using a simple scheme:
- Calculate the volume of 1 block;
- The resulting value is multiplied by the number of blocks required for the building.
As a result, we get 0.2 × 0.3 × 0.6 = 0.036 m3 (volume of gypsum block), after which we calculate the volume of building material for the entire garage with dimensions of 4x6 m 0.036 × 232 = 8.352 m3.
Detailed material calculation
For 1 row of a wall 6 meters long, taking into account the block dimensions of 20/30/60 cm, only 10 pieces are required. To lay 1 row of a 4 m long wall, you will need 7 blocks (rounding up).
The height of the future building affects the required number of rows. Lay the building material around the garage, achieving a wall thickness of about 20 cm. A building with walls 2.4 m high will require laying out 8 rows of material. The last stage is to calculate the total number of blocks.
This will require previously obtained data, the result is:
- A long wall will require laying 80 blocks;
- A short wall will require 56 blocks;
- The wall in which the gate opening is made will require laying 16 blocks.
When calculating the total amount of required material, the number of blocks for a long wall is multiplied by 2. The subsequent calculation is carried out simply - all the numbers are added: 160 + 56 + 16 = 232 blocks. The resulting value needs to be increased to 235 pieces for insurance purposes (accidental breakage of several blocks during transportation is possible). Based on this principle, calculations are made for a garage of any size required for your conditions.
Important points when laying aerated concrete
- The vertical edge of the block must also be coated with a solution of aerated concrete adhesive, after which it is distributed over the entire surface, creating a seam no more than 20 mm thick;
- The first row of the block is placed on the mastic, first lubricating the horizontal plane of the material, and then the vertical;
- In order for the glue to better adhere to aerated concrete, the blocks are moistened with plain water;
- The masonry often needs to be checked for level and tension of the cord;
- Possible block distortions must be corrected immediately.