Deep cracks
The most important thing here is not to leave the crack empty. In this case, it is best to adhere to certain rules:
- The crack must be protected from dust and dirt.
- Use wood putty to fill the damaged area.
- In the case where the surface is covered with paint or varnish, it must be cleaned with sandpaper.
- You can use stain to give the desired shade.
When the apartment contains very expensive or perhaps exclusive furniture, it is worth turning to professionals. They will help correct all defects without side effects.
PVA glue
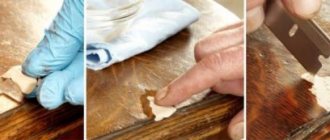
Acetate glue, which contains natural substances, does a good job of sealing cracks in fiber boards. To do this, fill a syringe with it and inject it deep into the cleft using a needle. The glue must be applied carefully and strictly to the crack so that lumps do not form. After this, the part is tightened with clamps and waited until completely dry.
Oddly enough, this rich egg sauce can work real miracles. Of course, if the crack is not through. Mayonnaise is applied carefully and only to the crack itself, without affecting the surrounding areas, otherwise you will also have to get rid of greasy stains later. The composition is left on the problem area overnight, and the excess is polished with a soft cloth. If necessary, the remaining scratch or unevenness is masked with furniture wax or other suitable material.
Whichever method you choose, remember that it is better to first try it on an inconspicuous area, such as the inside of a countertop or drawer. This way you will definitely save your family budget from additional expenses, and yourself from unnecessary hassle and running around in search of new concealers.
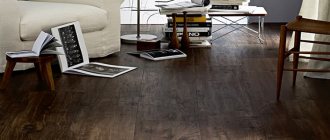
When wiping dust from wooden furniture, it is difficult not to notice cracks, scratches, and abrasions. All these are integral companions of time, appearing in the process of using furniture. Even small errors on the surface are clearly visible. They spoil the perfect appearance of a varnished product and leave an unpleasant aftertaste.
Scratches and chips on wooden furniture or doors are a common problem encountered in almost every home.
You can treat the furniture with a mixture of vinegar and olive oil, using it as a polish, and then wipe it dry
Wood stain can help, as it is the best way to remove scratches on furniture.
While minor damage can be easily removed using home methods, masking deep defects requires the use of only professional products. In particular, putties. Puttying will allow you to achieve a uniform, clean, even coating.
The putty is carried out in two stages - first the main chip is repaired, and after drying the finishing layer is applied, with a slight excess
Preparing the site
Before starting work, you need to thoroughly clean the surface of the furniture from dust and dirt. The cleaned area is coated with a degreasing agent and allowed to dry. Also at the preparation stage, you need to decide what material will be used to hide defects.
Applying the material
The purchased material is applied with a suitable tool or cotton pad to the damaged area. When applying, try to ensure uniformity. Excess material is carefully removed with a spatula.
Painting
A layer of paint is applied on top of the applied masking material, which matches the color of the rest of the furniture. Paint not only visually hides defects, but also provides additional protection against new damage.
Types of damage
Often, the same damage occurs in combination of two or more types, so we list the types:
- chips;
- cracks;
- holes;
- burns;
- swelling;
- abrasions.
Each of these types of damage occurred largely due to improper operation and disregard for safety rules, transportation, etc.
Cracks are classified by depth and by the layer to which they propagate.
Naturally, there are deep and superficial. Surface ones are mainly covered with various means. If restoration methods are used correctly, the table surface will be practically indistinguishable from a new coating without cracks.
If the crack is deep and extends into the wood itself, then reconstruction may not yield anything. The maximum that can be achieved is only to delay the complete failure of the part.
Restoration of wooden surfaces
No matter how carefully you handle the furniture, abrasions, scratches, and stains still appear. They are easy to eliminate. The main thing is to know how and with what.
- If the wooden surface has simply lost its shine, find a wood care product that contains orange oil. Take a clean sponge, dampen it slightly and microwave for 20-30 seconds. Spray the product from a spray bottle, then wipe with a hot sponge (hands should be wearing rubber gloves with a coating on the inside).
- More serious stains require serious measures. These are retouching markers (available in furniture stores), denatured alcohol and wax. First, clean the surface (dishwashing detergent diluted in water is the best solution). After cleaning, dry the wood with alcohol: use a moistened swab to rub the lightened areas well. In most cases, the color is restored. In deep scratches, alcohol does not restore the color; they are painted over with a marker of a suitable color. To add shine, the top surface is covered with wax and polished with a soft cloth.
- If you need to smooth out small unevenness, you can use a nail file. For meticulous work, it is easier to use than sandpaper.
- If the wood is locally swollen from moisture: place a leaking vessel, you can quickly get rid of the defect and neutralize its consequences by mixing salt and olive oil. The paste is applied to the damage and rubbed in a circular motion. Leave for 20-30 minutes. The salt will draw out the water, and the olive oil will restore elasticity to the fibers.
- If there are chips, you cannot do without putty. Suitable for both wood and automotive applications. The best way is to buy a light one and add color to it as needed. The chip is covered, a little putty is spread on the adjacent surface. After drying, everything is smoothed out well with fine-grain sandpaper.
If there are scuffs or stains on the wood, you can try to get rid of them by rubbing it with a banana skin. It works well for minor injuries.
You might be interested in reading what types of wall shelves there are (with drawings).
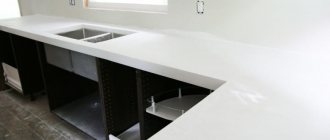
What is a plastic tabletop?
The plastic tabletop is an economy class option. This material can be imitated to resemble marble, granite, wood, quartz, and the cost will be six times cheaper than artificial or natural stones.
The basis of tables with a plastic top for the kitchen is chipboard or MDF, which can be of different thicknesses. Chipboard material under high pressure (postforming method) is combined with a thin but durable layer of HPL plastic, which is a decorative option. At the same time, the edges are carefully bent over the edge, and a flat and smooth surface is obtained.
HPL plastic consists of several layers of kraft paper, which are pressed together under high pressure and impregnated with resins. Thus, the material is reliably protected from moisture, mechanical damage and burnout. The quality of the material depends on the manufacturing technology.
Principles and instructions for restoring chips on a countertop
Knowing how and what you can use to repair a chip or crack on a tabletop, it’s not difficult to repair the furniture structure yourself
At the same time, it is important to comply with technological requirements and use effective options for restoration compositions
Restoration of wood and laminated chipboard countertops
When solving the problem of how to repair a chip on a chipboard tabletop, repair work involves the following algorithm:
- use a hairdryer to warm up the damaged area;
- remove the exfoliated layer, clean the defect area;
- apply glue and leave for 15 minutes;
- prepare the restoring composition in the form of a homogeneous thick mixture of sawdust and PVA glue, leave for 10 minutes;
- the damaged area is sealed with the prepared mixture, the mixture is compacted with a spatula, and the excess is removed.
Restoring a wooden countertop takes at least 24 hours
At least 24 hours are required for complete drying, after which the repaired particle board material is ready for use.
To disguise scratches on a wooden countertop, you should sand the surface and sand it. At the final stage, felt is used to provide a glossy finish. To eliminate chips on a wooden base, mix sawdust and PVA glue and fill the voids, which are first cleaned, blow-dried and sanded.
Plastic countertop repair
Deciding how and with what to repair cracks and chips on a plastic countertop in the kitchen should depend on the complexity of the deformation:
- minor damage to the plastic surface can be repaired using superglue or Moment glue;
- in some cases, restoration of the working plane requires the use of special glue for plastic. The composition is applied using a gun;
- If a fragment of a plastic structure breaks off, Titan glue is used for restoration.
To restore chips, it is recommended to grind the plastic into crumbs or powder, mix well with Titan glue and repair the damaged areas of the structure.
Restoring an artificial stone countertop
Cracks and chips on the working surface made of artificial stone are repaired using polyester resins. The algorithm of restoration procedures includes the following manipulations:
- the damaged area is cleaned and degreased;
- if necessary, the chip site is slightly deepened and widened;
- seal the defects with polyester resin and leave to dry completely for a day.
Next, you need to sand the coating with fine sandpaper, followed by polishing with felt. Small scratches on artificial stone can be easily masked with a repair acrylic compound or a glossy solution. I’m planning how to remove a chip on a stone countertop in the kitchen, using PVA glue, abrasive material of different grain sizes and felt.
- prepare the surface by sanding and grinding the damaged areas;
- prepare a restorative composition from acrylic plastic with the addition of an adhesive mass to a thick, uniform consistency;
- The restoration mixture is used to seal the depressions, chips, cracks and leave until complete polymerization;
- Next, the coating is polished with an abrasive material; at the final stage, it is necessary to polish the surface with felt.
Restoring an artificial stone countertop
Stone countertops with minor defects are often repaired using a grinding machine.
To do this, at the first stage, grind and polish the base; this will help to easily eliminate traces of careless use of the working surface. Next, the material is treated with special reducing solutions. Then they go through the grinding unit again: first with an abrasive, and then with a polishing disc.
At the same time, small cracks and chips are eliminated, the stone base acquires an aesthetic appearance and presentability
Then they go through the grinding unit again: first with an abrasive, and then with a polishing disc. At the same time, small cracks and chips are eliminated, the stone base acquires an aesthetic appearance and presentability.
The nuances of glass countertop repair
A kitchen countertop made of glass is difficult to restore, so care and attention are required when using it. Special equipment is used to remove small scratches. This requires skill and skills in working with fragile materials.
If, as a result of careless handling, defects in the form of cracks or chips have formed on the surface, the structure will have to be replaced with a new one, since it will be difficult and expensive to restore the integrity of the glass tabletop
Repair or change
The first important question when a defect is discovered is the feasibility of applying restoration work. Is it worth it? Or it would be easier to buy a new countertop. Many things speak in favor of restoration:
The price of new furniture can hit your pocket hard. Not everyone can afford to replace furniture at the slightest damage. For restoration you only need to buy consumables and put in a little effort and patience.
Secondly, buying new furniture will require time to re-install the chipboard surface. This will take more time than restorative procedures.
Inspect the crack carefully. A shallow crack or cracks are very easy to fix, spending a minimum of time, effort and money.
Well, the last important question: “Will I do the restoration of cracks myself?” “Or maybe I could call a specialist, he would do it quickly and efficiently?”
Repair of laminated chipboard furniture
Serious repairs to laminated chipboard furniture frames are required in cases where hinges, guides, fasteners and fittings are torn out of the board due to excessive load or improper use. Let's consider various options for restoring buildings.
Restoration of holes for fasteners
Laminated chipboard is a fairly durable material, but as long as its integrity is not compromised. Due to loads, improper operation, periodic disassembly of furniture or frequent opening of facades, holes very often break, as a result of which screws, confirmations, hinges and other fittings fall out of their fastening points. Simply screwing the fastener into the same place will not work, since the diameter of the hole has increased. However, there is one method that furniture assemblers use.
In order to be able to screw a screw or confirmation into the old place, you need to proceed as follows:
- use a drill with a diameter of 8 mm to expand the existing hole;
- pour PVA or wood glue inside;
- drive a wooden wedge or “coke” into the hole and cut off the excess;
- make a hole in the “coke” with a diameter smaller than that of a self-tapping screw or confirmat;
- screw the hardware into place.
Now you can install the hinge mounting and adjustment pad
How to repair a broken furniture hinge
It happens that a furniture hinge on the facade itself is pulled out of its seat along with pieces of laminated chipboard or MDF. The simplest option is to completely replace the module door. But the façade material may differ slightly in shade from the rest of the structure, and the cost of such repairs may be high. You can repair the canvas and install the hinge yourself and at minimal cost. There are two options:
- Moving hinges above or below the original installation location.
- Repair of the hinge seat.
The first option is the simplest and fastest, but you will still have to seal the old holes. To disguise a broken seat, you can use a special plastic plug. Large holes are restored using PVA mixed with fine sawdust. After the mixture has dried, it is masked with wax pencils and polished.
Moving the loop to another location
The second option is more complex, but, nevertheless, it will avoid making new holes and will extend the life of the facade for several more years. To restore the hinge seat you will need:
- epoxy resin;
- small sawdust;
- rubber or plastic spatula;
- electric drill;
- loop cutter.
Loop torn from the façade with “meat”
First of all, you need to clear the seat of the torn loop, mix sawdust with epoxy resin and fill the recess, leveling the mixture with a spatula. Allow to dry and, if necessary, add more filler. After complete drying, sand the hinge installation area. Next, make markings and, using a cutter or electric drill, drill a groove of the required depth for the mount.
Prepare a mixture of sawdust and epoxy resin and fill the seat of the furniture hinge bowl
Reinstall the hinges
A simple but dubious method
There is another way to attach a torn loop, but it is quite dubious, both from an aesthetic and practical point of view. A wooden block or plywood strip is installed in place of the hinge using glue or self-tapping screws. The fastening for the facade is mounted on them. The plank or block is fixed using screws or glue. However, with this method of installing the hinge, the facade can move significantly relative to its original position, and no adjustment can correct this.
For your information! In order for facades to last for a long time, you need to follow a few simple recommendations. It is necessary to tear off the doors of cabinets and bedside tables smoothly, without sudden movements. Do not hang heavy objects on the handles of the facades, as this leads to increased load, distortion and tearing of the hinges from the landing sites.
Sealing chipboard joints on the floor
The difficulty lies in the fact that the slabs on the floor are constantly subjected to significant physical stress; they “play” relative to each other. For this reason, the putty does not want to stick. There are several popular ways to seal such seams.
The seams are covered with epoxy mixed with sawdust. The sawdust is first finely sifted. The composition sets very quickly, so it is not worth preparing a large volume of such putty at once. Such protection serves for a long time and reliably. But the price of epoxy is high, and sealing joints is expensive.
You can replace the epoxy with hot wood glue. You need to mix sawdust in it and go through the seams.
The effect is achieved even greater than with epoxy, since the hot glue penetrates deep inside. This method also saves from moisture, and the joint stops “playing”. True, it is advisable not to walk on such a floor for several days, since wood glue takes a long time to dry.
This method is much cheaper. And if the floor is covered with linoleum on top, then you can completely forget about damage to the chipboards.
Restoration of chipboard furniture: what you might need
- Soft furniture wax (wax putty). Used to seal chips, scratches, cracks on wooden and laminated surfaces of cabinet furniture, interior doors, laminate and parquet. Provides moisture resistance to the restored surface.
- Hard furniture wax (melt putty). Requires melting before use (for example, using a lighter, soldering iron or gas torch). Application is similar to soft furniture wax. Recommended for restoration of chipboard surfaces with high intensity of use (countertops, shelves, floor coverings).
- Retouching agents - felt-tip pens or alcohol-based markers, valve and fiber. With their help, the texture of the material at the restoration site after waxing is completed to make it less noticeable. Ordinary felt-tip pens in shades that match the furniture, strokes, paints, even shoe polish and iodine will also work.
- Fixing varnishes, polishes (best in the form of sprays and aerosols) for surface treatment after restoration. For coating after restoration of defects, returning surfaces to their former shine, masking abrasions and minor scratches.
- Melamine edging with adhesive for replacement trim.
- Two-component epoxy composition, PVA, dowels (chops), wooden plugs for filling holes from torn hinges and other fasteners.
- Tools – plastic spatula, sandpaper, abrasive sanding sponge (fine), utility knife, hair dryer or iron, chisel, non-woven wipes and rags for finishing.
Natural granite
Photo: stemcellglobal.org
1/3
Photo: stemcellglobal.org
2/3
Photo: mountrainiersunspots.com
3/3
Granite is a spectacular, expensive material and does not always harmonize with the overall style of the interior. But many people like the durability of such a countertop and the large selection of colors and patterns. If the material has many structural veins, the pattern turns out to be unusually beautiful. By the way, you can make a kitchen apron from the same granite.
Disadvantages include high price and difficulty in processing at the production stage. It should be remembered that this is a porous stone; it should be periodically treated with special means to provide additional moisture resistance.
Typically, granite countertops are dark in a light kitchen and light in a dark one. There is no point in visually merging such luxurious material with the furniture and decoration of the room. A perfectly polished granite countertop looks even more luxurious in diffused but good lighting.
Pros:
- strength,
- beauty,
- durability.
Minuses:
- the material requires careful selection of style and decor in the room,
- high price.
Kitchen worktop ALPHALUX, Nanto stone, R6, moisture-resistant, 4200*39*600 mm
RUB 11,457*
Buy
*Price may change
Restoration of faded and worn chipboard countertops
Often, during use, chipboard countertops and cabinet covers wear out.
A tabletop that has faded from abrasion without severe defects on the surface (deep scratches, cracks) can be restored as follows:
- Select the coloring agent according to its shade. It is best to use felt-tip pens - you can moisten a rag with them and rub in soft circular motions and walk across the tabletop until it acquires an even color. Then fix the tint with a fixing varnish.
- In some cases, it is enough to treat a chipboard tabletop with polishing mastic with pigment (available for sale for light and dark furniture) or polish for laminated furniture. After applying the product, the surface must be polished with special lint-free wipes.
Agglomerate (quartz)
Photo: stemcellglobal.org
1/3
Photo: league.co
2/3
Photo: stemcellglobal.org
3/3
Agglomerate is a material created from fragments of real stone and a binder, such as polyester resin. The stone can be of any origin, and will transfer all its qualities to the agglomerate.
Quartz is one of the hardest stones, so a countertop made from it will be very durable. It is very important that the countertop made of quartz agglomerate is environmentally friendly.
Pros:
- strength,
- environmental friendliness,
- moisture resistance,
- heat resistance,
- spectacular appearance.
Minuses:
- The tabletop can only be transported in a vertical position,
- the material is cold to the touch,
- difficult to restore.
Postforming tabletop VEROY R9 Vittorian porphyry mountain mineral 3050x600x38mm. HOME
RUB 5,448*
Buy
*Price may change
How to Repair Worn and Broken Furniture Parts
First of all, you need to know: cracked and damaged furniture is repaired immediately after the defect is discovered. Otherwise, the pins and tenons may become deformed at the joints and it will be much more difficult to repair the furniture. So don’t debug for later, especially since fixing shortcomings is not particularly difficult. If you notice that some furniture parts are not connected tightly to each other, then you can start repairing. For this purpose, the future gluing area must be cleaned of old glue. This can be done using sandpaper. Afterwards, they need to be lubricated with casein, carpentry or PVA glue, squeezed tightly with a clamp, tied with twine and pulled as tightly as possible using wooden wedges. It would also be a good idea to put some kind of weight on the parts to be glued, so they will stick better. If, after cleaning the tenons, gaps appear at the joints, it is necessary to drive thin wooden wedges into them, pre-lubricated with glue. Small gaps can be eliminated using a cloth soaked in glue or putty.
In a stool with a cast metal frame, the thread breaks off in the socket where the leg is screwed in. We fix it as follows: take a nut with an identical thread and grind off the end, leaving two protrusions. In the hole with a deformed thread, we make two cuts for the nut protrusions using a needle file, and in the seat you need to select a recess for it. Next, we tighten the nut and screw in the leg.
Loose chairs with braces in the structure connecting the frame can also be repaired. To do this, holes are drilled: in the legs of small depth, and in the struts - through. Then you need to screw in the screws until the legs and struts are pulled together.
Furniture made from chipboard sometimes makes you happy with doors that fall off. This is due to poor fastening of the screws on the walls. In this case, you need to carefully drill holes for the screw (diameter 8 mm), drive a wooden plug into it (previously coated with glue) and screw the screw into it.
By the way, when drilling a polished slab, it is better to wrap the drill in a felt washer. This will protect the surface from damage, even if the drill goes right through.
Premium class countertops for only 1.5 rubles per day!
Like this? Let us explain this bold statement.
As you know, the average lifespan of a kitchen is approximately 15 years.
Previously, we indicated the retail price of various categories of countertops from the Kedr factory. If we consider the cheapest countertops of the first category with a cost of 4,000 rubles per 3 meters and compare them with the fifth category, which costs 12,000 rubles, the difference in price will be 8,000 rubles.
Let's divide these 8,000 rubles over 15 years. It turns out that per day there is only 1.5 rubles of the difference.
Agree, for a countertop that has excellent performance characteristics, the price is simply excellent!
Photo from source: pufikhomes.com
Table top Cedar 5140/Mn White moon
Restoration of chips and scratches
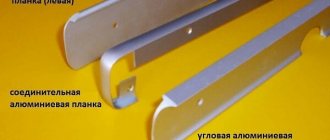
At the ends and surfaces of countertops, especially at corners and radii, chips are not uncommon. They can be easily removed, especially if a melamine edge was used when processing the ends. For restoration, you will need to purchase new material for processing edges, preferably PVC, of the required length and color, from a specialized store that sells chipboard and furniture fittings. Using an iron or an industrial hair dryer, remove the old edge, clean the chipboard from chips with sandpaper and, while also warming it up, stick on a new one. Cut off excess edges with a utility knife and sand with fine-grained abrasive paper. Often, after installing the edge, traces of glue remain. They can be disguised with tinting.
Restoration of a dent on the end of the facade
If the chips, scratches and dents on the furniture are quite deep, they can be disguised as follows:
- Treat the defect, clean it from dirt and, using a chisel, give the recess a more or less rectangular shape.
- Choose furniture wax to match the chipboard. Sometimes you need to mix several different crayons to find the right shade, since you are unlikely to find the desired color in a pure color.
- Using a rubber spatula and softened wax, fill the recess and compact well.
- After the wax has hardened, you need to carefully cut off the excess using a utility knife or rubber spatula. The wax should be flush with the surface of the chipboard.
- Sand and polish the wax with a rag. If necessary, use retouching agents to restore the texture of the material. The final step will be to fix the result with a fixing varnish.
Filled scratches mask and highlight texture
Related article:
How to remove scratches from furniture using: furniture pencil and stroke, wood wax and mastic, oil polish, using walnut kernels, nut oil, mayonnaise, tea leaves, machine oil, iodine, vinegar with vegetable oil, stain - in our publications.
additional characteristics
There are many characteristics, in addition to material and dimensions, that can influence your choice.
We list them below.
- Type and color of coating. Glossy surfaces have always been liked less than matte ones. And if we talk about color, then dark is better than light in terms of “appearance”. But a light-colored countertop is easier to care for.
- Connecting parts. Tabletop fragments are combined using various elements and each of them has its own pros and cons.
- End processing. As a rule, this procedure is included in the payment for the countertop. Non-standard processing requires additional money.
- Sharp corners and protrusions. The smaller, the more convenient, especially when the room is small in area.
Additional characteristics make subsequent selection easier.
About colors and design in a few words
When choosing a countertop, you must first take into account the interior of the kitchen. And one of the decisive criteria is color.
Below, in table format, experts from Obzor-Expert.com have listed several of the most popular colors used for painting countertops.
| Color | Description |
| White | This color looks great in classic, Scandinavian design, as well as modern and high-tech. In addition to white, you can use mirrors, dark cabinets, and paint the walls in pastel colors. |
| Beige | This color looks soft and calm. It is best combined with dark chocolate colored furniture. It is better to decorate the working wall in beige or cream. |
| Brown | Dark goes well with light. And it turns out that brown color is suitable for light kitchen sets - white, beige or cream. Brown is a good option for English design, loft or classic. |
| Grey | This color works well on white parts or wood, stone, concrete or metal. |
| Black | Practicality, style, convenience - this can be said about the black color, which suits many styles. In general, black is the easiest color to work with. It is best to combine black with white or metallic. |
Important! On matte countertops, scratches are not as visible as on glossy countertops. In addition, it is better to take speckled or crumbled options.
It is very important to choose the right color for the countertop so that it fits into the interior