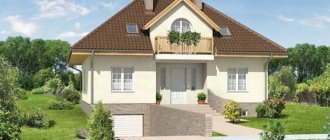
The need for a garage is not discussed if you already have a car. In most cases, the car owner tries to provide the most reliable shelter for his vehicle. But it happens that circumstances favor the need to build a garage at minimal cost and as quickly as possible. Is this really real? This will be discussed in the article.
Types of building materials
Regardless of whether you are going to do everything yourself or hire a private company for construction, it is worth figuring out what to build a garage from. Understanding all the pros and cons of a particular material, you can calculate the approximate construction time and viability of the structure.
The main materials are:
- Bricks.
- Expanded clay blocks.
- Concrete blocks.
- Aerated concrete.
- Profiled sheeting.
- Cinder block.
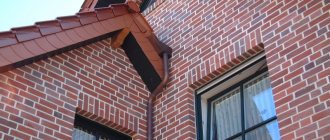
Brick garage Source uchastok74.ru
To wisely choose what is best to build a garage from, you need to know the characteristics of the materials and, based on this, choose what is right for your case.
When using brick, you will no longer be able to move buildings than using sandwich panels, which can be disassembled and assembled in another place at any time. An integral quality of corrugated sheeting is its convenience; it can be cut to the desired size, but do not forget that it can be cut just as easily by intruders. If you choose a foam block, the garage will cost more.
Garage made of sandwich panels Source allstroygroup.ru
What is cheaper to build a garage from:
- Profiled sheeting,
- Tree,
- Cinder block.
Let's look at the advantages and disadvantages of each material and figure out how to build a garage using these materials.
Corrugated sheet
Garages made of this material have come into fashion relatively recently. Let's look at its advantages and disadvantages:
Advantages:
- Cheap material
- Service life about 30 years
- Due to its low weight, a lightweight foundation can be used
- It can be disassembled and reassembled in a new place without much difficulty.
Flaws:
- Insulation is required as it does not retain heat.
- Low safety of things inside: the gate is easy to saw.
- External defects cannot be eliminated.
This material is recommended exclusively for those who quickly need a place to shelter a vehicle.
Garage made of corrugated sheets Source 2proraba.com
Tree
If you are wondering what to build a garage from inexpensively and with high quality, then think about building from timber. Building materials have proven their reliability and quality over the centuries. Based on the pros and cons, we will figure out who it is suitable for.
Advantages:
- Environmental friendliness of the material.
- Fast construction.
- Increased thermal insulation.
- Beautiful appearance.
Flaws:
- When compared with a brick building, fire safety is low.
- Increased sensitivity to humidity.
Recommended for connoisseurs of natural materials, for construction in suburban areas, next to a house or a bathhouse made of timber.
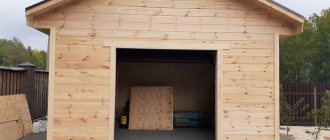
Garage made of wood Source garazhtyt.ru
See also: Catalog of projects for garages and carports, costing up to 500 thousand rubles.
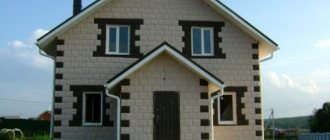
cinder block
The material, which has become widespread in the 21st century, has a number of advantages and is considered the most optimal for construction.
Advantages:
- Fireproof building.
- There is a possibility for wiring communications: electricity, water, heating.
- They retain heat several times better than brick.
- Affordability.
Flaws:
- Careful storage due to the fragility of the blocks.
- Exterior finishing required.
- Possibility of shrinkage and cracks.
Cinder block is considered the most optimal for building a garage. It is inferior in price to brick, with the same reliability parameters. It combines the qualities of all the above materials, such as: reliability, accessibility, speed of construction, thermal insulation, and a presentable appearance when finished externally.
Garage made of cinder block Source mfcs-ufa.ru
Preliminary stage
Doing it cheap does not mean doing it poorly. Although different materials can be used to build a garage, the preliminary stage will be the same for each of them.
Selecting a location
The convenience of using it will depend on how well and correctly the location for the garage is selected. If there is no other way out, then you can start from the free area in the yard. If possible, it is best to place the garage closer to the main building. In this case, it will be easier to operate it in bad weather, since you will not have to travel long distances, for example, in a downpour. If circumstances allow, then you can build a small transitional canopy for these purposes. It is good to place the garage structure in line with the main gate. If you are planning a parking area in front of the garage, then you need to step back five meters from the main gate. This will ensure that even with a parked car it will be possible to open the gate.
The site on which the garage will be built should not be the lowest point on the site. If this is the case, then rain and melt water will certainly accumulate inside the room, which is not good for both the car and the tool that is in the garage. This is also bad for most building materials from which the garage will be built. When servicing a car, you will definitely need water and electricity, so it is necessary to locate the garage in such a way that you have to put in less effort when connecting communications.
Laying the foundation
The optimal solution when constructing a garage structure at the lowest cost would be a slab foundation. A foundation of this type can hardly be called the cheapest solution, but it will eliminate the need for subsequent pouring of the screed. In the selected area, the dimensions of the future structure are clearly indicated. This can be done with string or fishing line stretched between the pegs. After this, the turf is removed from the designated area. This will make it possible to simplify the task of soil sampling. Next, a pit is dug over the entire area of the structure. Its depth should be half a meter. If it is known that the soil in the area is very frozen and heaving is observed, then additional insulation will be required.
The bottom of the pit for the garage structure is leveled and compacted well. After this, sand is added, which is also well compacted and leveled. A layer of 10 cm will be enough. A backfill of medium-fraction crushed stone is made of the same thickness; it is also leveled and compacted, which will simplify the task of subsequent filling. If insulation is necessary, insulation in the form of extruded high-density polystyrene foam is laid on top of the crushed stone. The one used for insulating routes is suitable.
The next step is to construct a metal grate. For a pouring height of 15 cm, one level of the grid will be sufficient, which is laid out with a cell of 10 cm. The metal rods are tied together using knitting wire. The dimensions of the grate itself should be 5 cm shorter on each side compared to the overall size of the foundation for the garage. The metal structure should not be laid directly on insulation or on crushed stone. It should be raised by 5 cm. This can be achieved with special plastic stands that are commercially available for this purpose.
The final stage in forming the foundation of the structure is pouring the concrete solution. It is better to use a concrete mixer for its preparation, since it will provide sufficient pouring speed to make the slab monolithic. After pouring, a deep vibrator is used. Its task is to correctly distribute the solution over the prepared base structure while removing air from the thickness. Smoothing can be done with a large trowel. Further work on the construction of the structure can begin in two weeks, if we are talking about the warm season.
Advice! If groundwater is close to the surface, then the foundation is waterproofed. For these purposes, waterproofing material is placed under the insulation.
How to build a garage cheaply and quickly with your own hands
Let's look at the stages of building a garage made of wood, corrugated sheets, and cinder blocks.
Made from wood
A timber garage is an option that has several qualities: beauty, environmental friendliness and ease of installation. Before construction, please note that there are 2 main methods:
- Frame technology combines low cost,
- Made from rounded logs - reliability.
Choose the most suitable option based on your budget.
How to build a garage with your own hands from wood:
- The first stage is to find a place to build.
There are two types of garages, both an object built on its own and one attached to the house. Don’t forget about the type of gate opening; for this, you should also take into account the space and decide on it in advance.
- The second stage, after preparing the layout and construction plan, is preparing the site.
The construction site must be leveled, cleared of excess debris and grass, and compacted. After which you get a perfectly flat surface without kinks or distortions.
Poured foundation Source sk-domline.ru
See also: Catalog of companies that specialize in small forms and foundation repairs. Small forms
- After preparing the ground, the third and most important stage is pouring the foundation.
According to the size of the future building, they dig a trench onto which the formwork is installed. In this case, be sure to prepare the cushion - for this, several layers of gravel and sand are carefully compacted. The base is reinforced with metal rods and the whole thing is filled with concrete. The foundation is settled for 3 weeks, after it is ready, they begin tying it with 50 x 100 mm boards.
- One of the hard jobs is over - all that remains is to build the frame.
To build the frame, use a strong and thick board. For interior decoration, you can use something thinner than 25 x 100 mm; even ordinary lining will do. After assembly, hydro- and vapor barrier is carried out using several layers of polypropylene or polyethylene film. Then the board is sheathed with any finishing material.
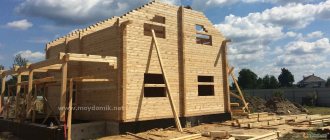
Wooden frame Source 2stiralki.ru
Important ! Do not forget that wood has the ability to absorb moisture, which is why it begins to rot over time. We recommend treating it once a year with special antiseptics that slow down these processes.
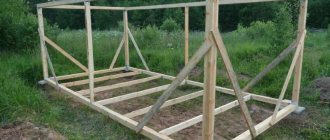
Construction of the box - assembling the “skeleton” and sheathing it
Now that the base is ready, you need to make the frame. We begin the work by laying the bottom trim around the perimeter of the foundation. To do this, we use a beam with a cross-section of 100x100 mm and fix it to the concrete using anchors. We connect the beams together in the corners “in half a tree” and fasten them with screws and corners.
Next, we install 100x100 mm racks at the corners of the building and align them vertically. To attach the racks to the bottom frame, we use screws and steel angles. Additionally, we strengthen the racks with struts, which can be made from boards 20-30 mm thick. We immediately tie all the corner posts on top with 100x50 mm timber strapping. After this, we install the racks along the walls in increments of 600 mm. Wall studs can be made from boards at least 30 mm thick and 100 mm wide. We fix and strengthen them in the same way as the corner posts.
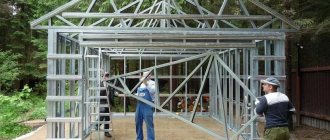
Then, on the entrance side, we install 100x100 mm posts to which the gate will be attached, and connect them together with a beam of the same section. As a result, an opening will be formed. To strengthen it, you can install a metal frame made of angle or channel around the perimeter.
Before you begin assembling the frame, treat all boards and beams with fire-bioprotective impregnation, which will increase the durability of the structure.
Next we make the roof frame. To do this, we lay rafters made of 30x100 mm boards on the mauerlat (upper frame frame). Since a pitched roof will be subject to a large snow load, the pitch between the rafters should be no more than 40 mm. To secure the rafters more reliably, we make cuts in the mauerlat along the thickness of the rafters. We nail a board 100 mm wide to the ends of the rafters along the perimeter.
Now that the frame is ready, you can immediately sheathe the walls. To make the building warm, we fill the frame space with mineral wool in slabs. This insulation is cheaper than many other thermal insulation materials, but at the same time it is durable, fireproof and, most importantly, has low thermal conductivity.
On the side of the room we cover the walls with a vapor barrier film. To make the vapor barrier airtight, we overlap the joints of the film sheets and seal them with double-sided adhesive tape. On the outside of the wall, we cover it in the same way with a wind-moisture-proof membrane and properly seal the joints.
To ensure that there is a ventilation gap between the sheathing and the films, we attach a sheathing of wooden slats with a thickness of at least 20 mm to the racks. To fasten the slats we use ordinary screws. To save money, we will not pre-sheath the external walls with OSB boards, but will immediately install siding. The only thing is that it is advisable to use durable metal siding.
To attach the siding along the perimeter of the walls, we attach the starting strip with screws from below, and also install corner profiles at all corners. Then we simply tuck the siding panels into the corner profiles and fasten them to the sheathing with screws. The inside of the garage can be sheathed with any sheet material, such as plywood or OSB. You can secure the sheathing to the sheathing with nails or screws.
When installing OSB boards or plywood, do not forget to provide expansion joints with a thickness of about 5 mm. These seams should be filled with sealant.
Video description
Watch the video on how to make a frame garage with your own hands:
From cinder block
How to make a garage from cinder block:
- When building from this material, all the necessary preparatory work is also carried out, as with wood. Finding a suitable location, leveling it and developing a plan.
- Cinder blocks do not require strong support, so a strip foundation is perfect. It is constructed in the following way: a trench is dug with a depth of about 45-50 cm and a width of 40-45 cm. Next, a cushion is created from broken bricks and sand, and cement is poured on top.
Strip foundation Source nibulon.ru
For your information ! The blocks differ in structure and composition. Hollow ones are intended for walls, and solid ones are for foundations. By mixing them up, you can end up with a destroyed building.
- A month later they begin to build the walls. When building them, the corners are initially erected, construction cords are pulled, and only then the laying begins.
- Laying this material is identical to laying brick, only in this case the work is done much faster. Also, do not forget about the thickness of the walls, because if you use 1.5 or 2 stones, then the walls will be able to withstand sudden temperature changes. In winter, the room will retain heat much better.
Cinder block laying Source remontik.org
Brick building
Brick is chosen for the construction of a garage only by wealthy citizens, since such a structure will have to spend quite a lot of money.
Most often, such material is used by various cooperatives, which make sure that their buildings are not destroyed by intruders. The procedure for erecting a brick building is considered complex, so citizens usually have to resort to the help of professionals, since it is almost impossible to cope with such work on their own.
Video description
Watch the video for garage projects made from SIP panels:
From corrugated sheets
A universal material that is suitable for the construction of sheds and fences, as well as garages. But it is worth remembering that not all sheets are suitable. When choosing corrugated sheeting, look for the marking “C - 20” - it means that it is “intended for walls” and has a hardness of 20. The higher this number, the stronger the sheet will be.
Garage made of corrugated sheets on a metal frame Source bjorklidens.se
If you decide to save on building materials, under no circumstances use grade 8 sheets. Although they will cost less, their characteristics are absolutely not suitable for construction. The main disadvantages are: short service life, lack of frost protection and terrible wind resistance.
How to build a garage from corrugated sheets:
- During construction, first of all, a monolithic foundation is prepared. Then the wooden formwork is erected. Rebar rods are attached to it. Then the racks of the frame structure are installed. To prevent them from bending, they are leveled using a level and filled with concrete. Usually they use M300; for these conditions this is the best option.
Monolithic foundation Source kromvel.net
Wooden garage
Relatively recently, wood was practically not used at all for the construction of a garage, but thanks to the advent of modern impregnations, wood now copes well with various negative influences. Additionally, with the help of fire retardants, wood becomes a material resistant to fire.
This material creates an attractive, inexpensive and warm garage. You don’t have to spend a lot of money on the construction of such a structure. In order to be able to walk in a building without outerwear even in winter, it is advisable to carefully insulate the walls, for which mineral wool is usually used or insulation is sprayed.
Main construction work
Upon completion of the preparatory actions, a list of main works is carried out. All stages of construction must be done sequentially to avoid mistakes. At each working stage, it is recommended to adhere to the instructions and standard rules for building a durable garage with a long period of operation.
Pouring the foundation
Its service life directly depends on the quality of the foundation of the building. Creating a foundation begins with excavation work and digging a trench. The standard trench width is 40 cm, depth - from 60 to 100 cm, depending on the degree of soil freezing in winter. The bottom of the dug trench is leveled, and the walls are processed with a shovel so that soil does not fall from them.
Coarse rubble crushed stone or stones are laid in several rows at the bottom of the trench. A cement-sand mixture is poured onto each row until the trench is filled. To prevent the foundation from sagging, it is recommended to use high-quality cement, and the sand ratio should not exceed 2:1. If you plan to install a finished metal structure, you should fill the entire area with concrete.
Making walls
The height and length of the garage walls are determined individually. The thickness of the masonry depends on the expected weather conditions, wind load and temperature changes. The simplest method of laying material for walls is brick, in which each subsequent row overlaps the seams of the previous one.
First, the corners are laid out, after which ropes are pulled to level the structure. Each row should be measured using a building level, paying special attention to the starting row. After the walls are erected, they are covered with thermal insulation material if additional insulation and protection is required.
Cover with a roof
The constructed base and walls are covered with a roof, which is easiest to construct from I-beams. The elements are laid crosswise in increments of about 1 m. The beams can be secured with anchors or other fixing elements. The base of the roof is covered with beams 4-5 cm thick. To prevent leakage and blowing of the roof, the beams should be laid as tightly as possible. Layers of roofing material and thermal insulation are laid on top of the beams.
The final coating is a screed and rubemast or its substitute.
We install gates
Garage doors come in swing, overhead, automated and sliding. The appropriate variety should be selected taking into account the availability of free space and your own design requirements.
Installation of gates should be carried out before or during the construction of walls. First, reinforcement bars are welded to the gate frame to create a stronger adhesion to the walls. During the construction of walls, reinforcement is embedded in the seams. Gates are mounted exclusively vertically. After leveling the structure, the gate is fixed using wooden braces.
Interior decoration
The purpose of the interior decoration is to additionally protect the garage walls from frost and provide decorative properties . To insulate the built garage from the inside, a false partition is built along the perimeter of the walls, into which thermal insulation material is placed. The top of the material is treated with paint or varnish.
If a material that cannot be painted is used for construction, then it can be additionally sheathed on the inside with thin sheets of plywood. If you wish, you can arrange a workspace in the garage - place a workbench, drawers and shelves for tools. When performing interior decoration, it is necessary to install a fire safety corner, consisting of a fire extinguisher, a box of sand and other elements.
Main types
Garage premises are classified into several categories. The list of varieties includes the following:
- Garages that are used as a parking space for a car. In such premises it is not necessary to carry out additional insulation and finishing work.
- Workshops where owners store tools and work. For convenience, the buildings are heated and equipped with a workspace.
- Storage garages used exclusively for storing various items.
According to the method of location, buildings are divided into separate ones and those that are part of an array or the main building. When building a garage, it is necessary to determine in advance whether it will serve as an extension or act as a separate element.
Is it necessary to make a design project?
To correctly calculate the amount of materials, you need to make a plan for the garage
. Before starting construction from scratch, it must be legalized. This requirement applies to buildings of any type to which it is planned to connect public communications - water, electricity, plumbing, sewerage. Therefore, the property owner should make a competent, carefully thought-out project. You can coordinate it with the relevant authorities yourself through the MFC, but it is more expedient through the board of the cooperative.
The garage drawing is made to scale and must contain the following information:
- location on the site with reference to distances to permanent landmarks;
- dimensions in millimeters (width, length, height);
- foundation type;
- walls;
- floors;
- roof;
- entrance gate;
- ventilation system;
- communications supply;
- internal diagram of the garage with wiring and consumers;
- availability of fire extinguishing means.
If you plan to install a second residential level, it is advisable to immediately indicate the status of the building as residential. Otherwise, serious complications may arise in the future.
Cost calculation
If we consider foam blocks as an option for a material suitable for building a garage, then it is easy to calculate the necessary cost estimate required for the construction of this structure. The first stage of costs is the purchase of foam blocks:
- Wall blocks - average cost is about 3 thousand rubles per m3 (block dimensions - 60/30/20 cm). The price for one block is 100 rubles.
- Partition blocks - average cost within 2800 rubles per 1 m3.
In addition to purchasing blocks, for construction you will need a standard set of building materials:
- Cement. Price for 50 kg (M300) – within 250 rubles.
- Sand. The price per cubic meter is within 200 rubles.
- Crushed stone – 1700 rubles per 1 m3.
- Gravel – 1200 rubles per 1 m3.
- Insulation - within 1300 per 1 m2.
- Waterproofing - from 40 rubles per 1 m2.
As we can see, building a garage, even taking into account the low cost of foam blocks, will cost a lot of money. There are ways to help save on construction costs:
- The floor in the garage is covered with crushed stone, rather than making a monolithic layer of cement. It is only necessary to pre-compact the soil before backfilling.
- Making a foundation on pillars, which will help save on cement mortar.
- Purchasing materials can be cheaper if purchased in winter.
Construction of a garage is justified for car owners. Initially, the cost estimate for this construction may scare you, but considering that a car left in the open air will be the goal of every thief, these costs will seem like a trifle to you.
Placement of the building
Planning your garage location
- On a small plot of land, a built-in garage is being designed, located on the ground floor. It does not require the construction of a separate foundation; the ceiling of the first floor is the roof. The main difficulty will be to ensure reliable waterproofing and protection of the house from exhaust gases.
- The home extension option provides a ready-made wall. It is easier to make a common roof than two separate ones, and heating does not have to be carried out far. But such a neighborhood is not very convenient, so it is better to connect the garage with outbuildings.
- It is better to place a separate structure for a car right next to the fence, so as not to lay a driveway along the site.