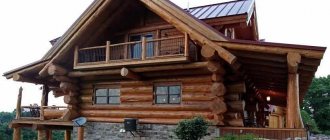
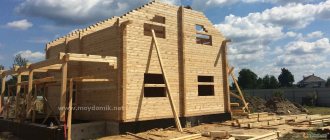
It is quite possible to build a brick house with your own hands, but it is a rather complicated and lengthy process. Here it is important to strictly follow construction technologies to ensure high strength, durability and thermal insulation. Brick still remains one of the best building materials due to its environmental friendliness, durability, high thermal insulation characteristics and aesthetics.
In the photo of a brick house you can clearly see examples of such buildings, their design features and construction technologies.
Materials and tools
To build a brick house you need to acquire the following tools:
- building level;
- construction hammer;
- device for unstitching seams;
- angle grinder;
- plumb line;
- cord for level control;
- concrete mixer;
- level;
- trowel;
- shovel.
The main materials include:
- brick;
- cement;
- sand;
- plasticizer (can be replaced with liquid soap);
- plywood or boards for formwork construction;
- insulation material (extruded polystyrene foam, mineral wool, etc.);
- lime;
- reinforcing bars;
- waterproofing material (for example, roofing felt).
Exterior decoration of the building
Siding was used for the exterior of the building. It was mounted with a ventilation gap of 25 mm. Also at the stage of exterior finishing, a vestibule was added. The foundation for the vestibule was not installed; the structure was installed on pieces of concrete laid on the ground and sidewalk curbs.
the house is covered with inexpensive siding; a vestibule has been added to the facade of a cheap house
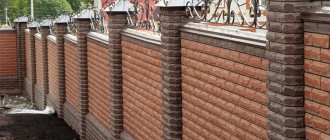
Brick selection
Manufacturers produce different series of bricks that differ in purpose. The most commonly used silicate white or red clay bricks. It is possible to combine these two types of bricks with each other.
Cladding a house with bricks is done using a special facing type of this material. It has a more aesthetic appearance. To reduce the load on the foundation, you can use cellular bricks. It has less weight, which reduces the load.
It is not recommended to use used bricks. It may have various defects, which will negatively affect the quality of the masonry. Use bricks that are undamaged and properly shaped.
Installation of rafters and roofing
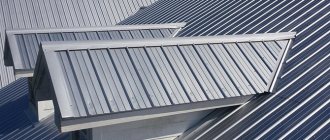
Upon completion of the assembly of the walls of the attic floor, the rafter system was installed. The rafter overhangs were not extended. An inch board was used as lathing. The roof was covered with corrugated sheets 4 m long.
assembly of rafter rafter system
profiled sheets on the roof finished roof
Planning
There are a variety of ready-made brick house designs. You can use one of these projects, create your own, or adapt a ready-made one to your needs. The project must include absolutely all the nuances - from the foundation to the finishing of the interior and facade.
If you plan to live in the house permanently, the walls should be thick enough to increase thermal insulation. If this is a small country house for temporary residence, you can do the masonry with half a brick. For a full-fledged house, it is recommended to lay 1.5 bricks.
For single-story houses, the foundation may be less strong than for multi-story houses. In this case, internal partitions can be made from gypsum board, this will save on materials and speed up construction.
The most reliable is considered to be a strip foundation, passing under all walls and partitions. This way the wall load will be evenly distributed over the base.
The principle of assembling the second floor
After installing the frame, a temporary floor from unedged boards was partially laid and the walls were assembled horizontally and installed vertically. Second-floor windows were also used.
installation of floors, assembly of walls on the second floor
raised gables, insulation of attic walls
attic walls raised
To increase sound insulation in the interfloor ceiling, non-woven cloth was laid on the floor joists under the boards. This allows you to partially dampen vibration from steps.
backing on joists to reduce vibration
Site marking
It is first necessary to mark the area on the ground. To do this you will need pegs and cords. From these it is necessary to construct a marking for all walls. Markings must be made in actual dimensions. According to the markings, trenches should be dug for pouring the foundation. Control the horizontalness of the markings using a building level.
If the house is multi-story, fairly deep trenches should be made - about 2 m. This will ensure the ability of the foundation to withstand high loads.
Installation of a shallow strip foundation
The foundation is pre-planned with a width of 35 cm and a height above the ground of 25 cm and 20 cm below the ground. A die-cut section of 2.5x100 mm was chosen as a reinforcing element. The reinforcement of the tape was planned in 2 layers, top and bottom, with three connected sheets of die-cutting in each.
On the advice of experienced builders, vertical elements were added, and the number of sheets to be connected was increased to 5 pieces. Additionally, the height of the foundation above the ground increased and amounted to 45 cm.
reinforcement with die-cutting - you can’t do that!
pseudo-reinforcement foundation ready for pouring
After the foundation was poured into concrete, 20 anchor bolts were installed to install the lower frame.
the foundation is poured, the mortgages are installed
Foundation formwork
You can build formwork for the foundation from boards or plywood. It must protrude above the ground. The protruding part of the formwork should be reinforced with side supports. Otherwise, the structure will collapse under the weight of concrete.
The formwork must be free of holes and other defects. Otherwise, concrete will flow through them, which will negatively affect the strength of the structure.
Crushed stone, stones or sand should be placed at the bottom of the trench. This pillow needs to be compacted well. Next, build a frame of reinforcement along the entire perimeter of the future foundation.
- Insulators ShF-20G
- Production of plastic for finishing
- How and how to caulk a timber house with your own hands: materials and step-by-step instructions
Construction of the first floor
Before installing the walls of the first floor, the platform was installed and insulated and pipes for the sewerage system were laid. The bottom of the platform is left open, the insulation is fixed by means of fixed cuttings of boards. 3 layers of foam plastic, 15 cm thick, were used as platform insulation. The subfloor is made of 150x50 mm boards.
insulation of the platform with foam plastic
subfloor is sewn
The walls were installed in a horizontal position. Foam plastic and 8 mm plywood protection are laid between the racks, and windows are also installed. The windows in the project were used second-hand. Installation of the assembled wall into a vertical position was carried out by two men. It was decided to abandon the installation of jibs in the construction of the walls. The builder assumed that the frame would be sufficiently rigid due to the plywood sheathing.
assembly of frame walls; insulation of external walls with polystyrene foam; frame of the wall; windows installed; wall on temporary braces
After assembling the walls of the first floor, the installation of internal partitions was carried out. Polystyrene foam was also used as insulation.
external walls are covered with plywood
assembly of internal walls
internal walls raised first floor assembled
Pouring the foundation
The construction of brick houses begins with the construction of the foundation. The latter can be monolithic or prefabricated. Monolithic is mounted directly on the construction site. It is necessary to prepare the appropriate amount of solution and pour it into the trench.
The prefabricated foundation is assembled from slabs. For brick houses it is better to build a monolithic foundation, it will be more reliable. But, it is not recommended for construction on soft soil. In this case, the optimal solution is a pile foundation.
After pouring, it is necessary to compact the concrete using an internal vibrator. This will remove air from the structure of the structure, which will have a positive effect on its strength. After the foundation has dried, you can begin laying.
Do it yourself: building a cottage (105 photos)
Two craftsmen decided to build a cottage with their own hands. And they offer to look at photographs taken from the first days of construction.
They planned to build such a house. there are 2 guys - me and my brother, 2.4 million money, 4 months. for construction.
sketch design of the 1st floor. There is a plot of 12 acres in Medovka with an old wooden house. We planned for half a year, calculated the estimate and made calculations for the entire structure.
we dig a trench under a strip foundation 40 wide and 80 cm deep. The dimensions of the building are 20.4 m by 10.8 m. The volume of excavated soil is 25 cubic meters. Made it in 4 days. We dug in May with 2 shovels. plus a day for marking and geodesy.
we dig a trench under a strip foundation 40 wide and 80 cm deep. The dimensions of the building are 20.4 m by 10.8 m. The volume of excavated soil is 25 cubic meters. Made it in 4 days. We dug in May with 2 shovels. plus a day for marking and geodesy.
reinforcement diagram. the reinforcement was laid in 2 rows: the bottom one in 3 cores, the top one in 2 vertical rods were placed every 1 meter. Since the house was a 2-story house, the corners were reinforced with piles and the reinforcement was knitted with an overlap. it took 5 kg of knitting wire.
We ordered concrete, grade 150, fraction 5-20. price 3000 per cube with delivery. We called many companies, chose the best one, payment upon delivery.
2 hours of continuous rowing with shovels and concrete in a ditch. The guys were kind and they had extra gutters, which made our work easier. in just one day we took 25 cubic meters. finished at 3 o'clock in the afternoon. They paid 75,000 rubles for concrete. the foundation cost 105,050 rubles. Hired workers will manage without the material: design and estimate 10% of the cost of the material, surveyor 5,000 rubles. earthworks 600 rub. cube concrete with viscous reinforcement 2,000 rub. per cubic meter total: 225,000 rub. Since my brother and I have experience in construction, we are building the entire house ourselves and will only hire transport.
While the concrete was cooling, a grounding loop was immediately laid. triangular trench with sides 3 meters and depth 70 cm. corners 50x50 and 3 m long are driven into the corners, welded together with a strip
we bring bricks. for the plinth you need about 5,300, the rest will go to pipes and poles with the import costing 50,100 rubles, it makes no sense to look somewhere cheaper because we have one plant
While we are delivering bricks, we have ordered a drilling rig. the well came out cheap because the water in the honey pot is very close 20 m. the cost with a filter is exactly 30,000
We also purchased some additional tools. welding machine 190A 7 100 mask 500, submersible vibration pump with hoses 2 000. and polyethylene film 25 m. needed to separate brick from concrete. everything according to science. the current total cost is 189,800
They carried it out for 1.5 days, but realistically in a day. Our sister's husband helped us in this matter. For which I thank him very much. In the morning we ordered a solution of brand 100 1.5 cubic meters
At the same time, we welded the grounding loop and buried it. We quickly built a box for the solution from improvised materials. don’t be lazy, strengthen it adequately so as not to collect all the solution in the area later)))
1 delivery of the solution was unsuccessful. We ordered from private sellers and were very dissatisfied with the quality of the product. with the delivery of 1.5 cubic meters it cost 4,900; they did not complete the entire volume planned for the day because I had to throw out about 0.5 cubic meters.
results of 2 days of laying. 5,300 can actually be laid by two people in 3 days. if you know how to do it, if the material is good, and the weather doesn’t let you down. You will need about 4.5 cubic meters of solution. We plan to reach the zero level the day after tomorrow and start laying communications
the zero cycle is completed. we buy a primer or bitumen mastic and go through all the internal walls with it. (hydraulic shutoff) now we proceed to the sewerage system
It took 6,300 for all the pipes; with proper calculation, assembling them is not difficult. To connect PVC pipes, we buy a special lubricant.
the slope must be at least 3 mm per 1 meter. The landscape of our site helped us with this and we didn’t have to bury them too much. All pipes are laid on a sand cushion (bed), we placed the necks of the pipes about 6 cm from the floor
We dig a hole for sewer rings. we decided to take 1.5 m in diameter. We will bury 3 rings. Now we order the soil and fill it up 15 cm short of the top. We leave that much for the sand cushion, water supply and rough screed.
So, let's move on to the drainage hole. Having used the terrain, there is no need to give the pipes more slope. We do it conscientiously so that we never call the sewer trucks, we dig a big hole. we bury 3 rings with a diameter of 1.5 meters and a height of 1 meter. with the cover, delivery and hatch it cost 14,200.
dug for 2 days. the soil was disgusting, almost the entire depth was loam. you need to dig 3.30 m deep. In photo 2. 60 the hellish hole came out.
There are 2 ways to dig drain holes by hand. 1. when you plumb the entire depth of the hole and then install the rings. there is a minus. Not all rings correspond to their sizes, which is what happened with us. the dispatcher (who neither….I don’t know) gave us the wrong dimensions, which added 2.5 hours of work to us. the point is this. They dug for an OUTSIDE diameter of 1.5 meters, but in fact the diameter came out to 1.7 meters. and this means that the rings will not fit there. Method 2 is used here, when you dig 1 meter. mount 1 ring on top of it, place it in thirds, lower into the inside of the hole and begin to dig them up. under their own weight they will go down. The advantage is that you do not remove excess soil. The downside is that it’s wildly inconvenient and slow and requires maximum labor. Plus, you will then have to install the hatch cover manually or call in small mechanization, for which you will have to pay. so 1 is optimal
Please note that we mounted the 2nd ring on bricks. This is such a clever move to increase the efficiency of the drainage pit so that sewage is absorbed into the soil not only through the bottom. some people also make pits (holes in the lower ring) to increase the efficiency of the pit, but there is a minus in this method. this weakens the ring itself. because we live in Russia where almost everything is done on the *****. reliability is the most important thing. There were cases where the rings simply broke in the pit. this indicates that they were poorly reinforced at the factory, and it is almost impossible to check this on site
the rings were installed. Let's start leveling the soil. it will take a lot of it. In addition to the fact that we removed 25 cubic meters from the foundation, 5 cubic meters from the drainage pit and a cube from the ground loop, we also need 45 cubic meters of soil. it weighs about 50 tons under a shovel. 5 trucks of soil cost us 14,300 + forgot to add 3 deliveries of mortar for 4,800 each, in total with rings, soil and mortar it came out to 43,400, in total our consumption at the moment is 241,400
the drainage hole is completed. In order for all the rings to work fully, the drain pipe must go up the ring, so the rings had to be planted another 0.5 m into the ground. We’ll install the pipe later, because equipment will be walking around the site and could crush the pipe.
We delivered polystyrene foam and a profile for the screed. according to the receipts it came out: 8,400 polystyrene foam and 1,800 profile and 420 metal scissors. total 10 720 +5 00 for extra. sand and transport. our expenses are only 257,200
We delivered polystyrene foam and a profile for the screed. according to the receipts it came out: 8,400 polystyrene foam and 1,800 profile and 420 metal scissors. total 10 720 +5 00 for extra. sand and transport. our expenses are only 257,200 and this mighty green mop. homemade device. but very useful. it will be useful to stretch the tie. I'll show you how later. insulate floors: our method is the simplest. no ventilation or additional insulation options are required. minus one. An unreal amount of soil was used, about 110 tons!!!!!!Our site does not allow the use of machinery, so we carried everything out manually. it's unrealistically difficult. Method 2. strengthen the foundation and install slabs. reliably, there will be no problems with all methods of insulation, but there is a minus of money; throw about 100 thousand more for such an area. 3 way. light overlap. take a larger beam or rafter and overlap it. costs minimal money. You don’t need so much soil, but it’s not reliable, ventilation and bioprotection are needed very seriously. For such areas it is not suitable. There is a technology for pouring concrete onto a sheet profile, but almost no one uses it. Most likely they just haven’t mastered it yet. but I’ll try to use this technology when I cast a balcony slab. The interesting thing is that with the help of profile ribs, an excellent design is obtained with minimal material costs, minimal weight and high load-bearing capacity.
we draw water around the house. all the pipes (cold water, hot water, heating) the guys were competent and gave us a discount, the pipes were bought from German and Czech manufacturers. I don’t remember from memory, I’ll tell you exactly later. it turned out exactly 20,000 + 2,700 welding feed cold (according to the advice) they made 32 diameters. DHW supply and return 25 diameter. It is not necessary to make a return line, but take into account the length of the pipes from the boiler. she will be needed. otherwise, when you open the hot water tap, you will have to wait a long time for it to flow. and I will always have it at the tap.
Serve cold (according to advice) made 32 diameters. DHW supply and return 25 diameter. It is not necessary to make a return line, but take into account the length of the pipes from the boiler. she will be needed. otherwise, when you open the hot water tap, you will have to wait a long time for it to flow. and I will always have it at the tap.
unsolder the heating. stripping pipe. what does it mean. a pipe reinforced with a layer of metal that needs to be peeled off for soldering. For this there is such a gadget that Maxim has in his hands.
the water was boiled. We plan to finish heating tomorrow. Tomorrow the material for the walls will finally arrive. We think we'll fill the screed on Tuesday and start working on the box.
install a profile. it will serve as a beacon for us when we pour the screed. The solution for the profile needs to be more abrupt.
let's continue. This is what the water intake point on the 1st floor in the boiler room looks like. I had to tinker with the heating. We will hide all heating pipes in the walls. so that later there are no problems with connecting the batteries, sign all the pipes and where they come from
We import gossilicate for the box. According to the estimate, 145 cubic meters are needed. this is 4 trucks. Because the facade will be covered with textured plaster, you need to take a good gas. found the optimal supplier at an affordable price. I’ll tell you more: the weather was disgusting. but there is nothing to do. Liskinsky bought silicate. there are a lot of positive reviews about it, especially since there are only 2 manufacturers of gas silicate, which are suitable in quality for laying on glue (but more on that later.) LGS is produced on German Wehrhahn equipment and the quality is excellent. For comparison: you can buy locally made shit, it will cost 2,400 per cubic meter. but you will lose on plaster on both sides, mortar and thermal conductivity. There is another one - also a good gas car, but it is expensive. 3,300 without delivery. The delivery of the LGS cost us 3,050 + the manipulator 1,500 per hour. We unloaded it in 3 hours with just two of us. the total cube to the object was 3180. The truck brought 38 88 cubes. in pallets - 27 pieces. The manipulator turned out to be very good, which is not unimportant.
pour the screed. We order sand concrete M150, we ordered it there, according to calculations, 10 cubic meters should be enough. This is where that unsightly green mop comes in handy. I believe this is the best tool. tested by experience. advice. Strengthen the profile better with the solution, otherwise it will be knocked down by the jet or you will knock it down with your foot in your haste. and without guides it is difficult to fill a more or less normal screed, especially in such areas. and stock up on boots)))
started at 10 am, at 4 pm the screed is ready, deviations from the horizon are within tolerance. everything will be finally leveled with self-leveling floors. They paid 29,100 for the screed. Tomorrow we will start working on the box. zero is completely finished. the hardest part is over. Considering that between us we have 15 years of experience, we plan to finish the box in a month.
Let's get to the box. 1 row must be passed to the solution. I’ll explain why row 1 is placed on the mortar: the glue seam is from 2 to 5 mm. and it will not be possible to somehow influence the block. Thus, row 1 is the last opportunity to correct all the shortcomings of the zero level, namely the elevation marks. in short, so that your walls are all even. + on the 1st row you once again draw out all the diagonals and dimensions and this is the last opportunity to make the house even. if you suddenly mess up the dimensions somewhere on the base.
try the glue. There are many different ways to apply glue. This means there are several tools for spreading glue: an ordinary spatula, a special carriage for glue and a glue ladle. We tried everything except the carriage. (I will say that the structure of the carriage and its abilities are not much different from an ordinary ladle.) I just took everything with a spatula, threw it on and smeared it. The bucket is not exactly the right size, namely its edges are slightly smaller than the size of the gas and its capacity is very good. small. Considering that the glue is very sticky crap, it doesn’t work very effectively because... Most of the glue remains in it. the carriage will have the same problem. so I won’t even test it. everything will be built in the old-fashioned way)))))))
We do everything according to science. An ordinary Kamensk hammer is not very suitable for laying such gas. it has a very large surface area. (dimensions 400x600x250 mm, weight 42 kg. Holy shit, how heavy. Compared to the usual size, the gas weighs 27 kg.)
Row 1 laid out. Now we are stupidly building walls. There is no point in messing with the layout (for masons) because... through 4 rows of windows, then block the doors. and you are unlikely to get into the layout, no matter how good your gas silicate is.
We build walls as far as the scaffolding we can get. back view. At first I was shocked by such sizes. but then I got used to it. let's move on.
I’ll tell you a little about connecting heating radiators. It was decided that we would not run pipes along the walls. purely because of aesthetics. I don’t want to glue wallpaper behind pipes) so I’ll tell you. therefore, a fine was immediately laid in the wall. then 2 pipes will come out of the wall carefully. Aim carefully, the pipes should come out under the window. We had already marked the windows on the ground in advance. when the heating was turned on.
I continue my story. end of the house. 1st floor by cost. GAZIKA truck + metal for the floors + lumber + fasteners for the roof + boiler piping + gates = 666,700
I'll tell you a little about the overlap. laid a corner 100x100x7 mm and primed it into the wall. I had to hide the corner this way because the walls will not be plastered, the finishing will begin immediately.
something like this))))) tomorrow we are going to pick up the poles on the roof.
the house is growing)
Just for fun, we decided to look at the walls as a rule and it turned out that our hands were growing more or less from the right place. deviation at 3 meters is no more than 5 mm.
brought half of the lumber. We will use copper sulfate with sodium bichromate as fire-bioprotection. a proven old-fashioned remedy and a cheap one at that.
So. They brought part of the forest. rafters, counter lathing, mauerlats and support beams. All lumber must be processed. We use a proven but extremely toxic mixture. I won’t reveal the main secret and proportions. very good dear info))))
1st floor ready
lay out the ceiling rafters. each end of the rafters was wrapped with roofing felt
We will fasten it with 50 cm studs. To do this, we drill the wood with a pen, then we go through another 20 cm with a hammer drill. We simply hammer in the remaining length of the stud. gas silicate is a malleable material.
hastily folded the stringers. The roof slope was 12 degrees. Please note that the slope cannot be less than 5 degrees, and if you decide to cover it with tiles, then at least 22 degrees.
the rafter system is completed. It took almost a cube of rafters to cover the roof. It’s too early to install the sheathing and counter-sheathing. because The pipe has not yet been folded. Tomorrow we will make a pipe and install steam-hydro insulation. more about her later
In the meantime, we began to assemble a water supply with a water cannon pump 60/72 60 cm. Its length and 7200 liters this pump can pump in an hour. the cost of the fun is 9,000 rubles. A check valve is installed immediately after the pump. and then the pipe is screwed onto the fitting
water supply system from a well. lowered the pump into the well. then there is a 5-way fitting, a flexible hose is screwed into it onto the hydraulic accumulator (blue tank), pressure switch, pressure gauge and then into the line.
A support beam is attached under the rafters.
installing a window. nothing complicated. First, remove the glazing beads with a wooden block. remove the sash. only the frame remains. We make several holes in it for fasteners and insert the frame into the window opening. I apologize for the unprofessional tool, it was just too late and I really wanted to do the windows))) so. covered the roof with utafol. Now you can install windows. We bought these windows. with delivery of 13 windows and 2 doors the cost was 87,900
We level the frame and secure it with anchors, then foam it and wait about an hour. then we insert the glass, put on the fittings and that’s it.
the window installation itself. takes 30 minutes. While the foam was cooling, they installed the front door. but about the door later. I didn't even take a photo.
We quickly folded the bathroom partition. In fact, all that remains is to hang the batteries, the light has already been installed. and you can live. slowly work on finishing.
so, we poured the lintel under the garage door, mixed the concrete by hand, about 0.3 cubic meters
If possible, we do the finishing. The walls are fairly even and there is no need to particularly level them. scrape the walls and apply putty "
Brick walls need to be plastered. We put up beacons and plaster.
we are working on the ceiling. We twist the sheathing in increments of 30 cm. This is enough because the sheathing will not take any load on itself other than cotton wool. We shoot the isospan B steam membrane; it is necessary so that when there is a temperature difference, condensation does not settle on the cotton wool.
set min. cotton wool on the ceiling. use protective equipment. otherwise you'll itch later
roofing system section
forgot to post it. This is what the roof looks like from above. All that remains is to fasten the sheathing and metal.
Installed mounting rings. and put 1 layer of putty, actually you need to lay the wiring first and then putty. but time is running out
boiler protherm dlo 40. max. power 32 kW. This thing costs 53,000 with delivery. You can't just get it. because It has been discontinued, but many people recommend it as a good boiler. what a heavy fucker. according to the passport 307 kg. a 40 cm concrete pad is poured underneath it. We begin to connect.
The boiler connection is made with a pipe with a diameter of 2 inches. The pipes are very serious and only two people need to solder them. We screw the combined coupling into the boiler, having previously lubricated it with paste for threaded connections. it turned with difficulty. broke 2 gas keys)))
This is what the house looks like from the garden. Now we can tear down the old house because it’s time to build an entrance in its place.
finally figured out the installation of the fucking gate. Regarding the installation, we were immediately deceived by the height of the lintel. that's why they invented it.
the actual gate fastening
ceiling of the 1st floor. the rafters are also wrapped with roofing felt at the ends.
the concrete has hardened, the pillars have been stacked. Tomorrow we will put up the formwork and pour the floor of the balcony. The casting will be unusual. using Oryol technology
I apologize for the order of the phot))))) so. They tore down part of the old house. he is preventing us from building the entrance group. pour concrete under the pillars. the procedure is the same. we dig a hole, knit reinforcement and pour it. nothing complicated.
So. I’ll tell you about “Oryol” casting; we first encountered this method in Oryol on a business trip. its essence is that instead of assembling formwork from plywood boards and clamps, a profile is used. This thing is quite durable and is capable of carrying heavy loads with minimal support.
one more I miss attention from others. Hug me, who cares, concrete consumption is minimal. This reduces the weight and stress on the supports.
This is what the balcony slab looks like from below. The price of such a product is only 4,000 for labor costs of 2 days. if you assemble conventional formwork it will take at least 4 days
facade is ready)))))
In general, the collection group is almost ready.
For the experts, in the meantime, we supply electricity to the house. The power cable was taken with reserve. AVVGng 4x25 industrial scale)))) we sleeve the cable and bury it in the trench. According to science, we fill it with sand and lay down alarm tape.
the second floor is finished. let's start the frontons
We put the pole, we tighten the cords, we do the trimming.
We put the pole, we tighten the cords, we do the trimming.
This is what the pipe looks like; I won’t explain its purpose.
the gables are finished. The entrance pillars are finished. The windows are standing, the batteries are unsoldered.
The box was finished, the windows were installed and the pipes from the roof were not pulled out. postponed to next season
They decided to make the roof overhang 50 cm because the length of the slope was 6 40 and the length of the rafters was only 6 00, the overhang had to be increased. The rafters were placed every 50 cm.
shot the film. This time we tried isospan. the film is much thicker and stronger than megaflex.
We bought the doors so as not to suffer)))) meter long. any cabinet with a piano will pass)))))))
So it goes. from the moment we started, it took us exactly 4 months to reach this state.)))) and 2 million money
It’s impossible to photograph the entire facade, but still. I need to tear down the old house, but I don’t have the time or energy))))
This is the view from the 2nd floor. it was specially made lower than 1st for comfort. unsolder the batteries
again, we hide all communications in the floors and walls
the attic space itself. They haven't installed spacers on the rafters yet. there is material, but you need to flood the house to dry it, and for this you need to lay cotton wool in the attic
the season is coming to an end, a lot has been accomplished, a lot remains to be done, but that’s for next spring.
We've slatted everything and are installing scaffolding to install the roof.
We turned on the heating, for unknown reasons, 1 pump could not cope, we had to add a second one. The launch was successful, but since the boiler is solid fuel and the area is huge, the boiler eats up firewood so much that at first you will have to stand next to it as a fireman. burn a lot of things, from pallets to an old house.
they threw temporary construction on pumps and sockets in each apartment to a minimum
we finish the sheathing. soon there will be metal
The metal has finally arrived on the roof. The area turned out to be 329 sq.m. with delivery with screws and packaging, the metal came out to 103,000. metal Monterry Norman
Source: myflonyan
Construction of walls
Construction begins with the removal of corners. The uniformity and strength of the entire structure depends on the correct placement of the first bricks. It is necessary to control the evenness of the walls using a plumb line and a building level.
Pull the construction cord firmly enough; there should be no deflections; maintaining the level depends on this. Each brick must be adjusted with a trowel.
After completing the main masonry, it is necessary to finish the outer part with facing bricks, unless another finishing option is used. The seams between the bricks need to be unstitched.
During the laying process, be sure to always bandage, otherwise the strength and durability of the structure will suffer. Provide all openings for windows and doors in advance.
You should not try to lay out all the walls in one go; let the solution harden, this is important for achieving high structural strength.
- Hot stamping non-woven wallpaper: pros + and cons
Fences-blinds: what are they and what are their advantages
- Analysis of competitors' prices. Main stages, methods and services
Features of the house layout
Through the efforts of two men, a cheap house for permanent residence with an attached garage was built. Initially, the project did not include a garage and was added after the house was completed.
finished frame house attached garage
In general, the project changed as the discussion progressed on the advice of other builders and the requests of the wife. The original layout of the house included 6 rooms on two floors.
During construction, it was decided to equip two bathrooms, while on the ground floor the toilet and bathtub should be separate. The area of the living room and the location of the stairs have also changed. Compared to the initial project, the living room was too narrow and elongated. The stairs were also planned to be awkward and steep. After the changes, these shortcomings were eliminated.
house layout 6 by 6
Photos of brick houses
Features of the staircase and its installation
The location of the staircase in the project caused a lot of controversy. Initially, its location suggested excessive emphasis on the attic ceiling. After changing the location and design of the staircase, it was made without a platform with slight turns.
The staircase is made of boards 50x150 mm, the width of the steps is 30 cm. The staircase was installed after the rough finishing of the first floor. Under the upper span there is space left for installing a toilet there. According to personal feelings, the staircase turned out to be comfortable and compact.
do-it-yourself staircase to the second floor, the space under the stairs to the second floor is sewn up
installation of staircase railings
How to make a project - preparatory stages of creating a drawing
The first step is to take into account the purpose of the future building: it will become a place for a country holiday or permanent housing. Before you start drawing up a project, you should take into account the number and needs of all the people for whom the building is intended to live. Personal preferences are discussed in advance. It is recommended to choose a quiet place away from the roadway. The construction of housing is divided into stages, with corresponding fixation in the sections of the project.
First, a sketch part is created. Then the architectural and structural sections. Following these, engineering and technical statements are prepared, and then it is time to create drawings for the finishing/design section for the corresponding stage of work. Sketching should be done before creating the main sketch. Then, based on the main drawing of the house, more detailed ones are drawn. They will become the basis for displaying an even more detailed layout.
Related documentation for the project and construction drawings
The project contains information about the stages of construction and the implementation of certain types of work. The master plan and detailed drawings are supplemented with explanatory tables and various annexes. In addition to individual plans that take into account personal preferences and special needs, mandatory documents with key data will be needed. These include documentation with a list of finishing and building materials, information about their type, documents describing engineering solutions, information about finances and technical aspects.
You will need data on height, area, mass and volume in cubic meters (cubic capacity). A description of the functionality of the building must be drawn up. This also applies to documentation with architectural and structural assessment. Based on the project, it is customary to organize a process that includes a certain sequence of construction work and associated financial costs.
The architectural passport contains:
- Copy of the designer's license;
- Plan and schematic cross-sectional images of the roof;
- Floor plans;
- Coloring of external walls;
- Explanatory note.
What is included in the structure of a house project
Before you start drawing up a project yourself, you need to understand its role, first of all, the purpose of each section. The detailed plan is mainly a guide for carrying out different types of work, according to existing standards and personal preferences. The document is endowed with a control function: over the consumption of materials, costs and quality of work. The building plan includes the size of rooms and openings, the location of stairs, the configuration of the roof, foundation, basement, floors and attic.
The sections of the project are conventionally divided into two subparts: architectural and construction and engineering and design. The first of these includes drawings of facades and detailed architectural diagrams. The parameters of length, distances, intervals, section parameters, area and volumes of rooms and units must be indicated there. As for the second part, it contains drawings of ventilation, heating, sewer and water supply systems, as well as an electrical network diagram.
The project also includes estimate documentation, without which it will not be possible to register the house as real estate!
List of required architectural drawings of a house with dimensions
These include architectural and construction sketches:
- ground floor plan;
- second floor;
- basement and attic (if any);
- truss structure;
- transverse and longitudinal sections.
Architectural sketches involve drawing exact parameters, general characteristics of a residential building, auxiliary buildings, parts of structures and individual structures. Plans are drawn up for each floor, with a clear indication of the functional role, be it residential, technical, utility or storage space. The area and all linear dimensions are indicated on the papers.
The locations of windows and doors with the corresponding sizes, intervals and distances are indicated here. You will also need a plan for the roof frame structure. At the same time, all rafters and other elements of the system are displayed. A table with the specification of the parts of this design should be attached to the drawing. The roof plan is formed separately, indicating the dimensions and angles. The location of hatches, chimneys, ventilation and hatches is also displayed. Additionally, diagrams of sections of spatial zones are drawn up - from the base to the roof. At least 5 such drawings are required, drawn from different sides.
Sectional drawings of a house and images of facades from different sides
Section drawings come in transverse, longitudinal and vertical directions. They are intended to determine the height of rooms on different floors, the depth of the basement or basement, and the angles of inclination of various parts of the roof. Creating a project is impossible without sketches of all facades. For a house with a normal configuration, these are drawings of 4 different sides: front, rear and end. Thus, the following sheets are added to the documentation: Front facade, Rear side of the building, Side facade No. 1, No. 2. This information will be supplemented by a table with the specification of various elements, including windows and doors.
The diagrams of the sides of the house are a kind of correspondence between the simplified house plan and the initial sketches. That is why drawing up simple plans using computer programs will not cause difficulties even for those who have not used them before. Design, however, requires the involvement of specialists in different areas of construction. The appearance of the front façade is of fundamental importance. It should be discussed further.
The diagrams specify the parameters, shape, method of opening and the number of components of joinery.
Constructive section: how to draw drawings and diagrams of individual elements
The design section includes detailed descriptions on diagrams with measurements in millimeters. It is replenished with both general plans and individual drawings of various elements. These include staircases, foundations, floors, and elements of the rafter system. For the project, you should indicate the features of materials and products for each unit. The foundation drawing displays the parameters of the reinforcement structures, location in the soil and materials for the work. The foundation plan is represented by a general drawing and drawings of longitudinal and cross sections.
Some types of drawings provide for sections of floor slabs in 2 planes at different elevations: +0.00, +3.00 and +6.00. Complex joints of structural parts are indicated separately. Calculations regarding staticity and strength are provided for all nodes. Tables are added to the section describing the features and algorithms for using crossbars, reinforcing bars and reinforced concrete parts.
Engineering section: drawings of rooms and communications
This section includes diagrams of electrical equipment, sewerage, water supply, heating systems, as well as explanations of calculations. The specification of individual equipment is displayed in the form of tables. The engineering and technical part must contain information about parts of the building and about separate and autonomous systems inside buildings. Plumbing drawings include a diagram of the location of communications on all tiers and in the basement. The sewer system is displayed using a similar principle. Often these two subsections are combined.
An axonometric diagram of the installation of water supply systems (hot and cold water) is added to the engineering part. The electrical project must contain an indicator of the estimated power of the building, a drawing of the wiring of lighting and power networks. The installation section is filled with general and floor diagrams. The technical part of the project also includes information about the location of electrical and gas installations and a diagram of the lightning rod device.
Security alarm system in house plan drawings
Before designing a house yourself, you need to consider using a security alarm. In this case, the development of a separate project is required. The alarm system is based on a structural network of devices for organizing different levels of protection of objects. Operational efficiency should be uniform throughout the entire area.
The project is created in accordance with GOST and SNiP and other regulatory documentation. In this case, factors such as the function of the room, the area of the object, its design features, and the alarm option (can be wireless or wired) are taken into account. On the building plan you need to indicate the security alarm circuit. It is equipped with sensors for glass breakage, movement, opening, as well as a siren, reader and motion detection zone. The signaling project is checked and approved by authorized organizations. Detailed diagrams are then created.
Computer programs for house design
You can design a house using applications:
- Google SketchUp;
- VisiCon;
- FloorPlan 3D;
- CyberMotion 3D-Designer 13.0;
- Home Plan Pro;
- AutoCad;
- House-3D;
- Envisioneer Express.
These tools are designed for modeling three-dimensional architecture, including one-story and two-story houses, dachas, and cottages. As an additional function, the programs allow you to virtually arrange pieces of furniture. Special plugins and extensions of these applications visualize objects. Thanks to this option, you can see how buildings look from above, in section, at an angle. In addition, modeling applications allow you to work with layers.
Models can be edited at any time, as well as rotated around their axis or enlarged to view the smallest details. To store different projects, libraries are provided in which you can quickly and easily view objects. Modern programs also allow you to create dynamic elements. Paid and free applications and online resources are available on the Internet to test design features under the most realistic parameters.
What to consider when drawing up a house plan
To draw up a plan, you need to decide on the number of storeys of the building, roof option, exterior, including the number of window openings, balconies and loggias. The possibility of arranging a terrace and attic should be provided. All these elements need to be displayed in longitudinal and cross sections, along with the design qualities and the required materials. The features of the site for the house are taken into account, including location, orientation to the cardinal points, relief, and soil features. The optimal internal layout, primarily the location of the premises, depends on them. The number and configuration of rooms is selected taking into account the number of residents and the age of each of them.
The main priority when drawing up a diagram is functional usefulness. Facilities should also be provided to accommodate construction workers and other workers. It is advisable to leave space in reserve on the plan: someday it may be “filled up” with an additional garage or guest house.
Some functional elements that are better to be provided in advance:
- workshop;
- cabinet;
- greenhouse;
- winter Garden;
- sauna;
- pool;
- Gym.
Large rooms need additional heating!