Many homeowners sooner or later face the problem of replacing old floor coverings. Of course, this problem is not solved in an instant and is often associated with a significant waste of material resources, because any work on remodeling the floor is an expensive pleasure.
Diagram of a variety of subfloors.
When starting renovation work, many people wonder which flooring option would be more acceptable. To do this, it is necessary to consider the main options and conduct a detailed analysis of them.
The modern system of the construction industry offers 3 methods of arranging floors: screed in dry and wet versions, design on wooden logs. These varieties are actively used at present, each of them has distinctive features.
When analyzing any of the methods, you should also highlight the nature of the materials used and the technology for carrying out installation work. Repairing floors on joists has noticeable advantages compared to other coating options. It is necessary to dwell in more detail on each of these options.
Cement screed: features
Scheme of cement floor screed.
Cement floor screed has the following purposes:
- Levels the underlying bases.
- Hides the pipeline.
- Evenly divides thermal insulation loads.
- Supply of standardized heat absorption to floors.
- Participates in the formation of slopes.
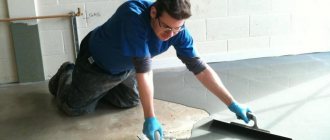
The screed requires perfect leveling of the base, it makes it perfectly smooth, neat and dry. The floor covering acquires a special strength, which makes subsequent use practical and convenient.
From a technological point of view, screeding seems to be a wet process, which leads to wetness of the walls, ceiling, and surfaces of neighbors. In addition, it is very difficult to be and live in a room where such work is being carried out.
The fact is that such repairs are often associated with dust and dirt in the room. Getting rid of this type of litter can be difficult. The poured floor takes a very long time to dry; the exposure time can reach a month. A wet base will not allow covering material to be laid on the surface for a long time.
Scheme for installing beacons for screeds.
Screed as a method of carrying out repairs indoors, even with high-quality organization, does not allow obtaining ideal results for leveling the coating. In addition to this, special mixtures should be used to level the base. These are self-leveling compositions, the cost of which is quite high.
Related article: How to restore a chair with your own hands?
In addition, the screed is distinguished by a complex technological installation process. It involves preliminary preparation of the base, priming, placing beacons, stirring the solution, and waiting for the surface to dry completely.
Having chosen this method of repairing the floor covering, it is worth monitoring the quality of the work, because it is impossible to redo the finished base, and dismantling the old one will cost a significant amount, and a lot of effort will be spent.
Among the disadvantages of this design is the rather complex calculation of the amount of material required.
Preparatory stage
Before pouring the screed, a complete inspection of the wooden base is carried out
At this stage we need to do the following:
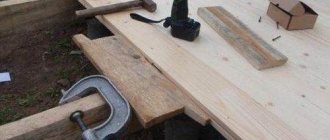
- All boards must be removed and inspected. Rotten, damaged or cracked elements should be replaced. We also inspect the logs. We replace unreliable beams with new ones.
Tip: pay attention to the lag step. If it is more than 40 cm, then it is better to install additional beams to increase the load-bearing capacity of the floor.
- Reinstall the floorboards. Boards with an uneven, damaged surface can be turned upside down. We carefully seal all the cracks between the boards with sealant. After the drying period indicated on the package with the sealant has expired, you can begin treating the floor with a moisture-resistant primer. We give time for the primer to harden. Using a laser device, we make a mark of the level of the clean floor on the walls of the room.
Attention: when determining the height of the screed, keep in mind that every centimeter of the thickness of the concrete layer puts pressure on the wooden floor weighing 100-120 kg. Therefore, if it is necessary to perform a high screed, it is worth further strengthening the logs or replacing them with metal beams, for example, from a channel.
Laying damper tape around the perimeter of the room
At this stage, you need to make something, like a trough, from waterproof insulating material for pouring concrete. To do this we do the following:
First of all, we attach a damper tape along the perimeter of the room to the bottom of the walls.
You can use a special strip, a regular board or a strip of polystyrene foam. The tape can be attached with double-sided tape or with a stapler. The optimal thickness of the strip is 1-2 cm, and its height should be a couple of centimeters higher than the height of the screed.
This element is needed not only for the deformation movements of the screed, but also as a soundproofing barrier. After laying the front layer, the protruding parts of the tape can be cut off. Now it’s the turn to lay the plastic film. Adjacent strips of film should overlap each other by 10 cm.
The joints of the film are sealed with tape. Also, the insulating layer must be wrapped on the walls of the room to a height of 15-20 cm. As a result, you will get a waterproof trough made of insulating material onto which you can safely pour the screed.
Attention: Under no circumstances should any holes, cuts or punctures be made in the insulating material. If they appear during the work, they should be immediately sealed with plastic patches.
Dry screed: highlights
Floor repairs based on dry screed seem to be a novelty. Compared to this method with conventional coating with a cement-sand mixture, the first option has significant positive indicators.
The assembly method is characterized by cleanliness, absence of dust, litter, and water. This floor is assembled in a short period of time. The finished base can be used immediately.
Diagram of a dry screed device.
The disadvantage of this design is associated with the material used. The evenness of the coating is ensured by finely dispersed expanded clay. However, such a base in the form of a granular substance can give uneven shrinkage, this is especially observed at the points of movement of the residents of the house, such as the corridor, passages.
In this case, the unevenness of the floor will appear even more pronounced. GVL is used as a rough option; the material is weak and easily broken; it is not able to withstand the loads acting on the floors. Points of active movement of residents begin to become crushed, cracked, and pressed through. The floor is deformed, the quality of the coating suffers.
In addition, paper laid on GVL seems to be a favorable area for the growth of fungi and mold.
Before the final decision is made on choosing a floor screed, it is necessary to study its features. When giving preference to one type or another, there is no need to rush; you should weigh all aspects of this process. The table below will help clarify the main points.
| Wet screed | Dry screed |
| The assistance of qualified craftsmen is required during installation work. | The flooring process is carried out according to a simplified scheme, which allows people who are not related to the construction profession to do the covering. |
| Associated with the treatment of the entire surface in a short period of time. The solution hardens quickly, after which it will be impossible to use it for work. | The dry coating is laid through several stages, gradually laying the floor. |
| Floor repairs involving the use of cement are characterized by poor heat retention and insufficient insulation from extraneous sounds. | Expanded clay is distinguished by a good degree of heat retention and excellent sound insulation properties. |
| A wet screed does not allow any other coverings to be placed on the surface except the floor base. | Using such natural qualities of expanded clay as flowability, any communications, heated floors, or electrical wires can be placed in the base. |
Related article: Electric heated floor under tiles: technology for laying tiles on a heated floor with your own hands
What do different technologies have in common?
Screed and joists serve one purpose - to make the floor in the house smooth and comfortable. There are other similar points:
- The events are carried out in several stages.
- The operation is performed by builders who have the skills.
- Materials and tools are prepared for installation.
- The base is leveled and concreted.
- During all work, surfaces are checked for evenness.
- It is possible to hide communications under the cover.
- The building materials used additionally insulate the surface.
Before choosing any method of floor arrangement, you need to take into account the design features of the building, its number of floors, and what materials the entire building is made of.
Wooden floors on joists
To answer the question of which is better - a floor on joists or a screed, it is necessary to understand the design features of each of these sides, highlighting their positive and negative aspects. Thus, a wooden base in the classical sense is an actively used type of floor base, as is a cement screed.
Options for plank flooring on joists.
The main positive aspects of using the structure on logs are:
- the ability to create a perfectly smooth surface;
- significant savings in material resources and effort;
- creating potential for the construction of various communications, electrical wiring and engineering systems in the underground;
- good heat retention and protection from extraneous sounds;
- reducing the load on old floors in a residential building;
- the ability to erect ceilings at several levels.
The construction of a floor on joists has a weak technological basis.
Such structures are characterized by the fact that they can be mounted on any shape, which can be bars, bricks, or roofing felt. They are secured using anchor bolts using one of the most basic methods.
In order for the floor to achieve impeccable evenness, you need to use a laser level. Other tools will not give the desired results. The weak point of such a base will be a frame anchor or a polypropylene nail, which simply will not support the weight of the entire device. As a rule, after 3 months such a structure begins to weaken and creaks appear.
Schemes of modernized wooden floors with joists.
An experienced craftsman must carry out installation of the floor on joists, because such work requires experience and is distinguished by a special jewelry and subtlety of the process. Not every person can lay such a structure on lining material of different dimensions and unequal thickness, observing construction standards and adhering to the same level.
However, even if the floor is laid incorrectly, it can always be disassembled, and the materials will remain intact. Installing a new structure is not at all difficult.
Related article: Making wooden gates with your own hands
For wooden floors, logs, plywood, and floor boards are used. Wood raw materials are absolutely clean from an environmental point of view; they do not change over a significant period of time. The gap between the floor and the base contains an air cushion; constant air circulation occurs here, thanks to which the integrity and excellent condition of the materials will be ensured.
Comparative analysis
Of course, a wooden floor is more environmentally friendly, its price is often lower than concrete, it is warm and reliable, but short-lived. And there is a possibility that your descendants, having decided to change their gender, will remember you “with a not evil, quiet word.”
In our opinion, it is more reasonable to make a combined version of the covering, in other words, the base is poured from reliable, durable concrete, and then you make a slab flooring on the joists. If necessary, you can tear it down and install an economical heated water floor or other covering to suit your taste in its place.
Installation of slab flooring.
Constructing a floor covering using joists and covering them with plywood
Many owners prefer warm wooden flooring, and flooring on joists and plywood to cold cement floors. For the subfloor on joists, as a rule, plywood sheet material of quality grade 1–4 is used (budget option).
Advantages of this design:
- the ability to create a smooth surface, even if leveling of 10 cm is necessary;
- a huge selection of materials, the possibility of saving (choice of budget products);
- the ability to hide wires and other electrical wiring;
- high level of sound insulation and thermal insulation;
- has little weight;
- Easy to assemble with your own hands without professionals.
Disadvantages of constructing logs with plywood:
- The disadvantage of this leveling is the loss in the height of the premises.
- If the structure is not installed correctly, the floor is on joists and may wobble and knock.
- Less durable and water-resistant than screed.
- The disadvantage of using plywood as a black covering is associated with the composition of the plywood and the use of harmful adhesive mixtures when fastening the walls. This point should be taken into account when purchasing and look at the labeling.
- Service life is shorter than with a screed
From all of the above, we can conclude that the use of logs and plywood is a more economical option, using budget material. However, with high-quality construction of the floor and the use of high-class materials, the cost of this option may be slightly more expensive than a cement screed. It all depends on the specific situation, on the square, on the chosen material and the expected result.
Many homeowners sooner or later face the problem of replacing old floor coverings. Of course, this problem is not solved in an instant and is often associated with a significant waste of material resources, because any work on remodeling the floor is an expensive pleasure.
Diagram of a variety of subfloors.
When starting renovation work, many people wonder which flooring option would be more acceptable. To do this, it is necessary to consider the main options and conduct a detailed analysis of them.
The modern system of the construction industry offers 3 methods of arranging floors: screed in dry and wet versions, design on wooden logs. These varieties are actively used at present, each of them has distinctive features.
When analyzing any of the methods, you should also highlight the nature of the materials used and the technology for carrying out installation work. Repairing floors on joists has noticeable advantages compared to other coating options. It is necessary to dwell in more detail on each of these options.
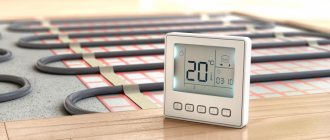
Getting rid of the squeak
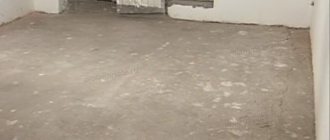
Floor screed in a new building
A wooden floor often has such an annoying drawback as a squeak that appears over time. Fortunately, you can get rid of it by identifying problem areas. In them, the coating usually sag and wobble noticeably. Having localized the source of the problems, you need to remove the loose nails and replace them with self-tapping screws. Then you should putty and renew the coating.
has a lot of advantages: simplicity of the process, ease of replacing individual elements, environmental friendliness, the ability to create an excellent microclimate in the room, aesthetics of the floor. A strong and warm coating will delight you for many years if you carefully approach installation and study all the nuances.
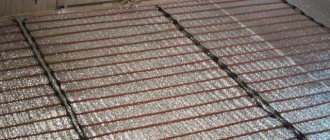
Installation of beacons
Laying reinforcing mesh and guide beacons
It is strictly forbidden to attach guide beacons to the floor with screws or nails. It is best to lay them on flat cakes or beds of mortar.
The outer beacons are installed at a distance of 20 cm from the walls (see video). And the step of the guides relative to each other is 1-1.2 m, but not more than the length of the rule.
It is better to use guide profiles for drywall as beacons.
Installing beacons along the mortar beds will make it easier to level them to the level of the finished floor. The beacon can be sunk deeper into the solution or raised higher by adding more mixture, thereby achieving the desired mark (see video).
Advice: if you do everything yourself, then keep in mind that after preparing the solution, it is better to lay the beacons within an hour.