One day there comes a time when the screed, which was once carried out according to all the rules, becomes unusable. This is not surprising, because she has a lot of loads that she has to withstand. The consequences of an uneven and crumbled screed can be quite unpleasant, so repairs are necessary, which you can do yourself.
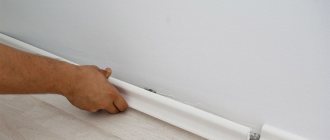
DIY floor screed repair
DIY screed repair
In order for the floor to be level and the floor covering to serve for a long time, a high-quality, even screed is necessary. It can be made using different technologies (there are single-layer screeds, which are laid in one layer over the entire thickness, there are multilayer screeds, which consist of several layers, there are prefabricated screeds, or dry screeds, which consist of elements ready for installation). But under any floor covering (laminate, parquet, tiles, linoleum or others) you need a smooth screed without cracks.
Screed tasks:
- ensure the durability of the floor covering;
- improving heat and sound insulation, which is important in apartment buildings;
- alignment of the horizontal plane of the load-bearing base (SNiP 3.03.01-87 allows “Deviation of horizontal planes over the entire length of the section being verified - 20 mm”)
- hide utilities (electrical wiring, heated floors, etc.)
There is no point in saving on screed; it is better to do it right away with high quality and for many years to come. However, everything tends to age and deteriorate; an old screed may develop cracks and chips. When starting a repair, you need to start from the base of the floor: check the old screed for voids or cracks. If a third of the old screed requires repair, then it is better to replace it completely. However, if the flaws are minor, you can repair the screed - this will significantly save repair time.
In our apartment, the old screed was initially made poorly. When we first crossed the threshold of our future apartment, where a modest renovation had been done, neat linoleum lay everywhere on the floor. After the move, we discovered that large and small irregularities began to appear through the thin linoleum. As soon as you lifted it, small pebbles, cracks, and irregularities appeared. Although in general the screed fulfilled its role. Therefore, it was decided to repair the screed with minimal time and money.
Preparatory work
After choosing the material for repairing concrete floors, you should begin the repair. First comes the preparatory stage:
- All foreign objects are removed from the room.
- Existing debris, concrete chips and dust are swept away. Potholes and cracks are thoroughly cleaned with a vacuum cleaner.
- Any dirt, rust, mold or old soil is removed with a stiff metal brush.
- To remove grease stains, you need to use a special solution.
- The concrete floor is swept with a wet broom, then it needs to be dried.
- If the reinforcement is visible, it should be cleaned with sandpaper and primed with a compound with anti-corrosion properties.
It is better to tap areas of the concrete surface that have lost strength with a hammer and clear them. The rule also applies to the edges of problem areas.
Repairing screeds with your own farts
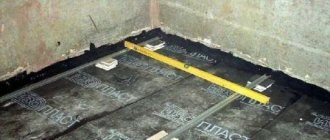
Using a level and a rule, we find the unevenness of the floor. “Pits” will be filled later, “hills” and “elevations” will be knocked down using a hammer drill.
The floor level along the entire wall under the window was higher than in the entire room, so the layer was completely knocked down.
The defects in the floor slab were simply foamed over: before the repair, we could not find sources of cold winter air coming from under the floor.
Mix the cement mortar.
Fill the areas with broken screed with the solution and level them using the following rule:
Let the new layer dry
For better adhesion to the leveling layer, prime the old screed with a penetrating primer.
Next, dilute the finishing mixture for screed or self-leveling floor according to the instructions
The finishing layer is quite liquid and is much easier to install than the base layer, but control using the rule is mandatory.
Before drying, the finishing layer is rubbed with a grater.
The self-leveling floor dries quickly enough, so it needs to be applied in small areas. A new screed, made with your own hands and for yourself, turns out smooth and without cracks, even if there is not enough construction experience.
After drying, the finishing layer is primed again. This will prevent cracks and other troubles.
Agree, the new screed even looks better than the old one.
Now you can lay almost any floor covering. We are planning carpet, naturally, with a backing.
We repair the screed
How to repair cracks in a floor screed depends on the degree of deformation of the subfloor.
Sealing microcracks
Shallow, small cracks usually do not cause problems. They arise due to improper concrete drying conditions. If they begin to appear soon after pouring, the floors should be wetted and covered with film.
Very thin microcracks can be left untouched or covered with liquid cement mortar or tile adhesive. If the width reaches several millimeters, it is better to play it safe and seal such cracks to the full depth.
- The crack is opened by cutting off the concrete on both sides of it with a grinder with a diamond blade, which is set at an angle to the crack.
If the amount of work is small, you can get by with a chisel and a hammer Source wp.com
- Pieces of concrete and cement dust are removed from the resulting triangular furrow.
- Its walls are well impregnated with a deep penetration primer.
- After the primer has dried, fill the recesses with the solution, applying it with a small slide.
- As soon as the solution sets, but does not completely harden, the excess is removed from the surface with a spatula.
If you immediately level the repair mixture over the surface, then during the drying process it will shrink and a depression will form.
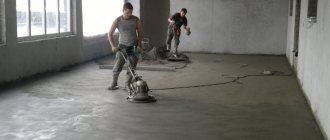
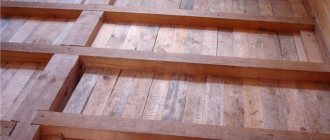
The process of leveling old floor screed
When carrying out renovations, people often encounter very poor subfloors. This could be a concrete screed that has become quite frayed over the years of use: potholes, chips, numerous cracks. Such a surface will never allow laying the flooring in a flat plane. For this reason, it is necessary to level the floor screed using self-leveling mixtures. They have excellent technical characteristics, which include instant drying. Now you no longer have to wait almost a month for a separate section of the screed to dry before starting subsequent work. In addition, such mixtures can also be used as a finishing layer of a self-leveling floor, which can be decorated as desired.
Tools, equipment and fixtures
All equipment must be in good working order; during work, preventive inspection and compliance with safety standards are necessary.
To repair a concrete floor screed you will need:
- pumping stations, compressors, high-pressure apparatuses;
- rotary hammers, jackhammers;
- shot-, sandblasting installations;
- industrial vacuum cleaners;
- trowels, metal brushes, spatulas, shovels, chisels;
- grinders, grinders;
- clean containers;
- construction mixer.
Advantages of leveling mixtures
The mixtures used in the work to ensure that the floor surface becomes perfectly smooth have a large number of positive qualities, among which the main ones are:
- The drying process takes a maximum of several days. After a few hours, you can begin laying individual types of flooring.
- A non-specialist is able to cope with the installation process on their own, having studied only the minimum requirements for preparing the mixture and pouring.
- Shrinkage of the finished solution does not occur if the technology for installing a self-leveling floor is followed. In addition, the surface becomes very durable and hard and can last for several decades.
- If there are low ceilings, then such mixtures are simply irreplaceable. The reason for this is the ability to create very thin layers within 3-5 mm. Everything will depend on the evenness of the base onto which the mixture is poured.
There are a large number of advantages, and all of them are aimed at obtaining the desired result in the end. It is very important that the surface for pouring is carefully prepared. It wouldn't hurt to spend a little more time on this.
Types of leveling compounds
To begin leveling the subfloor, you need to decide and select a specific mixture for the job. They contain very fine fillers. This allows for a smoother surface than a conventional cement screed. For minimal problems, specially liquid formulations are ideal, although their cost is slightly higher than conventional mixtures. All compounds used to level a self-leveling concrete floor are divided into types:
- Compounds with increased strength. Applicable for serious local problems. They can be poured if there is a deep crack, pothole or lack of an old-style concrete screed.
- Rough compositions. They are used when there are huge deficiencies in the base, the presence of numerous defects. This option is also called a “rough” floor. The layer of such a floor will be very large and can reach 50-70 mm.
- Finishing mixtures. They are able to level the surface to perfection and at the same time distribute themselves. All that remains is to fill and, if necessary, apply a rule or spatula. The layer can be made in thickness within 2-8 mm.
In addition, all mixtures are divided into cement and gypsum. The advantages of the latter are that they can be installed to a thickness of up to 10 cm. But there is a caveat - gypsum mixtures are only applicable in rooms with low humidity levels. They are not suitable for the bathroom or kitchen. At the same time, it will not be superfluous to arrange excellent waterproofing.
If you don’t have time to wait until the screed dries and you can install the floor covering, then the choice falls on quick-drying mixtures, which are abundant in construction stores from various manufacturers. A few hours after pouring, you can begin laying tiles or laminate.
It is worth noting that quick-drying mixtures are expensive to use for global repair work. They are more suitable for hiding minor defects in old concrete screed with a slight difference in floor level.
Making expansion joints
One of the main reasons for cracking of a concrete slab is the lack of compensation gaps around the perimeter of its abutment to vertical barriers - walls, columns, thresholds, etc. And in rooms with a large area, the screed can crack and swell during shrinkage and during linear expansion, if expansion joints are not installed in it, dividing the solid slab into several sections independent from each other.
The expansion joint allows the screed to expand freely Source tb.ru
See also: Catalog of companies that specialize in home insulation
Before repairing cracks in the floor screed, it is necessary to arrange all the necessary technological joints in it, otherwise they will appear again and again. And the sooner you do this, the better.
It will no longer be possible to create gaps between the floor and the wall using a finished screed. But you can cut the grooves as close to the wall as possible using a grinder with a large diameter disk or a wall chaser. If there are columns, a shrinkage seam is made around them, but not parallel to the edges, but in the form of a diamond, so that the corner of the column looks at the straight section of the groove.
If the dimensions of the room on one or both sides exceed 3-4 meters, the seams must be cut across it.
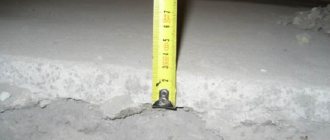
Note! The depth of the groove must be at least a third of the thickness of the screed, and the width must be at least 10 mm.
The finished cracks in the floor are cleaned of debris and primed. After the primer has dried, they are filled with polyurethane sealant or special mastic. After drying, these compositions retain elasticity, which will allow the cut cards to move independently of each other without transferring deforming loads.
Filling the seam with sealant Source stiagka-pola.ru
Tools
A complete list of equipment and tools that will need to be used will be useful for the job. The list will depend on the specific type of work performed and may change depending on the situation.
Containers are very important because they are used to mix the mixture with water. The amount of the finished solution should be such that it is enough for a maximum of 40 minutes of work. Otherwise, it will begin to harden and lose its properties and qualities. An electric drill and a mixer are suitable for the kneading process. The drill should operate at low speeds so as not to create a large number of bubbles that could affect the quality of the self-leveling floor.
Not all craftsmen trust the quality of the finished solution, such as its ability to self-distribute over the surface. It is for the purpose of leveling that spatulas are used. In any case, after finishing the work, bubbles will appear on the surface of the solution along the concrete screed, which should be eliminated. For this we use a needle roller. The length of the needle should be approximately 1-2 mm longer than the screed layer. Movement over the poured mixture is carried out in paint shoes, which allows you not to damage the surface.
The specific list of tools may vary. Everything will depend on the level of repair in the room, on the presence of potholes, cracks, and places where the old concrete screed has peeled off and needs to be leveled.
Causes of defects in concrete
Defects on a concrete floor can form for various reasons, which are primarily associated with violations in the process of its arrangement.
Cracks often appear due to the absence, untimely cutting or incorrect calculation of the thickness of joints in concrete floors, designed to prevent stress on the concrete during thermal expansion and shrinkage. A correctly made temperature-shrinkable seam will avoid many problems.
Other reasons for the appearance of cracks include:
- a large amount of water in the solution when pouring a concrete screed or a lack of it;
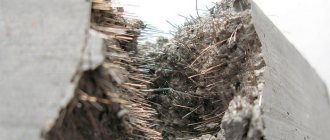
- poor quality reinforcement;
- lack of waterproofing of the base.
Defects can occur even with quality work done. Any coating is subject to natural wear and tear and is negatively affected by excess moisture. Potholes are caused by physical forces. The influence of external factors on the concrete floor cannot be ruled out. The weak point is the junction of the wall and the floor; cracks often appear there.
It is necessary to determine the type of damage. This will allow you to draw up a work plan and select the right material. The following types are often encountered:
- small depressions, potholes;
- cracks of various sizes;
- the finest cracks and chips.
Repairs should not be delayed for a long time. The size of the defects may gradually increase, the concrete will begin to crumble and come off in pieces, which will complicate the repair of problem areas.
Preparation and priming
The surface on which the solution is poured must be perfectly clean and free of defects: holes, cracks, potholes. The mixture may get into them. Existing defects are eliminated and sealed with putty. If the old base begins to peel off, it should be removed completely to intact sections. If this is not done, the leveling layer will begin to “walk”, cracks and shrinkage will appear. Even a flat surface is cleaned, after which debris, dust and other unnecessary elements must be removed from the work site. The best assistant in such a situation will be a construction vacuum cleaner. Every detail that is not removed will affect the quality of the poured solution. The grip will decrease and the floor covering will deteriorate.
If possible, the foundations for pouring should be leveled as much as possible. Self-leveling mixtures are best used with a layer thickness of 20-30 mm. There shouldn't be any serious damage. Otherwise, it would be a good idea to apply a layer of screed and wait until it dries completely. But not everyone has that much time to wait for the solution to be prepared. For this reason, many people have a question about how to level the floor screed. It is enough to take the appropriate mixture for work, recommended in certain conditions.
Leveling the screed with a self-leveling floor cannot be done without priming the base. This item is mandatory. Under no circumstances should he remain on the sidelines. If necessary, if there is strong absorption of the primer, the process should be repeated again. All this is done to increase the level of adhesion of the mixed solution to the surface.
When the house is located in places with high levels of humidity or a large amount of precipitation, an additional layer of waterproofing should be installed.
If there are concrete polymer floors,
then preparing the base takes much less time. True, everything will depend on the presence of defects on the old surface. There are often cases when the technology for installing self-leveling floors is not followed and cracks, mortar depressions and other operational inaccuracies appear. You will have to carry out repairs yourself, which requires a huge waste of time and effort.
Initial surface preparation is essential. This is why it is better to spend more time to make the base ideal for subsequent pouring.
Preparation of the solution
Here it is enough to adhere to the requirements that are written on the packaging from the manufacturer. The instructions allow you to comply with all proportions and time frames for pouring. It is worth noting that the liquid solution, of course, will spread perfectly over the surface of the concrete screed, but at the same time all the qualities of strength and strength will be lost.
The instructions for self-leveling floors also indicate that the required amount of water is initially poured into the container,
only after this the purchased mixture is poured to level the concrete screed. Otherwise, a large number of lumps will appear, which will be almost impossible to get rid of. The kneading process is carried out without haste, carefully.
The solution after stirring has fluidity for 30-40 minutes. Then it starts to freeze. It will be problematic to carry out the work and you will have to prepare a new portion of the solution. If all this is done correctly, then there will be no questions about how to level the floor under the screed.
Pouring process
Leveling a cement floor does not take much time. In this case, the sequence of work must be followed without deviation. After preparing the solution, you can simply pour it onto the surface.
If necessary, it is leveled using a spatula. It would be a good idea to read advice from experts who will guide you on the right path.
When carrying out work, it is best to take help from assistants who will stir, pour and level the solution. This is how the process will take less time and everything can be completed on time before the mixture loses its properties.
After pouring, pay attention to the surface. There will also be a limited time for this. The resulting bubbles are removed with a spiked aeration roller. This can be done by an individual. In this case, it will be possible to level the cement floor screed as efficiently as possible. When the room is small in size, individual stages of work can be performed by one person. If it is necessary to level the screed with a self-leveling floor, dexterity will play a significant role. Instantness will allow you to get a perfectly smooth surface without defects.
As the solution dries, cracks may appear on the surface. This indicates that the temperature during mixing and pouring was not maintained. Tile adhesive, on which a mesh for puttying facades is applied, will help eliminate them. Each individual case has its own subtleties and nuances, which it would be useful to study before starting work.
Adviсe
Almost anyone can level the floor after screeding. At the same time, it would be a good idea to ask for advice from a specialist who will tell you what to pay attention to. After removing the old coating, traces of bitumen mastic may remain. It should not be present during the filling process. For this reason, it is covered with expanded clay sand with a coarse fraction.
When the floor has been leveled with cement, temperature conditions should be created for the surface. There should be no drafts in the room. It would be a good idea to cover it with film to ensure that the screed dries evenly.
If you follow the technology and study it thoroughly, then no one will have any questions about how to level an old floor screed. It is very important to prepare the base and then the filling will be at the highest level. For those who are thinking about how to level the floor, you should contact the sellers, who will advise the best option for self-leveling flooring for the room. There are a huge number of mixtures, and they are all created for certain conditions for the installation of self-leveling floors. In conclusion, we recommend watching a video on how to properly level a self-leveling floor and avoid common mistakes in preparing the mortar and pouring the screed.
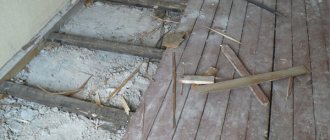
Nuances of partial dismantling
In a number of cases, there is no need to completely dismantle the old screed.
For example, if it is necessary to install a heated floor on a limited surface, or to reduce the overall level. Apply the following sequence of actions:
- A grinder or circular saw with a diamond wheel for stone work makes a large number of parallel cuts. It is more convenient to work with a saw because it has a mechanism for limiting the depth of cut, so they all come out the same.
- It is better to connect a construction vacuum cleaner to the saw to remove the resulting dust.
- Using a puncher with a spatula attachment, carefully chop off the cut strips.
- Remove the resulting waste with a dustpan and a hard plastic broom
- Vacuum the cleaned area of the floor.
- To level the surface, fill it with a solution like “Vetonit”
If it is necessary to remove a part of the screed that is very thick, you can use a construction router - a diamond-coated core drill. Holes are drilled across the entire area to be cleaned with a slight indentation, then the remaining partitions are broken using a hammer drill with a spatula attachment.
Dismantling an old screed is quite a labor-intensive and dusty undertaking. In order for it not to create problems, it must be agreed upon with neighbors and carefully planned. For complete dismantling, pneumatic jackhammers are used; for partial dismantling, you can use a circular saw and a hammer drill.
Is it possible to lay a screed on a screed, the technology of the installation process. Possible types of screed
Pouring a floor screed is a responsible undertaking, since heavy loads are placed on this structure. For the manufacture of screeds, a technology is used that varies depending on specific conditions. So, to answer the question of whether it is possible to lay a screed on a screed, let’s consider the requirements for obtaining a high-quality foundation.
Pouring mortar onto an old floor
Features of panel board removal
Panel parquet consists of square modules with a base made of wood or chipboard, on the front side of which small strips are glued. This type of parquet is somewhat easier to remove than piece parquet. As a rule, dismantling in this case begins from the wall opposite the window, from the last installed panel, which has an open groove. One module is pryed up with a crowbar and torn off from the base. The remaining shields are removed in the same way.
Panel parquet
You can also use a chisel or hammer drill to remove panel parquet. Dismantling the panel covering occurs quickly, even though previously this type of parquet was often laid on resin and held up very well.
What can panel parquet be like?
Table. How to remove panel parquet with your own hands.
| Steps, photo | Description of actions |
| Step 1 | Using a grinder, a cut is made in the parquet flooring between several adjacent panels. |
| Step 2 | The resulting debris is immediately collected with a vacuum cleaner - then there is less risk of getting very dirty. |
| Step 3 | With the help of a crowbar, the parquet board is raised - the crowbar is driven between it and the base. The shield is removed. |
| Step 4 | If the crowbar does not fit well into the gap between the shield and the base, you can use a hammer or hit it with your hand (depending on the required effort). |
| Step 5 | The required number of parquet panels are removed or the covering is completely dismantled, depending on what needs to be achieved - minor repairs to the floor or a complete replacement of the covering. |
| Step 6 | Each new section is sawed with a grinder. Further dismantling is carried out according to points 2-5. |
| Step 7 | Remains of parquet that are not removed immediately are cleaned off additionally. |
| Step 8 | The base, if it is installed on self-tapping screws, is easiest to remove - to do this, the fasteners are unscrewed and the base sheets are removed. |
| Step 9 | You can also, if you don’t mind the base, simply tear it off the joists using a crowbar. |
Base requirements
The filling technology requires compliance with the following requirements:
- Strength and integrity of the rough coating. Before installation, a number of surface preparation activities are carried out:
- small cracks are sealed with cement mortar;
- the entire surface is carefully tapped, any voids found are cleared and sealed with cement mortar;
- the prepared base is covered with a layer of primer, which will strengthen the old screed and prevent the appearance of fungus or mold on the surface.
- Compliance with the standards for the thickness and weight of the floor, since not all floors can withstand increased load. This is especially true for multi-storey buildings. And an increase in the thickness of the base will affect the height of the ceilings, which will affect the appearance of the entire room.
Important! Remember that the use of metal reinforced mesh makes the floor structure heavier.
Is crack repair always necessary?
Even experienced craftsmen cannot always guarantee that the cement screed will retain its solidity and integrity, since, despite its hardness and strength, it is a fragile material that is completely unable to adapt to environmental changes and withstand excessive loads.
In addition, having an impressive weight, the poured concrete slab under the final coating will not go anywhere, even if it cracks. It is not necessary to repair it if:
- the cracks are small and rare, not prone to expansion;
- when tapping with a mallet or walking along the edges of cracks, dust does not rise from them;
- the base does not vibrate under the weight of a walking person;
- Laminate, linoleum or other covering will be laid on the screed without rigid adhesion to it.
But in the case of finishing the floor with ceramic tiles, the diverging edges of the cracks can transfer stress to the tile adhesive and to the tile itself, hopelessly ruining the expensive coating.
A weak screed is the reason for cracking of tiles Source agromat.ua
Types of screeds
After considering these requirements, it becomes clear that in most cases it is undesirable to lay a screed on an old foundation due to the increase in weight of the structure. But since screed comes in different types, installation can still be done.
Types of screeds
- Dry - involves the use of dry, crumbly insulation (expanded clay), with which the surface is leveled. Special sheets are laid on this material, making the floor hard and even.
Advantages of the dry method:
- Light weight of the structure due to the use of lightweight porous insulation.
- There are no “wet” stages, which allows you to level the floor at any time of the year.
- Quick installation. Once leveling is complete, there is no need to wait a month for the base to dry.
- A layer of insulation improves the heat and sound insulation of the room.
- Fear of moisture. Porous materials absorb moisture, so using this method of floor leveling in wet rooms is strictly prohibited. This is fraught with deformation of the base and finishing coating.
- Wet - is a cement-sand mortar of liquid consistency. It is poured onto pre-prepared cards.
The advantages of this type include:
- Small base thickness.
- Fire resistance.
- Durability and resistance to heavy loads.
- Use under any type of finishing coating.
- Moisture resistance, allowing screeding in rooms with high humidity levels.
- Heavy weight.
- Long drying time for the base.
- Labor intensive installation.
- Precise adherence to proportions when mixing the solution.
Floor leveling using cement-sand mortar is carried out in different ways:
- directly onto the rough base;
- on a layer of waterproofing laid on the subfloor;
- on a cake with hydro- and thermal insulation.
The choice of one method or another depends on the thickness of the previous base and the ability to raise the floor a few more centimeters.
Types of floor screed
Technology and cost of concrete floor dismantling
The most common type of base for flooring is a layer of cement-sand mixture, which is located on the ceiling. If defects appear in the screed or its reconstruction is required, the concrete floor must be dismantled. Pouring the next layer of mortar is not always effective, since the solidity of the structure is lost and the load on the floors increases (more details here).
- Demolition technology
- How much does dismantling cost?
In what cases is the screed dismantled?
The concrete layer is multifunctional: it fills uneven floors, levels the surface, provides strength, thermal and waterproofing of the floor, and durability of the top coating. The quality of the screed depends on the correct percentage of the components of the concrete mixture, the presence of a lower layer of crushed stone or expanded clay, and reinforcing mesh (more about this here). If one of these conditions is not met, the concrete is destroyed.
The screed is removed under the following circumstances:
- the performance characteristics of the floor have deteriorated - signs of breakage (cracks and delamination) have appeared, unevenness has arisen, cement is seeping through the seams of the finishing coating;
- it was decided to replace the floor tiles because voids appeared underneath them;
- installation of reinforced screed required
- repair or installation of pipes and cables in a concrete layer is carried out;
- it is necessary to change the floor level;
- The house is undergoing a major renovation.
Dismantling methods
- Manual. It is advisable for small amounts of work, as it requires great physical effort. The work is carried out using a pick, crowbar, sledgehammer, hammer, chisel.
- Mechanized. It is carried out by construction companies using mechanical and electrical tools - in an apartment, a hammer drill with a “shovel” attachment is usually sufficient. In difficult cases and when the concrete layer is thick, electric platforms, diamond cutting equipment, a grinder, and high-power pneumatic concrete breakers are used.
- Combined. It is a manual method with the connection of equipment. It is practiced for the careful and delicate removal of concrete in multi-storey buildings, so as not to cause inconvenience to the residents of neighboring apartments. Manual work is carried out on problem areas.
Installation technology
Laying a screed on a screed, like any construction process, consists of stages; let’s look at them in more detail.
Preparation
- As stated earlier, before pouring the solution, perform a thorough inspection of the old base and, if necessary, repair it.
- To strengthen and improve adhesion, the base is primed.
- Next, lay a layer of waterproofing.
Important! If the base is already covered with a layer of waterproofing, it is not necessary to lay it again. The same applies to insulation.
- A damper tape is glued around the perimeter of the room to compensate for the expansion of the base as it dries.
- A reinforcing mesh is laid to strengthen the concrete structure. Depending on the thickness of the planned floor, a metal or plastic mesh is laid.
Stages of creating a durable floor
Pouring the solution
- Installation of the guides is carried out using piles of concrete mortar and metal slats, which are leveled using a level.
- When using metal slats, it is not necessary to pull them out after finishing work.
- Filling the solution is carried out in stages, with gradual filling of the marked areas.
- Alignment is done using a rule.
- It takes at least 30 days for the solution layer to dry.
To summarize, we note that it is quite possible to pour screed onto a screed; the main thing is to choose the right type, installation method and prepare the subfloor properly. But if the old foundation is in poor condition, it is better to dismantle it.
Sources:
https://www.diy.ru/post/4113/ https://sdelalremont.ru/process-vyravnivaniya-staroj-styazhki-pola.html https://laminatepol.ru/20897-mozhno-li-klast-styazhku -na-styazhku.html
Dismantling the concrete covering
There are many ways to dismantle a concrete coating, the most popular and most effective are: impact, concrete removal with slabs and cutting. We will tell you a little further about the features of the impact method, but now you will find out by what principle all concrete dismantling occurs.
The process can be divided into the following stages:
- Beginning - at this stage it is necessary to make an initial hole, from which further dismantling will take place. To do this, you can use any of the possible methods.
- After the beginning has been made, the entire screed is divided into individual elements by impact or by cutting.
- Finally, large parts are torn off from the supporting base and taken out of the room.
If the old screed is laid on a layer of crushed stone, then it must be removed together with the layer of crushed stone, this will make it much easier for you to tear it off from the base. Most often, broken concrete is collected with a shovel, and placing a shovel through the rubble will be very difficult. It is much easier to do this by sliding along the base.
Features of various methods
This option involves an impact force that is applied to the concrete surface, due to which the concrete begins to crack and break into small pieces, which can then be easily collected and thrown away or used for other purposes. Dismantling a self-leveling floor or concrete with a topping layer is best done using this method, since it is best suited for high-strength coatings and helps to easily clean more areas.
The power of electric jackhammers must be correctly calculated and selected depending on the thickness of the layer to be removed.
Next, we will tell you how to do the work correctly using:
- Impact devices: hammer drill and jackhammer.
- Cut concrete using a diamond blade.
- Dismantling the screed - drilling with a diamond drill.
Working with impact devices
We start from the door or any corner convenient for you. First, punch a hole all the way to the base and clean it completely. After this, you begin to chip five to ten centimeters from the edge, gradually expanding the hole and moving across the entire area. It is better to carry out the work in sections of three to five square meters. They crushed the intended area, cleared it and continued work.
Dismantling, during which the mortar is removed from concrete and cement, regardless of the method in which it is done, consists of breaking the floor into pieces.
A jackhammer is best suited for such purposes, since it is designed for this type of work. Many craftsmen use a simple hammer drill, equipped with a special pick or chisel. In this case, the drilling mode must be turned off and only the impact function must be left.
Cutting concrete
Dismantling concrete with a simple circle on metal is impossible. You will need to purchase a special diamond-coated wheel that is designed for concrete and stone.
When working with a circular saw, determine the level to the base so as not to touch it when cutting. This is about 10 cm, on the first floors it can be up to 25 cm.
The entire area is cut into small sections of half a square meter, then they are carefully undermined and removed entirely. In this case, it is necessary to work in safety glasses and a respirator, as there will be an incredible amount of fragments and dust, it is better to open all the windows and create a strong draft.
Working with a drill
If your hammer drill cannot dismantle a concrete floor, you can make the task easier. To do this, take a diamond drill and make a large number of holes in the concrete. After that, we use a lance to beat off the areas that are drilled on all sides. Try to maintain a right angle when drilling, as the drill can easily break.
If the work is progressing too slowly due to the constant overheating of the tool, try to find or purchase another hammer drill. Then, in the intervals when one cools down, you can safely use the second. Also, in order to crush the screed continuously and not be distracted by cleaning, you can find an assistant who will clean the area behind you.
- How to make a concrete floor screed with your own hands
- How and with what to level the floor in an apartment
- How to choose the right self-leveling floor mixture
- Stages of polishing and grinding a concrete floor
- We competently fill the water heated floor