The issue of floor leveling is acute during any renovation. And it’s good if previously a cement screed was made under the base and it was immediately of high quality. Then you can avoid the need for additional floor leveling. But if there is no such screed, or there is some other reason that requires leveling the floors, you still have to solve this issue somehow. And floor leveling slabs, which come in several types, sometimes become the ideal solution to the problem. Let's see what they are and how they are installed.
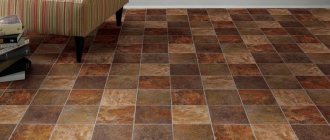
Floor leveling slabs
OSB boards for flooring
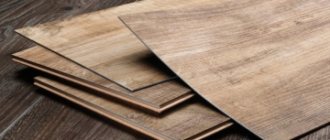
One of the most popular types of slabs used to level the floor is OSB board . The abbreviation can be deciphered as “slab made from oriented wood waste”. That is, the chips used to create them are located in a certain direction during production. The composition contains about 90% of wood chips, connected to each other using special substances (for example, melamine-formaldehyde or phenol-formaldehyde resins), as well as under the influence of high pressure and temperatures. The thickness and length of the chips are approximately 0.7 and 150 mm, respectively.
OSB board
The slabs used for the floor have several layers of wood chips and are quite thick, and therefore durable, capable of withstanding quite large loads. Moreover, in each layer the chips have a different orientation, which makes it possible to achieve high strength and durability.
On a note! OSB boards are quite elastic, and this is one of their main advantages. They can even be bent to some extent, and they will not break, unlike the same plywood. Also, the advantages of the material include its relatively low weight, good level of heat and sound insulation.
What are DSP and OSB? What is the difference?
The slabs are not at all afraid of many chemicals, which increases their stability during operation. They are not afraid of attacks from parasites or bacteria.
The disadvantages of this material include the content of a certain amount of phenol. However, E1 cass boards, usually used in apartments, contain it in a minimal volume, which means they are not dangerous to humans. Typically, such material has a certain quality certificate confirming its safety. By the way, there are certain categories of boards for the production of which methyl diphenyl diisocyanate is used, and such material is considered the most environmentally friendly, since it does not emit any harmful substances into the atmosphere.
Characteristics table
The disadvantages include low moisture resistance - OSB boards are afraid of large amounts of water. But in general it has sufficient moisture resistance, although this is only relevant for certain types. After drying, the slab is able to return to its original geometric characteristics.
Oriented Strand Board
On a note! If we compare OSB and chipboard, the first material is 2.45 times stronger than the second. It is not inferior in strength to dense and high-quality plywood.
In general, OSB boards are quite easy and convenient to work with. It can be drilled, sawed, and used to fix it with screws and nails, etc. Moreover, connections using fasteners on such plates are very strong. Also, after installation, the slabs can be coated with paint, varnish and other materials used for surface finishing.
Main characteristics of OSB boards
Prices for OSB boards (OSB)
pox plate
Concrete production
You can mix the polystyrene concrete solution yourself, because... the filler is low in weight. However, to facilitate the process, you can use a concrete mixer and a construction whisk.
It is recommended to purchase a special dry mixture that includes polymer additives, or make it yourself.
To prepare the working solution you will need:
- polystyrene granules - 1 m³;
- cement - 290 kg;
- powder SDO - 0.7 l of concentrate;
- plasticizers;
- water - 120 l.
These components are mixed sequentially until a thick solution is obtained, in which polystyrene foam granules will be evenly distributed.
Types and applications
Such slabs are used not only for leveling floors, but also in many other construction areas. So, we can say that the scope of application of the material largely depends on its type. The main categories are shown in the table below.
They are used in the construction of frame houses
Table. Types of OSB.
| Type | Characteristics |
| OSB 1 | This slab has modest density characteristics, but it is less susceptible to water than other types. It is usually used for interior finishing of premises, and is also suitable for leveling floors. |
| OSB 2 | This type is not characterized by increased moisture resistance, but has high strength. So usually such a slab is suitable for arranging floors or partitions indoors. |
| OSB 3 | This type combines a good level of moisture resistance and strength. The plate is suitable for both internal and external types of work. Not a bad option. |
| OSB 4 | This is a slab that is most often used for the construction of load-bearing walls, roofs, and a number of similar structures that must be powerful and durable. All her main physical characteristics are at the highest level. |
The thickness of the slabs usually varies between 8-26 mm. Typically, it is the thickness that indicates the main purpose of the material. For finishing options where no special load is expected on the surface, thin slabs are suitable, but where there will be a large load, it is worth laying thicker slabs. For a floor with a concrete screed, you can take material from 10 mm.
The thickness of the slabs can also vary
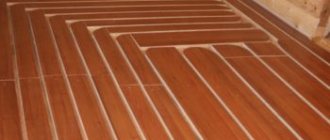
On a note! Sometimes OSB boards can be used as a finishing coating, although due to their external unsightliness they usually act as a rough material on which the finishing coating is then laid. Moreover, linoleum, tiles, laminate, and other other coatings can be laid on OSB.
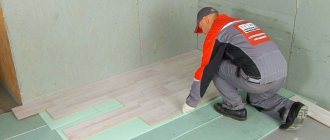
You can level floors using OSB not only along the screed, but also along the joists, and make a dry screed. In this case, the slabs need to be thicker. Sometimes sheets are mounted in several layers.
Scope of use of OSB material
Arrangement of dry screed
A slightly uneven base can be leveled using cement slabs fixed with special glue. But for a surface where the height difference exceeds 6 centimeters, it is better to use a dry screed. At the same time, the use of DSP instead of OSB will reduce financial costs.
The cement-bonded particle boards are fastened to guide beams, between which granular material is placed. Metal profiles, which are used when installing drywall, or wood blocks can be used as guides. Since self-tapping screws will be required to fix cement sheets, it is better to make guides from wooden materials of the required cross-section.
Depending on the degree of deformation of the base, the optimal height of a dry screed is considered to be 7-10 centimeters. Its main advantage is its light weight and significant heat and sound insulation parameters. The combination of CBPB and filler in the form of granules can improve the performance properties. This method of leveling the surface should be used in buildings where there are old floors in a dilapidated state.
Installation features
Working with OSB boards is convenient and simple, but there are certain features of the work that must be observed. So, firstly, it is important in any case to use a level and lay the slabs as evenly as possible, especially if you plan to install a laminated coating or tiles. However, almost all materials used for finishing are demanding in terms of the evenness of the base.
Do not forget that the material contains wood, which is a “living” matter, which means that the slabs may slightly change their width parameters during the process. Between them during installation you need to leave a small gap of 1-2 mm. Otherwise, they may become deformed later. But at the same time, if carpet or linoleum is laid on top, the width of the gaps should be minimal. And it is better to use sheets that are as thin as possible. Sometimes the gaps are sealed with sealant after installation is complete.
OSB floor painting
Advice! If the OSB will not be covered on top with another material, it is important to varnish it, otherwise it will quickly lose its appearance. And under it there must be waterproofing coatings.
As for the slabs, when laying ceramics on top of them, it is important to fix the slabs themselves well in order to avoid deformation of the ceramic coating in the future. The step between them should also be small.
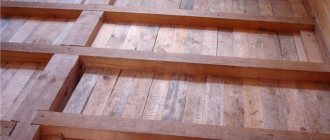
Laying OSB on a wooden floor
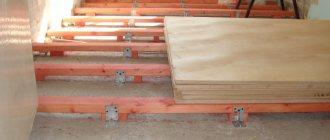
OSB can be installed on the floor using either joists or screeds. In the first case, the slabs are fixed on level logs. Usually the material is installed in two layers to make the base thicker. Thermal insulation can be laid under the slabs.
Also, the slabs are placed either on a ready-made cement screed, or on an old wooden base, if the goal is not to make a new floor, but only to level it. The main thing is that the base itself is more or less even. When installing on a wooden base, you need to fasten the plates with a pitch of approximately 30 cm between the screws.
Installation of OSB boards on a wooden floor
On a note! OSB boards can also be used in conjunction with underfloor heating technology. However, they cannot be heated too much, as this may start the process of releasing harmful substances into the air.
Kneading process
Due to the characteristics of polystyrene granules, the procedure must follow the sequence of laying the components. So, they begin work by adding cement and water in a ratio of 1:2 to obtain a liquid solution. Then a plasticizer is added (fumed wood resin such as SDO or detergent). Approximately 20 ml is poured into each bucket of water. Sometimes the finished mixture is immediately poured into the primary solution. This approach allows you to mix it evenly.
Next steps:
- Pour in polystyrene granules (measure the volume in advance).
- Stir until their surface is evenly wetted.
- Pour in the remaining cement, pour in the remaining water.
- Mix the solution until completely ready.
If the recipe requires the addition of sand, a means of accelerating setting, they are added simultaneously with the second batch of cement. The higher the grade of polystyrene concrete, the longer the mixing process will take (due to the hardness and thickness of the mixture). When mixing “manually” with a mixer, it is important to achieve uniformity of the mass throughout the entire volume of the container.
When using a mobile station, it is enough to follow the boot sequence. After the cycle is completed, the polystyrene concrete will be ready to be pumped to the screed site. Immediately after the tank is empty, it is ready to load the next batch of material. If you buy a ready-made mixture, it’s easy to put the production on stream (as long as there are enough workers).
Installation of OSB on a wooden base
Let's look at a specific example of how OSB boards are fixed to a wooden base.
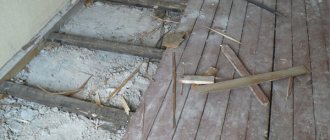
Step 1: The first step is to inspect your wood floors for integrity and quality. The floorboards should not be loose or squeak too much, the floor should be more or less even. If necessary, it is recommended to first repair the wooden base.
First, the floor is inspected
Step 2. Next, you need to lay out the slabs on the floor as they will lie, and then cut out the material of the required size for those areas where solid slabs do not fit. You can cut OSB with a regular electric jigsaw.
The slabs are laid out on the floor
Step 3. OSB boards need to be attached one piece at a time. The first one needs to be laid against the far wall so that there is a gap of a couple of millimeters between its edges and the wall.
Fastening OSB boards
Step 4. You can fix the plate with wood screws using a screwdriver. The pitch between screws is 30 cm.
The plates are fastened with self-tapping screws
Fixing the slabs
Step 5. The slabs need to be laid and secured sequentially one after another with a small gap between them of 1-2 mm. You should not lay them so that the corners of the slabs of the upper and lower rows meet at one point.
There must be a gap between the plates
Step 6. In this way, you need to lay and secure the slabs over the entire surface of the floor. Next, you can lay the finishing coating.
In a similar way, the slabs are attached throughout the floor.
Video - Installation of OSB on logs
Video - Installation of OSB on a concrete floor
DSP boards for flooring
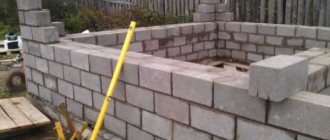
Another type of slabs that are often used for finishing and leveling floors are CPS slabs, that is, cement-bonded particle boards. The composition, as the name implies, contains shavings and cement, pressed under high pressure. Both materials are natural and do not pose a danger to humans, which means they can be used in all residential areas. Of course, they also contain other additives, but their quantity is insignificant and cannot affect the safety of the material. These boards are highly environmentally friendly, durable and relatively inexpensive. This material is new and has recently been increasingly used to create dry screeds.
DSP boards
The main properties of DSP are:
- high density, no worse than OSB, and the material is much stronger than gypsum fiber;
- resistance to temperature changes, and in particular to low temperatures. The slabs can also be placed where in winter the temperature is close to the level outside;
- The slab does not require additional preparation before installation. It can be used immediately and a finishing coat can be applied to it immediately after installation;
- this material does not burn well, which means it reduces the degree of fire hazard;
- Regarding resistance to a number of aggressive environments, DSP is a very durable and good material compared to its analogues;
- DSP does not rot over time, since it is generally an alkaline medium;
- it is not afraid of water, but you should still avoid laying CBPB in a room where the humidity level is extremely high;
- it is a good soundproofing material.
The use of DSP for flooring is very important in modern construction
On a note! DSP is not without its drawbacks. This is its large weight compared to the same OSB, as well as the release of a large amount of dust during sawing. The last factor is related to the presence of cement in the material.
Flaws
Despite the fact that polystyrene concrete screed has many positive qualities, it also has some disadvantages. This coating is not recommended for installation in rooms with high vibration load.
The porous structure can quickly crack under the influence of vibration. Thus, this material is not suitable for arranging floors in production workshops and industrial premises.
In addition, polystyrene concrete floor screed has low strength. Any mechanical impact can cause a split. Without a floor covering, the surface wears out quickly. It is necessary to strengthen it with special compounds.
This material has a high degree of shrinkage, so when pouring floors in rooms with a large area, pressing with a vibrating machine is required. When using polystyrene concrete, the surface of the screed is not smooth, which complicates the installation of many types of floor coverings. To level and strengthen the surface, pouring a strengthening mixture may be necessary.
Application and material selection
DSP boards are very often used in the repair and finishing of floors, but they do not act as a finishing coating, but serve only as a basis for other materials. They are ideal for laying ceramics, carpet, linoleum and other materials that require a flat base. Moreover, if we compare the cost and labor costs of installing a conventional screed and laying CBPB, then the latter win. With their help, you can do an excellent job of leveling the rough foundation with a minimum of effort.
Laying CBPB boards on the floor
DSP slabs can be laid on top of a concrete base, and on logs or wood flooring. In all cases, the material will serve well for many years. You can also make dry floor screed from DSP. They are also quite compatible with the base heating system, unlike the same OSB, which can be used only with certain restrictions.
On a note! DSPs are also suitable for creating partitions in rooms along with plasterboard sheets.
As for the choice of sheets, for the floor it is better to take those that have a thickness of 10-40 mm, no less and no more. The initial curvature of the floor can play a big role here. Good CBPBs should have the following physical characteristics:
- density – 1300 kg/m2;
- humidity – 6-12%;
- roughness – no more than 80 microns;
- tensile strength – 0.4 MPa;
- liquid absorption – 16%;
- swelling in water during the day – no more than 2%.
Options for installing DSP floors
With your own hands
If desired, you can make polystyrene foam concrete at home using the above recipe. A concrete mixer is used here to mix the raw materials. The material is produced according to the following algorithm:
- pour polystyrene balls into a concrete mixer;
- fill in 10% of the required volume of water;
- mix the ingredients for a minute;
- add saponified wood resin to the water (10% of the total volume of liquid);
- add the required amount of cement and the remaining water;
- stir the solution for 5 minutes.
We use ready-made polystyrene foam concrete to make screeds or pour it into collapsible molds to produce blocks. In the absence of a vibrator, a plasticizer can be added to the raw material mixture, which will improve the quality of the finished material. It is prohibited to use shampoo instead of the specified product - this is a violation of technology.
Installation of DSP on a wooden floor
Let's look at how to install DSP on a wooden base.
Step 1. The first step is to identify the location of the joists under the wooden floor, and also make sure that all the floorboards are firmly in place and the floor does not need repairs. In this case, you can remove some of the parquet boards and look at the logs underneath them. It is also important to get rid of creaking floors, if any.
First, preparatory work is carried out
Step 2. Next you can start laying the DSP. In places where there are no clear corners in the room, the DSP needs to be cut to the required parameters. This can be done using a regular hacksaw.
The slabs can be laid on the floor
Slab laying process
Step 3. The first sheet needs to be laid next to the wall in the far corner of the room. It is important to lay the remaining sheets staggered so that they do not overlap each other in the corners of adjacent rows.
The first sheet is laid near the wall
Step 4. Next you need to secure the sheets to a wooden surface. The sheets need to be stitched in the same way as drywall - around the perimeter and in the center, using wood screws. You need to hit the joists with self-tapping screws so that the sheets hold firmly.
Wood screws are used for fixation
Step 5. In this way, you need to cover all the floors with DSP slabs, if necessary, cutting the latter to the required parameters.
The floor is covered with DSP boards
Step 6. Since in this case it is impossible to recess the screws into the surface of the DSP (this is a dense material), it is recommended that after installing the slabs, fill them with a thin layer of self-leveling floor. It is recommended to cover the walls with polyethylene first so as not to stain them.
At the end the self-leveling floor is poured
Self-leveling screed
Video - General information about DSP
GVL sheets
There is another option for slabs that can be used to level floors. These are gypsum fiber boards, that is, sheets made of gypsum fiber. They include, as you might guess, ordinary gypsum, which is mixed in production with cellulose fiber necessary for sheet reinforcement, as well as a number of special substances that make it possible to achieve strength and high quality products. This is a material quite similar in some characteristics to drywall.
On a note! It is easy to distinguish gypsum board from plasterboard - the former does not have a cardboard shell, unlike the latter.
GVL sheets for floors
GVL sheets have the following advantages when compared with analogues:
- suitable for any type of work related to finishing floors, walls, partitions, ceilings;
- are able to regulate the level of humidity in the room and dry the room;
- do not release heat from the room;
- easy to install, do not crack during processing;
- do not burn and will not cause a fire in the house, meet fire safety requirements;
- lightweight, which greatly simplifies their installation;
- they can be laid on both concrete and wooden bases, you can make a dry screed;
- are not afraid of exposure to low temperatures.
Comparison of GVL with analogues
Types and features of use
The scope of application of the sheets largely depends on what type they were purchased. But almost all of them are suitable for flooring.
GVL sheets can be laid on top of a heated floor system
Table. Types of GVL.
| Slab type | Characteristic |
| Standard | This is a fairly durable and high-quality material that is not afraid of fire. Often used for finishing absolutely any purpose premises. The material has the following dimensions - 2.5 x 1.2 m or 1.2 x 1.2 m and a thickness in the range of 10-12.5 mm. |
| Moisture resistant | This option is characterized by increased resistance to water, as it is treated with special substances. It is correct to call it by the abbreviation GVLV. It is usually recommended for use in places where the humidity level is higher than normal - kitchens, bathrooms, etc. You can also use it to equip an attic or basement. The dimensions are the same as a standard regular sheet. |
| Floor element | This option is produced by the well-known. In another way, gypsum fiber sheets are called superfloor. One such sheet consists of two ordinary gypsum fiber board sheets with dimensions of 1200x600x10 mm firmly glued together with a shift relative to each other. The sheets also have a rebated edge 5 cm wide. The thickness of one sheet of superfloor is 2 cm. Such sheets make it possible to easily make a rough prefabricated Knauf floor base. |
Leveling the floor with GVL sheets
Most often, such slabs are used for the production of dry screeds in houses. This allows you to avoid fiddling with a wet screed and not doing a lot of dirty work, and also provide a very light and even base without wasting extra time - you won’t have to wait for the screed to dry. Immediately after installing the dry GVL screed, you can begin finishing the floor.
As for installation, GVL can be laid on any surface. It is enough to follow the general rules of work. So, for example, if insulation was installed, then the GVL needs to be reinforced with an additional layer of expanded polystyrene or other material. It is also possible to lay GVL when planning a heated floor. Just don’t use thick sheets - they won’t let the required amount of heat into the room. The optimal thickness is 10 mm.
Adapted dry screed Knauf
There should be no gaps of more than 2 mm between the sheets during installation. And if linoleum or carpet is laid over the gypsum fiber board, then all cracks must be sealed with sealant. The edges of the sheets, if any, must be cut off from those sides that will adhere to the walls or ceilings.
Installation of GVL floor - dry screed
Step 1. First you need to clean the surface of the ceilings or subfloor from debris and remove all unnecessary things from the room.
Cleaning the floor from debris
Step 2. Next, you need to provide a waterproofing layer by laying plastic film on the floor. It needs to be laid with a slight approach to the walls. The individual canvases are connected to each other with tape.
The film must extend onto the walls
Step 3. Then you need to pour a layer of expanded clay onto the film, which is leveled.
Expanded clay backfill
Leveling the expanded clay layer
Step 4. Next, you must install the beacons according to the level. They can be made from aluminum profile. Using them, using the rule, you need to finally level the expanded clay layer.
Aluminum profile cutting
Expanded clay is leveled along the beacons
Step 5. Now you can start laying the floor elements. The edges of the sheets that will be located against the wall need to be cut off with a jigsaw. The first sheet should be laid on expanded clay in the far corner of the room.
Laying GVL
The edge of the sheet is cut off
Step 6. If necessary, GVL sheets can be trimmed with a jigsaw to achieve the desired size. It is also worth making cutouts for heating pipes and other communications.
Cutting sheets with a jigsaw
Pipe cutout
Step 7. Now you can place the next sheet. The edge of the previously laid sheet is first lubricated with special glue. Next, you need to lay the second sheet so that the edges of it and the adjacent sheet meet each other. It is worth pressing the joint a little with your hand.
Application of special glue
Joining sheets
Step 8. Additionally, the joints of adjacent sheets need to be twisted using wood screws.
Using wood screws
Step 9. Thus, you need to cover all the expanded clay with gypsum fiber sheets. The gaps between adjacent sheets will be minimal.
Expanded clay is covered with GVL sheets
Step 10. The gap between the wall and the outer sheets of gypsum fiber board can be sealed with polyurethane foam. The work is completed.
The gap is filled with polyurethane foam
Composition of polystyrene concrete
Polystyrene concrete is a specific material that has a cellular structure and is relatively light in weight.
This is a multi-component composition, which includes:
- polystyrene granules 2-5 mm;
- Portland cement M400;
- foaming additives;
- quartz sand;
- plasticizers.
The proportions of the components of the composition depend on the conditions under which the coating will be used in the future. To increase the strength of the solution, the proportion of cement in the ratio of components increases. Approximately 60-80% of the composition should consist of polystyrene granules.
At least 10% should be represented by a special plasticizer, which will increase the plasticity of the solution and reduce the risk of polystyrene granules floating.
The solution must be thoroughly mixed so that the components included in its composition are evenly distributed.