If you notice that a little water has appeared around the base of the toilet, this is not yet a cause for alarm. But if water appears regularly after flushing and even forms small puddles, then your toilet is leaking. Even if the toilet is high-quality and expensive, no one is immune from such a nuisance. A leak at the base of the toilet is not serious and difficult to fix. If you don't know a good plumber or are afraid that the plumber will charge too much for his work, try fixing the problem yourself. This does not require expensive equipment or special skills.
External damage
Violation of tightness. If the toilet is installed on cement mortar, then in the place where it is connected to the sewer pipe, the cement crumbles, cracks appear and it begins to leak. Sometimes this occurs because the toilet was used shortly after it was installed. It is not recommended to use the toilet for 24 hours after installation. Clean the joint area from old cement. Do this with a screwdriver, chisel or knife. Prepare a new solution by mixing cement and silicone-based sealant. Do not add sand to cement. Leave for a day until completely dry.
Frequent problems due to which water constantly leaks from the drain tank
Faults that cause water to leak:
- Water flows non-stop from the water supply pipe.
- Water flows in a small stream into the drain bowl.
- Draining from the tank occurs only after much torment with a lever or button.
- The lever or button does not respond at all.
- Leaks and puddles form near the toilet.
- The tank is filling with an unusual loud noise.
How to change the cartridge in the mixer?
Which bathtub is better - acrylic or cast iron?How to clear a clog in the sink?
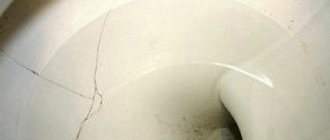
Crack in the base of the toilet
It often happens when a large amount of boiling water is suddenly poured into the toilet. Earthenware cannot withstand sudden changes in temperature and bursts. Two holes are drilled at the ends of the crack. The crack and holes are cleaned with sandpaper to remove irregularities and burrs. Apply epoxy resin to the leak site. Do not use the toilet until the epoxy resin is completely dry. If the epoxy resin does not help, then you need to replace the toilet with a new one.
Preventative work
If you don't want your toilet to break down frequently, you need to constantly take certain preventive measures.
The toilet tank and bowl should be cleaned once every six months.
Constantly review the condition of fittings and related fittings.
Any toilet does not “like” mechanical damage; it does not tolerate temperature fluctuations.
Timely prevention will extend the service life of the entire system.
When a leak appears, the simplest breakdowns are corrected first and only then begin to solve more serious problems.
You can fix a cistern leak with your own hands. The design of the tank is so simple that it does not require any special tools. Having completed such repairs yourself, you will definitely get great pleasure.
The cuff or corrugation is worn out
The rubber gasket became less elastic over time and cracked. To fix the problem, you need to remove the toilet from the base. Remove the old cuff. Install a new cuff on the sealant. If it is not possible to buy a new gasket, then the old gasket is bent upward around the circumference and sealant is thickly applied into the resulting space. Most problems can be solved with sealant, glue or a new gasket. In the most severe cases, you need to buy a new toilet and call a specialist to install it.
Why does a leak occur?
The tank can leak for various reasons. There is only one solution to fix it. Each tank design has its own characteristics. Therefore, the approach to solving such a problem will be individual. However, the most common is the “classical” design. Therefore, we will consider the problem of leakage, taking this design as a basis. We will give 7 solutions to the question of how to fix a leak in the toilet and why the toilet might leak?
First reason: Overflow
Perhaps the most popular and obvious reason was the banal overflow of the tank. When the toilet tank leaks water into the toilet. Excess water simply goes into the overflow hole. The main reasons for the appearance of such an overflow may be:
- The rubber gasket has lost its elasticity. Long-term use of the tank led to loose shutoff of the water flow. The gasket began to deform and leak liquid;
- The gasket does not press well and does not tightly close the outlet hole located near the drain valve, thereby creating a leak. This gasket has retained its elasticity and there are no signs of deformation. Water begins to flow due to poor pressure against the wall of the toilet;
- The valve pin that holds the float may have worn out. This occurs during long-term use and the appearance of corrosion on the body of the stud;
- A crack has formed in the valve body itself. Water begins to flow through it.
Note! When a brass valve is installed in the tank, there simply cannot be any cracks. They occur only on plastic products. Brass parts are highly reliable.
How to deal with such a leak
To quickly fix the problem when water leaks from the tank into the toilet, you need to find out the true cause of the tank leak. To do this you need to do a little testing.
Remove the toilet lid. Raise the float up with your hand. One centimeter is enough for the flow to stop. Consequently, the float arm is not bent quite correctly. It simply cannot shut off the water; it flows freely through the drain hole.
To correct and eliminate a leak, you need to slightly bend the lever so that it begins to shut off the water as soon as it reaches a certain point.
If the leak does not stop after lifting the lever, you need to carefully inspect the valve. The special fixing pin must be in place. There should be no damage to it. It should stop the float lever while inside the valve. In addition, you need to check the condition of the hole in which the pin is located. It may have been deformed.
A stud that has become unusable can be replaced with copper wire of a large cross-section.
If the hole is deformed, a new valve must be installed.
It is possible that the leak appears due to the gasket. If, after pressing it against the valve, water stops flowing out of the drain hole, you need to adjust its pressure. If it cannot be adjusted, a new gasket must be installed.
We examined the main reasons and methods for solving the problem of tank leakage using the classical scheme. It has been used for over 40 years. However, every year new tank designs appear with a certain operating principle. Try to further study their design.
Reason two: Bolts
Quite often, leaking water is associated with the bolts that connect the tank and toilet. Over the years, metal bolts become covered with rust, plastic bolts simply burst, which is why the toilet tank leaks.
How to solve this problem
First you need to thoroughly inspect all the fittings. It may be that only one bolt needs to be replaced. However, in order to avoid additional runs to the store, it is better to immediately purchase a new set of spare parts for the toilet.
To accurately determine the cause of the leak, you will have to disassemble the tank. Sometimes it is simply not clear which part has failed and which requires immediate replacement.
How is the replacement performed?
To fix a toilet cistern leak you need to:
- Before starting disassembly, you need to turn off the water supply;
- Remove all water from the tank;
- Unscrew the flexible line through which water is supplied;
- Unscrew all bolts. If the body of the bolts is covered with a large layer of rust, they need to be cut off with a hacksaw. Buying new bolts is much cheaper than installing a new toilet. After all, the old one can be broken by unscrewing rusted bolts;
- The toilet tank moves back;
- The shelf lying on the cuff is removed;
- The remaining water is drained;
- All detected rust is removed.
For assembly, all steps are performed in reverse order. New bolts are installed, rubber gaskets are changed.
When tightening the bolts, the slightest distortion is not allowed. Tightening should be done with little effort. If you put too much pressure on the bolt, you can easily crush the earthenware.
Third reason: Pear
The rubber bulb has failed and the toilet constantly leaks after flushing. With prolonged use, rubber becomes inelastic. It becomes rough and cannot take the desired shape. As a result, water constantly flows in the toilet.
Solution
How to fix a leaking toilet? Repairing a pear that has lost its shape is practically useless. You can spend a lot of time, and the result will be zero. It is much easier to buy a new pear in the store.
When purchasing, you need to choose the softest one from several products. It can be used for a long period of time until it becomes hard.
The pear is fastened with a thread. To remove it, you need to turn the bulb clockwise. To install, the bulb is rotated in the opposite direction. While there is no new pear, you can use the weight hanging on the rod. He will put pressure on the bag and press it to the saddle. Any heavy nut can become such a load.
Fourth reason: Skew
A malfunction of the tank may be due to a skew or large displacement of the lever on which the float is held. There are many reasons for the formation of misalignment. For example, a hole through which water begins to enter the float. The lever may have moved slightly to the side due to prolonged use. Another reason when the toilet tank is leaking can be low-quality plumbing parts purchased at the store.
How to solve this problem
If you purchased a bad float in a store, you need to change it to a more reliable and high-quality one. If a small hole forms in the float, it can be easily sealed with ordinary polyethylene. You can also use a lighter to heat a piece of plastic and close the hole.
But such repairs are considered temporary; the float will still need to be replaced.
Fifth reason: Depressurization
A leak appeared between the toilet and the cistern mount. Such a leak in the area of the connection between the tank and the toilet itself appears if the joint is depressurized. Usually the cause of this phenomenon is a large deformation of the rubber seal.
To eliminate the leak, a new gasket must be installed between the tank and the toilet.
This work is performed in the following order:
- The water supply is turned off by closing the main water valve;
- Remove all remaining water from the barrel by collecting it with a soft kitchen sponge;
- Lightly unscrew the drain nut. It can be found directly under the drain valve hatch;
- The screws that secure the tank to the toilet shelf are completely unscrewed. The tank is being dismantled;
- The lock nut that holds the drain is unscrewed, after which it is removed from the tank;
- A new gasket is installed. Each gasket is manufactured to specific sizes and shapes. Therefore, before buying a gasket, you must choose the exact size.
- If the gasket is smaller or larger, the problem will remain unresolved;
- The drain assembly is fixed with locknuts;
- The tank is returned to the shelf and secured with bolts.
It must be said that a leak between the toilet and the cistern may be associated with other circumstances:
- The bolt holding the tank container to the bowl is very rusty;
- The insulation that seals the mounting hole for the bolt has become unusable.
Of course, you will have to install a new bolt and replace the seal. The work must be performed in the following sequence:
- The water supply is cut off;
- Drained;
- All bolts are unscrewed and removed from the mounting holes;
- Sealing washers are placed on the bolts;
- The bolts are installed in place and tightened with nuts.
Your cash costs will be:
- Gasket – 200 rubles;
- A set of bolts – 50–300 rubles;
- Master services – 1200–1400 rubles.
Sometimes no replacement is necessary. Simply tighten the loose bolts. To do this, hold the nut with a wrench and tighten the fasteners with an ordinary screwdriver.
Care must be taken when doing this type of work. Ceramic products are not very durable. Tighten the bolt too much and a crack may appear at the bottom of the barrel. To prevent this from happening, it will be much safer to simply install new gaskets.
Sixth reason: Shut-off valve
The shut-off valve has failed. This causes water to constantly flow from the tank into the toilet. You can, of course, try to disassemble the drain valve. Adjust the pressure of the hatch on the drain pipe by slightly sharpening its end. Such manipulations require a lot of labor, and the desired effect is not always achieved. This leads to a simple conclusion: there is no need to carry out repairs; it is better to completely replace the entire drain assembly, or the entire toilet cistern.
To do this, you must perform the following steps:
- The toilet needs to have the water supply turned off. To do this, tighten the central water supply valve.
- The remaining water is flushed down the toilet;
- Open the lid and use a sponge to remove all remaining water;
- Remove the fixing screws;
- The tank is removed from the shelf;
- The sealing gasket is removed;
- The locknuts securing the drain assembly are unscrewed;
- The old mechanism is removed;
- A new system is being installed.
Before purchasing a drain unit, you should try to purchase a similar model that was previously in the tank. As a last resort, the same manufacturer. In other words, if the tank was manufactured, then the drain assembly must be of the same brand.
The new unit is secured with new locknuts and a new gasket is installed.
We return the tank to the shelf, new bolts are inserted into the holes. We screw it to the toilet shelf. All that remains is to connect the water and check the tightness of the new drain.
In principle, this work is not very difficult; it is enough to have a set of spanners and several adjustable ones. Buying a new drain will cost 400–4000 rubles. It all depends on the type of mechanism. Elite systems are much more expensive.
If the work is performed by a professional craftsman, you will have to pay 1600-1800 rubles.
Seventh reason: Cracks
The toilet tank is leaking due to a crack in the bottom or sides. Such a serious problem can be dealt with without even replacing the entire toilet.
What should be done
The tank is detached from the toilet and dried well. Any cracks that appear must be sealed with a high-quality sealant. I must say that this method gives the greatest effect. Of course, the sealant is not designed for long-term use; you will still have to buy a new tank and toilet.
Required tools and materials
If your plumbing is leaking, you must turn off the water before making any repairs. Due to the fact that the liquid is supplied to the system under pressure, in the process of troubleshooting we can flood the premises. For repairs you will need the following tools:
- sealant suitable for plumbing fixtures;
- sandpaper;
- screwdriver;
- burlap, twine or tow;
- hammer;
- knife;
- pliers;
- If it is necessary to replace a component, a working part of a certain type will be required.
When the necessary tools have been collected, you can begin to carry out repair work.
Some tips for the future
- Periodically check the areas behind the toilet and joints for moisture. Sometimes it can ooze out completely unnoticed. There will be no puddles, but brown streaks will be visible. These are the “first signs” and they cannot be ignored, since a large leak can occur at any inopportune moment.
- Every few years, check the condition of the gaskets and replace them with new ones if they are already outdated. Don't wait until the parts fail completely.
- Try not to lean on the tank while sitting on the toilet; press the flush buttons carefully.
- Special water filters will help prevent premature wear of fittings. This way, foreign impurities will not get into the tank, which will undermine the metal and clog the space between the moving elements.
- When replacing gaskets and other parts, do not skimp and buy from reliable manufacturers. This is a guarantee of long service life for your plumbing fixtures.
Having understood such an unpleasant phenomenon, we can draw the following conclusion:
- Minor defects such as wear of individual elements, which can be reached without complex disassembly of the entire system, can be repaired independently. Anyone with “hands in the right place” can do this.
- If there are serious cracks in the thicket or at its base and you definitely need to reinstall the plumbing with new ones, then decide what to do based on your experience. If it is not there, it is still better to entrust this work to a professional.
Share on social media networks: