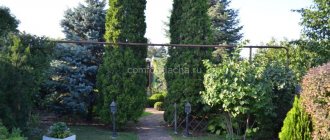
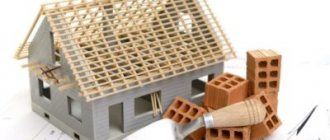
When planning to build a house, many developers lose sight of the fact that they first need to properly plan all the buildings on the site, and only then build a cottage. If you miss this moment, problems will arise. For example, it turns out that there is not enough free space in front of the house for a garage or a normal parking area for cars. The change house cannot be squeezed between the fence and the greenhouse, and there is nowhere to put a playground. There are no fire safety distances between the bathhouse and the neighbor's log house, and in the place where the owner wants to set up a private recreation area with a barbecue, his wife has already decided to plant a vegetable garden.
This article will help you rationally plan your site and thereby avoid conflicts with neighbors and endless disputes with household members.
Kinds
In order to have a harvest of fresh vegetables and fruits all year round, use:
- single-pitched structures;
- gable;
- arched;
- block structures.
A lean-to greenhouse can be called the simplest structure. Such greenhouses can often be seen attached to the main residential building.
Lean-to greenhouses have the following advantages:
- the design is inexpensive;
- has good thermal insulation properties, since the main wall creates an additional heat source;
- no snow cover remains on the sharp corners of the slope.
Single-pitched greenhouses are used only for home use, where you can grow fresh herbs for the table all year round or set up a winter garden. They are not used for industrial buildings.
Gable greenhouses are located from north to south. They are a separate building with different lengths and widths up to 12 meters.
This structure has its advantages:
- used in small farming, suitable for private use;
- can have different sizes: from 30 to 300 sq. m, which allows to reduce heat loss in the room;
- building with good thermal insulation and lighting.
A hangar greenhouse is a structure made of a gable or arched structure and has a maximum width of up to 25 meters. Due to the fact that there are no racks inside the greenhouse, you can make maximum use of the space inside the structure. Hangar greenhouses have a large width and a roof angle of up to 30 degrees, which means additional costs will be required to provide heating. For coating, reinforced film or polycarbonate is often used.
Hangar greenhouses have the following advantages:
- thanks to their design, plants receive the maximum amount of lighting;
- there is the possibility of using mechanics for maintenance;
- There is no need to remove snow from arched structures manually, as it comes off on its own.
Block structures are a series of greenhouses that are connected at the sides. A support post is placed at the junction points, which will reduce costs. The roofs are divided into separate sections with gutters for water drainage. Block structures can have different lengths - sometimes it reaches more than one hectare, so this type of greenhouse is used only for industrial use.
The advantages include the following:
- the cheapest design for industrial needs;
- has high resistance to wind and snow cover;
- all parts of the greenhouse have excellent lighting;
- you can easily place all systems for operation: heating, watering, lighting;
- the greenhouse is easily ventilated through the roof, on which vents are placed.
The disadvantages of this design can be considered that only up to 70% of the area is used. In addition, melt and rain water begins to accumulate in the recess on the roof, which requires an additional system for melting snow and draining melt water. Block tables are used only for industrial needs; they are not recommended for use in private households due to their size and cost.
If you plan to build a greenhouse on a small plot of land, underground or in-depth buildings are best suited, although for many, greenhouses built in the form of a house or an arched structure are familiar. If you build structures of this type, the plants will receive 20 to 35% sunlight, and when cold weather sets in, they will be quite cold.
School physics teacher Ivanov proposed a different construction option with a pitched roof, which has a slope of 20 degrees and a tightly closed wall at the back, which allows maximum use of solar energy. Thanks to this design, you can get a harvest much longer.
The construction technology is called Scandinavian, as residents of European countries with harsher climates began to use it. This unique design has virtually no disadvantages. Its main feature is that, thanks to a certain slope of the roof, the sun's rays do not slide across the surface, but fall perpendicularly - this allows you to harvest the crop much earlier.
Connecting multiple solar panels: series and parallel
To design a solar photovoltaic system for any household, several parameters need to be considered such as the available solar resource, the amount of energy supplied by the system, the efficiency of the solar panel, the autonomy of the system (off-grid or grid-connected), and the choice of components such as inverters , batteries and controllers.
Besides analyzing these components, there is one more element that can greatly affect the overall power output of the system, as well as the overall cost of the solar installation. This is the solar panel wiring.
We often hear installers talk about wiring solar panels in series or in parallel, but many of us who are not technically familiar do not understand the difference between these designs and therefore do not understand the impact our decision has on the overall life cycle of the system .
In this article, we will help you decide on the optimal way to connect solar panels and describe the general design options for serial and parallel connection of solar panels, their advantages and disadvantages.
The first thing you should know is that in any power system, the most important thing is the active power (expressed in watts). For what? Because all electrical devices consume active power to operate.
The equation defining this variable is: P = V * I, where 'V' is related to voltage and 'I' is related to current. These are the only variables that allow you to change the power output of the solar system, keep this in mind as it will be important later.
To get the active power you want, there are three ways to connect multiple solar panels together to create a power system that provides solar electricity to your home.
They are defined as:
- parallel connection
- serial connection
- combination of the two (series-parallel)
The decision to connect a particular solar panel will depend on the desired power and application of the system.
Parallel connection of solar panels
Parallel wiring of solar panels involves connecting the positive terminals of each panel together, as well as connecting the negative terminals of each panel together. They are then connected to the charge controller or solar system inverter.
When solar panels are connected in parallel (called arrays), they all have the same voltage, and the current each provides is summed.
The main advantage of this configuration is reliability. In the event that one or more solar panels are affected by either shading or other damage caused during manufacturing or during the life cycle of the system, the performance of the other solar panels in the array will not be affected because the wired connection makes all blocks are independent from each other.
On the other hand, there are some disadvantages to this type of connection. Lower voltage means higher current values, which results in higher electrical losses (power losses are related to the quadratic values of current) and therefore lower efficiency of your solar PV system.
Additionally, increasing the current is also undesirable because it implies increasing the wire gauge to have better capacity to handle higher current values (associated with higher temperatures and therefore safety issues). Ultimately, this results in higher installation costs due to larger cables as well as longer cables to accommodate the connection [1].
When should installation be done in parallel connection?
The answer is relative, but in most cases we assume that the system is very small and designed to power small loads or has a low voltage battery (eg 12V).
Serial connection of solar panels
A series connection is made by connecting the positive terminal of each panel to the negative terminal of the next panel (the connection is similar to connecting Christmas lights) until the last panel is connected to the charge controller or inverter.
With a series connection, the voltages of all solar panels are summed, and the current is maintained the same for all panels. A set of solar panels connected in series is known as a string.
As stated earlier: lower voltages mean higher currents, and higher voltages mean lower currents.
This statement is very important for a series connection because since this configuration increases the voltage values with each added panel, the total current provided by the system will be lower.
This means savings due to smaller wire sizes and cable lengths, as well as higher PV system efficiency (lower electrical losses).
However, the main disadvantage of this configuration is the low reliability of the system when connected in series. In other words, since the entire system is connected by one single cable, if the cable fails, the entire system will be affected.
When one of the solar panels in a string is shaded by a tree or cloud, it affects the overall performance and efficiency of the system.
Shading can even become more of a problem in this configuration because the shaded part creates resistance in the flow. This effect creates so-called hot spots. Hot spots are areas of elevated temperature that, depending on the wiring and size of the system, may even pose a safety concern.
When should you use a serial connection?
Typically, when higher voltage is required, a series connection is the logical solution.
Additionally, when the distance between the inverter or charge controller and the solar panels is long (20 feet or more), it is recommended to use a series connection because this type of connection allows the system voltage to be increased to match the inverter voltage input.
Daisy chaining has its problems, as stated earlier, but the shadowing and efficiency issue can be solved with one of the following two considerations:
- The first is related to efficiency. Selecting a micro-inverter for each panel provides the best solution for maximum efficiency since each panel will be independent of the other [2]. Therefore, dimming one panel will not affect the overall power output.
- The second option is to buy solar panels with a bypass diode. This diode acts as a wall that blocks or isolates the darkened area of the panel to avoid loss of efficiency to the rest of the same panel and therefore the entire power system [3].
Unfortunately, the reliability problem cannot be solved, since this is an internal property of the connection itself.
Series-parallel connection
We've described the advantages and disadvantages of connecting solar panels in series and in parallel, but what happens when we combine them together?
It is often necessary to set the connection according to the input voltage and current range of the inverter or charge controller.
But in some cases it is not possible to achieve the required voltage and current range through independent serial or parallel connections.
When connected in series, the voltage limit may be exceeded. And with a parallel connection, the current limit can be exceeded, while at the same time not providing the maximum possible active power of the configuration [4].
This is when a combination of two connection types is required.
The idea is to set up chains (connecting two or more panels in series) and connect them in parallel with other chains (creating row arrays). This allows you to get the benefits of series connection (lower electrical losses and lower costs) and the benefits of parallel connection (reliability).
In other words, each string of panels will add current and will also not be affected by the characteristics of the other string, while still obtaining higher active power with higher voltage values and lower current values (preferably for safety reasons).
In this configuration, creativity is the rule of thumb because with the same number of panels, multiple designs can be created that are tailored to the homeowner's goals or specific power component requirements.
Combining solar panels with different electrical characteristics
There is another important topic related to the choice of one or another type of connection in a solar photovoltaic system.
Do your solar panels have the same electrical characteristics?
So far we have assumed that your system contains a set of very similar or identical solar panels, which means the same manufacturer, the same electrical efficiency and characteristics (voltage, current and active power).
What happens if you decide to connect different solar panels?
Remember the inherent characteristics of each connection type: a parallel connection causes the entire system to have the same voltage, while a series connection causes the entire system to have the same current.
Consider a set of four solar panels: three 12V and 3A panels and one 9V and 1A panel.
If you connect these four panels in parallel, they should all have the same voltage and will therefore generate the maximum possible voltage for one of the panels, which means 9V.
Ptot = P1 + P2 + P3 + P4 = 9V * (3A + 3A + 3A + 1A) = 90 W.
When you look at the expression P = V * I, you will realize that there will be a voltage drop at the input of each panel (instead of a 12V output voltage, you will only get a 9V output voltage for each panel). This phenomenon directly affects the overall efficiency of your PV system because you are underutilizing the total power of the panels and therefore increasing the marginal cost of your system.
Now suppose you connect the same panels in series, the same problem occurs. You add up the voltages, but the current will be less.
Ptot = P1 + P2 + P3 + P4 = (12 V + 12 V + 12 V + 9 V) * (1 A) = 45 W.
As you can see, the resulting power output is very different from one configuration to the other, and if the solar panels were chosen identically, then the total active power would be Ptot = 144 W for either of the two configurations.
Therefore, it is not recommended to combine solar panels with different characteristics , because low performance and underload will affect the system.
It is not even recommended to choose solar panels from different manufacturers with the same electrical characteristics, because, in addition to the rated power, each panel has its own specific power reduction percentage, which is never the same between different manufacturers. Over the long term, some panels will degrade at a different rate than others. This represents instability and may also result in higher electrical losses.
But always remember that the main decision makers in setting the type of connection your system should have are:
- Inverter or Charge Controller Input Power Specifications
- Distance between inverter and panels
- Expected output active power
As you can see, the choice of a particular connection type is supported by in-depth technical analysis, and the range of possibilities can be very wide if the system is large enough.
. .
There is a place for each type of greenhouse
They choose a place for a greenhouse, first of all, based on its type. It is obvious that greenhouses of different purposes and designs require different conditions.
Types of greenhouses:
- stationary year-round or temporary (for the spring-summer period);
- heated or solar heated;
- intended for growing vegetables or only for seedlings;
- arched, block, tunnel;
- with racks, ground, hydroponics;
- polycarbonate, film, glass.
Placing a greenhouse on a site requires careful selection of location
Choosing a foundation
Let's say right away that the undisputed leader among foundations for greenhouses is a foundation made of timber 100 x 100 or 100 x 150, the latter is also called a “larch board foundation.”
Greenhouse on timber from the inside
But, as already mentioned, each case is individual, and first of all you need to decide whether the greenhouse can subsequently be moved to another location. It depends on this whether the foundation will be permanent or collapsible, and whether it will exist at all. Greenhouse foundations are as follows:
- Slab (monolithic)
- Tape
- Pile and point
- Beam or board
- Without foundation
Slab, strip, and pile foundations are capital foundations; they are non-removable, while timber foundations can be disassembled. We have already discussed these issues previously, and if you need more detailed recommendations, you will find them in the article choosing a foundation for a greenhouse here on the website.
Accommodation options from a scientific point of view
Experts in the field of agronomy and gardening emphasized the importance of proper placement of beds. To capture as much sunlight as possible, the beds are placed latitudally or meridionally (from east to west or from north to south). The second option is not very relevant, since only the beds on the southern part are illuminated, while the “northern” crops receive little light. Accordingly, they will bear fruit worse. On a note! Modern greenhouses in most cases are made of polycarbonate. They get enough light and heat. Therefore, to ensure maximum illumination and the absence of “blind” spots, the beds should be arranged strictly along the long side.
Latitudinal location: advantages
The latitudinal location of the greenhouse on the site is quite common. It has a number of advantages that should not be forgotten:
- all plants without exception are illuminated and heated;
- optimal heating (only provided that the slope of the roof slope is located to the south, and its angle is equal to the slope of the area where the greenhouse room is located);
- “bonus” warmth due to sun activity before lunch.
When the question arises about greenhouse lighting options (in the first or second half of the day), it is better to give preference to the first option. Since during this period the atmosphere has sufficient transparency and plants receive 8-12% more light than after 1 pm.
Meridian placement: when possible
It happens that it is impossible to install a greenhouse in the right direction on a site (free space does not allow or the required type of soil is not available), then a meridional installation is also possible.
In such situations, note when the greenhouse will function most. For example, if you plan to plant seedlings in the middle of the spring season or harvest cucumbers in early autumn, then it is advisable to use a polycarbonate structure, and it is preferable to install it meridionally.
Important! For year-round cultivation of crops in a greenhouse, this method of installation on the site is extremely undesirable. This is due to insufficient lighting for crops. The result is stronger stems and thick leaves, but poor fruiting.
In addition, when installing greenhouses in northern regions, you cannot adhere to the direction “from north to south”. Here the sun does not rise high even in summer. Such circumstances are typical for lands with a latitude of 60 degrees.
Let's find out everything about sizes
The dimensions of the greenhouse are calculated based on your own wishes and compliance with the standard dimensions of the profile pipe with polycarbonate. This is done to eliminate waste of materials, unnecessary scraps and unnecessary work that can be associated with arranging these scraps in an attempt to save money. The latter is absolutely not worth doing.
To make arches, it is best to take a metal profile 6 meters long. One whip will make an arc 2.2 meters high and 3 meters wide. This width is suitable for placing two beds and a path between them.
The standard dimensions of polycarbonate are 6x2.1 m. When covering the frame, you will not need to cut its sheets.
The height can be increased artificially: using a strip foundation. Another advantage of such a foundation is protection from the penetration of rodents or other pests.
The distance between each arch is set to 1 meter. That is, for every three arches - one sheet of polycarbonate (6x2.1 m). If, for example, you are planning a six-meter-long greenhouse, then you will need 7 profile rods for the main arcs and 3 polycarbonate sheets.
The optimal section of the corrugated pipe for the arches and the lower support frame: 25x25x2 mm. For lintels and vents, a section of 20x20x1.5 mm is suitable. For the door frame – 25x25 mm.
If you need a greenhouse more than 6 m in length, also focus on the standard parameters of polycarbonate to avoid overspending. For example, 8-10-12 m.
If you have a greenhouse that is larger in all dimensions, then for the base of the frame, take a profile pipe with a cross-section from 30x30 to 40x40 mm.
Advice: purchase material in reserve in order to avoid unforeseen situations with its shortage.
Make the entrance to the greenhouse at least 0.7-0.8 m, this will ensure the convenience of bringing in seedlings and tools, and there will be enough space for a regular garden wheelbarrow to enter.
If the greenhouse will be used during the cold season, make a small vestibule. It will protect against drafts when entering and exiting. It is also practical to store gardening tools.
Thickness of polycarbonate for greenhouse
For an arched shape, 4-6 mm is enough, but it is better to take 6 mm polycarbonate, the roof will be stronger and more stable.
But 4 mm may not survive the winter, depending on what the weather is like. If you live on your property all year round, you will be able to control the snow load, clearing away the accumulated snow if necessary.
If the greenhouse is sheathed with 4 mm polycarbonate, the distance between the arcs is reduced so as not to lose load. But saving in this way, you still spend more on metal profiles. And it’s not a fact that the reliability of the roof will increase from this.
And with polycarbonate 6-8 mm thick in winter there is much more guarantee that the sheets will not bend under the weight of snow.
What to consider when designing a greenhouse
Greenhouse construction diagram.
- Site layout. First of all, when designing, it is necessary to take into account the slope. For the most uniform illumination, the ground plane should be located at an angle of 15-19o. This is not difficult to do if you use a building level and a plywood template when leveling the ground. If you plan to use a large area for the construction of a greenhouse, then it is better to use a tracing cord and pegs for leveling.
- Material for the frame. Currently, the greenhouse frame is most often made of wooden beams, rectangular metal pipes or a metal corner. All these materials have both advantages and disadvantages. The wooden frame has a low coefficient of expansion, which is very important for glass greenhouses. However, wood is susceptible to rot and therefore requires additional processing. Metal, on the contrary, easily changes its dimensional parameters when temperature changes, but is much more durable than wood.
- Covering material. Today, covering materials for greenhouses are presented in a very wide range. This is glass, fiberglass, polyethylene film, organic glass and even canvas from plastic bottles. But the undisputed leader is polycarbonate. Cellular polycarbonate can withstand high dynamic loads, transmits up to 90% of light and bends easily, which does not require much labor during installation.
Basic principles for choosing a location on a site and installing a greenhouse with your own hands
To create optimal conditions for cultivating plants in the shelter and obtain a bountiful harvest, it must be positioned correctly. The structure must be installed taking into account all the features of the site:
- Soil type;
- Landscape features;
- Direction of the wind;
- Location of communications and other buildings.
We analyze the landscape features of the site
The following criteria are assessed before installation.
Soil type:
- Installing a greenhouse on too soft soil over time leads to significant subsidence or tilting. As a result, the strength of the building is compromised: the coating is destroyed, the frame is damaged, and the doors stop closing. Therefore, it is necessary to have good drainage and create a foundation;
- You should not install a greenhouse on clay soil, since clay retains moisture during watering, and this can lead to water stagnation and increased humidity in the room. However, if there is no choice, first they dig a pit and replace the clay layer with a sand cushion, under which they place a drainage layer, and then fill it with a fertile layer. Only after these measures can the greenhouse be installed;
- The location for the greenhouse should not be located near groundwater.
Presence of slope:
- It is not recommended to install the structure on a site with a slope. The optimal place is a flat area with solid soil;
- Longitudinal and transverse inclination of the building is not allowed. Installing a greenhouse on a site with a slope is only possible with the construction of a foundation.
Pros and cons of a relief area
Shadow and sun. The slopes of the relief area are always oriented to the cardinal points. On the south side in such areas the sun shines all day long, on the north side there is almost always shade. Slopes oriented to other cardinal points are more universal, and during the day shadow and sun alternate in fairly clear proportions. Such a dosed distribution of light and shadow is quite possible to use for growing certain types of plants with different light requirements.
Scheme of a double-glazed greenhouse.
Air swirls. An area located on a slope is always blown more strongly than a flat area. This is due to the air turbulence that occurs when the wind encounters an inclined plane. This is also facilitated by uneven heating of the soil in illuminated and shady areas.
General rules
Most novice summer residents, and some experienced gardeners, quite often wonder how to properly install a greenhouse on their plot in order to get the maximum benefit from purchasing such a structure. Before assembling a greenhouse in a permanent location, it is very important to determine the presence of the most favorable factors:
- the most flat area;
- lack of nearby groundwater;
- absence of buildings and vegetation capable of shading the greenhouse;
- the area under the greenhouse structure must be protected from drafts and gusty winds;
- availability of communications necessary to maintain the structure;
- the highest quality and fertile soil for growing plants.
Installation of a greenhouse always involves taking into account some of the requirements that apply to the location for such a structure.
It is not recommended to install the structure in excessively moist or shaded areas.
How to prepare the site before installation
When the location for the proper placement of the greenhouse is finally chosen, it must be carefully prepared. This stage takes quite a lot of time, especially if a solid construction is planned for more than one year.
Preparation includes the following actions:
- Marking.
- Clearing.
- For ground greenhouses, digging the soil, and for rack greenhouses, digging a pit.
Before installing a greenhouse, it would be correct to draw its detailed plan on paper, observing the scale, indicating the cardinal directions and marking paths and communications. Such a diagram will help you see the future structure from the outside and, if necessary, correct inaccuracies before work begins.
Once the plan is ready, they begin marking. Prepare pegs, tape measure and rope of sufficient length. Mark the corner points, drive a peg there, and then stretch a rope between them, outlining a rectangle. It is very important that all angles are 90 degrees.
To avoid clinging to the rope during subsequent work, the contours can be sprinkled with sand and the rope removed.
Marking the future structure
The resulting rectangle is freed from stones and sticks. Cultivated plants are transplanted to another place, and weeds are destroyed. Remove the turf, if there is any. Then the soil is leveled with a rake. A perfectly flat surface can be obtained using a long board and a level. The level is attached to the board and the soil is leveled with it, achieving horizontality.
If the plants will grow directly on the ground, dig the soil deeply and leave it to rest for two to three weeks. Shelving structures are often buried in the ground for better thermal insulation, so for such a construction you will have to dig a pit 0.8-1.2 m deep.
We think about protection from wind and dampness
It is these factors that determine how correct the microclimate inside the greenhouse will be. Immediately abandon the space that is between buildings or an unsaleable fence. In such conditions there will always be drafts, which is unfavorable for the plants growing inside. The walls of the greenhouse will be blown from all sides, so there can be no question of maintaining heat inside.
The following conditions will help to avoid such problems:
- The place for illumination should be chosen from the leeward zone;
- plant perennial shrubs nearby, but only so that they are low;
- make a protective screen.
When constructing a protective screen, it is better to use flat slate, and it must be installed so that the distance between it and the greenhouse is at least three and no more than 5 meters. No shadow should fall on the greenhouse, and the structure must fulfill its protective functions.
If you prefer to use ornamental shrubs as protection, you need to plant them at a distance of up to 15 meters from the greenhouse. It happens that the owners decide to install a greenhouse on a plot not far from the trees: this cancels the construction of a protective structure. In this case, you need to remember about the shadow and falling leaves: they should not fall on the roof of the greenhouse and prevent sunlight from penetrating inside.
To prevent dampness from accumulating in the soil near the greenhouse and penetrating into the root system of plants, waterproofing of the foundation is considered at the construction stage. In some cases, gutters are constructed on the outside that will collect excess moisture and carry it to a certain place (several meters from the base of the greenhouse).
Note! Excess dampness not only harms crops, causing their death, but also destroys the greenhouse structure and foundation, in particular.
Fire safety
In addition to the fact that the distance to the neighbor's fence must be maintained, based on the requirements, fire safety requirements must also be met. Fire safety rules must be followed based on the distance from the fence on the street side the greenhouse will be located. Wherein:
- a building made of non-combustible materials can be located 7 meters from the fence;
- if the greenhouse is made of materials with low fire resistance, then the distance should be at least 12 meters.
In any case, this parameter must be taken into account when choosing a location for the structure. It is also important to consider the size and layout of the greenhouse.
How to build a greenhouse on a slope
What is the slope of the ground at the location of the greenhouse? At least approximately: 5º, 15º, 30º or 45º.
Larger greenhouse, wooden frame, strip foundation, leveled soil inside the structure
Terraced placement of containers for hydroponic growing of plants in a greenhouse on a slope
The question “how to build a greenhouse on a slope” is too general. If you are interested in how to tie a foundation from sleepers, there is a lot of room for creativity. With a large slope, it makes sense to use some of the elements as pile supports, which will prevent the structure from sliding.
For significant slopes, a rational foundation design would be a pile. However, in a greenhouse, where the grillage should be located at ground level, it will not be possible to bring it to the same level according to the existing ground marks
If the greenhouse is large, a rational solution would be to make it a terrace by making the appropriate soil leveling.
It may be worth terracing the slope
General diagram of a terrace structure with a pile foundation, in this case the slope is planned on two levels
A small slope can be completely leveled
By the way, if the sleepers are wooden, we strongly recommend that you think carefully before using them in the construction of a greenhouse. Most likely, they are impregnated with creosote, and this is a dangerous, toxic substance. Toxic components will inevitably end up in the soil, and from there into food, poisoning you and your family members. Sending poisoned products for sale is no better.
Selecting a location
Installation of a greenhouse always involves taking into account some of the requirements that apply to the location for such a structure. Before assembling the greenhouse, you should determine its location on the site. As a rule, summer residents try to create the most attractive and elegant ensemble out of all buildings. In this case, the correct location of the greenhouse is not taken into account at all. According to the rules, the greenhouse must be installed in accordance with the cardinal directions:
- the meridional type of installation of the greenhouse on the ground involves the location of the façade parts of the structure to the north and south, while the side slopes will be oriented to the east and west;
- The latitudinal type of installation of a greenhouse on the ground is characterized by the reverse location of the structure, and the greenhouse facades will be oriented to the west and east, and the side parts to the north and south.
The best option is to place the structure on a flat and well-lit area.
It should be remembered that the assembly of the greenhouse can be done with your own hands after a thorough examination of the construction site. The best option is to place the structure on a flat and well-lit area.
What is the structure
An underground greenhouse is a structure, the main part of which is located below the horizon line. At the same time, the roof rises above the ground. It is made transparent so that the roof does not interfere with the penetration of sunlight. Under their influence, the space heats up. In this case, the heat does not leave the structure, but a thermos effect is created.
An underground greenhouse is a structure, the main part of which is located below the horizon line
Features of the structure
An underground greenhouse is a structure located in a recess at a depth of up to 2.5 m. The structure is usually built on a strip foundation. The base is made of timber, stone or brick.
What distance should be from the greenhouse to the neighboring area? — answers from 7dach.ru experts
As soon as the snow melted, the earth gave me small, strong sprouts. I planted greens in winter, when the soil was oaky. I sprinkled the seeds with purchased soil, and they lay there all winter, becoming stratified. I threw snow on the beds to melt it.
I live in Rostov on Don. I have a polycarbonate greenhouse, its walls are covered with a green coating. How can I remove it?
At the time when I decided to get a greenhouse at my dacha, I had no gardening experience at all. I didn’t dare to start experiments with expensive versions of ready-made greenhouses, you never know how it could all end. That's why the idea was born.
Hello! Chickens winter in a polycarbonate greenhouse. Please tell me, during deep processing and if you bring additional soil from the garden, can you plant cucumbers and peppers, or is it better to move the greenhouse to another place?
Is it true that in film greenhouses, cucumbers bear fruit better under a green film, and tomatoes bear fruit better under an orange film? And what does this have to do with?
At the dacha I built a simple greenhouse from scrap materials. These are wooden window frames, which are now being intensively replaced with metal-plastic ones. The size of the greenhouse is 6m x 2.5m. The greenhouse is built on a brick foundation, the frames are fastened with screws.
See all materials about greenhouses: See all
Trench greenhouse made of thermoblocks
Thermoblocks are permanent formwork made of polystyrene, which has sufficient rigidity and low thermal conductivity. The blocks are installed on vertically fixed reinforcement in the form of a wall and filled with concrete. Construction from thermoblocks is carried out quite quickly, and the walls are durable and well insulated.
Thermoblocks
Private wall block, lock
The greenhouse shown in the illustrations is oriented from west to east and has a gable roof with varying sizes of slopes. The northern slope is covered with OSB sheets and soft tiles, the southern one is made of 10 mm cellular polycarbonate. To improve illumination in the greenhouse, additional lighting with HPS lamps is provided.
Step 1. Mark the area and dig a pit for the greenhouse using the technology described above.
Pit preparation
Step 2. Install the formwork under the foundation and reinforce it using a corrugated rod Ø12-14 mm. The reinforcement is placed in two horizontal rows at the level of the foundation and installed vertically to the height of the walls. The intersections of the reinforcement are knitted using annealed wire. The foundation is poured with concrete and left for 15-25 days to gain strength.
Pouring the foundation and reinforcement for installing thermoblocks
Step 3. Treat the foundation with liquid bitumen waterproofing in several layers. Fill the bottom of the trench with sand and level it.
Foundation waterproofing
Step 4. Install the first row of thermal blocks and fill them with concrete. When cracks appear, the joints of the blocks are coated with cement mortar.
Construction of formwork from thermoblocks
Step 5. Every three rows it is necessary to perform horizontal reinforcement using corrugated rods. They are placed on special guides in thermoblocks.
Subsequent rows of walls
Step 6. Upon reaching the ground level, the outer side of the masonry is wrapped with rolled waterproofing, covered with sheets of flat slate and backfilled with soil.
Scaffolding
Step 7. Continue laying the above-ground part of the walls using the same technology. Perform door and window openings.
Greenhouse ends
Step 8. Fill the side ends of the greenhouse. Thermoblocks for them are cut to size according to a template.
View of the greenhouse from the other side
Step 9. The top row of masonry is reinforced with horizontal rods. After pouring and hardening of the concrete, the excess part of the vertical reinforcement is cut off, and the upper edge of the walls is leveled with cement-sand mortar.
Leveling the top of the walls
Step 10. According to the sketch, trusses are made from a metal corner 50x50 mm. Clean the welding areas and cover the trusses first with a primer, and after it dries, with light-colored metal paint.
Rafter truss
Step 11. Install the trusses into place, securing them to anchors in the concrete pouring of the thermoblocks.
Installation of rafters
Step 12. Using cross beams, the trusses are connected into a single structure. For sprockets, you can use a metal strip 20-30 mm wide.
Installation of shrouds
Step 13. The northern slope of the greenhouse is covered with a moisture-resistant OSB board.
The back wall is covered with OSB
Step 14. The walls of the greenhouse are plastered and, if desired, painted with weather-resistant paint.
Plastering greenhouse walls
Step 15. Cover the OSB board with flexible tiles. Wind and cornice strips are installed.
Covering the northern slope with soft tiles
Step 16. The southern slope is sewn up with polycarbonate 10 mm thick with a reinforced structure. When laying polycarbonate sheets, special profiles and screws are used. The ends must be insulated with adhesive tape and an end profile.
Covering the southern slope with polycarbonate
Step 17. Due to the large number of blank walls, the lighting in the greenhouse during the winter months is insufficient for most crops. Therefore, it must be equipped with lighting based on gas-discharge or LED lamps.
Additional lighting in the greenhouse
Video – In-ground greenhouse
A trench greenhouse is an expensive structure, but with active use it pays for itself in two to three seasons. In it you can grow not only the usual vegetables and herbs, but also southern fruits - citrus fruits, persimmons, pomegranates, pineapples. This greenhouse is also suitable for growing seedlings, rare flowers and ornamental plants.
Installation features
Most often, factory greenhouse structures based on polycarbonate sheets are installed with your own hands, the installation of which is carried out in accordance with the attached instructions in several stages.
- Complete assembly of the frame according to the diagram included in the instructions with arrangement of the end parts with cut polycarbonate sheets.
- Deepening the T-shaped tips of the assembled frame structure into the ground, followed by backfilling with earth.
- Cut the plastic and cover the entire greenhouse structure with sheets of cellular or monolithic polycarbonate.
- It is not recommended to leave a self-assembled structure slightly buried in the ground for a long time, since strong winds can overturn the greenhouse. For the purpose of permanent fastening, a beam or shallow foundation can be used. If timber is used, it is laid on a waterproofing layer of roofing felt or similar material.
- When attaching structures to beams, special attention should be paid to ensuring that the structure stands as level as possible, and that window and door openings do not have even slight distortions.
- If the design features and installation of greenhouses require the use of sealing tapes, then these elements must be laid carefully at the joints of the structure.
- It is necessary to build a greenhouse with your own hands so that the number of cracks and gaps between the frame and the covering material is minimal. Otherwise, the greenhouse soil may cool, and the temperature inside the structure will be insufficient for growing heat-loving garden crops.
- If sheet polycarbonate is used as a covering, then the edges of such material must be dug into the ground at least five centimeters.
- When using a film covering, the covering material should be secured to the timber using a wooden or metal strip.
Polycarbonate greenhouse
When using polycarbonate as a material for covering the frame of a wall-mounted polycarbonate greenhouse, you should remember the following rules:
- carefully measure the material;
- make holes at a distance of 4-5 cm from the edge. Polycarbonate will not crack at the drilling site;
- Use reinforced tape to cover all joints and cavities. This approach will allow you to insulate and maintain the microclimate even in winter;
- use thermal washers;
- Do not over-tighten the fasteners. The polycarbonate sheet should not bend under the influence of the fastener.
- seal the remaining cracks with foam or plaster;
- conduct electricity and other systems;
How to build a greenhouse on the roof of a house?
Placing a greenhouse building on the roof of a house significantly saves space and creates optimal conditions for cultivating plants. Receiving maximum solar energy will provide plants with more heat. You can also build a greenhouse structure not only in the private sector, but also use the roof of an apartment building. However, you should know that a greenhouse placed on the roof has special requirements both for the design and for the technology of cultivating vegetable crops. Main features of placing a greenhouse structure on the roof:
- Give preference to structures that are as light as possible and at the same time quite strong;
- As a coating, choose not glass, but polycarbonate;
- The frame must also be durable;
- The roof of the greenhouse should have an arched shape to reduce snow and wind loads.
Existing options for placing a greenhouse building:
- Build an additional transparent bay window;
- Install the finished structure on the existing roof;
- Rearrange the roof by building a kind of floor on it, which will have transparent walls, that is, rebuild the attic.
Before installing a greenhouse, you must read the documentation for the residential premises and calculate the load-bearing capacity of the floors to avoid possible problems. During calculations, also take into account the weight of the soil.
The roof covering also needs to be prepared for the construction of a greenhouse building:
- Provide additional waterproofing coverage;
- When arranging, do not forget about the water supply system. Since independent delivery of water to a height is quite difficult, it is better to use a drip irrigation system;
- To ensure air access to crops, it is necessary to have the maximum number of vents. This will prevent the plants from burning from overheating during hot days.
Installing a greenhouse on the roof of a high-rise building will be an excellent option for growing crops for residents who do not have suburban summer cottages. By following all the rules for placing greenhouse structures on personal plots and roofs of residential premises, and also taking into account all the listed nuances, any gardener can get a bountiful harvest.
Conclusion
In conclusion, we can say that the correct placement of the house regarding the cardinal directions will have a beneficial effect on the life and well-being of the building and the people living in it.
According to the centuries-old experience of house builders, which include the Slavs. History knows both majestic buildings and classic huts, once built by the Slavs. All these structures were erected with orientation towards the cardinal directions. Perhaps our ancestors were much wiser and had more knowledge than modern people.
Another important aspect is that: windows, rooms, corridors, utility rooms were placed in a certain combination with orientation to the cardinal directions for more comfortable practical use.
Well, the most important positive effect of such a house orientation is significant savings in money, materials, energy and fuel for the long period of operation of a residential building.
Useful tips for greenhouse location
What is the best way to place a greenhouse on a site if not a single useful piece of advice has helped you? It is necessary to take into account other important factors.
- The most useful rays are the morning ones. Therefore, the greenhouse is positioned in such a way that sunlight penetrates into the greenhouse from all sides throughout the day;
- Plant vegetables so that nothing blocks them;
- Do not install the greenhouse far from the main buildings, otherwise there will be difficulties with heating, lighting, and water supply;
- Install structures on a flat surface. On an uneven surface, the sun's rays fall unevenly, so it is better to immediately level the surface;
- Avoid placing near buildings. One of the sides will always block it from the sun, as a result the vegetables will not be sufficiently illuminated;
- If you cannot avoid the location of structures near the house, place the greenhouse so that one of the sides is in contact with the building on the south side;
- Clean up weeds and construction debris around and inside the greenhouse. They can harbor various pests;
- When building several greenhouses at once, calculate the distance between them so that they do not block the light from each other.
If your site is located in such a way that these tips did not help you, then position the greenhouse in a way that is convenient for you. The main thing is that the vegetables receive sunlight.
Where to put a greenhouse as an extension
This design has several nuances that are important to consider at the planning stage.
The main thing to think about before planning a greenhouse as an extension to your home is the plants nearby. Such a building can cast a shadow and interfere with the development of crops in the neighborhood. Start arranging the beds, stepping back a couple of meters from the future greenhouse.
Another important point is the side towards which the slope of the dacha is facing. If towards the greenhouse, then in winter the falling snow can cover the building. This is especially important if you are attaching the greenhouse directly to the wall of the house. In this case, provide a structure that can withstand the load of snow. It should be covered not with polycarbonate, but with the thickest glass possible; the first option simply will not withstand such a load. Make the roof of the extension with a strong slope or round. But it’s better to step back a little from the main building, about three meters.
Lawn
The easiest way to improve the area on the outside of the fence is to sow it with lawn grass. Such unpretentious vegetation does not require special care and looks neat throughout the season.
Water the grass when it's dry, feed it periodically, and trim it regularly to maintain its decorative appearance.
This option is suitable for “lazy” summer residents, as well as those who do not have the opportunity to “swing wild” in their fantasies due to the limited space between the fence and the road - even a narrow strip of lawn will look much more aesthetically pleasing than sloppy weeds.
If there is more than one greenhouse
Happy owners of large plots of land can afford to install not one greenhouse, but two or even three. In this case, you need to think not only how to position them relative to the house and other buildings, but also in relation to each other.
Ideally, they are placed side by side, at a distance of one to one and a half meters. This will make it possible to move between buildings to remove snow in winter and garbage in summer.
If the dimensions and configuration of the site allow, two greenhouses can be positioned longitudinally, joining them at their ends, or installed perpendicular to each other. This will not only save space, but will also make the communications that will have to be brought there less extensive.