If water drips from the air conditioner drainage pipe on hot summer days, this is not a cause for concern. This phenomenon means only one thing - the air conditioner is working properly and is functioning perfectly. The alarm should sound when the air conditioner is leaking anywhere else. To find the reasons, you need to familiarize yourself with the technical part of the split system and understand why and where the leak occurs. Read about all this, as well as how to troubleshoot the problem yourself, in the material below.
Where does the water in the air conditioner come from and why does it drip into the room?
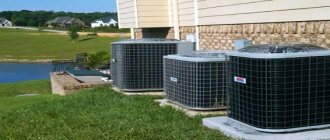
The operation of split systems is based on sudden cooling of the air. This change in temperature leads to the formation of condensation on the cooling element of the air conditioner - the evaporator, located in the indoor unit. Normally, water flows from the evaporator into a special bath, and then along the drainage route it is removed to the street or to the sewer. Most often, the drainage pipe is led outdoors, from where condensation drips.
A leaking air conditioner is usually caused by some kind of problem, and technically occurs in one of the following ways:
- Water does not leave the bath along the drainage route. For example, due to clogged drainage. As the condensate tank overflows, water flows from the split system into the room.
- Condensation drips past the bath. For example, if it has moved.
- Water hits the fan, and the air conditioner “ spits ” water. For example, this occurs when the evaporator freezes due to the condensation temperature being too low.
Naturally, a split system leaking into a room is not a standard option for the equipment to operate. In some cases, this behavior of the air conditioner is associated with incorrect installation, sometimes with malfunction, but more often with breakdowns. Below we will look at the main reasons why water flows from the air conditioner into the room.
Where does unnecessary liquid come from?
The air in the air conditioner is cooled by circulating refrigerant. The element of the flow pattern in which the temperature decreases is called the evaporator.
The device received this name because droplets of moisture, that is, “perspiration,” appear on its body during operation. The resulting liquid is the same condensate that requires removal from the split system unit.
Moisture is released from warm air at the moment of sudden cooling. One operating unit can accumulate up to 15-20 liters of liquid per dayDraining accumulated moisture is important for proper operation of the air conditioner. The climate control unit operates from the electrical network. As you know, water is a good electrical conductor. At high humidity there is a risk of a short circuit in the device circuit. Breakdown of expensive electrical equipment can be prevented by proper condensate drainage.
Signs of malfunction
First, a little theory. An air conditioner is one of the types of climate control equipment. The equipment allows you to maintain a comfortable temperature level in the apartment in hot weather. However, its operation entails certain difficulties. It happens that liquid leaks directly into the room, and often this is not a couple of drops, but a rather impressive leak. Even more difficulties arise if the entire internal unit of the equipment leaks - then condensation flows onto the floor, as well as furniture and other items, including electrical appliances, which can result in complete failure of home appliances.
Let's try to figure out why water is dripping from the air conditioner. The fact is that the principle of operation of the equipment is not only to cool the air, but also to create a favorable microclimate in the room. For this purpose, the system is additionally equipped with the option of drying air flows. The mechanism of action is simple: liquid from the air, in contact with a cooled element, condenses and settles on the surface of the indoor unit, from where it is discharged to the external one. It is impossible to determine exactly how much water is produced per day. Much here depends on the initial air temperature and the level of its humidity, as well as on how many degrees the room needs to be cooled - that is, the determining factors in this case are the power of the equipment and the climate parameters in the room. On average, a split system is capable of removing 13-15 liters of water per day; industrial air conditioners with high power are capable of converting up to 150 liters of liquid in 24 hours.
Most of the models on the market remove moisture to the street, but if liquid suddenly stops flowing from the external unit, this directly indicates a malfunction of the equipment.
The presence of a breakdown is also indicated by the appearance of ice on the block. Regardless of whether entire drops freeze or only slight frost appears, you should immediately call the experts, as this indicates that the temperature regulators are not working properly.
Experts advise
Here are a few more comments and advice from professionals who install, adjust, and repair refrigeration devices. In general, the most common reason that the air conditioner is leaking is a clogged drain tank. If you neglect to clean it during service, it will eventually become clogged. Dirt, wasps, spiders, and other insects get into the tube. The question often arises - what are insects doing inside the tube? They, like all living things in summer, are attracted to water. Some even settle there. Inventive owners of air conditioners sometimes put a mosquito net on the end of the tube, but over time it also becomes clogged.
Since the diameter of the hole in the drainage pipe is about 1 cm, and it becomes clogged, when the split system is operating, water drips through the indoor unit into the apartment, not through the pipe to the street. It is better to entrust the solution to the cleaning problem to specialists. After turning off the air conditioner and after washing it, the problem will be completely eliminated and the drainage system will be cleaned.
Often, an independent human factor is to blame for water dripping from the housing. So, during renovation, it happens that you need to move it a little higher, lower, or to the side (especially when the renovation concerns the ceilings in the room). In this case, if this is done without the participation of specialists, the angle of the drainage may change, and the water does not flow outside as expected, but drips into the room. This cannot be done without the participation of service workers, since it is necessary to drill a new hole and re-lay the communications. In addition, during the currently popular high-altitude insulation work, industrial climbers, as experience shows, can cover the drainage with putty (if the neighbors are dripping from above) and bend the end of the drainage tube up. Here, of course, in order to eliminate the leak, it is necessary to redo the intervention of careless workers.
Why does water flow
Several breakdowns lead to the disastrous result of the air conditioner leaking. Let's look at each of them:
- In those years when the daytime temperatures do not drop below +30, the cooling system wears out. As a result, the container where the condensate collects becomes overfilled and it flows out.
- Don’t think that problems with a split system can only arise in the summer. Problems also occur during cold weather. During freezing, the heat exchanger becomes covered with ice, causing condensation to appear on the housing. Basically, freezing occurs when there is a significant difference between degrees at night and during the day.
- The reason why water drips from the air conditioner into the room may also be a broken drainage. As a result, condensate flows in, although it should go out.
- A leak may also occur due to the drain hose being positioned incorrectly. Accordingly, the liquid changes direction.
- A depressurized circuit can also result in troubles and additional expenses. The result may be weakened pipes through which the liquid functions within the system. In this case, water will not flow in a stream, but condensation will be visible on the body.
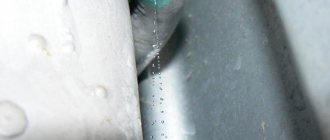
The accumulated condensate is immediately visible Source antares-48.ru
- And finally, the cause of the leak may be increased pressure inside the circuit. This reason is quite serious, and there is no point in trying to deal with it without the necessary tools and knowledge.
Causes of leakage
The drainage is clogged and cannot drain fluid out:
the entry of insects into the outlet pipe, which are attracted by the coolness of the water during the hot period. They remain there, settling inside the block, preventing the normal outflow of condensate;
- the outlet hose becomes clogged with debris, dirt, dust, animal hair, which gets inside the split system along with the drawn-in air flow. Over time, the remaining dirt accumulates inside the outlet tube, condensed moisture collects in the pan, and then pours out over the edge;
- bacterial contamination of the tank, the entire drainage. If the necessary maintenance is not carried out properly, colonies of bacteria, mold, and mildew begin to multiply in the unit. Microorganisms accumulate inside the system, mucus forms, preventing natural outflow. In addition to the fact that this is dangerous for the health of apartment residents, negative external manifestations arise: an unpleasant odor, water leaking from the air conditioner;
incorrect placement of the outlet pipe during installation. The hose must be placed at a slope so that the moisture flows out on its own under the influence of gravity. If you place it horizontally, with bends, creases, etc., the condensate will not overcome the obstacles and will accumulate in the pan.
- the indoor unit is not installed strictly horizontally, as required by the installation instructions. Result: water flows from the air conditioner into the room;
- During installation, elements of the water drainage system were damaged;
- poor-quality flaring of copper pipes contributed to depressurization of the cooling circuit. Freon began to come out and ice began to form on the evaporator. When the ice cover melts, a volume of liquid is formed for which the split drainage is not designed.
Use of climate control equipment during the cold season at low temperatures. If the split system is not designed to operate in cold weather, and a winter heating kit is not installed, the water in the outlet pipe outside will freeze. The ice plug will prevent moisture from draining out.
Why does water flow from the split system indoors?
There are many reasons why the indoor unit of an air conditioner leaks. In this article we will look at them one by one, from frequent and simple to more rare. This will make it easier for you to find the problem and fix it yourself.
Causes:
- The drainage tray is full;
- Broken pipe;
- The drainage tube is clogged;
- The drain tube is not installed correctly;
- Evaporator frozen;
- Problems with the pump;
- The freon line is broken.
User errors that cause the air conditioner to leak
When choosing an air conditioner and its further operation, it is extremely important to follow the manufacturers’ recommendations on temperature conditions: both outdoors and indoors. Violation of operating standards leads to incorrect operation, freezing and leakage of both the internal and external units.
Case from practice! Application from a flower shop. The 7000 W air conditioner does not work: the external unit is covered in ice, water is dripping from the internal unit. The area of the room is small - 6 m2, fenced off. The temperature outside is about 0°C, indoors 20°C. No installation violations were found. What could be the reason? In the operating instructions we read: when cooling, the temperature outside should be 18 - 43 C, indoors 21 - 32 C. Thus, the cause of the problem is a violation of operating conditions, as well as the initially incorrect choice of a split system model for the client’s needs.
Causes of leakage
- If the cooling system operates at full capacity for a long time - and this, as a rule, happens in hot summers - the condensate collection tank simply overflows, and that’s it, the device leaks into the house and not outside.
- In winter, the heat exchange part of the air conditioner may become covered with ice, and this in turn leads to the formation of condensation from the working fluid. It is he who begins to flow. Freezing occurs when the outside temperature differs significantly between day and night.
- The air conditioner drainage system may fail, causing condensate not to flow into a special container, but to drip or flow.
- The drainage hose may be in the wrong position, as a result of which the liquid simply does not rise in the right direction, and the split system begins to leak.
- The circuit has depressurized due to the fact that the pipes leading the liquid into the system have weakened, and it flows drop by drop.
- There may be excess fluid inside the circuit, which leads to increased pressure. This problem is quite serious, because in the end it may turn out that your air conditioner is not just leaking, but broken.
The flow of a split system looks like this:
How to understand that a breakdown has occurred?
First you need to determine where the leak came from.
There are three main locations.
- Directly from the indoor unit itself.
- Through the blinds of the split system, individual drops or large splashes enter with air flows.
- Water flows along the wall on which the indoor unit is located in the room.
Once you determine where the drop occurs, you can decide how to deal with it.
First, do a quick check. You should check the condensate tray; if the leak started during a hot period, when the air conditioner operates for a long time in cooling mode, then this is a completely normal situation. When the container is overfilled, the water will overflow and form a leak. To stop a flood, you just need to drain the water.
Drips are also often caused by dirt on the condensate tray. If it is not cleaned, the dirt can be compressed and form a blockage.
Inspection of the condensate tank during hot weather should be done every few days, since the equipment is working at its maximum capacity at this time, as well as before the onset of cold weather. If the dripping does not stop after this, then a serious equipment failure has probably occurred.
Not spring drops
It happens that water drips from the air conditioner indoors due to the large difference between the day and night readings of the thermometer. When it falls “overboard,” the condensate turns into ice, and in the morning it melts and flows down anywhere. If this is the reason, the sector where the heat exchanger is located needs to be insulated. Glass wool is quite suitable for these purposes. After such work, there will be no more leaks.
Water flows from the air conditioner into the room - what to do
So, let's look at the causes of leaks from the air conditioner and solutions. Of course, it is best to call a specialist to your home, but you can perform some actions yourself:
- If we are talking about the first reason, then a master may not even be needed here. It is enough to pour out the excess liquid from the drive, insert it into its original position, after which the equipment will work properly again. It is important to turn off the power first. In the future, also do not forget to monitor the slightest leak.
- One of the reasons why the air conditioner leaks is the result of the appearance of ice - it makes sense to make thermal insulation. For example, to avoid temperature changes, you can use glass wool.
- If the cause of the breakdown is the pump, it should be repaired, if possible, or replaced. It is difficult to do this without proper experience, so it is better to turn to the experts.
- If the corrugated hose is positioned incorrectly, it is enough to place it at the correct angle.
- The pipes can be strengthened if it is better to tighten them with nuts and finally use sealant for processing. It is important to act delicately here so as not to break the thread.
Even if the split system has been repaired, do not forget to monitor it so that there are no unnecessary accumulations in it, and in the future it will no longer leak. Prevention is always very important in the case of air conditioners.
Repair of air conditioners in case of leakage in the apartment Source www.stroiword.ru
Some of the reasons why the air conditioner drips in the room can be corrected yourself. As for complex faults, it is better to entrust them to specialists who understand this. For example, if the indoor unit is leaking, you cannot do without special knowledge and tools. In general, this applies to most internal damage that is not visible to the naked eye.
Possible malfunctions and ways to eliminate them
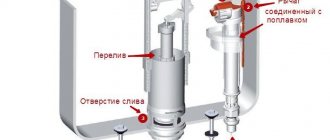
The device requires repair if:
- The valve does not shut off the water. The causes of the malfunction may be:
- wear of the sealing gasket that serves as a locking device;
- disconnecting the shut-off valve from the spindle;
- spindle bend;
- contamination of the valve with deposits contained in the water;
If the spindle is bent or the valve is disconnected, the valve box must be replaced.
- the valve is leaking or dripping. The main reasons for such a malfunction may be:
- formation of a crack on the device body;
- absence or insufficient quantity of stuffing box.
Replacing the gasket and cleaning the housing
To repair a valve with your own hands when the gasket is worn out, you will need the following tools and materials:
- adjustable wrench;
- a piece of plumbing rubber;
- scissors;
- pliers;
- knife;
- linen thread or other sealing material.
Rubber and scissors are required to make your own sealing gasket. If you know which gasket is installed on the spindle, you can purchase the finished product at a plumbing store.
The gasket is replaced according to the following scheme:
- Using an adjustable wrench, you need to unscrew the valve axle that secures the valve spindle;
Disassembling the valve to replace the gasket
- Use pliers to unscrew the nut securing the gasket;
- the washer and the failed gasket are removed;
- a piece of rubber is cut out, the dimensions of which are slightly larger than the dimensions of the valve;
- a hole is made in the center of the cut piece of rubber;
- the rubber is placed on the valve and secured with a nut;
- Excess rubber is trimmed around the valve using scissors. The finished gasket must completely match the dimensions of the valve;
Attaching a new gasket to the spindle
- Using a knife, the valve body is cleaned. It is recommended to carefully remove all deposits not only in the device body, but also in the threaded connection;
If it is not possible to clean the case by mechanical force, you can use kerosene or WD-40 liquid.
- the crane-box is mounted on the thread;
- The connection is sealed, after which the device can be completely fixed.
Sealing the threaded connection with flax thread
Valve repairs must be carried out when the water supply (heating) is shut off.
Replacing the stuffing box
If a faucet valve is leaking, then in most cases the problem is the absence or excessive sealing of the stuffing box. For repairs you will need:
- an adjustable wrench or wrench of the appropriate size;
- gland packing;
- knife or flat screwdriver for sealing.
In this situation, you can repair the valve yourself according to the following scheme:
- shut off the water supply to the system;
- remove the rotation handle;
- unscrew the fixing nut. When loosening the locking, it is recommended to keep the spindle in one position;
- remove the sealing ring securing the packing;
- use a knife or screwdriver to remove the old packing;
The process of replacing the stuffing box to eliminate a leak
- apply and compact new sealing material;
- Reassemble the faucet in reverse order.
The process of replacing the gasket and stuffing box is described in detail in the video.
https://youtube.com/watch?v=r7a44zQX2oo
Repairing cracks
If a valve is leaking and the cause of the leak is a crack in the valve body, then you can:
- completely replace the valve;
- seal the crack with special materials.
Crack in valve body
Among the materials used to seal cracks, cold welding agent can be distinguished.
Tool for cold welding of metal
Detailed instructions for use of the product are indicated on the packaging. The general usage pattern is as follows:
- the place where the crack needs to be repaired is cleaned of dirt and degreased with acetone;
- the composition for application is prepared;
- the finished mixture is applied to the crack and distributed evenly over the surface;
For welding strength, it is recommended to apply the mixture to a larger area than the crack itself occupies.
- The composition is expected to dry completely, after which the welding area can be cleaned and painted.
Method of using cold welding to repair a crack
Thus, you can eliminate the most common valve problems yourself. If the repair work carried out does not help correct the situation, the valve must be replaced.
Broken or broken connections
There is usually a pipe between the drain hole of the tray and the drainage tube. Sometimes it can crack, break off or fly off the tubes. This is a flexible hose that is held on with clamps or latches.
Open the air conditioner cover and look on the right and left sides (depending on the installation option) at the condition of the pipe. If the problem is in it and it is from it that water flows, it needs to be changed.
Solution
Don't look for an original pipe - you'll just waste your money . At any plumbing store or market, buy one of the same diameter and secure it with ordinary plastic zip ties.
If the old pipe was secured with clamps, wrap them or the pipe itself with fum tape. Then put on a new one.
Air conditioner drain pipe in the indoor unit.
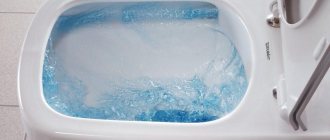
To start the dishwasher for the first time you need...
You should first make sure that the outlet through which the machine will be connected to the electrical network is in working order. Check if the water supply valve is open, which even professional installers often forget about. Looking into the chamber, it is worth taking a closer look and checking how freely the impeller rotates for spraying.
The filters should be removed and washed with a solution of regular detergent. Free the inner walls from stickers, shipping inserts and twisted wires. Check and remove any foam particles that may have crumbled into balls during the process of unpacking new equipment.
Next, we recommend watching the video of the first launch of the dishwasher:
Household chemicals for dishwashers
It’s not so easy to understand the wide range of special products for dishwashers for the first time. Therefore, it is most logical to purchase a standard set at the same time as purchasing a car. It includes everything you need for work - washing gel or powder, rinse aid and salt.
Before the test run, you need to pull out the lower dish basket. Then the lid of the salt receiver compartment should be visible in the bottom, into which you need to pour 300-400 g of regenerating salt using the wide outlet of the funnel. And before adding salt, pour in clean water - about a liter. Water will prevent salt crystals from sticking together.
Then you need to find compartments for rinse aid and detergent in the door. Depending on the dishwasher model, these compartments may also be located on the front panel. Having filled them with the required amount of cleaning chemicals, you need to make sure that the machine recognizes it and will use it. Otherwise, you will have to delve into the settings and enter the type of the selected product into it.
Setting up equipment
You will also have to manually adjust the salt supply mode, having previously determined the hardness of the water from the tap. Hardness is determined by test strips, which should be included with the machine. The selected mode will be saved in the dishwasher's memory.
But not forever. Most models require updating the settings if the power goes out while turning on the machine.
Having finished with the settings, all that remains is to select the “Standard” washing mode. Then close the door and start testing. If the first run is successful and does not reveal any operational problems, you need to let the equipment cool down. And only after that, load dirty cups and plates into it for washing.
The dishes are placed in grids, previously freed from food debris. However, in no case should it interfere with the free rotation of the sprinkler.
There is no need to add salt and rinse aid during the second start - one filling will last for a long time. But the detergent must be renewed in the compartment intended for it.
Photo: https://cleanadvice.ru/wp-content/uploads/2018/03/kak-pomyt-posudomoechnuyu-mashinu-svoimi-rukami4.jpg
At first, the car may seem like it requires too much attention and care. But as you get used to it, all of the above operations will become automatic and will be performed in a couple of seconds.
What to do if the drainage channel is clogged?
In general, this problem is always the result of poor air conditioner maintenance. If you regularly check the drainage channel for debris and remove it in a timely manner, the likelihood that the air conditioner will leak will be reduced by at least half. Particular attention should be paid to the drainage pipe in the summer, when many insects get into it.
If the channel is too clogged and water still flows, the problem can be solved in two ways:
- on one's own;
- with the help of specialists.
The second option is, of course, better, since in this case you will not damage anything. In addition, by ordering professional air conditioner cleaning, you will be entitled to any bonus services, for example, preventive diagnostics of the air conditioner, which will allow you to identify problems at an early stage, and thereby avoid major problems.
If you decide to do everything yourself, then first you will need to eliminate the insects that have accumulated there from the tube. If the plug they form is not too large, you can try to blow out the pipe with a vacuum cleaner, but if there are a lot of them there, you will have to clean the pipe with a piece of thick wire, which can harm the device.
Next you need to blow the pipe through the outer end. Just don't do it with your mouth - a regular plastic bottle or something similar will work as a plunger. Do this a few times to loosen the clog, it usually works.
Installers with two left hands
Problems with condensate drainage may begin soon after installing the air conditioner.
In 99% of cases this is due to unprofessional (in some cases drunk) installers. The fact is that the drainage tube must slope downwards throughout its entire length. Sometimes, during installation, a hole is made in the wall that runs parallel to the ground, or even directed upwards. In this case, according to the law of gravity, moisture will not be able to flow out and will accumulate in the tray.
It is not difficult to identify the problem - just look at the places where the drainage enters and exits the wall.
Solution
There are two options - either punch a new hole, or hang the air conditioner higher. But the best thing is to call the installers. They simply must correct their mistake.
If you installed the air conditioner yourself, you will have to arm yourself with a hammer drill and choose. Naturally, it will be easier to punch a new hole. Its entrance should begin in the same place as the old one, but the channel should be directed downward.
Poor quality installation
Violations of air conditioner installation technology can lead to various problems, including water leakage into the room:
- The slope of the drain pipe is not observed. The optimal angle is considered to be 15%. If the drainage drain is not tilted, the water will not be able to flow out by gravity through the tube and will accumulate in the pan and overflow into the room. To eliminate this problem, it is necessary to correctly install the drainage system, taking into account the angle of inclination.
- Use of low-quality materials for the drainage system. Over time, the drain tube may sag, crack, or break, allowing water to leak from the air conditioner. In this case, it is necessary to replace the drainage tube.
- Poor fastening of the connecting elements of the drainage system. Water may leak in these areas. You just need to tighten the nuts.
Options for solving the problem
As soon as you notice that water has started to flow, immediately disconnect it from the power supply. You can clean the drainage tube yourself. To begin, take a medium-thick wire and make a small hook. Then carefully insert it into the drainage tube and push it forward with rotational movements.
From time to time, take it out and clean it. If you feel that the wire is resting against something, then the reason is a blockage. Thanks to the pre-formed hook, you can easily reach any midge. In addition, you should clean the condensate tank, bath, and filters from bacterial contamination using special products.
Professionally, I use steam cleaning, which will deal with bacteria and germs. Steam is supplied under pressure through a special pipe
If there is icing, you should wait until the ice melts on its own. Then contact the master. After such an express cleaning, you can also carry out a general cleaning.
To do this, you need to disassemble the indoor unit. Using a screwdriver, remove the drain pan, then attach a high-pressure washer (water hose) to the drain pipe and rinse for 5-10 minutes. If you find that the problem is due to unprofessional installation, then you should call specialists.
To prevent breakdowns, you should regularly carry out technical cleaning of the air conditioner, which consists of washing the filters and drain pipe. In warm weather, climate control equipment must be cleaned once every 2 weeks. From time to time you should check the condensation level of the split system.
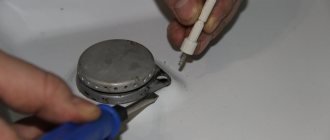
An effective way to check the condition of the strainer is to spray it with a thin stream of clean water.
Now you know, if water flows into the apartment from the split system, you should immediately disconnect the device from the power supply. Then you need to check the condition of the air conditioner. And if, after all our recommendations, water is still dripping, then immediately call a specialist.
How to unscrew the faucet nut if it is stuck
The easiest way to get a stuck nut to unscrew is to knock it off with a chisel or hammer. You can use a grinder. But in most cases this option is not suitable. You just need to unscrew it so that you can screw it back later. It would seem that the situation is hopeless, but this is somewhat untrue. There are several ways to help “re-stirring” a rusted nut.
Dissolving rust
Many people know this liquid as WD-40. In common people they call it “Vedashka”. The essence of this product is that it dissolves rusty deposits and, as a result, reduces friction. As a result, the fastening gradually begins to give in.
If this product is not at hand, then you can find a replacement. Kerosene, carburetor cleaner, gasoline, and brake fluid work well for this. In addition, vinegar, iodine or alcohol are suitable for the same purposes.
Guide to action:
- Thoroughly pour the liquid over the nut and wait about thirty minutes. As soon as time has passed, you can take the key and try to turn it off. If the fastening does not yield or yields but is very tight, then the liquid has not penetrated the rust sufficiently. We wet it again, only this time with a piece of rag, and wrap it around the nut. This will give the liquid a better chance of eating away the rust.
- After such a lotion, the fastening element should begin to move. To make the movement easier, you can tap it a little with a hammer. And only then, using the key, you can try to rip it off. To make the jerk stronger, you can lengthen the handle of the key. Any piece of pipe will do.
Heating the nut
Exposure to high temperatures causes metals to expand, which means the rust will break down. After such an execution, any compound, even a completely sour one, will cease to be so strong. For heating, you can use any heat source. You can use a hair dryer, a torch, a blowtorch or a regular lighter.
Guide to action:
Thoroughly warm up the nut and screw itself. After that we try to turn it with the key. Sometimes the edges of the fastener are damaged, preventing the key from being used. In this case, we put the socket head on the nut and warm it up together. Then unscrew it with a knob.
Destroying the nut
You can destroy the connection with an ordinary chisel, it can be cut with a hacksaw or grinder, or you can use a drill.
Guide to action:
- By hitting a chisel with a hammer, we make grooves on the edges of the nut. The blows must be strong so that the chisel goes deep. This increases the internal diameter. Gradually we will destroy the fastening element. The same effect can be achieved if you drill holes on the edges with a drill. Once the nut is broken, it can be easily removed.
- Things will move much faster if you cut off the nut with a hacksaw or electric grinder. The main thing is to make a cut along the axis.
As you can see, even the most rusty nut can be unscrewed (if you really want to). However, it is much better not to bring the situation to such a result. It is better to initially use a fastener that is not subject to corrosion. Then you certainly won’t have to rack your brains over how to unscrew the “stubborn” without breaking it.
Subscribe to our Social networks
Arctic cold in the indoor unit
Sometimes the reason that water flows from the air conditioner may be ice on the evaporator. Open the outer panel of the indoor unit of the air conditioner and inspect the radiator. If there is ice on it, the cause has been found.
In this case, there is so much ice on the air conditioner evaporator that it even froze the filter.
Ice may appear for three reasons:
- The air conditioner is set to operating temperature too low;
- The room temperature is lower than the operating temperature than the air conditioner and the humidity is high;
- There is not enough freon in the line.
Your actions
Turn off the air conditioner and wait until the evaporator thaws. To speed up the process, you can blow it with a regular hair dryer. After this, increase the temperature and use the device.
If the leak appears again over time, the problem is most likely low freon pressure. You won’t be able to fix this yourself, call a professional. At the same time make sure that the repairman has checked the freon line for leaks and topped up the air conditioner.
The fact is that the refrigerant circulation system is closed. If the pressure drops in it, then it could be broken. But sometimes freon comes out through microcracks in pipes or fittings very slowly and it doesn’t always make sense to seal them.
When to contact the service center
As can be seen from the above, some problems that caused the leak can be eliminated independently. However, it is necessary to soberly assess your technical skills and knowledge in the field of climate control systems. If you do not have confidence in your abilities, then if a leak is detected in the air conditioner, it is recommended to entrust its diagnosis and repair to specially trained service personnel. It should be kept in mind that most specialists may charge an additional fee for obvious signs of unsuccessful attempts to repair the unit themselves.
Important! It is forbidden to open the air conditioner and try to fix a serious equipment breakdown yourself, without having the necessary experience and knowledge.
It must be remembered that most large manufacturers of climate control equipment have their own official service centers in major cities of the country. Representatives of companies such as LG, Electrolux, Midea, Daikin are always ready to provide their specialists for warranty repairs and periodic maintenance of their equipment.
Where to buy a replacement
While repair work is being carried out, a portable air conditioner can be a temporary replacement for a stationary product. It can also come in handy at the dacha, or, for example, when traveling somewhere to visit. The best option in terms of price-quality ratio is to purchase from the AliExpress online store. Mandatory long waits for parcels from China are a thing of the past, because now many goods are in intermediate warehouses in destination countries: for example, when ordering, you can select the “Delivery from the Russian Federation” option:
For exclusive owners
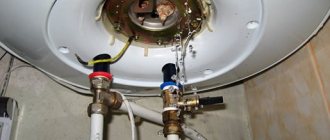
Sometimes water is drained using a special pump. This is usually done when it is not possible to lay drainage to the street. For example, if the room in which the air conditioner is installed is located below ground level - in the basement.
In this case, a small pump is placed on the drainage system, which pumps water out of it from time to time. Typical pump problems may include:
- The float chamber is clogged;
- The power contacts have come loose or oxidized;
- There is no contact between the sensor and the pump;
- The air vent tube is pinched, flown off or clogged;
- The pump itself burned out.
To find a solution to the problem, you need to check all the above points.
Recommendations
All of the above reasons are not the only ones, but are the most common in practice. To a large extent, everything depends on how well the drainage from the air conditioner was thought out and executed during its installation or laying of communications.
After completing the installation work, it is necessary to check how the drainage is proceeding. This is very simple to do, just fill a convenient container with water and carefully, without fanaticism, pour it directly onto the evaporator.
An equally important factor will be timely maintenance of the air conditioner, which should preferably be carried out at least once every 2-3 years.
If your air conditioner is leaking , just order air conditioner service!
“Equipment for Comfort” will qualitatively carry out all the necessary maintenance work on the air conditioner on-site in St. Petersburg and the Leningrad region.
Copyright © Blog “Technology for Comfort”