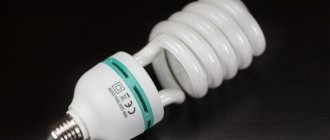
When your water heater leaks, you need to find the source of the problem as quickly as possible and fix it. If this is not done, the consequences can be the most unpredictable, and you will have to spend a lot of nerves and money to eliminate them. A faulty boiler can cause flooding not only of your own apartment, but also of your neighbors’ homes if you live in a multi-story building. There is also a risk of electric shock.
One of the most common breakdowns of devices is water leaking out of their top or bottom, which makes it impossible to operate the equipment normally. You need to look for why the boiler is leaking after it has been disconnected from the network and the water supply has been shut off.
Inspecting the water heater
If you find a leak in your boiler, then, first of all, you must disconnect the device from the electrical network.
Next, acting slowly, you can proceed directly to the inspection. When conducting an inspection, we must determine the location where the leak occurred.
Note! If the boiler is leaking from above, then there can only be one cause of the problem: a hole has formed in the tank. There are several reasons for the appearance of such holes, let’s get acquainted with them
There are several reasons for the appearance of this kind of holes, let’s get acquainted with them.
- We didn't bother to ground the water heater tank beforehand.
- A boiler was purchased with a good old manufacturing defect.
- The water supplied from the tap is of poor quality.
- We have been using the boiler for two or three years, and during this time we have not even thought about taking preventive measures.
- The tank is missing the required magnesium rod.
Regardless of the cause of the leak, the device must be removed in order to be repaired (or, alternatively, replaced with a new one). It is worth noting that if water seeps out from under the plastic cover, then the damage is definitely serious, and the water heater most likely cannot be repaired.
In another case, if the seal of the tank is broken, liquid flows out from under the plugs, flowing down the inlet and outlet hoses. This is also a sign that the broken heater will need to be replaced.
Note! The problem that unfortunate owners of water heaters most often encounter concerns heating elements - or, more simply, elements that directly heat the water. Heating elements break quite often, so they, as well as storage tanks, must be periodically descaled
Features of gas connections
When connecting gas stoves, water heaters and other types of equipment, flexible hoses are also used. Unlike water models, they are yellow and are not tested for environmental safety. For fixation, end steel or aluminum reinforcement is used. There are the following types of devices for connecting gas appliances:
- PVC hoses reinforced with polyester thread;
- made of synthetic rubber with stainless steel braid;
- bellows, made in the form of a corrugated stainless steel tube.
The Santekhkomplekt holding offers engineering equipment, fittings, plumbing fixtures and devices for connecting them to communications. The assortment is represented by products and materials from well-known foreign and domestic manufacturers. Discounts apply for bulk purchases, and product quality is confirmed by standard certificates. For information support and assistance, each client is assigned a personal manager. The ability to arrange delivery within Moscow and to other regions of the Russian Federation allows you to quickly receive the purchased goods without unnecessary hassle.
How to fix a leaking water heater
When you have identified the cause of the leak and assessed your capabilities, you can begin repairing. To repair a boiler, you need to prepare a hose and a container for draining hot water, a screwdriver or screwdriver, a set of keys and a multimeter or indicator. Carefully study the design of the device if you have never encountered disassembling the device. The design of a water heater is not as simple as it seems at first glance.
Let's look at step-by-step instructions for eliminating boiler leaks if you need to replace the heating element.
Step – 1. Disconnect the device from the power supply and turn off the water supply valves.
Step – 2. Unscrew the pipes, connect the hose, open the valve and drain the water from the storage tank.
Step – 3. Remove from the wall and dismantle the old heating element.
Step – 4. Install a new heating element, assemble the structure and install it in place.
If the reason lies in a leak in the tank itself, the boiler cannot be repaired. The water heater is a monolithic structure similar to a thermos, and it will not be possible to dismantle the tank from it.
Is it important to repair a boiler after leaks appear?
Unfortunately, the design of modern boilers does not allow any repairs, or they will be so expensive that it is better to purchase a new device under warranty.
The first reason why you should not send your water heater in for repair is the special coating that is applied to the inner surface of the device during its manufacturing process. This coating is glass enamel - a substance that prevents corrosion. Glass enamel is applied in a thin layer, so welding work can cause irreparable damage to such a layer. The consequence will be the rapid occurrence of rust, and, accordingly, end-to-end damage to the boiler body.
It should be remembered that the internal tank belongs to the category of non-separable elements; it will not be possible to get to it without damaging the housing. Why is that? Because the boiler belongs to the category of short-lived household appliances. Therefore, you will need not only a standard tool, but also a special one. Or contact the appropriate workshop, but the price of repairs does not meet expectations - it is best to purchase a new device.
What to do first
First of all, when the boiler leaks, you must immediately disconnect it from the electrical network. Then do a visual inspection to determine where exactly the water is coming from. If the product leaks from the side or top, it means that a hole has formed in the body.
If water leaks from below, this indicates that, at best, the magnesium rod needs to be replaced and the heating element, which is clogged with lime deposits, needs to be cleaned, but a final diagnosis can only be made with an “opening.” If the water heater is leaking, and water is seeping out from under the plugs, and leaks are going through the water supply and drainage hoses, then it is necessary to urgently change the heating element and check the tightness of the connections. Regardless of why the water heater is leaking, it must be dismantled - drain the water, remove it from its mounts and disassemble it to determine the reasons. Any home craftsman can handle this work, but only a professional can establish an accurate diagnosis of what exactly failed and what is the cause of the leak.
Before starting all work, while the water is draining from the water heater, you need to prepare the tools necessary for dismantling:
- a medium-sized adjustable wrench so that you can unscrew the largest nut on the product;
- special tester or multimeter;
- screwdriver and knife;
- set of tubular keys;
- the rubber hose for draining the water is already in operation.
About the brand
In the mid-40s of the last century, Aristide Merloni launched the production of electric water heaters under the Ariston (Successful) brand. The name fully justified itself, and after some time all the sons of the entrepreneur successfully entered into a similar business, and the youngest, Vittorio, inherited his father’s company.
The Ariston company today is one of the top three in terms of global sales of household appliances, and Ariston brand kitchens are sold with already built-in basic household appliances from the refrigerator to the dishwasher. In Russia, this company became famous in the late 90s of the last century, and now almost every major city has its service center.
Is repair possible?
In some cases, it is possible to repair the water heater yourself. However, the process is not as easy as it might initially seem.
The first step is to understand the cause of the problem. To do this, you should prepare and take tools that may be useful during the inspection:
- hoses (needed to drain liquid);
- screwdriver;
- wrenches (socket, tubular, adjustable);
- multimeter
Afterwards, be sure to disconnect the device from the power supply and drain the liquid. The device tank must be empty. Only after these manipulations do they proceed to inspection, identifying the causes of breakdown or leakage.
In some cases, the problem can be solved with minor repairs. In others, you will need to completely replace the water heater with a new one. It is advisable to do this before the warranty expires.
Here's what to look for during your inspection:
- Water leaks appear in the joint areas of the pipes. The cause of the malfunction is a leak in the water heater tank. Repair is not possible. The boiler will have to be replaced.
- Leakage is observed in the upper part. If the device has been properly maintained on a regular basis, the magnesium rod has been replaced on time, but there is still a leak, repairs will not help. You'll have to buy a new boiler. Also, the entire water heater must be replaced if it has an old magnesium rod that has not been replaced during prolonged use. This provokes rotting of the tank (in the case of a non-enameled inner surface).
- The tank cap is leaking. In these circumstances, a new heater is installed.
- Leaking directly in the tank. The most unpleasant situation is that the leak comes from the bottom of the tank. The most likely scenario is that sediment builds up and eats away at the bottom of the tank. Repair is not possible. The fact is that the water heater is a complete device with a single body and enameled internal walls. Once the enamel surface is damaged, it cannot be repaired.
The first place a plumber will check is the drain valve. It is located at the bottom of the tank. Responsible for draining sediment from the water heater. The valve is easy to replace, so this situation is the simplest.
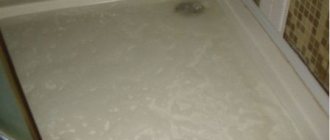
It is important to remember that not every small puddle of water found at the base of a water heater is due to a leak. Condensation may form on the pipes and fixtures that surround the water heater.
As condensation accumulates, liquid will begin to drip, accumulating on the floor. This is especially true in basements or in damp weather.
Boiler design and operating system are more complex than one might think. For this reason, the best way is to order repairs from specialists or purchase a new device.
Tips for extending service life
For the longest service life of the water heater without breakdowns, it is important to follow the manufacturer’s recommendations for its installation and use. This applies to any equipment that provides heating or water heating. When installing a boiler, it is important to provide grounding, a magnesium anode, and a safety valve.
- Before installing the device, be sure to check what pressure is in the system. Normal value: up to two atmospheres. If the value is exceeded by more than 3 atmospheres, this pressure must be reduced, for which a reducer is installed in front of the device, which will prevent the temperature from rising.
- The optimal temperature for the boiler is up to 50 °C; it is not recommended to set it above this value.
- Clean it periodically (2-3 times a year); it is important to monitor the condition of the rod.
- It is recommended to connect the device to the water supply system through a special magnesium filter, which is best purchased at the same time as purchasing a water heating device. This will reduce water hardness levels if they are very high or there are a large number of impurities in the water.
If the boiler is leaking, you need to try to determine the cause of this unpleasant phenomenon as quickly as possible and eliminate it. And in order to avoid breakdowns of this kind, you need to follow the operating rules of the water heater, periodically clean it, and replace worn out elements.
Modern household appliances for autonomous heating of hot water are highly efficient and reliable, ensuring long-term service life. However, many users have encountered a situation where the boiler is leaking.
Not only the scale of flooding of the apartment and its consequences, but also the safety of expensive equipment and the possibility of its further operation depend on the correctness and speed of emergency repair of leaks.
Therefore, residents who have installed such equipment in their house or apartment need to understand the causes of leaks and know the sequential actions in case of an emergency in order to properly repair the boiler.
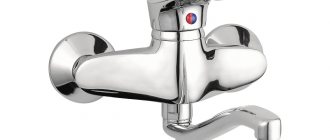
What to do if the new faucet is dripping?
Sometimes even a faucet that was purchased and installed relatively recently begins to leak. In such situations, the reason, as a rule, is simple to the point of banality - the device has a manufacturing defect, which is difficult to identify during external inspection.
New mixer
Finally, we note that a faucet in a kitchen or bathroom can start dripping at any moment. To solve this kind of problem, you can go one of two possible ways - to involve a qualified specialist in the work or to try to do everything yourself. However, if you know the exact cause of the leak and how to properly eliminate it, then no difficulties should arise.
Causes of leakage and solutions
After disconnecting the Thermex hot water boiler from all utility networks (water, electricity) and draining the water, it is carefully removed (for a wall-mounted structure) and placed on a clean rag on the floor, with the taps placed at the top
Then they do a thorough internal and external inspection and study the nature of the leak:
- If it flows from above or from the side along the body, this indicates the presence of a fistula, one or several.
- A lower leak indicates the need to change the magnesium rod and clean the element from scale formation.
- If the boiler is leaking from the plugs, this indicates an urgent replacement of the heating elements and the need to check the tightness.
- If there is a leak from the plastic cover, then the boiler is completely unusable due to problems with tightness; water escapes from the plugs, along the supply and return. This failure cannot be corrected; a new device is required.
Operating rules
To avoid situations like this with a water heater leaking, you need to know how to use it. Even at the installation stage, strictly follow the manufacturer’s instructions
When connecting the boiler to the electrical network, it is important to provide a magnesium anode, a fuse and grounding
Basic rules of use:
- Before installing the boiler, check the pressure in the water supply system. It should not exceed two atmospheres. If the pressure is higher, the water heater will not be able to function normally. To reduce the water pressure in the system, a reducer is additionally installed.
- When using the water heater, you should clean the rod once every three months and monitor its condition.
- When using a water heater, you should not set its temperature above the optimal mark (50 C).
- Water with increased hardness in the system or the content of an abundance of chemical additives and impurities in it cannot but affect the operation of the water heating device. In the case of such water, it is imperative to install a filter on the inlet and periodically carry out maintenance on the heating tank by cleaning it from contaminants and replacing the necessary components.
Proper operation of the device will extend the life of the boiler and eliminate possible minor breakdowns.
Mixer dirty
The liquid will flow in a weak stream if the mixer spout
a traffic jam has formed. The pressure will be equally bad for both cold and hot water. To fix the problem, it is necessary to carry out a number of procedures.
- Close the riser to turn off the water.
- Carefully remove the mixer.
- Unscrew the spout from the general body.
- Remove the mesh and rinse it under running water. If salt deposits or heavy dirt forms, let it soak in a special cleaning solution.
- Rinse the faucet spout thoroughly and clean the insides of dirt using a brush.
- Reassemble the mixer in reverse order and install it in place. Don't forget to open the riser.
This procedure may take some time; alternatively, you can simply replace the clogged faucet with a new one. Experts recommend replacing worn parts every few years to avoid serious damage in the future.
Preparing everything you need
Before starting work, we prepare everything that may be required. Mandatory equipment includes:
an adjustable wrench (it is important that it is larger than the largest nut in the water heater); knife; electrical tester; screwdriver; tubular wrenches (full set if possible); socket wrenches; a rubber hose with which we will drain the remaining water from the tank.
If any of the items are missing, be sure to buy this, because this tool will definitely be useful to you in the future. There is an opinion among some “masters” that, supposedly, with minimal knowledge about the operating principle of a water heater, they can easily install the device or, even worse, carry out repairs. In reality this is not the case, since minimal knowledge is clearly not enough; therefore, full-fledged repair work should be carried out exclusively by professionals. But such a trivial problem as a boiler leak can be fixed on your own. Let's look at how to do this.
Visual inspection is the main diagnostic method
If drips appear on the body of the device, you should not immediately proceed with dismantling; you must first carry out a preliminary visual inspection. This is a very important method that will help quickly identify the leaky area.
The correct inspection sequence should be as follows:
- Fill the water heater with water up to about. This should not be done forcibly, since leaks can appear only when the water heats up.
- Inspect the bottom of the water heater, especially the seams and seal of the heating element cover.
- Inspect the walls of the device. In these places, leakage occurs extremely rarely, only during long-term operation of the water heater.
- Inspect the top.
Often, worn-out rubber water intake or supply hoses may be to blame for fluid leaks. Such places should be carefully inspected in advance and done periodically in the future.
Preparing for work
Before you begin directly repairing/replacing the mixer, you must turn off the water in the riser. Otherwise, problems with the tap will be aggravated by flooding of the apartment (not only your own, but also the neighbors below). Only after turning off the water can further work begin.
Water supply risers
To carry out repair work, you will need the following:
- some kind of vessel (to collect water);
- rags;
- Adjustable wrench;
- sponge;
- silicone seals;
- cleaning agent;
- screwdrivers;
- wrench;
- fluoroplastic sealing tape;
- rubber gaskets (new);
- pliers.
PTFE tape
All these tools/materials are quite enough to deal with a leaking plumbing faucet yourself.
Repair kit for mixer (AKVAREM)
Types of valves in a gas boiler
The normal operation of gas equipment intended for heating sanitary water and preparing coolant is ensured by a wide range of systems, parts, devices, each of which clearly performs the important function assigned to it.
The design of gas boilers has the following types of valves:
- Gas valve. A component of the gas system responsible for the proportional supply of blue fuel to the gas burner, ensuring a stable combustion process in accordance with the commands of the electronic board. This electromagnetic device also includes shut-off and control valves.
- Safety valve. A component of the hydraulic system designed to discharge excess coolant from the heating circuit in case of exceeding standard pressure values.
- Three way valve. Part of the hydraulic system of double-circuit boilers only. Redirects the flow of heated water from the heating circuit to the hot water supply during its consumption for hygienic purposes. Depending on the class of the boiler, it can be with or without a servo drive.
All of the listed types of valves involved in the operation of a gas boiler can be replaced or repaired in the event of a breakdown.
Let's take a look at the technology for restoring their functionality. By mastering simple repair principles and techniques, you can significantly increase the service life of the boiler itself.
How to repair a shower switch?
Bathroom taps have a separate bath-shower switch. If the breakdown of this element is not repaired in a timely manner, the entire mixer may fail.
Based on their design features, the following types of switches are distinguished:
- Spool type. Such switches are produced complete with valve taps.
- Cartridge. This type of switch usually comes with Russian-made mixers.
- Cork type. This design is almost never produced by modern manufacturers of plumbing equipment.
- A push-button switch allows you to mix water from a hot and cold pipe.
The most common cause of a leaking pushbutton switch is a damaged gasket. In this case, you can remove and thoroughly clean the old rubber ring, but it will be most effective to replace it with a new one.
Repairs are carried out as follows:
- First of all, you need to remove the button. To do this you will need an adjustable wrench. All manipulations must be done with great care so as not to damage other parts.
- Use a wrench to unscrew the entire switch.
- There should be rubber gaskets on the retractable switch rod. Worn rings must be replaced with new ones.
If for some reason it is not possible to replace the gasket with new material, the old ring can be softened. First, the rubber must be thoroughly washed with soapy water, then soaked in gasoline or solvent for several minutes. However, it is worth remembering that such manipulation will only achieve a temporary effect. After some time, the switch will start to drip again, and even then replacing the gasket will be inevitable.
The procedure will be as follows:
- First you need to remove the plug;
- Using a screwdriver, you need to unscrew the screw that secures the lever;
- Next, you need to remove the lever itself;
- then the nut that secures the cartridge is unscrewed and removed;
- the old cartridge must be removed and a new one installed in its place;
- The repair work is completed at this point, the last stage will be the assembly of the device.
The spring, like the switch cartridge, cannot be repaired. Therefore, if this element breaks, it must be replaced with a new one.
Replacement occurs as follows:
- at the first stage, the faucet gooseneck and shower hose are removed; for this you will need an adjustable wrench;
- next you need to remove the adapter;
- the next step is to unscrew the fastening screw and the plug;
- then remove the rod where the spring is located;
- the damaged spring is removed and a new one is installed in its place;
- After you have replaced the broken part, the device must be put back together.
One of the most common failures of a spool switch is a leak at the location of the water switch handle.
The reasons for this problem may be the following:
- the rubber seal, which is located at the rotating rod of the crank, has deteriorated;
- the seal on the axle box is worn out;
- The screw that secures the crank or axle box is not screwed on properly.
To begin repairing the switch, you need to identify the source of the problem. To do this, you need to unscrew and remove the switch handle and run the water. This way, you will be able to see the exact place where the water is oozing from.
If there is a leak in the area of the valve-axlebox, rotary rod or mounting screw, the rubber O-ring must be replaced. If the crank fixation is weak, you need to tighten the screw more firmly.
A few more frequent breakdowns
Listed above are the most common breakdowns of water heaters that lead to liquid leakage. But there are other malfunctions that are not so common.
Water dripping from safety valve
The safety valve protects the liquid heating device from excessive amounts of liquid, which can cause serious damage to the boiler. Along with the liquid, the pressure in the tank also increases, and accordingly, damage to the housing may occur.
Replacement of safety valve
The design of a safety or check valve is simple: a body made of brass, locking mechanisms and several springs of a certain stiffness. After the pressure on the main mechanism is exceeded, it opens, releases liquid, and then returns to its original position.
If small drops appear flowing from the safety valve body, you should immediately pay attention to the rubber seal. It may become unusable and cause a leak. After replacing such a seal, the water drops stop.
If the safety or check valve itself for the water heater is leaking, this only means damage to the housing. Even a microcrack that is invisible to the eye can lead to such consequences. A thorough inspection of the shut-off element should be carried out, and if the leak is coming from the body, the safety valve should be replaced completely.
Boiler leaks when water supply is open
A breakdown occurs when, when the hot water tap is open, the water heater begins to leak. The reason for this situation is the pressure, which gradually decreases as the heated liquid leaves the tank. Most often, such leaks occur from rubber or silicone seals.
When the liquid is heated, not only pressure affects the seal, but also temperature. As we know, as the temperature increases, rubber gaskets also expand. While there is hot water in the tank, the seal holds it back and begins to flow immediately after cooling.
To fix the problem, you should drain half the water from the boiler, determine exactly where the liquid is flowing, and replace the gasket in this place.
Do-it-yourself Termex boiler repair
Before you begin the repair, first gather the necessary tools: a set of wrenches, an adjustable wrench, electrical tape, various screwdrivers, pliers. After this, turn off the water by closing the inlet and outlet valves to the water heater. Then drain the water from the boiler tank and disconnect it from the power supply.
The next step is to remove the protective cover. If you have a vertically located boiler, then the lid is located at the bottom, and in the case of a horizontally located one, it is on the left or in front.
When removing the cover, pay attention to the stickers. Often the screws for fastening it are located under these stickers
If you have unscrewed all the screws and the cover still does not come off easily, check the stickers again.
Replacing the heating element
First, perform all of the above steps and remove the tank cap.
To make it more convenient to work, you can even remove the tank from the wall.
It is worth noting that most Thermex models have not one, but two heating elements. Therefore, it is imperative to remember how and in what sequence the parts need to be connected. It’s better to photograph the whole process.
To remove the heating elements from the Thermex water heater, remove the top cover by unscrewing the bolt; disconnect all plugs and unscrew the bolts securing the heating elements.
The heating element itself is turned off as follows:
- After removing the cover, find the protective thermostat, remove the tips from it;
- also remove the tips (3 pieces) from the heating element;
- cut the plastic clamp;
- Unscrew the screws, removing the sensor;
- now disconnect the cable and unscrew the four screws;
- then you need to dismantle the nut on the clamping bar and pull out the heating element.
After dismantling the heating element, it is necessary to clean the surface of the tank from dirt and scale. Only after this can you install a new heating element and put everything back together.
Do not forget that the heating element does not always need to be changed. If the water in the tank still heats up, but it happens slowly, then, most likely, scale has formed on the heating element. Then dismantle it and descale it. Then install. The problem should go away. Also, do not forget that it is advisable to clean the heating element with chemicals rather than scrape off the dirt. In the latter case, there is a possibility of damage to the part.
To clean the heating element, you can use a solution of citric acid or vinegar (its percentage in the solution should be about 5%). The part must be immersed in liquid and wait until the scale falls off. Then you need to wash the heating element.
Faulty thermostat
The thermostat in Termex water heaters is located under the cover, next to one of the heating elements, and its sensor is located inside the tank.
Sometimes the thermostat fails. This element cannot be repaired; it must be replaced. To perform the replacement, you need to do all the preparatory steps, remove the cover, then remove the thermostat. But before dismantling, we recommend checking this part. To do this, use a lighter to heat the tip of the sensor (copper). If the thermostat is working properly, you will hear a characteristic click, which means that the protection mechanism has activated and the circuit has opened. Otherwise, you will have to replace the part.
Tank leak
No matter how trivial it may sound, but first you need to find where the water is coming from. A lot depends on this, since if the tank is rotten, you will have to buy a new water heater. So:
- if water oozes from the side seam, then the container is rusty and repairs will not be possible;
- If water comes out from under the lid at the bottom, then you need to disassemble the tank.
If traces of leakage are found in the places where the heating elements are attached, then your water heater is not hopeless and can be saved by replacing the gasket.
In the case of the second option, complete all preparatory steps, then remove the plastic cover. Next, take a close look at where the water is leaking. If it comes out near the flange, then the rubber gasket has deteriorated (less often this is a problem with the heating element). Otherwise, the tank is rusty and the boiler can be thrown away. To replace the gaskets, you need to remove the heating element. But it is necessary to carefully examine the heating element itself. If it is cracked, it is also better to replace it.
Is the boiler leaking? 5 tips if your boiler tank is leaking
The average service life of a boiler with an open heating element is about 8-10 years, subject to regular descaling. Boilers with a dry heating element demonstrate a longer service life - up to 10-12 years, since they have a built-in insulated structure in the tank.
Even with regular preventive cleaning work and the installation of a salt filter that softens the water, the metal body of the water heater is susceptible to corrosion and begins to leak. When choosing a boiler model for intensive use, it is recommended to opt for heating element models made of copper and stainless steel.
It is easy to determine the presence of a breakdown. Visual monitoring shows that there are pockets of moisture and water on the top or bottom cover; in addition, the water temperature on the display does not always correspond to real indicators. There are also frequent cases of rust leaks forming on the body or tiled wall.
Why is the boiler leaking?
Lack of regular preventive maintenance and refusal to use salt softening filters most often leads to breakdowns, but in addition to this, the following factors are also identified:
- violation of installation rules - at an average pressure of more than 5 atmospheres, a regulator that reduces the pressure is not installed in the cold water supply;
- lack of regular replacement of the magnesium anode;
- faulty boiler safety valve;
- an ill-conceived system for discharging excess water from a storage tank into the sewer system;
- violation of operating rules - frequent changes in heating temperature, lack of preventive shutdowns of the system;
- “stray currents” - a situation when neighbors on a riser incorrectly install the grounding of their water heater (relevant for residents of high-rise buildings).
What to do if there is a potek boiler: 5 important tips
First of all, you need to turn off the power to the water heater from the electrical network and make every effort to collect water from the tank. It is important to shut off the cold water supply using a special valve. When the boiler leaks, it is better to warn the neighbors below that repair work will be carried out, since the level of operating pressure in the water communication system may change dramatically.
How to repair a boiler
It is recommended to start diagnostics with visual monitoring: where exactly the source of leakage is observed and whether the integrity of the body shape is compromised, whether pockets of corrosion and rust are visible.
The temperature of the water flowing from the tank is also taken into account: warm (hot) indicates that the internal heating system is normal; cold - along with damage to the housing, the heating element itself failed. If the boiler tank leaks, the water heater must be dismantled and checked to detect pockets of rust and deformation.
As a rule, the cause of such malfunctions is a change in pressure, as well as incorrect operation of the device: the access to water was blocked when there was a significant amount of hot water in the tank.
Often, breakdowns of individual water heaters occur in apartments during preventative maintenance to replace sections of the water supply system or when water is drained from all floors. The main cause of the breakdown is a failed combined non-return safety valve.
If the boiler leaks immediately after installation, this indicates a violation of the sealing of the structure and requires consultation with a specialist.
Who will repair the water heater?
The answer to this question may vary depending on the following factors:
- do you have experience and knowledge in this area;
- how much time and effort should be spent on repairs;
- Availability of necessary parts for replacement.
As a rule, they turn to specialists for qualified help, and if the water heater is under warranty, then to a service center or to the company that carried out its initial installation and commissioning of the system.
Is it necessary to dismantle the boiler during repairs?
Some types of damage can be resolved without removing the tank. This applies to poorly secured water pipe washers or replacement of a safety valve. If the gasket near the flange wears out, work is also carried out without dismantling the water heater from the wall: the bolts are unscrewed, the protective cover is removed and the water is drained. After removing the heating element, replace the gasket, coat all parts with heat-resistant silicone and fix the cover back. The system can be powered 30 minutes after completion of repair work.
Regular and irregular boiler leakage
If a situation has already arisen that requires removing the device, it is important to descale it and check the condition of the heating element. Some boiler models allow you to assess the internal condition: how much the metal base has succumbed to corrosion, visualize problem areas and repair them before a leak starts. The boiler does not necessarily leak regularly: sometimes these are small leaks formed after the repair of water supply pipes or in the event of a sudden cold snap. In this case, you need to monitor the changes for several days and if the situation does not change, carry out work to replace parts.
Sometimes a situation arises when a neighbor’s boiler leaks, and your heating device also begins to fail; water and rusty stains are visible on the floor and walls in the bathroom or kitchen. The reason your heater is malfunctioning is that the safety valve has failed and the system cannot cope with the high pressure in the pipes.
Regularly monitor the condition of your household appliances and carry out preventative descaling work.
Source: https://vencon.ua/articles/techet-boyler-5-sovetov-esli-potek-bak-boylera