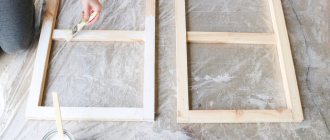
We finish the surface with acrylic paint and varnish.
After drying, we mount the decorated doors back on the cabinet.
This method of decoration involves creating a unique surface on the front parts of the cabinet, completely imitating wood carving. Even a specialist at close range is unlikely to distinguish the decor from real carvings, let alone your guests, who will be simply amazed by the transformation of long-familiar furniture.
Ideas for transforming modern cabinet furniture
Many years ago, unable to change the kitchen, I covered the facades with napkins, having learned about this method on one forum in a decoupage thread. The furniture lasted a couple more years, and now it lives in a relative’s apartment as a temporary option.
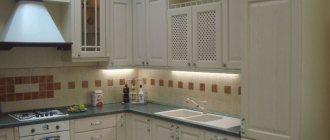
Photo of an old kitchen
Now I'm annoyed by the closets in the bedroom. They are still strong, quite comfortable, just tired. In times of crisis, it’s not yet possible to dream of new ones, so I decided to look for ways that would help me modify them. It turned out that this is possible, and there are many options and all of them are quite budget-friendly.
I share my research.
Idea 1: applique
Applique or decoupage is the simplest and most common way to give new life to old things. The drawing or image can be anything. Quite often, three-layer paper napkins are used for decoration, using only the colored top layer.
But these can be special decoupage cards sold in art stores, wallpaper, photographs, pictures printed on a printer, and magazine clippings.
The decor of the old cabinet is made using applique
In order for the furniture to look decent and serve for a long time, you need not just cover it with paper with a pattern, which will quickly get dirty or tear, but perform a whole series of works:
- First of all, the doors and sides of the cabinet are cleaned of dirt using a soap solution. Sometimes they even have to be treated with sandpaper or a sanding machine - you need to look at their condition.
- After cleaning, degreasing and drying, the furniture is primed, and if it is dark, then painted with light paint. Although if you use a pattern on a dense opaque base for appliqué, this is not necessary. You can use regular PVA glue as a primer for napkins and decoupage cards.
- When the paint has dried, carefully stick on the image - a whole sheet to fit the door or cut out elements, it depends on your imagination. The main thing is that you like the decor of your closet with your own hands.
- To ensure that the applique stays firmly in place and does not come off, and that the cabinets can be subjected to wet cleaning, they are coated with colorless varnish after the glue has dried. Preferably in two layers.
Idea 2: painting
The simplest solution that makes it possible to update an old cabinet with thousands of options. The most affordable is painting in one color. But not the only one. You can paint the body and shelves or drawers in different colors, or highlight the part of the facades limited by moldings or panels in a different tone.
Old bookcases can still serve in a children's room
Using masking tape or stencils, you can apply colored stripes, geometric shapes, and ornaments to furniture. And if you rub certain places with a candle before painting, and after the paint has dried, rub them with scratch paper, you will get an artificially aged surface.
As in the previous case, the surface of the cabinet needs to be prepared for decoration:
- Remove the fronts and fittings from them, take out the shelves and drawers, and clean everything well.
- If there is polishing, it must be removed using a sanding machine, since the paint will not adhere to it.
- Then all the details are painted with your own hands in the main tone. The number of layers depends on the desired result.
- Next, act according to the circumstances: if you are satisfied with a monochromatic cabinet, simply assemble it after the paint has dried, returning the handles to their place.
- If you are planning transitions of color and pattern from one part to another, then first insert drawers and shelves, hang doors, and then proceed to the second stage.
There will be dark stripes where the masking tape used to be.
You can buy figured wooden slats or polyurethane moldings, paint them in the desired color and stick them on the facades in the form of a frame. In general, there are a lot of options.
Idea 3: upholstery with sheet materials
Instead of paper, you can paste over the facades or nail thin sheets of plywood, laminated fiberboard or mirrors onto them.
Such a chest of drawers in a hallway with mirrored facades will visually add space and light
Pre-sheet materials are cut and cut to size. You can enclose them in a frame made of wooden slats.
Idea 4: decorating with fabric
If you've made new curtains or a bedspread and you have a lot of material left over, use it to update your furniture. Decorating with fabric is no more complicated than appliqué, the main thing is that it does not stretch and is dense enough.
All work is carried out using the same technology, only instead of a paper base, a textile base is used. But you can do it even simpler and fix the fabric using a furniture stapler on the back of the walls and doors. Of course, to do this, the cabinet will have to be disassembled and then reassembled.
Built-in wardrobe and door after decorating with fabric
You can go further and place a layer of thin foam rubber under the fabric. This is an excellent solution for a restless child’s nursery, but not only that. Such a soft wardrobe would also look good in an adult bedroom. You just need to carefully select the color of the fabric to match the wallpaper or decorative elements.
Decor options
Old furniture can become an original interior design decoration using decorating techniques. Many ideas have been developed on how to make a new cabinet out of an old one. These are dyeing and artistic painting technologies, methods of decoupage and wallpapering, and adding decorative inserts.
Upholstery and upholstery with fabric or leather will change the style of items in accordance with the updated interior of the room.
An original and effective solution is mosaic decor. The technique suits Art Nouveau and Art Deco styles. The elements used are ceramics, glass of different shades, etc.
The decor of an old cabinet can be done with gilding. Furniture is given a luxurious look with the help of foil, which allows you to completely cover the item or create sophisticated patterns.
When restoring furniture, it is important to consider the harmony of the combination of finishes with the color scheme of the room.
Painting
Painting furniture is a simple and effective technique. The design can be monochromatic or combine a range of contrasting shades. Partial coloring of elements is possible: drawers, doors, handles, side parts, etc. Furniture processed using the ombre technique looks original - with transitions from rich to pastel shades.
Chests of drawers and sideboards made of natural solid wood are recommended to be treated with a thin layer of translucent paint to preserve the texture of the wood. Surfaces are painted with acrylic paint, which is considered optimal for furniture decoration, since the material is odorless, easy to clean and mix. Before work, surfaces are sanded and primed.
Stencils and stickers
Stencils and vinyl stickers are an affordable and easy way to decorate your closet on your own. The method allows you to decorate furniture with patterns of laconic geometric shapes or complex compositions. Decorative stencils allow you to complete your work accurately. The method is suitable for Art Deco and Art Nouveau styles.
Decorating furniture with wallpaper will help hide surface imperfections and change the design of the item. The color scheme of materials is chosen in accordance with the shades of the interior. Before finishing, the cabinet frame must be sanded and painted. It is possible to combine the raw texture of wooden furniture and wallpaper patterns used to decorate some cabinet elements. The method is suitable for vintage-style rooms.
Wallpaper as a decoration is suitable for many interiors due to a wide palette of shades, color combinations and patterns. Textures can be embossed, glossy or matte.
If you decorate the cabinets with photo wallpaper, you will get an original model. Wallpaper can also be glued to parts of the cabinet: sides, doors, shelves, etc. After finishing work, the product is coated with a fixing varnish.
Decoupage
Using the decoupage technique, furniture is decorated with a pattern that merges with its surface. The method is simple to perform and effective. The finishing material is special napkins with floral patterns, images of nature and animals, paintings by famous masters, etc. The image can be clear or blurred in accordance with the design project.
Ways to transform wooden cabinets
The texture of natural wood is very beautiful, and it’s simply a shame to hide it under a layer of paint, paper and any other materials. If you want to get real designer cabinets from old and dry ones, you will have to work hard.
Firstly, most likely, you will have to replace the hinges and other fittings; as for the surface itself, it all depends on its condition and what you want to get in the end. But in any case, you first need to fill up all the potholes, scratches and other defects with a putty or furniture wax that matches the color, and then these places, and if necessary, the entire surface, are sanded with sandpaper.
The old varnish must be completely removed
Next, you can choose one of the following decor options:
- Toning . Cover the entire cabinet with stain, choosing a color slightly darker than the original.
- Craquelure . Paint the furniture with glaze paint, and then apply a special varnish on top, which, when dry, “breaks” the base layer, creating characteristic cracks on the surface. They will be more noticeable if the paint color and the original cabinet color are different.
This is the surface you will get as a result
- Patination . Softwood and softwood furniture can be brushed with a stiff wire brush to create grooves. Then it is painted with acrylic compounds and, without waiting for the paint to dry, it is lightly wiped with a cloth. At the end of the work, the surface is varnished.
The price of such an independent restoration cannot be compared with the cost of work performed by a master, and the result may not be worse.
Secrets of the master
Hello visitors to the site “Secrets of the Master”! Quite recently, in the article “Calculation and assembly of doors for a wardrobe”, I promised to talk about some methods for independently finishing cabinet facades. As you know, the main and most common filling of a sliding wardrobe system is a mirror or glass. And how this mirror or glass is processed will subsequently affect the overall appearance of any wardrobe, i.e. no matter how bizarre its geometry is in shape, the main advantage and beauty is still the façade (face)! In fact, there are quite a lot of processing methods. From the simplest to the most complex, high-tech and costly. I think there is no point in talking about everyone, because not everyone will be able to process glass/mirror with sandblasting or a special alkaline suspension, engraving or silk-screen printing at home. Therefore, we will consider a couple of options for the simplest and at the same time quite beautiful decoration of wardrobe doors, which any craftsman can do independently.
Update methods
There are different ways to update furniture items:
The restoration tools at hand will help in choosing the appropriate method. Artistically updating the appearance of furniture will not require significant expenses.
Decoupage is one of the decoration techniques. Drawings, paintings or carved ornaments are attached to the object. Then the base of the composition is varnished. Various coating options, in addition to the main functions of protection and extending the durability of the service life, also perform the function of giving the item a visual effect.
Painting is decorating a surface using paints and a brush. It is distinguished from painting by the spatiality and tangibility of the pictorial surface in the environment.
Painting and filming eliminate defects on the facade of furniture, and also facilitate its integration into the interior of the room. The color scheme of surfaces is selected based on the overall design concept of the room.
Make a slate surface
Chalkboards are all the rage right now, so why not make one out of cabinet doors? The slate effect can be easily achieved in two ways: buy a film or paint the chest of drawers with chalkboard effect paint.
Cabinet restoration technology
Before you decorate the cabinet with your own hands, you need to prepare it for work. First of all, you need to remove the existing fittings from the cabinet. At the same time, you should pay attention to the performance of the door hinges; it is quite possible that they require replacement. The tilt in the spatial position of the cabinet should be eliminated, if any. To do this, the gaps between the planes of the box are removed, after which they are reliably welded together.
The coating is removed with a spatula using a solvent. Then the surface is thoroughly sanded with sandpaper. The inside of the cabinet is treated with denatured alcohol to eliminate stubborn stains. This is followed by fungicide treatment to prevent mold formation.
After some time, the irregularities are smoothed out with sandpaper. After dust removal, the surface of the cabinet must be puttied and single scratches painted over with paint compounds that match the tone of the old coating. Using plastic moldings, plaster overlays and imitations of stucco (without disturbing the style), missing or damaged decorative fragments should be restored
Video description
The video shows how to apply large posters to wardrobe doors:
Method three - stained glass
It is easy to remove the doors and replace them with stained glass windows made in specialized workshops. Only wealthy people can do this. But even here, if you wish, it is not difficult to save money by choosing translucent stained glass film instead of stained glass finishing. It is also allowed to be used if the doors have a mirror surface.
The film has a translucent base. It lets light through. It is reflected from the mirror and comes back. In this way, a glow effect is formed, similar to the reflection of colored glass. The film is applied in the same way as a vinyl sticker. The following photo allows you to evaluate the result.
Method four - matting mirrors with paste or aerosol
This method of cabinet decor allows you to give the smooth surface of glass or mirror roughness and opacity. To implement it, you need to purchase a stencil, an aerosol or paste for matting, and a spatula for applying such compositions. The operating procedure is as follows:
- the surface of the cabinet is degreased with alcohol or glass cleaner;
- a stencil is attached similar to vinyl stickers;
- paste is applied to the open areas of the stencil with a spatula or an aerosol is sprayed;
- after the time specified on the packaging of the product has passed, the excess paste is removed with a spatula;
- The stencil is carefully removed.
The result sometimes helps to completely change the appearance of the cabinet, improve it, and divert attention from other more significant defects. We hope that the proposed methods will help you understand how to decorate a closet and give it a second life without extra costs.
Decoupage furniture
You can also make your own wardrobe decor from fabric. To add harmony and elegance to the interior of the room, fabrics are selected that match the color pattern with the tone of the wallpaper. The texture of the fabric should be dense to prevent deformation when stretched. Thin foam rubber can serve as the basis for the fabric upholstery of a wardrobe. The fabric must be secured to the back of the doors or the inside of the cabinet with a furniture stapler or liquid nails.
It is not difficult to decorate a wardrobe with your own hands using antique decoupage. Furniture is removed from paint using a sanding machine. Then the surfaces are degreased with a solvent, followed by a layer of primer. To age furniture, you don’t have to resort to scratching, creating cracks, etc. Modern chemistry can handle this perfectly. To create the effect of cracks, craquelure varnish is applied to the primed base.
Coniferous wood wardrobes are updated using the following technology. The surface is treated with a metal brush to give the wood structure characteristic stripes. After this, the wood should be coated with dark paint. Without waiting for the paint layer to dry, they pass a cloth over the painted surface of the wardrobe. After applying the varnish, the restoration is complete.
Cover with film
Self-adhesive film will help hide all the imperfections of cabinet doors or dresser drawers in a couple of simple steps. The range of films is huge, you can choose one color or with an interesting pattern, golden or imitating wood. Do not forget to degrease the surface before application, or even better, sand it and cover it with a layer of primer.
Updating a chipboard cabinet
Many apartments still have old chipboard furniture. It is quite functional and, despite the long period of operation, it is still possible to decorate a cabinet from chipboard with your own hands.
The cabinet is disassembled and old fittings are removed. Surfaces intended for pasting are cleaned with water and added dishwashing detergent. Then degrease with a cloth soaked in vinegar. This should be done with special care, since poor-quality degreasing will subsequently lead to peeling of the self-adhesive film.
After this, the required size of the film is cut, while not forgetting about a small margin. The prepared base is moistened with water from a spray bottle. This technique, in which the film will not immediately set to the surface, is used to allow it to be moved and adjusted when correcting distortions or folds.
The laid self-adhesive film must be smoothed with a soft cloth using movements from the middle of the tape to the edges. This removes air from under the film. If it is impossible to completely remove the air, the resulting bubbles are pierced with a thin needle, and the area is smoothed with a soft cloth. The updated cabinet is assembled and new fittings are installed in place.
Unusual uses of plaster
Plaster allows you to add texture to any surface. These can only be some corner elements, such as a contour ornament, or the entire surface will have a relief pattern. For such work you will need all sorts of stamps and stencils.
Wardrobe decor with fabric wallpaper
The finished texture can also be saturated with color. Here again you will need paint. Painting or covering in one tone is a matter of imagination. Texture and decoupage are amazingly combined. Then the surface will really seem voluminous and somehow impossible.
Screen-painted cabinet decor
Always give your furniture new life. Believe me, you will never be able to find more unusual and original furniture than made by yourself. Get inspired and start creating!
Decoration technologies
Stylish furniture can also be decorated with a photograph printed in a large photo studio.
When decorating an old wardrobe with your own hands, you can paste a photo with your favorite applique on the door. Before this, they are sanded with sandpaper, dusted, primed and covered with a layer of white paint. After sticking the photo, the wardrobe is varnished with colorless varnish.
When mirroring a cabinet, one achieves hiding defects on the doors, as well as expanding the space in a small room. First, mirror panels are ordered in the workshop. Then the mirrors, aligned in place, are fixed to the cabinet doors with special fasteners or using liquid nails.
Wallpaper remnants can also be used as furniture decor material. They are used to cover the facades of cabinets, doors, and interior walls. In this case, it is recommended to use PVA glue. A wide selection of self-adhesive wallpapers significantly expands the range of design inspiration.
Restoring old furniture is not difficult if you follow the recommendations. But among the household members there are many original craftsmen who can do everything. All they have to do is show them the decor of an old cabinet with their own hands, a photo, and they can easily restore it.
Good luck to them in transforming our old faithful companions in life!
Choosing a style
The very first step is to imagine what should happen in the end. Imagine a picture or find it in an interior magazine, and then, based on the visualization, choose a method of implementation.
- The Provence style will be supported by furniture decorated using the decoupage technique, hand-painted, decorated with hand-embroidered fabrics, or partially covered with companion wallpaper that supports the overall tone of the room.
- The Russian direction (folk, Old Russian, popular print versions) is the application of ornaments and patterns on wood or glass facades. In a nursery or kitchen, a painted large item for storing dishes, table linen, children's clothes or toys will become a real treasure.
- The belonging of simple-shaped objects to the chinoiserie, colonial or eclectic styles will be emphasized by painting with Chinese motifs followed by varnish coating.
- The soft classics of the bedroom can be set off by voluminous quilted wardrobe doors, echoing the manufacturing method, chosen material, color with a high headboard.
- Even in simple and strict minimalism there is a place for the designer’s “joke”, which makes the interior special. Using a craquelure coating on one item, painted in the same color scheme as other furniture, is a way to create an accent, a “zest” of the space being decorated.
When decorating furniture using decoupage technique for the first time, choose white paint for the base. It is easier to choose the necessary decoupage napkins for this tone, and PVA glue will remain invisible. The product will look professionally made due to the overall light finish. It is more difficult to decorate a dark surface neatly.
How to decorate kitchen furniture (42 photos): ideas and instructions
Beautiful furniture in the kitchen instantly improves your mood and becomes the main condition for preparing real culinary masterpieces and delicious morning coffee.
Famous designers advise how to decorate an old kitchen set with your own hands.
Decorating will easily refresh the interior and make the furniture unique and elegant.
Furniture decoration is a fascinating creativity accessible to everyone, an interesting process and an exclusive, spectacular result.
Make old
Many styles, such as shabby chic, Provence and vintage, are furnished with artificially aged furniture. So if your closet is ugly old, you can make it beautifully old. We discussed the methods in this post, choose the most suitable one: “Aging techniques: an overview”
Kitchen table decoration
The decoration of the tables is varied.
Oriental style table
Oriental style pattern for the table
We will paint the old table black and glue on gold patterns: gold leaf - thin gold leaf. We can buy it in all stores for professional artists or for handicrafts. And the price of such a rich restoration will please us.
Ceiling box - kitchen element
The ventilation duct can be annoying, “crush”, and seem superfluous, but look how organically it fits into the kitchen interior, matching the color with the walls. The structure acts as a kind of frame for the headset, which seems to be recessed inside. This technique adds completeness to the look of the kitchen.
Decorating kitchen cabinets
Antique decoration
We create the effect of crackle - cracked old paint.
Acrylic paints of two colors and craquelure varnish used with water-based paints will create a noble patina of time.
For this we need:
- water primer (can be replaced with PVA glue);
- acrylic paint – 2 shades;
- craquelure varnish;
- matte acrylic varnish;
- wide brush.
Advice! To acquire the skill of such decoration, it is better to first try it on an unnecessary board.
- Apply paint to the primed surface.
- After it dries, apply craquelure varnish, moving the brush in one direction.
- After an hour, apply paint of a different shade, moving the brush in the same direction.
- After it dries, we open it with acrylic varnish.
Decoupage cabinets
Ordinary pictures will masterfully breathe newness into old furniture.
- wood primer;
- acrylic paint;
- clear acrylic varnish;
- PVA glue;
- brushes and roller;
- sandpaper;
- pictures, patterns cut out from magazines, drawings or printed on a printer.
Here are the instructions for decoupage:
- prime the sanded surface;
- paint it in a suitable color and wait until the paint dries;
- we apply the selected drawings to the surface of the cabinet, marking with a pencil their most advantageous location;
- soak the pictures in water;
- apply glue to the marked areas of the cabinet;
- We put the wet drawings in place and, ensuring they fit perfectly, glue them;
- After drying, coat them with varnish twice.
Now this cabinet will become the most interesting piece of furniture.
Decorating the closet with wallpaper
Covering an old cabinet with vinyl or non-woven wallpaper is a cheap and easy way to decorate.
- Bright wallpaper for the closet will go well with light walls.
- If the walls have wallpaper with a pattern, then it is better to cover the cabinets with plain colors.
Advice! In a small kitchen, the same wallpaper as on the walls is used to decorate the cabinets so that they do not stand out, illusorily cluttering the kitchen.
- The newest version of this type of wallpaper is self-adhesive wallpaper with imitation metal, wood, and stone.
Note! It is better to glue wallpaper onto a closet using PVA glue - it is stronger and more reliable than wallpaper.
Decorating a cabinet with cork
Eco-friendly cork in rolls or sheets is suitable for original cabinet decoration.
- We can easily cut out even a complex pattern from cork and quickly glue it to the cabinet.
- First we’ll make the drawing out of paper and try it on the cabinet.
- Then, according to the template you like, we cut out the part from the cork and glue it with special glue.
- Its contrast on dark and white cabinets is very beautiful.
Other Cost-Effective Kitchen Cabinet Makeovers
- We simply insert fashionable tinted mirror glass into the cabinet doors. By the way, they will visually expand the kitchen.
- We will stick ceramic tiles on the cabinet doors and place it above the sink - harmoniously and functionally.
- We will screw in new fittings, which will also give it an expensive and very stylish look.
- The doors can be lined with bamboo mats for an exotic style.
- We can easily make a gilded openwork antique frame for a cabinet from artificial flowers attached to a simple frame, which we will cover with gold spray paint.
So, decorating furniture with paper, fabric, and painting will renew and modernize it as much as possible. Numerous photos convinced us that it is possible to transform kitchen furniture without titanic labor feats and global spending. It's all about our sincere desire to successfully update it.
When adjustment is needed
The problem of sagging or asymmetry of furniture doors can arise when transporting furniture or careless handling. Even a simple rearrangement of furniture can affect the position of the closet doors, especially when it comes to massive wardrobes. If the furniture is new, the doors will need to be adjusted during the assembly process. If the doors are loose or improperly secured, there will be a squeaking sound when opening and closing, which will lead to scratches over time, and the door may simply fall off. By spending a little time, you can give the cabinet a neat aesthetic appearance; just study the design of the fastening mechanisms and stock up on suitable tools.
If cabinet doors are not secured correctly or are loose, they may need to be adjusted
Add volume
If you want to achieve a classic look for your cabinet, all you have to do is glue on wooden slats or stucco molding, and then paint - and the effect will add up. You can paste an inscription cut out of wood with words that are meaningful to you or the name of the contents of the box.
A voluminous texture can be created with colored sawdust or other similar material: the door is covered with glue, and the sawdust is inflated on top, then everything is secured with spray varnish. Please note that such a surface is very difficult to clean.
Do not forget that the appearance of furniture is greatly influenced by fittings. In any case, it is worth replacing the handles, and maybe this will be enough. Lighting can also enliven the familiar look of a cabinet or shelving unit.
Photos: bohemianjunktion.com, anangelatmytable.com, decorpoint.com, fondodejuventud.org, theroomedit.com, hfapconference.com
dressing room, bedroom, furniture, do it yourself
Niche - for clothes
One can only envy the owners of “natural” niches or those created during renovation: sometimes they are located in the most convenient and necessary places. The recess in the hallway should be used for storing outerwear, and the niche in the room should be used as a frame for a built-in wardrobe, which will fit perfectly into the room and save useful space.
Crossbar - for zoning
The concrete beam left after combining the kitchen and living room cannot be dismantled? Turn it into the advantage of the interior by painting it in the color of the ceiling or highlighting it in contrast, and place the furniture based on its position.
You can install a table, bar counter or sofa under the crossbar - the main thing is that the object visually borders the ceiling beam. This technique will allow you to zone the room without special costs and loss of usable space.
Photo printing and photo wallpaper
The equipment is suitable for restoring a kitchen cabinet or buffet. Photo wallpaper can be purchased at the construction department or contact a printing house.
Printing centers will help:
- enlarge the image without losing the quality of the picture;
- make a collage of several photos or pictures;
- apply an image to a film for gluing to a specific type of surface.
A boring three-leaf wardrobe has turned into a stylish and light wardrobe for the bedroom
Before applying photo wallpaper:
- Clean the doors (walls) from the old coating.
- Level the surface using sanding and priming.
- Paste the wallpaper. To secure the result, coat with clear or tinted varnish.
Expert opinion
Anastasia Mikhaleva
Furniture designer.
Note. The appearance of the photograph depends on the type of surface. The image applied to the glass will become glossy. When mounted on a chipboard facade, the image will become three-dimensional, as if printed on matte paper.
Protrusions - as a frame
You may get the impression that a niche was specially created in the interior of this living room - it fits so harmoniously into the decor. In fact, these niches and openings went to the owner of the apartment from the time the house was built.
The designer turned the niche into one of the main features of the room. A classic interior often involves the presence of moldings decorating the walls, but here a small protrusion plays the role of decoration. It frames the sitting area with a sofa and paintings, and also smoothes out the impression of an overly high ceiling.
Gilding
Gold can decorate not only women's necks, but also your closet. At the same time, it is not at all necessary to pay a lot of money for the sake of a luxurious look. Today there are many alternatives for decoration, one of them is gold foil.
It is good not only for its price, but also for its capabilities - completely covering an object or “looming out” in the form of sophisticated patterns. It is easy to work with, and the result can simply be sealed with varnish for reliability.
But keep in mind that the cabinet facade for such material must be appropriate. Firstly, it should be even and perfectly smooth, otherwise the foil will not stick well. Secondly, dark - to emphasize the “luxury” of gold.
Paint
Paint will be a real savior in furniture restoration. Before applying paint, sand the surface and coat with primer.
You can simply paint the cabinet in 1-2 colors, or you can paint a real picture on it. If you don’t have enough artistic skills for painting, you can make a drawing using a stencil. Geometric lines and shapes can be easily created using masking tape - it will serve as a smooth border for the paint. And for more complex patterns and pictures, the stencil will have to be made specially.
We talked about ways to transfer images to surfaces here: “The Happiness of Drawing on Walls.” And this link contains detailed instructions for using stencils: “Experiment: painting a wall using a stencil.”
What you need for pasting
Gluing the trim is not difficult if you prepare everything you need first. Let's list what you need for the job.
Tools
- Construction or stationery knife. If the blade has been used, it is better to replace it with a new one. It should be very sharp. This is the only way vinyl can be cut smoothly and easily.
- Pencil or marker for marking. The marks are placed so that they are invisible after installation. Therefore, it is worth thinking in advance about how to clean them.
- Scissors for trimming and cutting lines of complex shapes.
- Ruler. It is best to take a long metal ruler. With its help you can measure and, if necessary, cut strips.
- Felt spatula or similar device. A soft tool smoothes the PVC film, allowing it to be glued without creases or bubbles.
- Hair dryer. A household hair dryer will do, but it’s better to take a hair dryer with a power control function. It is needed to warm up the vinyl when gluing.
Materials
You will need a preparation to degrease the base: any solvent, alcohol or gasoline. For not entirely smooth surfaces, a primer is required. It will improve adhesion to the decorative coating. If leveling is necessary or the base is too rough or grainy, a finishing putty is used and a primer is applied on top of it.
Now let's get to the instructions.
Toning
Changing the color of the facades can decorate boring furniture. Instructions for tinting a wardrobe:
- Clean the surface from dust with a dry cloth.
- Also treat the inner walls with an antiseptic (vinegar will do). It will get rid of the musty smell.
- Use wood putty to remove defects. The color must match the details.
- After the composition has dried, sand the treated areas with sandpaper.
- Coat the cabinet with a texturizing wood stain. It should be darker than the color of the furniture.
The tinting technique is suitable for decorating a cabinet in the bathroom, kitchen or hallway.
Remember that this method is only suitable for natural wood surfaces.
Niche - for shelves
Any niches can be used as efficiently as possible. Turn recesses into convenient shelving by installing several shelves inside. A cozy corner can become your favorite place in the house if you add it with a seat, pillows, and lighting.
The recesses formed by the fireplace can easily be turned into a place to store kindling material, books, decor, and paintings.
Replacement of accessories
When restoring a cabinet, don't forget to update the handles. They create coziness and complete the image of the room. If the wardrobe is in satisfactory condition, but the handles have lost their external gloss, it will look unkempt.
Replacing faded hardware with new ones will add brightness. For children's furniture, focus on accessories in the form of animals or plants.
Handles of an elegant curved shape will make a boring facade elegant and transform an old cabinet.
Overhang to match the wall color
Any protrusion can be turned into an architectural feature. Despite the fact that it seems superfluous, an “outstanding” element adds individuality to the room, “complicates” its appearance, and allows you to approach the solution creatively.
If you don’t want to focus attention on the ledge, the best way to dissolve it in space is to paint it the same color as the walls.
