How to attach a vapor barrier to the ceiling
Ceiling installation includes 3 stages: waterproofing, insulation and vapor barrier. This is the last layer before finishing. Its installation is determined by the type of material used, as well as the design of the ceiling.
Fasteners for proper installation of vapor barrier on the ceiling
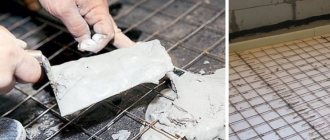
Construction staples are preferable for fastening the covering. They are much thinner, provide the same reliable fixation of the film, but do not violate the vapor barrier properties of the coating. Thick cardboard or other similar material should be placed under the staples.
It is allowed to use nails with wide heads. It is better to choose galvanized ones, as they are resistant to moisture and will last much longer.
Scotch tape also serves as a fastening element. It is used both for attaching film to joists and for vapor barrier of joints. In special cases, a profile is also used to connect sheets to each other.
How to install and secure different types of vapor barrier on the ceiling
In order for the vapor barrier to effectively perform its functions, it is necessary to follow all the rules for waterproofing during installation:
during installation, it is allowed to use vapor barrier materials that are less resistant to water than waterproofing materials; it is very important to achieve a solid surface; for this, the film is laid overlapping, the sheets are glued with tape, and so on; it is necessary to exclude moisture in the vapor barrier coating; work cannot be carried out during snowfall or rain , fog; when laying rolled vapor barrier, the material must first be kept in a warm room for at least 20 hours; the film should not be stretched too much, it should sag slightly; when vapor barriering corners, be sure to use solid material. Important! When choosing different types of coatings, the list of rules is supplemented with recommendations from the manufacturer
Important! When choosing different types of coatings, the list of rules is supplemented with recommendations from the manufacturer
General information
The presence of moisture in the basement can be explained by partial or complete freezing of the room in winter. In this case, it is enough to insulate the walls and arrange ventilation. In other cases, you cannot do without special protection. Damp or damp insulation will not provide heat retention and will subsequently require replacement.
Waterproofing the basement from the outside from groundwater is indicated for use when water gets inside under the pressure of a water layer. Measures to protect the basement from the inside are effective when water enters the room by capillary means through defects in the building envelope.
Waterproofing the basement from groundwater is carried out in two planes:
- vertical (when the room is located in a layer of groundwater in the absence of drainage);
- horizontal (the basement floor is at (at) water level).
To carry out protection inside the basement, basement waterproofing materials that differ in composition, application technique, reliability and service life are used.
The main ones should be considered:
- materials in rolls;
- sheet materials;
- liquid-based formulations.
The latter are divided into:
- compositions based on aqueous solutions;
- bitumen-based compositions;
- penetration chemicals;
- injection formulations.
Each material for waterproofing a basement from the inside has its own advantages and disadvantages. The general goal of all work carried out is to create a room free of water in water-saturated soil.
Vapor barrier material for ceilings: overview of popular types
Vapor barrier materials have different characteristics. The choice of material depends on the specific home and the expected results.
The materials used for vapor barrier are in many ways similar to those used for waterproofing work. Basically, different types of materials are used in roll form.
The choice of material for vapor barrier depends on the type of house and the expected result
Types of materials:
Polyethylene films. The versatility of the film allows it to be used for different types of work. The film is a durable material; reinforced mesh and fabric give it additional strength. The film can be perforated or non-perforated. They have equally good characteristics and, as a result, are interchangeable. Films made of foil material. On one side the film has a reinforced mesh, on the other there is a metal coating. Thanks to this, several goals are achieved at once: a vapor barrier and a layer for heat reflection are created. To prevent heat from escaping from the room, the film is laid down with a metallized layer. Films are made of polypropylene. On one side, the film is equipped with a layer that consists of cellulose-viscose fiber, which is responsible for water absorption. The layer absorbs the resulting condensation and prevents moisture from seeping inside the insulation. If ventilation is arranged correctly, moisture simply evaporates. Membranes. They can consist of vapor barrier and waterproofing materials. They differ from other materials by the additional function of vapor permeability. At the same time, a special coating that absorbs moisture prevents it from penetrating into the thermal insulation layer.
Each material is of good quality and performs its functions at a high level.
Izospan S
The structure of the material combines two layers: on one side there is a smooth surface, on the other there is a fleecy surface. The fleecy layer retains condensation followed by weathering. Izospan C creates a vapor barrier for the insulation, preventing the absorption of vapor from water particles formed inside the room.
The material is widely used in the construction of walls, installation of insulated, sloping roofs and interfloor ceilings. Paro-waterproofing using type C is installed in various cement screeds and in flat roof structures.
In a word, in structure and characteristics the material is very similar to type B. At the same time, it has an increased margin of safety and, therefore, the reliability of the super-dense panel is higher. Buying isospan C will cost the consumer about 50-60% more than type B.
Characteristics of isospan Type C:
- 100% polypropylene;
- Applicable temperature range -60 – +80 °C;
- Tensile load: longitudinal // transverse. N//5cm not less than 197/119
- Vapor-tight
- water resistance not less than: 1000 mm water column.
Application of isospan S:
- Sloping roof with an overlap of at least 15 cm
- Attic floor protection. A vapor barrier layer is spread on top of the insulation, smooth side down;
- Concrete floor. spread on a concrete surface, smooth side down;
- Wooden floors of horizontal design.
Laying the canvas on sloping roofs should be done from bottom to top. The material overlaps about 15 centimeters.
To avoid depressurization, overlapped joints are glued together with a special tape that is sticky on both sides, similar to double-sided tape.
The structure is secured with slats 5 cm thick. A gap of at least 5 centimeters is left between the roof tiles and the vapor barrier layer; it is necessary for natural ventilation.
Types of vapor barrier materials
Several basic types of materials can be used to create a vapor barrier layer. This is a polyethylene or polypropylene film, the so-called diffuse membrane or liquid rubber. Previously, only roofing felt, roofing felt and other similar materials were used.
Polyethylene film
Polyethylene film is the cheapest and simplest material used to create a vapor barrier layer
It is quite thin, and therefore during installation it is important to be careful not to tear it. The film may or may not have fine perforations
Vapor barrier film "Yutafol N 110"
However, in any case, no matter what the film is, when using it you will have to create a ventilation gap. And since it will have to be done anyway, many do not think about the presence of perforation and simply buy the material that costs less.
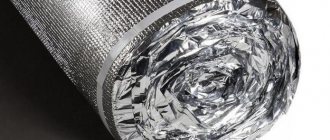
Now there is another subtype of films made of polyethylene - it has a reflective layer coated with aluminum. This material has higher vapor barrier properties and is usually used in rooms where there are high levels of humidity and air temperature.
Vapor barrier film with foil coating
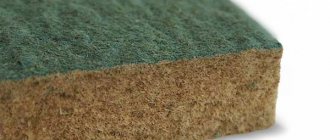
Polypropylene film is characterized by high quality and strength. It is easy to install and can last for many years. Polypropylene film is made not only from polypropylene - it also has an additional cellulose-viscose layer that can absorb quite a lot of moisture and retain it. At the same time, as the humidity level decreases, the layer dries out and is again ready to absorb it.
Polypropylene vapor barrier
When laying this type of film, it is worth remembering that the anti-condensation absorbent layer should be turned away from the insulation. And between the vapor barrier layer itself and the insulating material, a small gap is left for ventilation.
Diffuse membranes are perhaps the most expensive vapor barrier option. They are considered to be of the highest quality, are called “breathable” and are capable of not only protecting building materials from excess moisture, but also regulating the humidity level
Membranes are divided into single- and double-sided, and the materials are mounted in different ways - if when laying a one-sided version of the membrane it is important to observe which side it will be turned to the insulation, then the double-sided one can be laid as you like
Such membranes are characterized by significant vapor permeability. They are made from a special non-woven artificial material and can have several layers. There is no need to leave a gap for ventilation during installation.
Diffuse membrane
When creating a wooden floor cake, liquid rubber is used extremely rarely for vapor barrier; it is more suitable for concrete bases. However, it is still a common enough option to talk about. This rubber is a polymer-bitumen composition prepared on the basis of water. It is applied very simply - sprayed on the base, and forms a seamless and durable coating - a kind of rubber carpet. When the polymerization process is completed, the material will not be able to pass through any substances.
Liquid rubber
Liquid rubber can be applied automatically and used to process spacious structures, or manually - this option is suitable for small rooms.
Izospan instructions for use. Izospan A, B, C, D, F
Izospan is an insulating film coating. The main purpose of the film is to ensure that the original thermal insulation characteristics are maintained throughout its entire service life. It is difficult to imagine a modern construction project without the use of various types of thermal insulation. Mineral wool, Penoplex, Izolon, Izover, various polystyrene foams and simply polystyrene foam - all these materials require their own protection.
Thermal insulation materials practically envelop our house, retain heat on frosty and rainy days, create comfort in the hot summer, preventing the penetration of heat flows. But how to protect the thermal insulation belt from negative atmospheric phenomena? Reliable protection from moisture, rain, damaging winds is designed to be provided by 100% polypropylene, with the proud name - Izospan .
To create a barrier at the stages of the construction process, to perform the function of protective insulation for thermal insulation, this is the true purpose that isospan vapor barrier successfully fulfills. Despite its apparent simplicity, the material differs by type.
We bring to your attention – Izospan instructions for use. Figure it out: which side to lay the isospan on. Consider the isospan technical characteristics, and the installation method.
Worthy competitors of isospan:
Before moving on to a detailed review, it should be clarified that the films are presented by the manufacturer in a wide variety and have different purposes. Vapor barrier films and membranes are divided into absolutely vapor- and water-tight and partially permeable to moisture only in one direction. Some of the materials successfully complement thermal insulation, enhancing its characteristics.
Variety of materials
To protect surfaces and insulation from moisture use:
- reinforced polyethylene film;
- aluminum coated film;
- film made of propylene fibers;
- membrane vapor barrier.
What where When?
The main role of a vapor barrier material is to protect wooden structures and insulating material from moisture, rotting and, as a result, premature destruction.
It is extremely important to use it on lower floors, above basements and basements, and especially above bathrooms and kitchens. It is also necessary to remember that the insulation protection must be double-sided, since wet mineral or glass wool almost completely loses its thermal insulation qualities. That is, the film is placed between the finished floor and the insulation material, as well as between the insulation and the subfloor
However, often the bottom layer is replaced with waterproofing
That is, the film is placed between the finished floor and the insulation material, as well as between the insulation and the subfloor. However, often the bottom layer is replaced with waterproofing.
Which side should I lay?
You need to know which side to lay the vapor barrier on the floor. An extremely important nuance, since the wrong technology for installing the material will negate all its properties.
A man lays vapor barrier material on the floor
Here are the instructions:
- The double-sided film is placed with the smooth side facing the insulation and the corrugated side on top. The rough surface acts as a filter for steam and even the smallest drops of water.
- It is customary to lay polypropylene with the wicker side away from the insulation, and the smooth side inside.
- Installation of foil vapor barrier is carried out with the aluminum side facing the room, as it tends to reflect infrared radiation.
- Individual installation technology is possible for individual brands and types of vapor barrier materials.
- Before use, be sure to read which side to place the vapor barrier on the subfloor and insulation.
Laying algorithm
It's not complicated:
- First, the old flooring is dismantled down to the subfloor. Then the base is prepared: debris is removed, cleaned, leveled, treated with antiseptic and primer. Old floor beams or joists that have begun to collapse must be replaced with new ones.
- Hydro and vapor barrier of the subfloor is carried out, preventing moisture from entering the insulation from the ground or lower rooms. The film strips are laid with the correct side (see above) overlapping by 15-20 cm. The edges must be glued with reinforced or double-sided tape. Also, the vapor barrier should extend 10-15 cm onto the walls and joists. It can be attached to beams and joists with metal brackets.
- A layer of insulation is laid on top of the film with the seams staggered and a thickness of at least 20-30 cm.
- A second layer of vapor barrier is laid on top of the insulation, also with an overlap and gluing the joints. If installation is carried out on wooden floor joists, it is necessary to lay the film so that it sag slightly: this way a ventilation gap is created between it and the finished floor. However, it is also recommended to put counter-battens on the logs on top of the vapor barrier, which will prevent the film from coming into contact with the finished floor.
- The finished floor is filled and then finished with the finishing floor covering.
Now you know how to install a vapor barrier on the floor and will not make the mistake of doing your own repairs.
We recommend looking at what happens if the vapor barrier is not installed correctly. Condensation fills the ceiling with water, the insulation gets wet and mold spreads. Don't make these mistakes.
In winter, when it’s frosty outside but the inside of the house is cozy and warm, unnoticeable steam forms in the rooms. And this steam must leave the room freely. To accomplish this task, a vapor barrier is installed. You need to know which side to lay the vapor barrier on the floor, walls or ceiling.
Leroy Merlin
It's no secret that the site for the construction of the Leroy Merlin hypermarket in Minsk on the street. Timiryazeva was allocated by the city authorities several years ago. However, the retailer was apparently studying the market potential and was postponing a decision to build the facility.
It was previously reported that the company will enter the market not through opening a representative office, but through the Russian structure “Leroy Merlin Russia”. Those. The activities of the network in Belarus will be coordinated from Moscow. However, according to belretail.by, the final decision was still made in France, and Moscow will only supervise the issue.
In confirmation of the information already announced, we managed to look through the latest research on the DIY market of the Russian Federation, which is being conducted, and there we found the following text:
“In 2021, Leroy Merlin plans to enter the Republic of Belarus. The first hypermarket is planned to open in Minsk. The project will be handled by the Russian office (without creating a separate division at the first stage. The decision on subsequent development in the Republic of Belarus will be made based on the results of the work of the retail facility in Minsk."
The first store will appear in Minsk on the street. Timiryazev next to the car. Its total area will be 17,000 square meters. m, retail - 10,000 sq. m, the street pavilion of the “Garden” department will occupy 1000 sq. m. Nearby there will be a parking lot for 900 cars.
Leroy Merlin is scheduled to open by the end of 2021. However, vacancies for a hypermarket HR Manager, Certification Specialist, and Regional Supplier Relations Manager are already posted on obs.tut.by today.
belretail.by is already collecting comments from independent DIY market experts, which will be published later. From the first conversations it is clear that the new player will be faced with a number of issues that will not be easy to resolve.
First of all, this is the share of goods from Belarusian manufacturers, which is usually quite large for Leroy Merlin (in Russia the degree of localization reaches 55%). Are there enough material manufacturers in Belarus to provide these indicators?
The retailer also has its own private label, orders for which must also be placed with local manufacturers.
The French chain offers the lowest prices in its segment in the markets where it operates and operates under the slogan “low prices every day.” Maintaining such a positioning in Belarus will be very difficult.
In any case, the arrival of an international player will significantly revive the DIY segment and this will have an impact on all players operating in Belarus. First of all, we are talking about the OMA, Mile and Materik networks.
The largest facility of this format today is the construction hypermarket “Materik” in Brest. Its total area is 15 thousand square meters. m (2 thousand less than the planned Leroy Merlin), but the retail area is 12 thousand sq. m. m. 2 thousand more.
So it’s too early to say that the French will build the largest construction hypermarket.
Source: https://belretail.by/news/frantsuzskiy-leroy-merlin-pridast-uskorenie-i-dobavit-tonusa-belarusskomu-ryinku-diy
Modern range of vapor barrier materials
In construction, it is possible to use several technologies that would protect the structure of the building. There are main types of vapor barrier materials:
Pasted vapor barrier - insulation carried out by pasting the base.
- insulation carried out by gluing the base (glued vapor barrier);
- protective layer of paint material (paint vapor barrier);
- Grouting the base with ordinary sand-cement mortar.
All these insulation methods mainly serve to protect the heat-insulating material from moisture penetrating from the room and are applied to the base of the structure.
Today, modern manufacturers offer quite a large variety of vapor barrier materials that perform several functions at once:
- “Penofol” is a material that is used as insulation, which performs functions and serves for heat, hydro and vapor barrier. Presented as a multilayer composite, covered on one or both sides with aluminum foil, and inside there is foamed polyethylene. There are quite a large number of modifications of this product, which will allow you to make a more accurate choice for a particular case. Thus, “Penofol A” is insulation covered with foil film only on one side, “Penofol B” is insulation covered on both sides with foil film, and “Penofol C” is insulation that has, on one side, a foil coating, and on the other side - a self-adhesive surface. If thermal insulation properties (insulation) are a priority, and vapor barrier properties are in second place, then perforated “Penofol” is used.
- “Armofol” is a foil material (insulation). Usually made from glass mesh on both sides. This modification of the vapor barrier material may have a self-adhesive surface. This material is mainly used for heat, hydro, and vapor barrier of baths, saunas, and bathrooms.
- “Alucraft” - this material consists of three layers: foil, polyethylene and kraft paper. This material is attached to the insulation from the inside to create a vapor barrier, usually under the lining. This material is secured using aluminum tape or a stapler.
- “Izospan B” - the material has a smooth structure on one side and a rough structure on the other. The rough surface serves to retain condensation and further evaporate it. It is used to protect the insulation and structures of buildings from moisture saturation from inside the room.
Content
The well-known company Leroy Merlin is today recognized as the first in Europe in terms of sales of goods for construction and finishing.
In total, this French DIY retailer includes 183 hypermarkets in Greece, Russia, Italy, Poland and many other countries. Moreover, their products are presented both from their own production and to order from other brands. That is why, if an inexperienced person, having heard about vapor barrier from Leroy, visits a hypermarket, he will be surprised. Indeed, there is something to be confused about: in the Leroy Merlin display case there are the famous Izospan, and the little-known Texibit, and Axton, and even some Tyvek products! How can this be?
In fact, this French DIY retailer partners with several global companies to offer their products in its network of hypermarkets. And now our own brand in this section is Axton, which produces building materials specifically to order from Leroy Merlin, albeit in Russia. Therefore, if you are looking for reviews of vapor barrier from Leroy Merlin, this is just about three types of Axton vapor barrier film.
Vapor barrier of ceiling, roof, walls and floor
It is important to understand which side of the vapor barrier is correctly mounted on the ceiling, roof and walls. If you make a mistake, then over time the insulation will begin to rot, which reduces its thermal insulation properties and leads to the destruction of the walls.
You can refuse thermal insulation of the roof only if you have a heated attic. A vapor barrier layer is laid on the living room side. The membrane is mounted with the rough side outward, the foil material with the aluminum layer down. The film is a very fragile material and is not recommended for use in the kitchen.
To furnish the attic, it is best to use a membrane film. It lies on the insulation with its smooth side. To prevent moisture from penetrating through the mounting holes, it is attached to the beams with a stapler. The material with foil is mounted in the same way as in previous cases. It can be fastened with wide-headed nails; the joints are additionally sealed with construction tape. When insulating walls from the outside, experts recommend using a double layer of vapor barrier.
Installation of film with foilSource stroy-podskazka.ru
It's no secret that a lot of moisture can penetrate into the house through the floor. Even the best quality foundation cannot completely protect against this problem. To solve this problem, specialized vapor barrier materials are used when arranging the floor. The installation rules are similar to all other solutions. The best option for the floor is film, creating a waterproofing barrier. Closer to the room, roll material is used, laid overlapping, the joints are taped with tape or metallized tape. For attic or interfloor ceilings, the material is laid with the smooth side down.
Any underground structures, balconies and basements can also be built using such materials. They are constantly in contact with cold air, so vapor barrier is very important. Foamed polyethylene is used for balconies and is mounted with the reflective side inside the room. For all other cases, only membrane film is used.
Balcony vapor barrierSource stroy-podskazka.ru
Izospan A
The membrane, like a check valve, freely allows water vapor to pass through from the thermal insulation side. Does not interfere with the natural ventilation of the insulation. On the other hand, it reliably blocks the penetration of moisture from the external atmosphere, prevents the formation of condensation, and prevents the wind from destroying the structure of the insulation.
Due to the water resistance of the material on the outside, membranes are widely used in roofing structures and are widely used as protection for walls and ventilated facades of buildings and structures for any purpose.
The waterproofing property possessed by the isospan membrane prolongs the service life of the thermal insulation for a long time. Even the best insulation is destroyed over time under the influence of wind; the use of Izospan A will be the ideal solution to protect the outside of the house.
How to properly install vapor barrier to insulation
Due to the wide variety of vapor barrier materials, the question may arise - which side should the vapor barrier be laid in order to ensure proper functioning and prevent damage to the insulation? For all film vapor barrier materials, there is an important rule that must be taken into account when laying the film. Moreover, this rule applies to any part of the room - walls, floor or ceiling, but only for those vapor barriers that have a two-layer structure
Moreover, this rule applies to any part of the room - walls, floor or ceiling, but only for those vapor barriers that have a two-layer structure.
If you are using a vapor barrier that is covered with an aluminum layer, then it is installed like this: the shiny side faces the inside of the room, and the rough side faces the insulation. The foam vapor barrier is installed with the smooth side facing the insulation, and the rough side into the room.
Any vapor barrier material is laid with an overlap, the layer must be overlapped by the second layer by at least 15 cm. The joints between the layers must be glued with tape, and the vapor barrier is secured to the surfaces using a construction stapler.
There are a number of features of installing vapor barriers that are associated with the places where the building is insulated. For example, in unheated attics or attics, a layer of vapor barrier is attached to the ceiling between floors (beams), a ventilated gap is left and a rough ceiling is laid. When insulating the external walls of houses, a vapor barrier layer is attached to the frame so that the smooth surface is directed towards the wall, and the rough surface towards the street.
You can easily distinguish the sides of a vapor barrier material from each other; just look at it. The sides of the film differ in appearance; they can be foil, smooth or rough. The instructions that come with the purchase of quality materials will help you determine which side the vapor barrier should be laid.
To make a balcony a comfortable room (and especially if you want to connect it to an adjacent room, thereby increasing its area), it is important to lay thermal insulation on it. One of the main elements of the thermal insulation “pie” is the vapor barrier of the balcony
It can be done either with the help of specialists or independently.
If you prepare theoretically, understand why this is important and how to do it correctly, there will be no difficulties. And we will give answers to basic questions, for example, which side to lay the vapor barrier on below.
Why do you need moisture protection?
What is vapor barrier, why is it needed, and how is it performed? I've thought about this before. Now, having gained experience in this matter, I will accurately convey the technical aspects and describe step by step the technology for installing vapor barriers.
The vapor barrier affects not only the effectiveness of the insulation, but also the durability of the structure
Why do you need a vapor barrier at all? As you might guess, its purpose is to protect surfaces from steam. Moreover, we are talking not only about visible steam, but also moisture, which is always present in the air.
Inside the home, the humidity level is almost always higher than outside, which is explained by cooking, washing and taking water procedures. Since steam moves towards the cold - out, excess moisture can significantly reduce the life of building structures and the effectiveness of insulation.
Insulation of walls from the inside with mineral wool must be done using a vapor barrier film
Protection is necessary in the following cases:
- When insulating walls from the inside with mineral wool. As is known, the level of vapor permeability and moisture absorption of mineral wool is quite high. Therefore, the absence of a vapor barrier can lead to the accumulation of moisture inside the insulation. This in turn will lead to a decrease in the efficiency of the insulation, dampness of the walls, the formation of fungus, etc.;
Frame walls insulated with foam plastic from the inside must be protected from moisture with a vapor barrier
- When insulating frame structures. Vapor barrier is necessary for frame walls, wooden floors and pitched roofs not only when using mineral wool insulation, but also polymer insulation, which has zero vapor permeability. The fact is that zero vapor permeability of thermal insulation leads to the fact that all moisture rushes into the elements of the wooden frame. As a result, the tree quickly becomes unusable;
Vapor barrier film must be used when insulating floors
- When insulating floors. In this case, vapor barrier allows you to protect the insulation from rising steam.
If mineral wool is used inside partitions, vapor barrier need not be used, since there are no temperature differences in the partitions that could lead to the formation of condensation.
As we found out, the vapor barrier should not allow air to pass through, which carries moisture. Therefore, the vapor barrier film should not be confused with waterproofing, which often has the ability to allow air to pass through.
Polyethylene
Polyethylene films are the cheapest vapor barrier option. As a rule, polyethylene film is used for waterproofing interfloor ceilings and walls.
Single-layer polyethylene film is cheap, but not durable
Kinds. There are several types of polyethylene films:
- Single layer. The cheapest, but not durable, and also unstable to mechanical loads;
- Reinforced. They are a three-layer material. The middle layer is made of fiberglass mesh.
Reinforced film has tensile strength
Thanks to the reinforcing layer, the film has higher strength and durability;
- Foil. The main feature of these films is their ability to reflect heat.
The photo shows a polypropylene vapor barrier film - it has high strength and long service life
Polypropylene
Polypropylene vapor barrier films are the most popular, as they are superior to polyethylene films in all respects. In particular, they are stronger, more durable, and resistant to UV radiation and temperature changes.
Another feature is that these films usually have a two-layer structure. As a result, one side has a rough surface.
One side of the polypropylene vapor barrier has a rough surface that retains moisture
This is done so that the villi retain moisture on the surface of the coating and thereby allow it to evaporate. Beginners often ask which side to put the vapor barrier on?
The material is laid with the smooth side against the insulation, and the rough side against the cladding. True, if you mistakenly attached the canvas with the rough side to the insulation, this is not a critical mistake, since in any case the material does not allow moisture to pass through.
Therefore, a ventilation gap is required between the film and the finishing material.
Vapor barrier axton from the French manufacturer Leroy Merlin has proven itself as a reliable and durable material
Vapor barrier is a set of various methods of protecting heat-insulating materials and building structures from the penetration of steam and, as a consequence, from the loss and absorption of condensate (Footnote 1).
Materials
Types of films
Polyethylene
Below is a table from the manufacturer of roofing materials with a brief description of the main parameters of the vapor barrier reinforced film (Footnote 2)
| Material | 4-layer reinforced polyethylene film with a reflective layer of aluminum. |
| Flammability | G4 is highly flammable (GOST 30244-94) |
| Flammability | B2 moderately flammable (GOST 30402-96) |
| Breaking force | 450 N/5 cm |
| Vapor permeability | 3.1 x 10⁻⁶ mg/m*h*Pa according to GOST 25898-83 |
| Diffusion resistance Sd | More than 150 m |
| Heat resistance | from - 40 °C to 80 °C |
| Weight | 180 g/m² |
| Roll weight | 13.5 kg |
| Roll size (area) | 50 m x 1.5 m (75 m2) |
| Film type | Price per roll |
| Reinforced 4x25 m 100g/1 m2 | 2750 |
| Reinforced 2x10 m 140/1 m2 | 750 |
| Single layer 3x100 m 120 microns | 4600 |
Vapor barrier laying technology
After choosing a vapor barrier, it is also very important to install it correctly. This is not difficult, but requires care when installing, since in most cases the vapor barrier material has an external and internal surface in relation to the insulation
Choosing a side
Among builders, there are two opinions on which side to lay the vapor barrier against the insulation. Some believe that the vapor barrier should be attached only to one “correct” side, while others believe that it does not matter which side the vapor barrier is attached to. All vapor barrier membranes come in two types:
- for one-sided installation, this type of vapor barrier is attached to only one side;
- double-sided, which can be worked with regardless of its side.
Before installing the vapor barrier, you should carefully study the instructions included with the material itself. If there is none, remember these simple rules:
- The outer side of the vapor barrier has a pile in which moisture is retained and then evaporates. The inner one is smoother. It is the smooth side that should come into contact with the insulation.
- If the vapor barrier material has a different color, then the light side will be the inner side and should lie on the insulation.
- Usually the vapor barrier is sold in rolls. When rolling out such material, the side that will be facing the floor will be the inner one.
If you still have doubts, you can do a small experiment. Take a small piece of vapor barrier membrane and cover a mug of hot water with it. Condensation will appear on the side of the film that is waterproof, which means the inside.
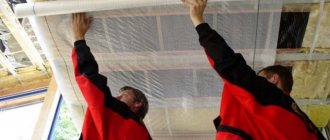
Installation of vapor barrier film on the ceiling
After determining the inner and outer sides of the vapor barrier, there are no further questions about how to properly lay the vapor barrier. But still, a few nuances need to be taken into account:
Before laying the vapor barrier, it is necessary to carry out preparatory work
First of all, it is necessary to treat all wooden elements with special agents against insects, fungus, rot and fire. Subsequent work should be carried out only after the impregnation has completely dried. Irregularities on the surface to which the vapor barrier will be attached should not exceed 0.5 cm. If the house is located in a climate zone where there are frosts below -25˚C in winter, then a vapor barrier must be laid on both sides of the insulation. When installing, pay special attention to the corners
It is important that the corners are covered with a solid film. It must be well stretched. At the joints of the canvases, the vapor barrier must be laid with an overlap of at least 10-15 cm. With less overlap, moisture can penetrate inside
With less overlap, moisture can penetrate inside
It is important that the corners are covered with a solid film. It must be well stretched. At the joints of the canvases, the vapor barrier must be laid with an overlap of at least 10-15 cm. With less overlap, moisture can penetrate inside
Seal the joints with tape
You need to use special tape, preferably the same brand as the vapor barrier. The film is attached to the beams using a stapler. If installation is carried out between beams, you can use slats and screws with a wide head.
Laying vapor barrier on walls and ceilings
After installing the insulation on the walls, a vapor barrier film is laid. Which side to lay towards the insulation was discussed above. You just need to consider the following:
- The vapor barrier must be well tensioned so that it does not sag, there are no unevenness and so-called waves.
- The joint should overlap 5-10 cm and be securely taped with wide tape.
- The film should fit tightly to the insulation.
- Near window and door openings, it is necessary to leave 2-4 cm of vapor barrier film “in reserve”, since shrinkage or deformation of the material may occur during operation.
- There should be a small gap between the vapor barrier and the facing material for ventilation and condensate removal.
- After laying the vapor barrier, it is necessary to cover it with finishing material as soon as possible, since this material is “not friendly” to sunlight. If you leave the vapor barrier uncovered for just one season, ultraviolet radiation will do its dirty work and all your work will go down the drain, and the vapor barrier membrane will have to be replaced.
When laying a vapor barrier film there is nothing complicated and no special skills are needed. The main thing, as with any other work, is to be careful, take your time and read the instructions of the manufacturers of the material you are working with. Then there will be fewer mistakes, the house will be warmer, the mood will be excellent and you will be proud of your creation.
Basic insulation mistakes
External insulation of the walls of a country house must be carried out in accordance with the requirements and rules for installing materials. Errors that most often occur during insulation contribute to improper circulation of air flow and the formation of moisture inside the cake, which leads to a weakening of the thermal insulation qualities:
- incorrect calculation of thermal resistance;
- if there is no base strip at the bottom of the wall, the insulation may come into contact with the ground;
- Expanded polystyrene should not be left in the sun for a long time during installation;
- cracks between insulation boards lead to the appearance of cold bridges;
- Expansion dowels should be installed at the corners of the building and around doors and windows to securely fasten the material.
In addition, you should not skimp on materials, since in addition to their correct installation, the low quality of the material should not cause poor-quality insulation.
Thus, when insulating walls, the living space is preserved; careful consideration of details is required to calculate the amount of materials and determine the order of installation work.
Installation of a vapor barrier
Installation of vapor barrier material is an important stage of work when insulating building structures, determining their ability to retain heat and provide protection against moisture penetration into the insulation.
A vapor barrier is installed during the construction of a building (structure) before finishing the premises or installing the roofing, as well as when performing repair work on these structural elements.
Performing this work requires knowledge of the installation features of a vapor barrier.
They can be divided into several stages: preparatory, execution of work and final.
Preparatory stage
During this period of work, the material that will be used as a vapor barrier is selected and purchased, and the selection criteria will be:
- place of use, installation (facade of the building, interior, etc.);
- requirements for technical characteristics (ability to pass evaporation);
- operational indicators;
- the possibility (features) of installation on a particular building structure.
Initially, prepare the surface on which the vapor barrier will be mounted. These works depend on the material from which the base is made and the location where they are carried out.
Wooden structures are treated with antiseptic solutions and fire-fighting substances, and brick and concrete are treated with deep penetration primers to prevent the appearance of microorganisms (fungus, mold, etc.).
Execution of work
At this stage, the installation of a vapor barrier is carried out on a selected area of building structures, while the installation is carried out on different elements of the building (ceiling, wall, rafters, etc.) made of different materials (metal, wood, concrete, etc.) differently.
Ceiling mount
The installation of a vapor barrier layer on the ceiling is required when performing work on insulating rooms on the upper floors of a building that have a cold attic, when insulating the roof of buildings that do not have an attic, when insulating basements, as well as the ceiling in a bathhouse.
For these purposes, films of various types, as well as pseudo-diffusion membranes, are used.
The film (membrane) must be solid to cover the entire required area. If this is not possible, installation is carried out with an overlap of 10.0 - 20.0 cm.
Attaching the vapor barrier membrane to the ceiling
The joints are taped on both sides with construction tape or special tape to prevent the possibility of moisture penetration.
When using foil film, the strips are laid end-to-end, without overlapping. The joints are taped with aluminum tape.
When installing on a wooden surface, use a construction stapler or nails with a large head.
Vapor barrier can be attached to wooden surfaces with a stapler
The vapor barrier layer should extend onto the walls and there should be no gaps in the corners. If possible, the joints of the strips of the material used (film, membrane) should be located on the rafters or elements of the ceiling frame, which will allow the vapor barrier to be securely fastened and prevent the connecting tape (adhesive tape) from peeling off. The canvas should not sag, but be taut.
Ceiling covered with vapor barrier film
Floor fixing
When performing floor insulation work, the vapor barrier is laid after the waterproofing is done and the insulation is laid.
The film (membrane) must be solid or overlapped to prevent water vapor from penetrating into the insulation layer.
The vapor barrier should lie on the walls, and between it and the insulation layer there should be an air gap of 45.0 - 50.0 mm.
Wall mount
When installing a vapor barrier to a wall indoors, galvanized nails with large heads or staples are used to secure it.
Fastening is carried out directly to the surface of the wall, if it is a wooden structure, or to a wooden sheathing mounted on a wall made of concrete or brick.
When performing facade work, the vapor barrier layer is mounted on the frame for fastening the facade finishing elements.
During this period, excess film (membrane) that interferes with the finishing of the insulated room (corners, excessive overlap on the wall, etc.) is removed. The fastening of the installed vapor barrier is checked.
How we developed an AR application for DIY retailer Leroy Merlin
Product Director of the NULLgravity agency Dmitry Pankrushev talks about the advantages of using augmented reality in a mobile application.
Augmented reality is one of the main technological trends in retail in recent years. Retail is rapidly moving online, and success largely depends on the willingness to embrace technology. But not everyone knows which way to approach them. To make your task easier, you should study ready-made cases.
Why does a DIY retailer need an app with augmented reality functionality?
We all buy things on the Internet. The pitfall of online shopping is the inability to try on the item you like and see how the item will look in real conditions. However, if we talk about furniture and home decor elements, even buyers of physical stores cannot “try them on.”
But now we can solve this issue using augmented reality. This approach makes the shopping process more convenient and faster. It also reduces the likelihood that the customer will choose the wrong product and be disappointed with the purchase.
Using the Leroy Merlin application, users will be able to visually evaluate their choice and see how the product will look directly in their apartment. To do this, you only need an iPhone or iPad.
The application uses the device's camera and complements the image with products from the catalog. It is worth noting that all models are displayed in actual sizes, color and texture correspond to reality. Thus, the use of augmented reality technologies for “trying on” furniture provides a completely new, improved customer experience.
Technical implementation
Our task was to visualize products from the range of Leroy Merlin stores. This turned out to be a very interesting and at the same time challenging activity.
First, we needed to find a designer who specializes in rendering 3D models, then we spent a long time selecting a model format that can be used in Xcode.
The final stage was the implementation of the application functionality itself.
There were no problems with 3D modeling. The difficulty turned out to be that there are a lot of items in the Leroy Merlin assortment. Making augmented reality models for all products at once is a labor-intensive process. Therefore, at first we created about 30 models that appeared in the first release of the updated application. We received a lot of positive feedback from users and media attention.
It became clear that Leroy Merlin customers are ready for innovation, are not afraid to try new things and are happy to master technology. Therefore, we decided to expand the range of products available for trying on in 3D. But at this stage we were faced with the fact that new products could appear in the application only with a new release.
But the team works in sprints of two weeks, and not every sprint ends with the release of a new version. We didn’t want to delay adding new 3D models so much, so we implemented a solution using our middleware, which allows you to load new models without releasing an updated version.
Working with ARKit
Of course, there are many different solutions for augmented reality. These are InfinityAR, Vuforia, ARToolKit, Catchoom, Augment, Blippa and several others. But we understood the advantages of a native framework and decided to go with Apple ARKit.
After Apple presented it at WWDC, this technology became more accessible. However, let’s not lie, the task was not an easy one, because together with Leroy Merlin we were one of the first to implement ARKit in a mobile application.
Our best programmer was hired for this task. iOS developer Inna Kuts spent an entire sprint searching and studying materials on the topic of creating ARKit that were available on the Internet. In fact, at that time there were few materials: a couple of video courses and documentation. You could say we had to figure out the new technology from scratch.
But even now, after the release, the development process does not stop. For example, Apple recently released an update to ARKit that will make augmented reality work on vertical surfaces.
This means that you can not only see how a chest of drawers will look in this part of the room, but also do the same with any finishing materials, decorative elements and lighting. For example, “try on” your favorite sconce or wallpaper. Based on recent research, we created a test build and already know how to make everything work.
In addition, the NULLgravity team is now actively preparing for the release of an augmented reality library for Android, which is at the beta testing stage. So, soon we will be able to please those Leroy Merlin customers who use Android devices.
How the development went
We have been working on a mobile application for Leroy Merlin for about a year now. Those who work with corporations know how different the process is from working with a startup or developing your own product.
There are many more stakeholders involved in the process. The infrastructure of a mobile application becomes very complicated: the backend is done by one team, the application by another, the servers are in the area of responsibility of a third, and so on. This largely determines the course of mobile development. It is not always possible to implement obvious and necessary functionality immediately, in the first release.
Since Leroy Merlin is not just another building materials store, but the largest innovative company in the DIY retail segment in the world and Russia, we understood that the standard functionality of an ecommerce application would not be enough.
Innovations in any case had to create a new customer experience, and augmented reality functions turned out to be the right solution. We were lucky that the client team supported this initiative. Not all companies are ready to invest in technological solutions that are difficult to monetize immediately, but Leroy Merlin decided to undertake such an experiment.
And it turned out to be successful. Together with the team, we decided to submit the project to the “Golden Application” competition in the following categories:
Do I need to tape the joints?
This is also mandatory - the individual parts of the vapor barrier should be hermetically connected to each other without forming gaps, the same applies to the places where the vapor barrier is attached to windows or doors. For this, self-adhesive tapes are used - double-sided or single-sided - usually made of polyethylene or butylene, propylene. These tapes not only perfectly hold membranes together, but are also used in their repair - they can be used to seal holes and cracks.
Under no circumstances use tape for this; it is better to contact a sales consultant at a building materials store or go to the website of the company from which you purchased the vapor barrier - as a rule, companies produce materials for repairing their products.
What you need to know about laying vapor barriers - answers to popular questions
Install a membrane on the outside or inside of the heat insulator
#1. If it is necessary to insulate the facade, then a film for vapor removal is placed on the outside.
#2. But when insulating the roof, films with an anti-condensation coating, diffuse or volumetric, are used. They must be placed on top of the mineral wool, similar to how it is done in a ventilated façade.
#3. If the roof is built without insulation, then the layer of film should pass underneath the rafters.
#4. When insulating the upper floor of a room under the attic, we place a vapor barrier at the bottom of the heat insulator.
#5. And the last option is internal wall insulation. Here, a vapor barrier film (without perforation) should be mounted on top of mineral wool, located inside the room.
How should the membrane be laid - face or back?
#1. As it turned out, many craftsmen do not know which side to install the vapor barrier. The easiest way is if the vapor barrier film has the same front and back sides, the issue is immediately removed. But not always - single-sided films are also produced. For example, anti-condensation ones - their reverse side is fabric, and during installation it should face the inside of the room. The metal coating on the foil membrane should also be facing there.
#2. The manufacturer usually includes installation instructions for diffusion films. It describes in detail the rules for installing the membrane. Read this description carefully: after all, the same company can produce both single-sided and double-sided films.
Sometimes you can determine it externally - by color. If the membrane has two sides, then one of them is more brightly colored. This is usually the outer side of the film.
In what cases is an air gap near the membrane necessary?
#1. At the bottom of all vapor barrier films there is usually a ventilation gap of about 5 centimeters wide. This is done to get rid of condensation. The wall cladding must not be allowed to come into contact with the membrane. If a diffusion-type film is used, then it is mounted directly on the insulation, moisture-resistant plywood or OSB.
Here the air gap must be made on the outside of the membrane. The anti-condensation membrane should have a gap of 4 or 6 centimeters on each side.
#2. When insulating the roof, we create a gap for ventilation by constructing a counter-lattice consisting of bars. And for a ventilated facade, the gap is obtained by installing racks or horizontal profiles located perpendicular to the film.
What should be the overlap when membrane parts overlap each other?
#1. There are markings along the edge of the vapor barrier films. It means how much overlap the canvases should have – usually from 10 to 20 centimeters
This is important when vapor barrier of the roof - here the film should also protect from moisture. The overlap is calculated depending on the angle of the roof slope
So, an angle of up to 30 degrees requires an overlap of up to 10 centimeters, 15 centimeters is enough for angles from 20 to 30 degrees. If the slope angle is less than 20 degrees, the parts of the film should overlap each other by 20 centimeters, no less.
#2. The diffusion type membrane should overlap in the place where the ridge is, also by 20 centimeters. In the valley the overlap will be 30 centimeters, and an additional strip is laid along the slope if the roof slope is small. The approach of the strip on both slopes should be from 30 to 50 centimeters. On the roof, the membrane also covers the side parts of the heat insulator. Its output goes either to a drain gutter or to a drip.
Why and how are joints glued, and is it necessary?
Individual parts of the membrane must be sealed hermetically. This is done using self-adhesive tapes, single-sided or double-sided. They are made from ordinary or foamed polyethylene, butyl rubber or butylene, polypropylene. These tapes can also be used to repair vapor barriers by sealing cracks and holes.
Manufacturers recommend which tape is best to use. Just don’t use tape, especially narrow tape, for these purposes. In this case, you can forget about tightness - the seams will come unglued in a short time.
What fasteners should you use?
To install the membranes, you can use nails (provided they have a wide head), or you can use a regular construction stapler. But counter rails are considered the best fasteners.
Results
Today we figured out how to properly insulate an attic with mineral wool and came to the following conclusions. If the attic is unheated (cold), then the insulation is placed between the floor beams. If the attic is heated, then thermal insulation is placed between the roof rafters. There is a method of laying thermal insulation on the attic floor, then the wall itself is insulated and then a section of the first floor floor from the wall to the edge of the building. This approach will slightly reduce heating costs, since there is no need to heat extra square meters.
For work, it is better to use glass wool, since it does not break and, after compression, restores its previous shape. It is lightweight and does not overload the load-bearing floor beams and rafter system. If you use stone wool, then you need to take slabs with a soft end so that they can be inserted between the guides at random. A vapor barrier is laid between the heated room and the insulation. When laying thermal insulation on the roof, you also need waterproofing, which is placed on the outside. There must be a ventilated gap between the waterproofing and the finishing.
https://youtube.com/watch?v=I7x8yKzAUVg
Is it necessary to install it?
Sometimes you may not need to install a vapor barrier. If the frame is built from durable timber, dried to a minimum level of humidity. The connecting elements must fit as tightly as possible. This way the structure will be protected from moisture.
A number of risks remain:
- Due to the specific nature of wood as a material, fibrous and porous, at high humidity it serves as a medium for the development of pathogenic microflora.
- If you varnish, after a few years the treatment will become ineffective. After 5-10 years, moisture will begin to penetrate deep into the timber.
- If the house is for permanent residence, installation of waterproofing is required. This will prevent the walls from rotting from the inside from moisture generated during cooking and other household needs.
Preparatory work
As already noted, steam insulation should be done before insulating the balcony. Prepare the room, remove everything unnecessary, including garbage. Remove the door frame and balcony threshold. Fill cracks and crevices with foam. Eliminate any unevenness.
When the surface is ready, you can begin installing the vapor barrier layer. But before that, it’s worth dealing with the question that worries builders (especially beginners): which side should the vapor barrier material be laid on? Vapor barrier materials are produced double-sided
Which side to lay the insulation on is really important, and it also matters on which side the vapor barrier is done - external or internal: Balcony vapor barrier diagram
- if external insulation of the facade is carried out, steam insulation is laid on the outside of the insulation;
- if the insulation is internal, the insulation should be laid as an inner layer over mineral wool or polystyrene foam;
- When insulating the ceiling, a film that retains steam is glued to the insulation.
If the balcony vapor barrier material has a fabric side, it should “look” outward, while the foil side should look inside the balcony (with internal insulation).
Preparatory part
Before you insulate the floors in the attic of your home, you need to be well prepared.
- selection of wool and related materials;
- calculation of the required amount of material;
Selection of mineral wool
Stone or mineral wool is the name of a whole direction, in which there are dozens of different models. Based on the name, this includes all soft insulation materials made from rocks; the most famous option is basalt wool.
A number of sources include glass wool and slag wool here. In the first case, glass is used as the basis, and slag wool is made from blast furnace slag (a by-product of blast furnace production).
All materials are good, but which one is better is a moot point. I’ll say right away that if you take material from a well-promoted brand, there is not much difference in quality.
Mineral wool on any base is suitable for a cold attic
It is much more important to choose the type of material.
There are 2 types of such insulation:
- Soft mats that are sold rolled into rolls.
- Dense slabs.
Theoretically, insulating the ceiling from the cold attic side can be done using both options, but from experience, it is better to give preference to dense slabs.
The price of the slabs is slightly higher, but this material does not shrink over time, plus, when wet, some models of slabs can be dried without loss of volume and quality.
As for soft mats, here you are buying a “pig in a poke”; well-known manufacturers make good products, but it is not a fact that you will not buy a fake.
Such mats are inexpensive, but in an attic they lose volume in a couple of years.
It is better to insulate the ceiling of a cold attic using slabs
Related materials
This is the case with related materials. Any cotton wool is afraid of moisture; to protect it, a vapor barrier membrane is needed.
It is a fabric that allows steam to pass through only in one direction; neither steam nor moisture passes through from the other side.
Material calculation
To calculate the amount of wool, you need the area of the attic and the thickness of the insulation:
- With the area of the attic floor, everything is simple - the length is multiplied by the width. Plus 5% for shrinkage and trimming.
- The thickness of the material depends on the climate zone. In central Russia, to insulate an attic floor with mineral wool, the thickness of the slabs is 100 mm, the mats are taken 150 mm. Accordingly, the further north, the thicker the layer.