Here you will learn:
- What is a heat pump
- Advantages of heat pumps
- Principle of operation
- Types of heat pumps: nuances of operation of the freon-water heat exchanger
- Pros and cons of homemade equipment
- Heat pump from air conditioner
- How to make a DIY heat pump from an old refrigerator
- Manufacturing of geothermal installation
You can make a heat pump for heating your home from an old refrigerator or air conditioner. We offer simple instructions for assembling and installing heat pumps.
Using an old refrigerator
The device of a heat pump from a refrigerator
So, in order to assemble a heating system in a country house, you need to have a heat pump.
Today, such units are not cheap, this is explained by high technical characteristics and painstaking work on their assembly. But, if you wish, you can assemble the heat pump yourself.
You can build a simple heat pump from a household refrigerator. The peculiarity of the technique is that it has two main components of a heat pump - a condenser and a compressor. This will significantly speed up the assembly of the heat pump with your own hands.
So, assembling a pump from an old refrigerator is as follows:
Capacitor assembly. The element is made in the form of a coil. In refrigerators it is most often installed at the back. This well-known grille is the condenser through which heat is transferred from the refrigerant. The capacitor is installed in a container that is highly durable and can withstand high temperatures. To avoid damaging the coil during installation, experts recommend cutting the container and installing a capacitor in it. After this, the container is welded. Next, a compressor is attached to the container. It is almost impossible to make a unit at home. Therefore, it is better to take it from an old refrigerator
At the same time, you should pay attention to ensure that it is in good condition. You can use a regular plastic barrel as an evaporator. After all elements of the system are ready, they are connected to each other. Plastic pipes are used to connect the unit to the heating system. Thus, you can build a heat pump from an old household refrigerator
If you need to pump freon into the system, you need to call a specialist. This kind of work can only be done with the help of special equipment.
Thus, you can build a heat pump from an old household refrigerator. If you need to pump freon into the system, you need to call a specialist. This work can only be done with the help of special equipment.
Take note: refrigerator heat pumps are often used to heat small spaces and domestic buildings. This could be a garage or a small shed.
The first channel will let air into the freezer, and the second will release it. In this case, physical processes occur that cause the capacitor to heat up.
You may also be interested in an article on how to make a Frenette heat pump with your own hands.
You can read about Igor Savostyanov’s Henk System heat pumps here.
Classification by construction type
The operating principle of geothermal heating is similar to that of an air conditioner or refrigerator. The main element is a heat pump included in two circuits.
Operating principle of a geothermal (heat) pump
The internal circuit is a traditional heating system consisting of pipes and radiators. External - an impressively sized heat exchanger located underground or in the water column. Both a special liquid with antifreeze and ordinary water can circulate inside it. The coolant takes on the temperature of the medium and, “warmed up,” enters the heat pump, the accumulated heat is transferred to the internal circuit. In this way, water is heated in pipes and radiators.
The geothermal (heat) pump is a key element of the system. This is a compact unit that takes up no more space than a washing machine that is familiar to us. If we talk about performance, then for every 1 kW of electricity consumed, the pump “produces” up to 4-5 kW of thermal energy. While a conventional air conditioner, which has a similar principle of operation, will “respond” to 1 kW of heat for 1 kW of electricity consumed.
Scheme of geothermal heating in a private house
It must be admitted that the installation of this type of heating is the most expensive and labor-intensive to date. The lion's share of its cost is the purchase of equipment and, of course, excavation work. Naturally, a thrifty owner wonders whether it is possible to save money, for example, on installation and make geothermal heating with his own hands? In order to answer this question, it is necessary to understand which systems are used most often and understand the features of their design.
Horizontal heat exchanger
Quite often, a horizontal circuit is used, in which pipes are laid in trenches to a depth greater than the freezing level of the soil in a given area.
The disadvantage of a geothermal heating system with a horizontal circuit is the large area occupied by the collector
The disadvantage is that the area occupied by the circuit must be much larger than the house itself, so to heat a building with an area of 250 m², about 600 m² will go under the pipes. Not every developer can afford such luxury.
In addition, inconveniences arise if the site is already landscaped; for example, you have to observe the distance from trees (1.5 m) and many other nuances.
Vertical heat exchanger
A more compact, but also more expensive option is a vertical heat exchanger. Its installation does not require a large area, but it will require special drilling equipment.
Installation of a vertical heat exchanger requires the use of special drilling equipment
The depth of the well, depending on the technology, can reach 50-200 m, but its service life is up to 100 years. This method is especially relevant when planning geothermal heating of a country house with a developed adjacent territory; it allows you to preserve the landscape almost in its original form.
Water-based heat exchanger
The most economical geothermal installation uses thermal energy from water. It is recommended if the distance to the nearest body of water does not exceed 100 m.
A water-based heat exchanger is the most advantageous and therefore more appropriate for the device
A circuit of pipes in the form of a spiral is laid on the bottom; the depth should be less than 2.5-3 m, that is, deeper than the freezing zone. Reservoir area – from 200 m². The main advantage is that there is no need to perform labor-intensive excavation work, but it is necessary to obtain permission from special services. Having spent significant amounts of money on expensive equipment, you should not skimp on high-quality installation. After all, the quality and efficiency of the entire system will depend on it.
As you can see, installing geothermal heating at home with your own hands is not so easy. Of all the listed types, perhaps only the last option will be quite easy to implement on your own. But even in this case, it is worth weighing all the pros and cons.
Types of structures
- Soil - water
. Heat is drawn from the soil mass. Heat can be collected in two ways: a vertical probe or a horizontal collector. - Water is water.
Heat is taken from the mass of groundwater or an open reservoir. - Air - water
. Heat is taken from the mass of the external air environment. This type of structure is not effective in areas with harsh winters. But air heat pumps for heating a house have an undeniable advantage: there is no need for excavation work to implement them.
Soil-water design
Good heat transfer is guaranteed by soils saturated with moisture.
- Either the entire required area of the site is opened, then the pipes are laid, and after laying they are buried with soil.
- In the second method, trenches are dug under the pipes, into which the collector pipes are laid in rings.
Air-water design
We recommend:
- What is the best heating system for a private home? You will find the answer in the article.
- In the next article we will talk about the features of heating a private house with your own hands.
- All types of heating boilers.
- What types of heating devices are the best? Let's figure it out![/list
Characteristics
Most thrifty owners want to save money on heating and water supply for a private home. A heat pump is suitable for such purposes.
It is quite possible to build it yourself, while saving a lot of money - a factory-made device is very expensive.
Properties and device
The device has an external and internal circuit along which the coolant moves. Components of a standard device: a heat pump, a device for intake and a device for heat distribution. The circuit from the inside consists of a mains-powered compressor, an evaporator, a throttle valve, and a condenser. The device also uses fans, a pipe system, and geothermal probes.
Advantages of the heat pump:
- does not emit any harmful substances, absolutely environmentally friendly;
- there are no costs for the purchase and delivery of fuel (electricity is spent only on moving freon);
- no need for additional communications;
- absolutely fire- and explosion-proof;
- full heating in winter and air conditioning in summer;
- A self-built heat pump is an autonomous design that requires minimal control effort.
How to make a DIY heat pump from an old refrigerator
Before you begin manufacturing a heat pump, you need to select a heat source and resolve the issue with the installation’s operating diagram. In addition to the compressor, you will need other equipment and tools.
Execution of diagrams and drawings. To install a heat pump, you need to make a well because the energy source must be underground. The depth of the well should be such that the ground temperature is at least 5 degrees. Any body of water is also suitable for this purpose.
The designs of heat pumps are similar, so regardless of what the heat source is, you can use almost any circuit found on the network. When the scheme is selected, it is necessary to make drawings and indicate in them the dimensions and joint locations of the nodes.
Since it is quite difficult to calculate the power of an installation, you can use average values. For example, for a residential area with low heat loss, a heating system with a power of 25 W per square meter will be required. meter. For a building that is well insulated, this value will be 45 W per square meter. meter. If the house has sufficiently high heat losses, the installation power should be at least 70 W per square meter. meter.
Selecting the required parts. If the compressor removed from the refrigerator is broken, then it is preferable to purchase a new one. It is not recommended to repair an old compressor, as this may negatively affect the operation of the heat pump in the future.
Additionally, you will need to purchase the following parts:
- sealed stainless steel container with a volume of 120 liters;
- plastic container with a volume of 90 liters;
- three copper pipes of different diameters;
- metal-plastic pipes.
To work with metal parts you will need a welding machine and a grinder.
Assembling components and installing a heat pump
First of all, you should install the compressor on the wall using brackets. The next step is working with the capacitor. The stainless steel tank must be divided into two parts using a grinder. A copper coil is mounted in one of the halves, then the container must be welded and threaded holes made in it.
To make a heat exchanger, you need to wind a copper pipe around a stainless steel container and secure the ends of the turns with slats. Attach plumbing transitions to the terminals.
As soon as the work with the components is completed, you need to select a thermostatic valve. The structure should be assembled and the system should be filled with freon (grade R-22 or R-422 is suitable for this purpose).
Connection to the intake device. The type of device and the nuances of connecting to it will depend on the circuit:
- "Water-earth". The collector should be installed below the ground frost line. It is necessary that the pipes are at the same level.
- "Water-air". Such a system is easier to install, since there is no need to drill wells. The collector is mounted anywhere near the house.
- "Water-water." The collector is made of metal-plastic pipes, and then placed in a reservoir.
You can also install a combined heating system to heat your home. In such a system, the heat pump operates simultaneously with the electric boiler and is used as an additional heating source.
It is quite possible to assemble a heat pump for heating a house yourself. Unlike purchasing a ready-made installation, this will not require large financial costs, and the result will definitely please you.
Assembling a simple pump from an air conditioner
Modern air conditioners can perform the function of an air-to-air heat exchanger. But their performance drops along with the outside temperature.
By modifying the air conditioner, you can get a really working pump model. To do this, you can assemble a homemade HP with your own hands according to working versions of the drawings from an air conditioner, which takes energy not from the outside air, but from running water. In this case, only the compressor is used from the air conditioner.
Stages of work:
- A heat exchanger needs to be made for the compressor. A copper tube 30 meters long is wound in the shape of a coil on a cylinder. After which this structure must be placed in a steel container that has connections for water.
- The compressor must be connected to the lower inlet of the heat exchanger, and a control valve must be connected to the upper inlet.
- It is best to have a technician charge the system with freon.
- Next, the entire structure should be checked and a test run of the HP should be performed.
- After eliminating the shortcomings, the system is disconnected from the voltage, everything is secured, covered with a protective casing and put into operation.
Installing water meters yourself
Replacement or installation of meters can be done by residents. Changing the device is much easier, but there may be some problems with the initial installation.
The most important thing is to prepare the documents correctly and carry out installation with special attention. There is one suitable place for installation, this is immediately after the riser, on the first straight section of the pipe. This applies to hot and cold water
This applies to hot and cold water
There is one suitable place for installation, this is immediately after the riser, on the first straight section of the pipe. This applies to hot and cold water.
You will need to install three elements: a meter, a faucet and a coarse filter. Once the circuit is completed, the wiring is installed.
All modern elements are threaded and installing them is not difficult. The main thing is to know that the tap will need to be opened and access to it should be provided; the filter must be directed downward, and the counter must be clearly visible.
Sequential installation of all necessary elements.
Faucet, filter and counter.
A check valve is added to the simple circuit to stabilize the meter readings.
Diagram with shut-off valves
For convenience, a shut-off valve is installed; with its help, you can always turn off the water supply in order to replace the meter.
Tips for choosing a system
Installation of ground-to-water equipment is more expensive than all other options, because it requires deep excavation when the equipment is located vertically or a large free area when laying communications horizontally.
These parameters limit the use of the system and significantly reduce its attractiveness.
Installing a water-to-water pump also has some limitations. If there is an accessible body of water nearby, you can place the system in it. The lack of open water will entail drilling wells and drainage wells, which is also not cheap.
An air-to-water pump does not pose any installation problems, and can operate correctly even in apartment buildings, but in severe winters with low temperatures, its efficiency decreases and a parallel energy source is required to support it.
However, the installation of geothermal heating eventually pays for its costs and begins to produce a free resource, allowing owners to live in the most convenient, pleasant and comfortable conditions, without spending a lot of money on utilities.
What is a heat pump for heating a private home? How does it work?
A special device that is capable of extracting heat from the environment is called a heat pump.
Such devices are used as the main or additional method of heating rooms. Some devices also work to passively cool the building - the pump is used for both summer cooling and winter heating.
Environmental energy is used as fuel. Such a heater extracts heat from air, water, groundwater, and so on, so this device is classified as a renewable energy source.
Important! These pumps require an electrical connection to operate. All heating devices include an evaporator, a compressor, a condenser and an expansion valve. Depending on the heat source, water, air and other devices are distinguished
The principle of operation is very similar to that of a refrigerator (only the refrigerator emits hot air, and the pump absorbs heat)
Depending on the heat source, water, air and other devices are distinguished. The principle of operation is very similar to that of a refrigerator (only the refrigerator emits hot air, and the pump absorbs heat)
All heating devices include an evaporator, a compressor, a condenser and an expansion valve. Depending on the heat source, water, air and other devices are distinguished. The principle of operation is very similar to the principle of operation of a refrigerator (only the refrigerator emits hot air, and the pump absorbs heat).
Most devices operate at both positive and negative temperatures, but the efficiency of the device directly depends on external conditions (i.e., the higher the ambient temperature, the more powerful the device will be). In general, the device works as follows:
- The heat pump comes into contact with environmental conditions. Typically, the device extracts heat from the ground, air or water (depending on the type of device).
- A special evaporator is installed inside the device, which is filled with refrigerant.
- Upon contact with the external environment, the refrigerant boils and evaporates.
- The refrigerant then enters the compressor in the form of vapor.
- There it contracts, which significantly increases its temperature.
- After this, the heated gas enters the heating system, which leads to heating of the main coolant, which is used for heating the premises.
- The refrigerant is gradually cooled. Eventually it turns back into liquid.
- Then the liquid refrigerant enters a special valve, which seriously lowers its temperature.
- Finally, the refrigerant enters the evaporator again, after which the heating cycle repeats.
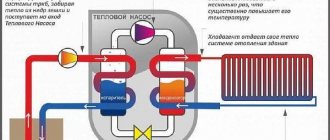
Photo 1. Operating principle of a ground-water heat pump. Blue indicates cold coolant, red indicates hot fluid.
Advantages:
- Environmental friendliness. Such devices are renewable energy sources that do not pollute the atmosphere with their emissions (while the use of natural gas produces harmful greenhouse evaporations, and coal combustion is often used to produce electricity, which also pollutes the air).
- A good alternative to gas. A heat pump is ideal for heating premises in cases where the use of gas is difficult for one reason or another (for example, when the house is located far from all major utility networks). The pump also compares favorably with gas heating in that installing such a device does not require obtaining government permission (but when drilling a deep well, you will still have to obtain it).
- Inexpensive additional heat source. The pump is ideal as a cheap auxiliary power source (the best option is to use gas in winter and a pump in spring and autumn).
Flaws:
- Thermal limitations when using water pumps. All thermal devices function well at positive temperatures, while when operating at negative temperatures, many pumps stop working. This is mainly due to the fact that the water freezes, which makes it impossible to use it as a heat source.
- Problems may arise with devices that use water as heat. If water is used for heating, you will need to find a stable source. Most often, this requires drilling a well, which may increase the cost of installing the device.
Attention! Pumps usually cost 5-10 times more than a gas boiler, therefore the use of such devices for the purpose of saving in some cases may not be practical (for the pump to pay for itself, you will need to wait several years)
Application
A self-assembled heat pump is suitable for the following cases:
- if you want to save on fuel to heat your home;
- if it is impossible to supply gas to the house or it is too troublesome, then buying bottled gas is not a solution to the situation;
- there is no desire or ability to heat with coal, wood, electricity, or other fuel;
- if the owner of the house is a supporter of the use of environmentally friendly alternative energy. The device is quite practical even if it has the ability to use other energy sources.
A do-it-yourself heat pump is made for the home, based on technologies for collecting heat from the ground, water, and air. It is used for heating, water heating and even indoor air conditioning.
Features of the air-water thermal system
The heat pump, which this article is devoted to, unlike other modifications of a similar device (in particular, water-to-water and ground-to-water), has a number of advantages:
- saves electricity;
- installation will not require large-scale excavation work, drilling wells, or obtaining special permits;
- If you connect the system to solar panels, you can ensure its complete autonomy.
A significant advantage of a thermal system that extracts wind energy and transfers it to water is its 100% environmental safety.
Before you begin designing a pump, you need to find out in which cases the system is most effective and when its use is inappropriate.
A heat pump system that extracts energy from the air mass can be used to heat all types of coolants used in the CIS: water, air, steam
Specifics of application and operation
The heat pump operates productively exclusively in the temperature range from -5 to +7 degrees. At an air temperature of +7, the system will generate more heat than necessary, and at temperatures below -5, it will not be enough for heating. This is due to the fact that the concentrated freon contained in the structure boils at a temperature of -55 degrees.
Theoretically, the system can generate heat even in 30-degree frost, but it will not be enough for heating, because the heating capacity directly depends on the difference between the boiling point of the refrigerant and the air temperature.
Therefore, this system will not be suitable for residents of the Northern regions, where cold weather sets in earlier, but in houses in the Southern regions it can effectively serve for several cold months.
If standard batteries are installed in the room, the heat pump will work less efficiently. The air-to-water device is best combined with convectors and other radiators with a large area, as well as with water-type “warm floor” and “warm wall” systems.
Also, the room itself must be well insulated from the outside, have built-in multi-chamber windows that provide better thermal insulation than conventional wooden or plastic ones.
The heat pump interacts best with a water-based “warm floor” system, which does not require heating the coolant above 40 - 45º C
A homemade heat pump can effectively heat houses up to 100 square meters. m and is guaranteed to produce a power of 5 kW. It should be understood that it is impossible to fill freon with sufficient quality into a structure created in domestic conditions, so you should count on its boiling point of up to -22 degrees.
The home-assembled device is ideal for supplying heat to a garage, greenhouse, utility room, small private pool, etc. The system is usually used as additional heating.
An electric boiler or other traditional equipment for the heating season will be required in any case. During severe frosts (-15-30 degrees), it is recommended to turn off the heat pump to avoid wasting electricity, because during this period its efficiency is no more than 10%.
Heat pumps supply sufficient energy to heat water in indoor private swimming pools (+)
Operating principle of the system
The working substance in the structure is air. Through the outdoor unit, which is installed outdoors, oxygen enters the evaporator through pipes, where it interacts with the refrigerant.
Under the influence of temperature, freon becomes gaseous (since it boils at -55 degrees) and enters the compressor in heated form under pressure. The device compresses the gas, thereby increasing its temperature.
Hot freon enters the circuit of the storage tank (condenser), where heat is transferred to water, which can subsequently be used to organize heating and hot water supply. In the condenser, the freon loses only part of its heat, and is still in a gaseous state.
Passing through the throttle, the refrigerant is sprayed, as a result of which its temperature decreases. Freon becomes liquid and in this form passes into the evaporator. The cycle repeats.
The figure schematically shows the implementation of the principle of an elementary heat pump, divided by a compressor and an expander into two circuits - high and low pressure
For those wishing to independently build a heat pump from waste materials and used equipment, for example, from an old refrigerator, the information contained in our recommended article will help.
Pros and cons of homemade equipment
A heat pump is a device that does not produce heat, but moves it from one place to another, increasing the temperature through compression. This process proceeds according to the principle of the Carnot cycle, which consists in the movement of the working fluid (refrigerant) through a closed system. When its state changes from liquid to gaseous and vice versa, a large amount of energy is released or absorbed. This principle is used in the design of refrigerators, but the mechanism of action of a heat pump is to absorb heat from outside and transfer it to the room.
Stages of the Carnot cycle:
- liquid freon flows through the tube into the evaporator;
- interacting with the coolant, which is water, air or soil, the refrigerant evaporates, taking on a gaseous state;
- the working fluid passes through the compressor and is compressed under pressure, which increases its temperature
- then it enters the condenser, which acts as a heat exchanger;
- transfers the resulting heat to the coolant and again takes the form of a liquid;
- in this form, freon enters the expansion valve, where at low pressure it again moves to the evaporator.
An industrial production device is expensive, the payback period is on average 5-7 years. The popularity of a heat pump from an old refrigerator is due to minimal material investments in the manufacture of the unit and the possibility of saving energy costs during its operation.
Attention! To obtain 3-4 kW of thermal energy, an average of 1 kW of electricity is consumed.
Additionally, the following advantages of using homemade equipment are highlighted:
- absence of noise, foreign odors;
- no installation of auxiliary structures or chimney required;
- the operation of the equipment does not harm the environment, since it does not involve the release of combustion products into the atmosphere;
- the ability to install the system in a convenient location;
- multifunctionality. In winter the device is used as a heater, and in summer as an air conditioner;
- safety. Operation does not involve the use of fuel, and the maximum temperature of the unit components does not exceed 90 0C;
- durability, reliability. The service life of the unit when using high-quality components is 30 years or more.
The main disadvantage of homemade devices is their low productivity, so they are often used as an additional option for heating individual rooms in the house. It is recommended to assemble such a system in rooms with good thermal insulation and a heat loss level of no more than 100 W/m2.
Types of units
A visual representation of the design options for heat pumps is provided by their classification according to the type of coolant on the external and internal contours of the structure. The device can receive energy from:
- soil;
- water (reservoir or source);
- air.
Inside the house, the resulting thermal energy can be used in the heating system, as well as for heating water or air conditioning. Therefore, several types of heat pumps are distinguished depending on the combination of these elements and functions.
Ground-water system
Receiving heat from the ground is considered one of the most effective for this type of alternative heating, since already about five meters from the surface the ground temperature remains fairly constant and is little susceptible to changes in weather conditions.
The geothermal heat pump uses special heat-conducting probes
A special liquid, commonly called brine, is used as a coolant on the external circuit. This is an environmentally friendly composition.
The external circuit of a ground-to-water heat pump is made of plastic pipes. They can be placed in the ground horizontally or vertically. In the first case, work may be required over a large area, from 25 to 50 square meters. m for each kilowatt of pump power. The areas allocated for the installation of a horizontal collector cannot be used for agricultural needs. Here, only laying out a lawn or planting annual flowering plants is permissible.
To construct a vertical collector, you will need a series of wells 50-150 meters deep. Since the ground temperature at this depth is higher and more stable, this geothermal heat pump is considered more efficient. In this case, special deep probes are used to transfer heat.
Water-to-water pump
A water-to-water heat pump can be an equally effective choice, since at great depths the water temperature remains quite high and constant. The following can be used as a source of low-grade thermal energy:
- open bodies of water (lakes, rivers);
- groundwater (boreholes, wells);
- wastewater from industrial technological cycles (return water supply).
There are no fundamental differences in the design of ground-to-water or water-to-water heat pumps. The least costly construction will require the construction of a heat pump that uses the energy of an open reservoir: pipes with coolant must be equipped with a load and immersed in water. When using groundwater potential, a more complex design will be required. It may be necessary to construct an additional well to discharge water that passes through the heat exchanger.
Using a water-to-water heat pump in an open pond can be very beneficial
Universal air-to-water option
In terms of efficiency, the air-water heat pump is inferior to other models, since in the cold season its power is noticeably reduced. However, its installation does not require complex excavation work or the construction of deep wells. You just need to select and install the appropriate equipment, for example, directly on the roof of the house.
An air-to-water heat pump can be installed without extensive installation work
The undoubted advantage of this design is the ability to reuse the heat that leaves the rooms heated by the heat pump with exhaust air or water, as well as in the form of smoke, gas, etc. To compensate for the lack of power of the air heat pump in winter, alternative heating options should be provided.
The least expensive option may be an air-to-air heat pump, the construction of which does not require complex work to create a traditional water heating system in the premises.
Types of heat pumps: nuances of operation of the freon-water heat exchanger
The natural energy source can be a borehole, ground or reservoir type system. Each option is unique. The operating principle and installation differ.
When the source of energy is a well, it is necessary to drill a corresponding hole in the ground. In 1 m of the source you can extract 50-60 W of energy. For normal operation of the heat pump, 20 m is required.
Features of obtaining energy from a well:
- The main advantages are compactness and high heat transfer;
- The downside is the difficulty of drilling a well.
When the heat source is soil, the pipe lies at a depth below the freezing level of the ground. To lay the pipe, you can dig a pit or trench.
Extracting energy from the ground is a rather difficult process that requires a large area that will not be available for exploitation.
If there are bodies of water nearby, you can place the pipe in the water source. The main requirement is sufficient depth. In 1 square meter of water you can get 30 watts of energy. To fix the pipes at depth, a weight is attached to them.
In some cases, air is used as the source. This pump contains refrigerant. In this case, freon from the refrigerator is suitable. The substance takes heat from the air and releases it to the room.
All components of a solar battery are available and not expensive. And you can assemble the structure yourself.
What is a geothermal pump
The principle of operation of a heat pump
First, you need to understand what a geothermal pump is and what principle it works on, because it is the heart of the entire device we are describing.
It's no secret that the earth always maintains above-zero temperatures. The water under the ice is in the same state. In this relatively warm environment, a closed pipeline containing liquid is placed.
The operating scheme of heat pumps is quite simple and is based on the inverse Carnot principle:
- The coolant, moving along the external circuit, is heated from the selected source and enters the evaporator.
- There it exchanges energy with the refrigerant (usually freon).
- Freon boils, turns into a gaseous state and is compressed by a compressor.
- Hot gas (it heats up between 35–65oC) enters another heat exchanger, in which it transfers its heat to the heating or hot water supply system of the house.
- The cooled refrigerant becomes liquid again and returns to a new cycle.
Principle of operation
All the space around us is energy - we just need to be able to use it. For a heat pump, the ambient temperature must be greater than 1C°. Here it should be said that even the ground in winter under snow or at some depth retains heat. The operation of a geothermal or any other heat pump is based on transporting heat from its source using a coolant to the heating circuit of the house.
Scheme of the device operation point by point:
- a heat carrier (water, soil, air) fills the pipeline located under the ground and heats it;
- then the coolant is transported to the heat exchanger (evaporator) with subsequent heat transfer to the internal circuit;
- in the external circuit there is a refrigerant - a liquid with a low boiling point under low pressure. For example, freon, water with alcohol, glycol mixture. Inside the evaporator, this substance is heated and becomes a gas;
- The refrigerant gas is sent to the compressor, compressed under high pressure and heated;
- hot gas enters the condenser and there its thermal energy passes to the coolant of the home heating system;
- The cycle ends with the transformation of the refrigerant into liquid, and due to heat loss, it returns back to the system.
The same principle is used for refrigerators, so home heat pumps can be used like air conditioners to cool a room. Simply put, a heat pump is a refrigerator with reverse action: instead of cold, heat is generated.
DIY heat pump
- Evaporator assembly
. A plastic container with a volume of about eighty liters is suitable for the case. The coil is made of a copper tube of smaller diameter. Water is supplied to the container through conventional pipes. - The work of a specialist
. It is recommended to entrust the following work to a specialist - they consist of soldering pipes, connecting a compressor and pumping freon. For those who decide to make the connections themselves: the compressor is connected to the tube from the lower terminal of the condenser, and the upper terminal is connected to the control valve. However, after soldering the tubes for refilling the freon system, it is better to call a specialist and at the same time ask him to check your work. - Connecting the external part
. Pipes from probes or manifolds on the outside of the heat pump are connected to the evaporator. The connection methods are no different from how water pipes are usually connected. The only thing that needs to be taken care of is the thermal insulation of the pipelines at the exit from the depth and entry into the compressor room. - Connecting the heating system
. The heating system of an apartment or house is connected to the condenser tank. - After commissioning, the homemade heat pump is ready! Commissioning work
consists of eliminating leaks that have appeared, testing the operating mode, setting up automation, and debugging the nuances that inevitably arise when putting the system into working condition.
As a result, the main energy consumption of the system comes down to the operation of two pumps (circulation of brine from the external part of the heat pump and water from the heating system itself) and a compressor.
Manufacturing of geothermal installation
It is quite possible to make a geothermal installation with your own hands. In this case, the thermal energy of the earth is used to heat the home. Of course, this is a labor-intensive process, but the benefits are significant.
Calculation of the pump circuit and heat exchangers
The circuit area for HP is calculated at the rate of 30 m² per kilowatt. A living space of 100 m² requires about 8 kilowatt/hour of energy. This means the contour area will be 240 m².
The heat exchanger can be made from a copper tube. Inlet temperature 60 degrees, outlet 30 degrees, thermal power 8 kilowatt/hour. The heat exchange area should be 1.1 m². Copper tube with a diameter of 10 millimeters, safety factor 1.2.
Circumference in meters: l = 10 × 3.14 / 1000 = 0.0314 m.
Quantity of copper tube in meters: L = 1.1 × 1.2 / 0.0314 = 42 m.
Necessary equipment and materials
In many ways, success in the manufacture of heat pumps depends on the level of preparedness and knowledge of the contractor himself, as well as on the availability and quality of everything necessary for installing a heat pump.
Before starting work, you need to purchase equipment and materials:
- compressor;
- capacitor;
- controller;
- polyethylene fittings intended for assembling manifolds;
- pipe to the earth circuit;
- circulation pumps;
- water hose or HDPE pipe;
- pressure gauges, thermometers;
- copper tube with a diameter of 10 millimeters;
- insulation for pipelines;
- set of seals for sealing.
How to assemble a heat exchange block
The heat exchange block consists of two components. The evaporator must be assembled according to the “pipe-in-pipe” principle. The inner copper tube is filled with freon or other rapidly boiling liquid. Water from the well circulates through the outside.
Before assembling the capacitor, it is necessary to wind the copper tube in the form of a spiral and place it in a metal barrel with a capacity of at least 0.2 m³. The copper tube is filled with freon, and the barrel of water is connected to the home heating system.
Construction of the soil contour
In order to prepare the required area for the soil contour, a large amount of excavation work is required, which should preferably be carried out mechanized.
You can use 2 methods:
- With the first method, it is necessary to remove the top layer of soil to a depth below its freezing. At the bottom of the resulting pit, lay the free part of the outer pipe of the evaporator in a snake and reclaim the soil.
- In the second method, you first need to dig a trench across the entire planned area. The pipe is laid in it.
Then you need to check the tightness of all connections and fill the pipe with water. If there are no leaks, you can fill the structure with earth.
Refueling and first start
After installation is completed, the system must be filled with refrigerant. It is best to entrust this work to a specialist, because special devices are used to fill the internal circuit with freon. When filling, you need to measure the pressure and temperature at the compressor inlet and outlet.
After refueling is completed, you need to turn on both circulation pumps at the lowest speed, then start the compressor and monitor the operation of the entire system using thermometers. When the line warms up, frosting is possible, but after the system is completely warmed up, the frosting should melt.
What is a heat pump and how does it work?
The term heat pump refers to a set of specific equipment. The main function of this equipment is to collect thermal energy and transport it to the consumer. The source of such energy can be any body or environment with a temperature of +1º or more degrees.
There are more than enough sources of low-temperature heat in our environment. This is industrial waste from enterprises, thermal and nuclear power plants, sewage, etc. To operate heat pumps in home heating, three self-regenerating natural sources are needed - air, water, and earth.
Heat pumps “draw” energy from processes that regularly occur in the environment. The flow of processes never stops, because the sources are recognized as inexhaustible according to human criteria
The three listed potential energy suppliers are directly related to the energy of the sun, which, by heating, moves the air with the wind and transfers thermal energy to the earth. It is the choice of source that is the main criterion according to which heat pump systems are classified.
The operating principle of heat pumps is based on the ability of bodies or media to transfer thermal energy to another body or environment. Receivers and suppliers of energy in heat pump systems usually work in pairs.
The following types of heat pumps are distinguished:
- Air is water.
- Earth is water.
- Water is air.
- Water is water.
- Earth is air.
- Water - water
- Air is air.
In this case, the first word determines the type of medium from which the system takes low-temperature heat. The second indicates the type of carrier to which this thermal energy is transferred. Thus, in heat pumps, water is water, heat is taken from the aquatic environment and liquid is used as a coolant.
By design, heat pumps are vapor compression units. They extract heat from natural sources, process and transport it to consumers (+)
Modern heat pumps use three main sources of thermal energy. These are soil, water and air. The simplest of these options is an air source heat pump. The popularity of such systems is due to their fairly simple design and ease of installation.
However, despite such popularity, these varieties have rather low productivity. In addition, the efficiency is unstable and dependent on seasonal temperature fluctuations.
As the temperature drops, their performance drops significantly. Such heat pump options can be considered as an addition to the existing main source of thermal energy.
Equipment options that use ground heat are considered more effective. The soil receives and accumulates thermal energy not only from the Sun, it is constantly heated by the energy of the earth's core.
That is, the soil is a kind of heat accumulator, the power of which is practically unlimited. Moreover, the soil temperature, especially at some depth, is constant and fluctuates within insignificant limits.
Scope of application of energy generated by heat pumps:
The constancy of the source temperature is an important factor in the stable and efficient operation of this type of power equipment. Systems in which the aquatic environment is the main source of thermal energy have similar characteristics. The collector of such pumps is located either in a well, where it ends up in an aquifer, or in a reservoir.
The average annual temperature of sources such as soil and water varies from +7º to + 12º C. This temperature is quite enough to ensure efficient operation of the system.
The most effective are heat pumps that extract thermal energy from sources with stable temperature indicators, i.e. from water and soil
Main types of geothermal heating systems for home
If you have understood the basic principles of operation of geothermal heating in a country house, it is worth considering an equally important issue and finding out what types of systems there are. They differ solely in the type of heat exchanger, the use of each of which depends on many factors. Depending on the characteristics of the site and the characteristics of a particular area, three types of heat exchangers can be used:
Horizontal heat exchanger. The design of a heating system based on a horizontal heat exchanger requires the presence of a large plot of land not used for a vegetable garden. For example, in order to heat a house with an area of 200 sq.m., it is necessary to use a land plot of at least 600 sq.m. In this case, the pipes are laid in specially prepared trenches dug slightly below the freezing level of the soil. This depth varies and depends on the characteristics of a particular region.
- Vertical heat exchanger. The use of this type of heat exchanger allows you to save space; it can be equipped without damaging the landscape of the area. In order to deepen special geothermal probes, it is necessary to use special drilling equipment, which requires a large investment. The depth of the well into which the probe is placed can reach 100-150 meters, and its diameter is only 100-150 mm.
- Heat exchanger placed in water. The installation of a heat exchanger of this type is the most economical option, however, only owners of houses located next to a body of water, the distance to which does not exceed 100 meters, can use such a system. In this case, it is possible to organize geothermal heating of a private house using the thermal energy of water at the lowest cost. The heat exchanger pipes are laid at the bottom of the reservoir, the depth of which is at least 2.5-3 meters, while its area must be at least 200 sq.m.
Before starting installation work, it is not enough to know the operating principle of geothermal heating; it is important to compare your financial capabilities and weigh the pros and cons, taking into account the terrain and the characteristics of the land. If there is a body of water near your house that satisfies all the listed requirements, then you are incredibly lucky, because in this case you can organize heating of the house yourself, and for this you do not even need permission from regulatory authorities. As for other types of construction, in the case of using a horizontal heat exchanger, you need to have a lot of free land, and if you decide to install a vertical heat exchanger, you need to have a sufficient supply of funds necessary to carry out expensive drilling work
As for other types of construction, in the case of using a horizontal heat exchanger, you need to have a lot of free land, and if you decide to install a vertical heat exchanger, you need to have a sufficient supply of funds necessary to carry out expensive drilling work.
Waste oil dripper stove
One of the cheapest types of fuel is used oil. The oven can heat up to 800-900 °C. The initial temperature is 90°C.
Fill in some of the oil and add 50-100 g of ignition material (special fluids, fuel oil, kerosene or diesel fuel). This is necessary for quick ignition of the stove. Wait until the combustion process stabilizes. You can then complete the next section.
If oil spills, it must be removed immediately. Combustion occurs inside the pipe. This is a safe process. Fuel consumption ranges from 0.5 to 1.5 liters per hour. When the stove is burning, you can heat the water.
Recommended for use: solar oil, fuel oil, waste oil, fuel oil. Do not use gasoline, acetone or other solvents. Avoid getting water into the fuel.
The technical literature contains many detailed instructions for making a drip heater for water injection with your own hands. Each of these designs is unique and has its own advantages and disadvantages. You can also use the kiln in the workshop version, but you can finish it at your own discretion.
Take a look at the overview video on IV infusion. Oven on the solarium:
Drawings and tips for installing a waste oil furnace contain this video:
Prospects for the development of geothermal structures
Just 25 years ago in Europe, 25 million homeowners used earth's heat to heat their homes; today this figure has increased several times. This proves the cost-effectiveness of geothermal systems
, payback in several years.
In addition, the governments of many countries subsidize homeowners who wish to use the energy of the earth. In Russia, such designs are not widespread, which is associated with high initial costs. However , there are prospects:
with the development of competition,
the cost of heat pumps will decrease
, which will lead to cheaper geothermal heating. But the best option is state or at least regional support. Especially if we take into account the environmental significance of this method of heating homes.
In terms of cost of expenses for 2021 and ease of use, geothermal heating is equal to heating with main gas, while being completely explosion-proof and installed in a couple of weeks. All other heating methods are either significantly more expensive or require greater daily labor costs. Trends in rising energy prices in the foreseeable future will lead to the alignment of Russian prices with prices for European consumers. Discussions about payback are mainly conducted by competitors in the workshop; they do not take into account the convenience of this heating method and inflation.
Today, the conventional consumer earns enough money not to notice the high cost of heating his home, but over time, everything can change. Since thoughts about a country house arise among the population of our country over 40 years of age, investments in HP heating can be considered as investments in a personal pension fund. Spend on installation once and subsequently receive 4-5 kW of heat per 1 kW of electricity.
Air-to-water heat pump for home
A feature of air-water systems is the strong dependence of the coolant temperatures in the heating system on the temperature of the source - the outside air. The effectiveness of such equipment is constantly changing both seasonally and in weather conditions. This reveals a significant difference between aerothermal systems and geothermal complexes, whose operation is stable throughout its entire service life and does not depend on external conditions.
In addition, air-to-water heat pumps are capable of both heating and cooling indoor air, which makes them popular in regions with relatively cold winters and hot summers. In general, the use of such systems is most effective in relatively warm areas, and for northern regions additional heating means are required (electric heaters are usually used).
How do air-to-water heat pumps work?
The operation of an air-to-water heat pump is based on the Carnot principle. In more understandable terms, the design of a freon refrigerator is used. The refrigerant (freon) circulates in a closed system, passing through the following stages:
- evaporation accompanied by strong cooling
- heating from the heat of incoming outside air
- strong compression, at which its temperature becomes high
- condensation with transition to a liquid state
- passage through the throttle with a sharp drop in pressure and evaporation
For normal circulation of the refrigerant, it is necessary to have two compartments - the evaporator and the condenser. In the first, the temperature is low (negative); thermal energy from the ambient air is used for heating. The second compartment serves to condense the refrigerant and transfer thermal energy to the coolant of the heating system.
The role of the air coming from outside is to transfer heat to the evaporator, where the temperature is very low and requires an increase for the upcoming compression. The thermal energy of the air is available even at subzero temperatures and is retained until the temperature drops to absolute zero. Low-potential sources of thermal energy make it possible to obtain high system efficiency, but when the outside temperature drops significantly to -20°C or -25°C, the system stops and requires the connection of an additional heating source.
Advantages and disadvantages
The advantages of air-to-water heat pumps are:
- easy installation, no excavation work
- The source of thermal energy - air - is available everywhere, it is accessible and completely free. The system only requires power supply for the circulation equipment, compressor and fan
- the heat pump can be structurally combined with ventilation, which can significantly increase the efficiency of both systems
- The heating system is environmentally friendly and not hazardous in operation
- the system operates almost silently and can be controlled using automation systems
The disadvantages of an air-to-water heat pump are:
- limited application. Household HP models require the connection of additional heating systems already at -7°C, industrial models are capable of maintaining temperatures down to -25°C, which is too low for most regions of Russia
- the dependence of the system efficiency on the outside air temperature makes the system operation unstable and requires constant reconfiguration of operating modes
- To power fans, compressors and other devices, a connection to a stable power source is required
When planning the use of such a heating and hot water system, it is necessary to take these features into account.
Installation power calculation
The procedure for calculating the power of an installation comes down to determining the area of the house to be heated, calculating the required amount of thermal energy and selecting equipment that corresponds to the obtained values. There is no point in presenting a detailed calculation methodology, since it is extremely complex and requires knowledge of many parameters, coefficients and other values. In addition, you need experience in performing such calculations, otherwise the result will be completely erroneous.
To solve the problem, it is recommended to use an online calculator found on the Internet. It’s easy to use, you just need to enter your data in the boxes and get an answer. If in doubt, the calculation can be duplicated on another resource to obtain balanced data.
How does it work?
The operating principle of geothermal heating involves the use of heat pumps. They operate according to the classical Carnot cycle, taking cold coolant deep below and receiving in return a fluid flow heated to 50 degrees inside the heating system. The equipment operates with an efficiency of 350 to 450% (this does not contradict the fundamental physical laws; why will be discussed later). A standard heat pump heats a house or other building using the heat of the earth for 100 thousand hours (this is the average interval between preventive major repairs).
Heating to 50 degrees was not chosen by chance. Based on the results of special calculations and the study of practically implemented systems, this indicator was recognized as the most effective. Therefore, earth heating, which uses the flow of energy from the subsoil, is mainly supplemented not by radiators, but by a warm floor or an air circuit. On average, for 1000 W of energy driving the pump, it is possible to raise approximately 3500 W of thermal energy to the top. Against the backdrop of the rampant increase in the cost of coolant in the main network and other heating methods, this is a very pleasant indicator.
Geothermal heating is formed by three circuits:
- ground collector;
- heat pump;
- actually, the heating complex of the house.
The reason is simple - the water that occurs in a sufficiently heated soil layer quickly corrodes the equipment. And even such a liquid can not be found in any random place. The choice of a specific coolant is determined by the design decisions of engineers. The pump is selected depending on the design of the remaining parts of the system. Since the depth of the well (level of installation of equipment) is determined by natural conditions, the decisive differences between types of geothermal systems are associated with the design of the collector in the ground.
The horizontal structure implies the location of the collector below the soil freezing line. Depending on the specific area, this means a deepening of 150-200 cm. Such collectors can be equipped with various pipes, both copper (with an outer layer of PVC) and those made of metal-plastic. To get from 7 to 9 kW of heat, you will have to lay at least 300 square meters. m collector. This technique does not allow you to get closer to the trees than 150 cm, and after installation is completed you will have to landscape the area.
A vertically aligned reservoir involves drilling several wells, necessarily directed in different directions, and each one is drilled at its own angle. Geothermal probes are located inside the wells, thermal output from 1 linear. m reaches approximately 50 W. It is easy to calculate that for an identical amount of heat (7-9 kW), 150-200 m of wells will have to be installed. The advantage in this case is not only in savings, but also in the fact that the landscape structure of the territory does not change. It will only be necessary to allocate a small area for the installation of the caisson block and for the installation of the concentrating collector.
A circuit heated by water is practical if it is possible to bring the external heat exchange unit into a lake or pond to a depth of 200 to 300 cm. But a mandatory condition will be the location of the reservoir within a radius of 0.1 km from the heated building and the area of the water surface at least 200 square meters. m. There are also air heat exchangers, when the external circuit receives heat from the atmosphere. This solution works well in the southern regions of the country and does not require any excavation work. The weaknesses of the system are low efficiency when the temperature drops to 15 degrees and a complete stop if the temperature drops to 20 degrees.
Which TN is better to collect
Let us formulate the problem: you need to build a homemade heat pump at the lowest cost. A number of logical conclusions follow from this:
- The installation will have to use a minimum of expensive parts, so it will not be possible to achieve a high COP value. In terms of performance coefficient, our device will lose to factory models.
- Accordingly, it makes no sense to make a purely air HP; it is easier to use an inverter air conditioner in heating mode.
- To get real benefits, you need to manufacture an air-to-water, water-to-water heat pump, or build a geothermal installation. In the first case, you can achieve a COP of about 2-2.2, in the rest you can achieve 3-3.5.
- It will not be possible to do without underfloor heating circuits. Coolant heated to 30-35 degrees is incompatible with the radiator network, except in the southern regions.
Laying the external circuit of the HP to the reservoir
To implement the water version of the HP, certain conditions are required (to choose from):
- a pond 25-50 m from the home; at a greater distance, electricity consumption will increase significantly due to a powerful circulation pump;
- a well or well with a sufficient supply (debit) of water and a place for drainage (pit, second well, drainage ditch, sewer);
- prefabricated sewer (if they let you crash into it).
Groundwater flow is easy to calculate. In the process of heat extraction, a homemade heat pump will lower their temperature by 4-5 °C, from here the volume of the flow is determined through the heat capacity of the water. To obtain 1 kW of heat (we take the water temperature delta to be 5 degrees), you need to drive about 170 liters through the heat pump within an hour.
Heating a house with an area of 100 m² will require a power of 10 kW and a water consumption of 1.7 tons per hour - an impressive volume. A similar heat water pump is suitable for a small country house of 30-40 m², preferably insulated.
Methods for selecting heat from geothermal heat pumps
Assembling a geothermal system is more feasible, although the process is quite labor-intensive. We immediately reject the option of laying the pipe horizontally over an area at a depth of 1.5 m - you will have to shovel the entire area or pay money for the services of earth-moving equipment. The method of drilling wells is much simpler and cheaper to implement, with virtually no disturbance to the landscape.
Since the thermodynamic calculation of a heat pump is quite difficult for most DIYers, we will not present it here. Our task is to present several working models so that any enthusiast can take any of them as a basis for creating their own brainchild.
Self-production of the device
A review of the design options for the Frenette pump allows us to understand that the principles of its operation can be used with varying degrees of efficiency in structures of various types and types. The basic idea remains the same: a narrow space between metal elements, filled with oil, and rotated by an electric motor.
The diagram shows a version of the Frenette heat pump, which is usually used for self-manufacturing of the device. The basis of the design is metal discs separated by nuts (+)
To make such a device, you need to prepare the necessary materials:
- hollow metal cylinder;
- a set of identical steel disks with a hole in the center;
- set of nuts 6 mm high;
- threaded steel rod:
- electric motor with extended shaft;
- bearing;
- Radiator;
- connecting pipes.
Pump dimensions may be larger or smaller. But the distance between the disks should be maintained exactly - 6 mm. Standard nuts are used as spacers, and a steel rod is the center of the structure.
Its thickness should correspond to the diameter of the nut. If you don’t have a threaded rod at hand, you’ll just have to cut it.
Metal disks for a Frenette heat pump should be slightly smaller than the diameter of the cylindrical body to ensure free rotation and more efficient heating of the coolant
Obviously, the hole in the disks must be such that they can be freely put on the axial rod. The outer diameter of the disks should be several millimeters smaller than the housing. If there are no ready-made elements at hand, the discs are cut out of sheet metal yourself or the work is entrusted to a turner.
Steel discs for a Frenette heat pump can be cut at home if you have the right equipment
The cylindrical body can be made from an old metal container of a suitable configuration or welded from metal. A piece of wide metal pipe will also work.
The walls are welded to the ends of the cylinder. The housing must be sealed so that oil does not leak. Additional holes should be made in the upper and lower ends of the housing: for the entrance and exit of heating pipes leading to the radiator.
Of course, all pipe connections should be sealed. For threaded connections, special sealants are used: FUM tape, flax, etc. If you decide to use polypropylene pipes, you will need special fittings and, possibly, a soldering iron to install such pipes.
A high-performance electric motor is not required to operate the Frenette pump. A device removed from an old or broken household appliance, such as a regular fan, is suitable.
In order for the rod to rotate freely, you need a suitable bearing of standard sizes. When all the elements are prepared, you can begin assembling the device. First, a central axis with a bearing is installed on the lower part inside the housing. Then the spacer nut is screwed onto the axle, then the disk is put on, the nut again, the disk again, etc.
Discs with nuts are alternated until the housing is filled to the top. Even at the preparation stage, you can make preliminary calculations on the number of required disks and nuts.
It is necessary to add the thickness of the disk to the thickness of the nut (6 mm). Divide the height of the body by this figure. The resulting number will give information about the required number of “nut + disk” pairs. The nut is installed last.
Once the housing is filled with these moving parts, it is filled with liquid oil. The type of oil does not matter; you can take mineral, cottonseed, rapeseed or any other oil that tolerates heat well and does not harden. After this, the structure is covered with a top lid and carefully welded.
At this point, the radiator pipes are usually already attached to the caps. For convenience during further installation and maintenance of the device, two shut-off valves can be installed on the pipes. Now you need to attach the heat pump axis to the motor shaft.
The system is connected to the network, the presence of leaks is checked, and the operating characteristics of the device are assessed.
A self-made Frenette heat pump can be connected to a conventional cast iron or bimetallic radiator, which will provide the necessary heating effect
If everything is done correctly, the axle with discs will begin to spin, heating the oil inside the device. The hot coolant will move through the upper hole through the pipe into the heating radiator. The cooled oil will return to the heat pump housing through the down pipe to be reheated.
Types of heat exchangers
In the designation of the type of heat exchanger of a heat pump, the first indicator determines the method of constructing the external circuit of the heat supply system, and the second - the design of the internal circuit.
"Water - water"
In heat exchangers of this type, heat is taken from water bodies (well, river, lake, etc.), solar energy or other objects. A coolant—water or another liquid—circulates in the primary circuit. Circulation is carried out by creating pressure through the installation of a pump.
The circuit can be closed or open; which option to choose is determined by the type of coolant. In the heat pump, in the internal circuit, freon circulates, which, receiving energy from the external circuit, evaporates, enters the condenser, where it transfers the resulting heat to the consumer’s coolant.
"Water - air"
In heat exchangers of this type, the energy collected in the external circuit, in which liquid (water or other energy carrier) circulates, enters the heat exchangers of the heat pump, where it is transferred to the indoor air.
"Air - air"
In this type of heat exchanger, the external circuit is located on the outside of the building; it is the evaporator in this pump design. The heat from the outside air heats the refrigerant, which evaporates. Then, passing through the compressor, it is compressed and supplied to the indoor unit - a condenser, which is located inside the building. The condenser gives off heat to the air inside the room in which it is located, and the refrigerant is again supplied to the evaporator.
"Air - water"
In this type of heat exchanger, thermal energy is taken from the outside air. The air enters the compressor, where its temperature rises under the influence of pressure, after which it enters the heat exchanger. In the heat exchanger, the supplied air is condensed and energy is transferred to the energy carrier of the consumer’s heating system.
"Earth - Water"
Heat exchangers of this type are based on receiving energy from the earth and transferring it to consumers. Brine (antifreeze) circulates in a closed external circuit located below the freezing level. Circulation is carried out by installing a pump. The brine enters the heat pump's condenser, where it transfers the resulting energy to the refrigerant, which in turn transfers it to the consumer's heating system by condensation in the pump's heat exchanger.
"Earth - Air"
In heat exchangers of this type, the thermal energy obtained by the brine circulating in the external circuit, which is located under the surface of the earth, is transferred in the heat exchanger chambers to the air inside the room.
Costs and payback prospects
The costs of equipment and its installation during the construction of geothermal heating depend on the power of the unit and the manufacturer.
Everyone chooses a manufacturer based on their own considerations and information about the reputation and reliability of a particular brand. But the power depends on the area of the room to be served.
This figure summarizes the benefits of using a geothermal heating system. It is precisely this ratio of incoming and outgoing energy that allows the system to first quickly pay for itself and then save its owner’s money (+)
If we take power into account, the cost of heat pumps varies in the following ranges:
- for 4-5 kW – 3000-7000 conventional units;
- for 5-10 kW – 4000-8000 conventional units;
- for 10-15 kW – 5000-10000 conventional units.
If we add to this amount the costs that are needed to carry out installation work (20-40%), then we will get an amount that for many will seem absolutely unrealistic.
But all these costs will be recouped in a very reasonable time frame. In the future, you will only have to pay minor expenses for the electricity needed to operate the pump. And it's all!
Due to the insufficient efficiency of geothermal systems for heating residential buildings, they are used as an addition to the main heating networks or built in complex with two or more heat exchangers
As practice shows, geothermal heating is especially beneficial for houses with a total heated area of 150 square meters. m. Within five to eight years, all costs for installing heating systems in these houses are fully recouped.
If geothermal heating is not particularly in demand among owners of private houses, then the effectiveness of solar systems has already been appreciated by residents of the southern regions. The technology for constructing solar heating is quite simple, and its efficiency and practicality are confirmed by many years of experience in use by Western countries and our compatriots.
Operating principle
- Freon, which has a low boiling point, passes through the evaporator from its liquid state to a gaseous state. This process occurs at a temperature of about minus five degrees and low pressure in the system.
- From the evaporator, freon in a gaseous state enters the compressor, in which it is compressed to create high pressure and temperature.
- Then the hot gas passes into the second heat exchanger, the condenser, in which the heat exchange process takes place between the coolant from the heating return and the hot gas.
Note!
The heat generated in the summer can be successfully used to heat a swimming pool.
Device installation features
The procedure for connecting a pool heat pump depends on the features of the specific model. Therefore, before starting work, you should carefully study the manufacturer’s instructions and strictly follow the requirements and recommendations contained therein. Typically, industrial models are supplied already assembled and with a set of components necessary for installation.
Functional diagram of a heat pump connected to a pool:1 – Heat pump for the pool2 – Remote control device3 – Clean water for the pool4 – Circulation pump5 – Bypass (bypass) and control valves6 – Water supply pipe from the pool7 – Filter
During the connection, you will need to install a couple of pipes, as well as provide power. The heater is installed in the pool maintenance system so that it is located after the filtration system and before the chlorinator.
As shown in this diagram, the heat pump should be connected after the water filter, but before the chlorination device
It is very important to choose the right place to install the equipment. Typically, an air-to-water heat pump is an impressively sized unit, reminiscent of the outdoor unit of a split-system air conditioner
To install the air source heat pump, it is necessary to choose a sufficiently spacious place, which should be protected from external factors, for example, using a canopy
The location for installing such equipment must meet the following requirements:
- good ventilation;
- absence of obstacles to the movement of air masses;
- distance from open fire and other heat sources;
- protection from external environmental factors: precipitation, debris falling from above, etc.;
- accessibility for maintenance and necessary repairs.
Most often, the heat pump is installed under a canopy. For additional protection, you can install a couple of side walls, but they should not in any way interfere with the air flow that is pumped by the fans.
The pump is mounted on a metal frame; the base must be strictly horizontal. This will minimize problems such as vibration and noise during operation of the device, and will also protect the device from damage.
The air source heat pump must be installed on a solid and strictly horizontal base. This will reduce vibration during its operation and reduce the amount of noise.
When installing the heat pump and connecting it to the system, it is important to make sure that all its elements are clean. It wouldn’t hurt to check the inner surface of the pipes used to make the connection.
All pipe connections through which water circulates must be carefully sealed and checked for leaks. To prevent vibration from the heat pump during its operation from being transmitted to the rest of the system, it makes sense to consider connecting using flexible hoses.
Providing power to the heat pump will require special attention. It must fully comply with the rules for installing electrical equipment, taking into account all fire safety requirements.
There is usually a high level of humidity around a swimming pool, and the likelihood of electrical equipment coming into contact with water increases significantly. Therefore, it is necessary to carefully insulate all electrical contacts, additionally protecting them from possible contact with moisture.
In the connection diagram of the heat pump to the power supply, it is imperative to include automatic switches, which are equipped with sensors that respond to temperature increases. You will also need protection devices that will prevent current leakage.
All conductive components must be grounded. To connect cables, both power and control, you will need special terminal blocks. The manufacturer's instructions usually indicate the required cross-section of electrical cables through which the equipment can be connected to the power supply.
These data must be adhered to. The cable cross-section may be larger than recommended, but not smaller.
Installation of a heat pump for heating pool water is carried out in accordance with the manufacturer's recommendations. It is usually installed after the water treatment system, but before the chlorination device, if available.
How to make such a device yourself?
The most practical model for heating homes is considered to be the Frenette heat pump model, which does not have a fan and an internal cylinder. Instead, a series of metal discs are used that rotate inside the device. The role of coolant is performed by oil, which enters the radiator, cools and then returns to the system. The operation of such a device is convincingly demonstrated in the video:
For those who know English, this video may be useful:
It is not difficult to make a heat pump according to Eugene Frenette’s principle at home. For this you will need:
- metal cylinder;
- steel wheels;
- nuts;
- steel rod;
- small electric motor;
- pipes;
- radiator.
The diameter of the steel disks should be slightly smaller than the diameter of the cylinder so that there is a small gap between the walls of the housing and the rotating part. The number of disks and nuts depends on the size of the structure. The discs are successively strung on a steel rod, separating them with nuts. Typically nuts with a height of 6 mm are used. The cylinder should be filled to the top with disks. An external thread is applied to the steel rod along its entire length. Two holes are made in the housing for coolant. Through the upper hole, heated oil will flow into the radiator, and from below it will return to the system for further heating.
The developers of the device recommend using liquid oil rather than water as a coolant, since the boiling point of such oil is several times higher. If heated quickly, water can turn into steam and excess pressure will arise in the system, which can lead to structural damage.
This is an approximate design diagram of a Frenette heat pump, which is not difficult to implement using available tools and available materials
To mount the threaded rod, you will also need a bearing. As for the electric motor, any model that provides a sufficient number of revolutions will do, for example, a working motor from an old fan.
The device assembly process is as follows:
- Two holes are made in the housing for heating pipes.
- A threaded rod is installed in the center of the body.
- A nut is screwed onto the thread, a disk is placed, the next nut is screwed on, etc.
- The installation of disks continues until the case is full.
- Liquid oil, such as cottonseed oil, is poured into the system.
- The body is closed and the rod is fixed.
- Heating radiator pipes are connected to the holes.
- An electric motor is attached to the central rod, which provides rotation.
- Plug in the device and check its operation.
To improve the performance of this type of heat pump and make its use more convenient and economical, it is recommended to use an automatic on-off system for the motor. Such a system is controlled using a temperature sensor, which is attached directly to the device body.
Hydrothermal heating design diagram
Today, three fundamentally different schemes for arranging underground heating are most widespread. To ensure maximum efficiency of heating a house, the total area of the external underground circuit should be 2.5 times larger than the heated area of the residential building.
The following types of geothermal heating are used in autonomous heating:
- Underwater option.
- Horizontal bookmark.
- Construction of wells.
In each specific case, the choice of one or another type of geothermal heating will depend on the area of the house, the financial capabilities of the homeowner, and the characteristics of the area. The underwater option can be used in cases where there are deep bodies of water nearby that do not freeze to the bottom in the winter.
There are several types of such heating.
Horizontal bookmark
This option of hydrothermal heating involves making a pit next to the house, the depth of which will be 2 meters deeper than the freezing point of the soil. Accordingly, to heat a private house with an area of 100 square meters, you will need to dig a pit with a depth of more than 3 meters and a total area of 250 square meters.
If the available area of the site allows for such a foundation pit, then a horizontal foundation will be the best option for geothermal heating of a private house. A system of pipes is laid inside the pit through which non-freezing coolant circulates. The external heating circuit is brought into the house and connected to a heat exchange unit.
Among the advantages of this geothermal heating scheme, it is customary to highlight its efficiency, ease of arrangement, and reduced costs for installing the external circuit. At the same time, it is necessary to take into account the mandatory requirements for the correct calculation of the volume of the pit, which is not always possible to place on a small plot of land.
Geothermal home heating:
Underwater option
Owners of private homes who live near lakes and rivers often choose hydrothermal heating using an underwater option. It is only necessary to correctly consider the location of the external contour, which is placed at a depth of more than 4 meters, which eliminates the possibility of freezing of a lake or river to the bottom. The underground and above-ground parts of the circuit, which goes directly from the shore of the lake to a heated private house, are necessarily insulated, and underground pipes are laid at a depth below the freezing point of the soil.
The use of an underwater option makes it possible to simplify the arrangement of the heating system of a private house, since there is no need to carry out expensive and complex excavation work. The external circuit will be heated by the heat of the water, after which the heated coolant is supplied to the system, ensuring the operation of the equipment.
Execution of hydrothermal wells
The installation of geothermal wells for organizing autonomous heating is the best option, allowing to significantly reduce the costs of the homeowner. The well is drilled to a depth of 30-50 meters, which increases the heating efficiency, since at great depths the temperature of the earth will be higher than at the surface itself.
Drilling a well is one of the effective methods of installing such heating
Today, many homeowners, when installing an autonomous geothermal heating system in a private home, choose the option of drilling wells, which greatly simplifies the installation of the circuit. In this case, maximum efficiency of the equipment used is ensured, allowing you to use all the capabilities of such modern technologies even if you have a small area.
Heating a private house by laying an external circuit in deep wells allows you to reduce the total cost of installing autonomous heating in a house by 20-30%. Due to the high heating temperature of the coolant in the deep circuit, it is possible to use heating installations that are small in power, which simplifies the installation of equipment, reduces its cost, while simultaneously ensuring maximum convenience of living in a private home.
Conclusions and useful video on the topic
If it’s easier for you to perceive visual information, then this video will allow you to see with your own eyes exactly how a geothermal system functions, as well as learn more about who benefits from this type of heating and why.
We invite you to watch a short video in which the owner of a horizontal subsoil collector will talk about his impressions of its operation. Additionally, by watching this video, you will learn about the ongoing costs associated with operating a geothermal heating system.
Each owner of a private home chooses for himself whether to buy the services of resource supply organizations or rely only on himself. In doing so, he is guided by a whole list of considerations.
The goal we have set for ourselves is not to push you to a ready-made conclusion, but to share information about options for solving the problem facing you.
Do you have anything to add or have questions about geothermal heating of a private home? You can leave comments on the publication. The contact form is located in the lower block.
Manufacturing and installation
Making a heat pump is not difficult if you have the parts - a compressor (it can be pulled out of a broken air conditioner), copper pipes (for the circuit) and a tank with a capacity of one hundred liters.
The pump is manufactured according to the following algorithm:
- the compressor is mounted on the wall;
- a coil is made from pipes (to make it, you need to wrap the pipes around a container of a suitable shape);
- the tank is cut in half, a coil is placed inside it and brewed;
- several holes are left in the container through which the coil pipes are led out;
- to make the evaporator, a plastic barrel is used, identical in size to the tank, and internal circuit pipes are inserted into it;
- PVC pipes (installation diagrams for warm water floors in the apartment) are installed, transporting heated water;
- It is not recommended to fill the unit with freon yourself; it is better to entrust this action to a specialist.
The cost of work in different regions of our country can vary dramatically. In addition, the cost of operation and the pump depend on its type and heating system.
In order to have an idea of the order of the numbers for this service, we will consider several proposals from different regions without taking into account the cost of other equipment of the building’s heating system.
- In St. Petersburg, installation of a heat pump, regardless of its type, will cost the Customer from 35,000.00 rubles;
- In Moscow, installation organizations, regardless of the type of heat pump, are ready to perform turnkey work for an amount over 45,000.00 rubles;
- In Krasnodar, installation of a heat pump will cost from 40,000.00 rubles.
- If we talk about the installation of heating systems using heat pumps, then the average prices for a set of works, taking into account the cost of equipment, are as follows:
READ MORE: Ondulin tiles, pros and cons of an ondulin roof, technical characteristics of the roof and components photo
A) Installation of geothermal domestic heat pumps:
- Power – 4-5 kW (50 – 100 m²) – from 130,000.00 to 280,000.00 rubles;
- Power – 6-7 kW (80 – 120 m²) – from 138,000.00 to 300,000.00 rubles;
- Power – 8-9 kW (100 – 160 m²) – from 160,000.00 to 350,000.00 rubles;
- Power – 10-11 kW (130 – 200 m²) – from 170,000.00 to 400,000.00 rubles;
- Power – 12-13 kW (150 – 230 m²) – from 180,000.00 to 440,000.00 rubles;
- Power – 14-17 kW (180 – 300 m²) – from 210,000.00 to 520,000.00 rubles.
B) Installation cost of air source heat pumps:
- Power up to 6.0 kW (50 – 100 m²) – from 110,000.00 to 215,000.00 rubles;
- Power up to 9.0 kW (80 – 120 m²) – from 115,000.00 to 220,000.00 rubles;
- Power up to 12.0 kW (100 – 160 m²) – from 120,000.00 to 225,000.00 rubles;
- Power up to 14.0 kW (130 – 200 m²) – from 127,000.00 to 245,000.00 rubles;
- Power up to 16.0 kW (150 – 230 m²) – from 130,000.00 to 250,000.00 rubles;
- Power up to 18.0 kW (180 – 300 m²) – from 135,000.00 to 255,000.00 rubles.
How to improve the energy efficiency of the system?
Ready-made factory complexes are good because all their structural parts and components are balanced and adjusted to each other in terms of characteristics. The advantage of independently organizing the system on separate units is that each circuit and operating unit can be upgraded independently of the general infrastructure. Thus, many people abandon the standard heat accumulator, replacing its function with a concrete screed. In this case, geothermal heating will operate with minimal temperature differences in the mixing tank circuit. It is also recommended to experiment with refrigerant and the use of compressors with “floating” capacity. Correct calculation of the load with optimal heat distribution along the operating circuits will increase the efficiency of the system by 15-20%, while minimizing power supply costs.
About the advantages and disadvantages of the system
For the first time, geothermal heating was looked at closely in the United States during the crisis in the 80s. Quite expensive installations were installed in the homes of the richest and most advanced, but gradually they became more accessible and popular. Europe took note of the new product and began to actively implement it in its open spaces. Now this type of heating is no longer a curiosity; in Sweden, for example, about 70% of all heat is synthesized using heat pumps.
Manufacturers of miracle equipment and green people unanimously talk about the advantages of this type of heating over all others, the main advantages that are emphasized are:
- Thermal energy of the earth is used for heating, which is renewable and inexhaustible;
- there is no risk of fire;
- there is no need for delivery and storage of fuel materials;
- When the equipment operates, no harmful emissions are generated, the system is absolutely safe and environmentally friendly;
- the system operates autonomously and does not require constant monitoring and intervention;
- it is economical and requires virtually no maintenance costs from the owner;
- With all the variety of models, the equipment productivity coefficient remains consistently high.
The geothermal heating system performed well in combination with “warm floors”. This duo ensures uniform temperature distribution and prevents the formation of overheating zones.
Note that these systems have not yet become popular in the post-Soviet space. This is largely due to the fairly significant capital investments that will need to be made at the very beginning, and the rather long payback period. It is quite difficult to convince our fellow citizens that this is, after all, economically profitable. Although, if we take into account the annual rise in price of conventional coolants and the fact that the system is designed for an average of 100 years of efficient operation, the choice will seem quite justified.
Process description
The vacuum pump is made as follows:
- First, cut off the top of the compressor with a hacksaw.
- Then the motor suspended on springs is removed from the housing. No tools are needed here - it is not secured.
- The copper tubes located in the housing are connected to oil-resistant tubes, connecting to the “+” and “-” lines on the motor. Excess elements are cut off.
- The opened case must be equipped with a lid. It should be slightly smaller than the sawn-off fragment so that the oil can flow into the container (along its edges). The lid is best made from brass foil using a soldering iron. Its inner side is equipped with stiffening ribs, and its outer side is covered with linoleum (for sound insulation).
During compressor operation, some oil is inevitably lost and is released into the discharge line as oil mist. A tubular level gauge helps track costs. It should be located behind a transparent tube, which is connected to the container using a hose. The tube can be replaced with the body of a ballpoint pen.
The level gauge is covered with a cap to protect it from dust, leaving access for air. Make marks on the mechanism yourself, indicating the maximum and minimum oil levels. The junction of the tube and hose is sealed with sealant.
The finished structure is placed in a box. Its frame is made of a steel angle measuring 2.5x2.5 cm. Any sheet material can act as a cladding. A door should be mounted into the side wall in order to take readings from the level gauge without removing the vacuum pump from the box. A simple latch will be enough to secure it.
Types of homemade heaters from the refrigerator
Based on the type of energy source used, home heat pumps are divided into the following types:
- geothermal (open and closed);
- air.
Units using secondary heat sources are usually installed in enterprises, since their operating cycle is associated with the generation of energy, which requires additional disposal.
In geothermal pumps, the energy source is soil or groundwater. Closed-type devices are divided into:
- Horizontal. The collector that collects heat is shaped like rings or zigzags. It is placed horizontally in trenches at a depth of more than 1.3 m. The distance between the pipes is about 1.5 m. Similar heat pumps are used to heat a small area. If the soil is sandy, then the length of the contour is increased by 2 times, since it is not able to retain moisture.
- Vertical. It is distinguished by the vertical location of the heat collector manifold. The depth of the well is about 200 m. They are filled with groundwater, which subsequently releases heat. This version of the system is used if there is no possibility of its horizontal placement or there is a high risk of damage to the landscape. 1 m of a well provides 50-60 W of energy, so for a pump with a power of 10 kW it is enough to drill 170 m. To get more heat, you need to make several small wells at a distance of 20 m from each other.
- Aquatic. The shape of the collector is identical to the horizontal type of heat pump, but it is placed at the bottom of the reservoir, below the freezing level (depth - from 2 m). This method of system installation is usually less expensive. The cost depends on the location of the reservoir, its depth and the total volume of water.
In open-type pumps, the water used for heat exchange is discharged back into the ground.
The circuit of water heat pumps is made of plastic pipes, which are pressed to the bottom of the reservoir at the rate of 5 kg per 1 m of length. Every 1 r.m. circuit provides about 30 kW of energy. If you need a system with a power of 10 kW, then the length of the circuit must be at least 300 m. The advantages of the design include ease of installation and low cost. The downside is the impossibility of heating the room in severe frosts, since energy is not generated.
As the name suggests, air source heat pumps use air as their energy source. These units are suitable for areas with a hot climate, since at sub-zero temperatures productivity will be greatly reduced. The main advantage is the absence of large material costs for drilling wells. The system is located near the house.
The efficiency of a pump depends on its conversion factor, which is the difference between the energy it consumes and the energy it outputs. The main factor influencing this value is the temperature of the input and output circuits. The system will work better if the difference between these parameters is large.