When operating the heating system of a private home, there are unforeseen cases of leaks occurring in one of the sections of the main line. Leaks often occur in hidden places, so it is important to know how to detect a water leak in a heating system in this situation.
If a heating system leak occurs when using antifreezes that are colored in different colors, the task is simplified, but if the working fluid in the line is clear water (about 80% of cases), it becomes more difficult to detect the place of depressurization.
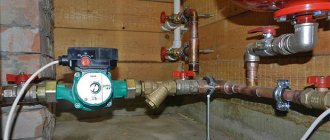
Help in the search are technical measuring instruments and special equipment, with the help of which it is easier to detect places of coolant leaks.
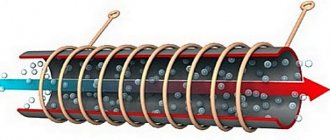
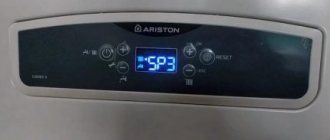
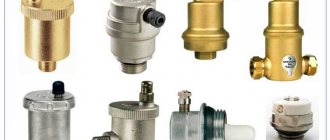
Fig.1 Heating equipment
Causes of leakage
It is important not only to detect a coolant leak in the heating system, but also to understand why it occurred. Situations in which the pressure gauge on the boiler may indicate low pressure are as follows:
- violation of the tightness of connections as a result of corrosion of pipes, wear of gaskets or loosening of threaded connections;
- thermal expansion and contraction of fittings. When the coolant reaches a certain temperature, the metal parts expand, but as soon as the water cools, the metal of the fittings narrows and begins to let liquid through;
- changing the coolant in the pipes. If water was first used and then you decided to pour antifreeze into the system, the seals may expand and then dry out;
- excess pressure in the heating system due to the expansion tank being too small. This can lead to cracks in the pipes.
In addition, leakage occurs as a result of improper installation or operation. This is especially true for metal-plastic lines, which are more sensitive to any violations of installation technology.
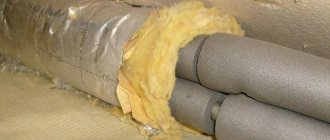
Total heat losses in heating networks
As a result of the inspection of the heating network, it was established that
- 60% of heating network pipelines are insulated with glass wool with 70% wear,
- 30% extruded polystyrene foam type TERMOPLEX and
- 10% polyethylene foam.
| Thermal insulation | Total losses of thermal energy in heating networks, taking into account the percentage of coverage and wear, kW | Calculation of heat losses in heating networks, taking into account the percentage of coverage and wear, Gcal/hour |
| Glass wool | 803,589 | 0,69092 |
| TERMOPLEX | 219,180 | 0,18845 |
| Foamed polyethylene | 86,468 | 0,07434 |
| Total: | 1109,238 | 0,95372 |
What areas and elements can leak?
Leaks are most common in metal pipes. Elements that may be subject to destruction are the following:
- joints of pipes, adapters and seams;
- solid pipe;
- radiator;
- under the locknut;
- in the heated floor circuit;
- space between battery sections.
Leaks in the heating system often occur in radiators.
Most often, cheap polymer pipes are susceptible to damage. They break, leak, swell. Metal-plastic pipes are also susceptible to leaks if they were incorrectly selected. There are special products for heating systems. If pipes for cold water are installed in it, then under the influence of high temperatures they become deformed and burst.
Calculation of pipeline wear
The average age of heating network pipelines is 36.5 years.
During a physical examination, it was found that the residual service life for it is assumed to be 15 years, while the standard service life is 25 years. Pipeline wear is determined as follows:
36.5/(36.5+20) x (100-15) = 54.9115%
Look at an example of a survey before upgrading a boiler house and heating network.
What immediate measures are taken if a leak occurs?
The appearance of a leak in the heating system requires an immediate response. The first measures depend on the nature of the problem and the location where it occurred.
A leak in a private house can be fixed on your own, but in an apartment you should be careful not to flood the neighbors living below. Another nuance is that during the renovation the entire riser will have to be shut off, which means that all the apartments it connects will be without heat.
You can try to fix a small leak yourself using improvised means. If the problem is serious, then shut off access to the coolant and call specialists.
Hot water splashing in all directions can cause injury, so before turning off the water supply, you must throw a thick blanket over the pipe or radiator. Valves for shutting off hot water can be located directly in the apartment, but most often they are located in the basement of the entrance. You'll have to go down there, find the right tap and turn it off.
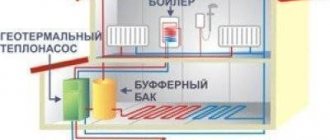
Water heating system design
Water heating system
The method of heating a house using a liquid coolant (water, or water-based antifreeze) today is one of the most thorough and reliable schemes: water is heated in a boiler, transferred to heating radiators, transfers thermal energy to the air space in the house and completes the cycle by returning to the cauldron.
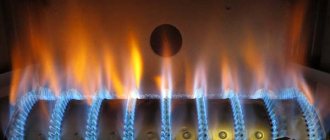
The owner of a private house most often uses natural gas to power the boiler, but can also use wood, coal or kerosene. The design of the heating circuit consists of key components - boiler, pipes, heating radiators - and auxiliary components - expansion tank, hydraulic pump, thermostats, valves.
In a modern home, in most cases, automated boilers are installed. The control panel allows you not only to turn the boiler on and off, but also to set parameters for its optimal operation.
Leak Diagnosis
A regular sheet of paper will help you verify that there is a leak. To check, you need to turn off the hot water and wait for the coolant in the pipes to cool. With hot coolant, the leakage area will quickly dry out and the problem will not be found. Next, a sheet of paper is passed through the pipes, paying special attention to the joints. Where the paper gets wet and the leak needs to be fixed. This method is acceptable if the breakthrough occurred on a visible section of the highway. It is more difficult to identify it in a hard-to-reach place, in a “warm floor” system or underground.
Each heating system must be equipped with monometers, which will indicate leakage. If the pressure in the system decreases, the readings on the instruments will also deviate downward. It is recommended to install monometers on each circuit and monitor the presence of depressurization on each of them.
Only specialists using special equipment can diagnose leaks underground or in finishing:
- moisture meters - detects leaking pipes in walls or heated floors. Not used for checking underground communications;
- thermal imagers - helps to find a leak if the pipes are hidden shallowly and the coolant is at a high temperature. In the case of cold water and buried communications, the thermal imager will not be able to work;
- acoustic devices - detect leaks by capturing sounds.
A leak in a heating system can be found using a thermal imager.
The most difficult thing to determine is the location of a leak in a “warm floor” system, and especially if it is located under a screed. You can find the problem yourself using a simple method, but first you need to understand where the pipes go. To do this, the heating is turned on at maximum temperature, and the floor surface is generously moistened with water. The places where the contour turns are located will dry faster. They are outlined with a marker or pencil, and the area that takes the longest to dry is the intended breakthrough. The problem can only be resolved by disassembling the screed above the floor.
There are special devices on sale that automatically detect water leaks. They are not cheap, but they fully pay for themselves in operation. The device consists of sensors, valves and a control unit. The sensor sends a signal about a leak to the main unit, the valves are activated and shut off the water. Thus, the owner does not have to worry that he will flood his neighbors while he solves the problem of a breakthrough.
Materials for repairing leaks
The selection of materials for repairing the damaged area is carried out depending on the location of the leak and the temperature of the coolant. All products must withstand both physical and temperature stress. The following materials are used for repairs:
- rubber elastic bandage - used to seal curved areas or fitting locations. The bandage itself is not able to withstand high water pressure in the pipes, so after screwing it on, it is necessary to screw the reinforcement on top or tighten the clamp;
- repair tape - suitable for sealing pipes, withstands pressure up to 35 atmospheres, temperature range from -70 to +370 degrees. The service life of the material is 50 years;
- clamps are metal clamps that can withstand pressures of up to 70 atmospheres and temperatures of more than 100 degrees. The clamps are designed for standard pipe diameters and are used only on straight sections of the pipeline;
- two-component compositions - epoxy resin or cold welding. Good for eliminating leaks in curved areas or in hard-to-reach places. Epoxy resin is best used in combination with binding materials (cloth, bandage, etc.);
- light-curing plastic - a kit that includes liquid plastic and an ultraviolet lamp. Under its radiation, the material polymerizes and hardens. Operates in the temperature range -40 – +150 degrees.
All these materials are suitable for major repairs of depressurization. If there is nothing suitable at hand, then wooden choppers, cement coating, and various adhesive materials are suitable as temporary devices.
Use of special sealants
Unlike mechanical means, the use of sealing compounds does not provide a 100% guarantee of eliminating leaks. On the other hand, it is impossible to use clamps and tape on the flat surface of the radiator when the fistula is located directly on the front panel. There are 3 options left: try a chemical, weld the hole, or replace the battery.
Undoubtedly, sealant for pipes and radiators is the most convenient tool for the average user. Before throwing the heating device into a landfill, you can try to seal it. What sealants are usually used in such situations:
- two-component plastic composition called “cold welding”;
- liquid agents added to the coolant;
- adhesive heat-resistant plastic that hardens after ultraviolet radiation.
Reference. High-quality cold welding from Loctite costs about 27 USD. e., 1 liter of liquid sealant “Aquastop” – 72 USD. e., light-curing plastic Bondic – 32 cu. e. per set.
Two-component waterproof glue will definitely help if you strictly follow the technology - dry, clean and degrease the defective area before applying a patch. See the video below for cold welding tests on water pipes.
Liquid sealants are offered for different coolants (water, antifreeze) and types of heating systems. After adding the product, chemical compounds fill the fistulas from the inside within 2 days. Of course, large defects and through holes cannot be repaired; you must first use a mechanical method. For example, hammer a wooden chop into the hole.
Note. Aquastop liquid is mixed with the coolant in a ratio of 1: 100. That is, it will take no more than 0.5 liters of product to seal the closed system of a one-story house.
Bondic plastic gel is sold complete with an irradiator and is applied to the damage in small portions. Each subsequent drop is illuminated by ultraviolet light and instantly hardens. An indispensable condition is a dry, grease-free surface; the type of pipe material does not matter.
Plastic becomes solid after irradiation with ultraviolet light, before which the material remains liquid indefinitely.
Methods for eliminating leaks
Once the leak has been located and you have the necessary tools to fix it, it's time to fix the water leak in your heating system.
When the pipe is leaking
Pipe leaks are most often caused by poor-quality welds. A rubber gasket and clamp solve the problem. The pipe is thoroughly cleaned of paint, sealant is applied to the hole, and a gasket and clamp are placed on top. The bolts are tightened as tightly as possible to prevent future leaks.
In a bent section of pipe, the leak is repaired with epoxy resin or repair tape. The resin is applied only to a dry surface, so you will have to drain the water and systems. If you do not want to free the batteries from the coolant, it is better to choose tape.
- Before gluing, the pipe at the leak site and approximately 8 cm around it is thoroughly cleaned and degreased.
- The tape is soaked in water for 20 seconds.
- The hole in the pipe is wrapped with an acrylic gasket from the repair kit.
- The tape is wound diagonally, starting from the edge of the gasket, forming turns up to the middle of the hole.
- At the time of winding, the tape is pressed well against the surface for about 7 minutes.
- When the material begins to stick to the gloves, it is left to dry completely.
A rubber gasket and a clamp will help solve a leak in a heating pipe.
The time for complete hardening depends on the temperature of the pipe. At 20 degrees this is about half an hour.
When the radiator leaked
The leak could be the joint between the battery sections or the radiator plate. In this case, cold welding will be required. Turn off the water supply, first clean the damaged area, degrease it, and only then apply sealant to the hole and an area of 3-5 cm around it. The weld hardens quickly. After it has completely dried, turn on the heating.
Leaks between sections are more difficult to eliminate. To do this, the radiator is dismantled and the nipple connection is tightened tightly, applying maximum force. Upon completion of the work, the battery is mounted in place and water is supplied to the system.
The pipe is leaking - what to do at the first stage
In the event of a fistula appearing on the central heating riser, from where water is gushing out, we offer the optimal plan of action:
- Organize the coolant drain into a bucket or basin by quickly wrapping the pipe with any rag. This way you will preserve the flooring, personal belongings and furniture, and prevent flooding. Proceed with caution - in winter the temperature of the network water reaches 90 °C.
To prevent your neighbors below from forming such a bubble, collect water in a bucket - Spend 2-3 minutes calling the dispatcher of the heating supply organization. Report the accident, call the plumbers.
- While the repairmen are getting there, try to close the riser yourself. Too hot a coolant will still not allow you to close the fistula under pressure.
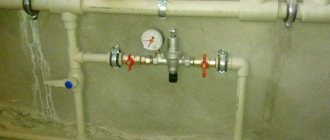
- Taps should be found in the basement heating point located under the entrance. Observe where the riser penetrates the ceiling and close the nearest valve. As a last resort, turn off the main house tap during repairs.
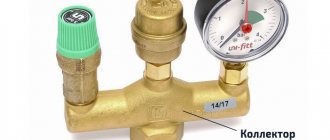
An example of the location of shut-off valves in a heating point
Advice. If, before the plumbers arrived, it was not possible to tie a rag around the riser and stop the flow of coolant, throw an old blanket or a thick coat over the pipe that absorbs water well.
In the current reality, craftsmen often have to wait 2-3 days (reasons: holidays, weekends, accidents at other facilities). It is impossible to leave residents without heat for a long time, so in case of delay, make an improvised clamp from scrap materials:
- Find a rubber glove, a bicycle tube, or a ready-made medical tourniquet. The second component of success is soft steel wire with a diameter of 2-4 mm.
- From a glove (bike inner tube), cut a strip 4-5 cm wide, as shown in the photo.
- Applying the end of the strip to the pipe 1 cm below the fistula, wind it with tension. The goal is to tightly seal the hole with several layers of rubber.
- Hold the “bandage” with your hand and secure it with wire. It is better to wind the latter tightly, turn to turn, helping with pliers. Now the common valve in the basement can be opened.
Note. On a water supply system, the described procedure is performed under pressure, if it was not possible to cut off the riser from the main line. It is not necessary to wind many turns of wire; the main thing is to temporarily stop the leak.
Also use the procedure described above when a cast-iron central heating radiator is leaking heavily and there are no shut-off valves. Typically, radiators leak at the joints between sections, and a temporary clamp should be applied there.
When a leak forms from under the nut, the connection must be repacked
If a trickle of water is observed at the place of the threaded connection of iron pipes, you need to unscrew the fixing nut from the coupling with a gas wrench. Wrap the exposed thread with a braid of fresh flax (clockwise) and tighten the nut again. The plumber will show the considered sealing options in the video:
In a private home, eliminating a leak is greatly simplified - just shut off the required valve or quickly empty a section of the heating network. It is not necessary to wind the rubber; it is better to repair the hole using a more reliable method. When the leak in the apartment is temporarily fixed, you don’t have to wait for locksmiths - choose the right time and finally seal the hole using any of the methods presented below.