The cost of furnishings directly depends on the material they are made from. Laminated chipboards are widely used in furniture production - the products are inexpensive, have a wide range of models and a variety of shades and textures.
To increase strength, moisture resistance and decorativeness, particle boards are covered with a laminated front layer in the form of a film based on melamine resins.
You can make furniture with your own hands from laminated chipboard, but it is worth considering that if you cut it yourself, you can get chips on the front surface. Experts recommend making a drawing of the future product and ordering cutting of parts in a store or furniture workshop using special equipment.
DIY furniture from laminated chipboard
Main material: chipboard
Wood in its pure form is practically no longer used in cabinet furniture; solid wood is considered an expensive luxury material.
Now wood is being replaced with a cheaper material - laminated chipboard (abbreviated laminated chipboard). Most often, these boards have a thickness of 16 mm; chipboards with a thickness of 10 and 22 mm can also be found on sale. 10mm sheets are typically used to fill wardrobe doors, and 22mm sheets are used for bookcases and shelves where high bending strength is required. Also, sometimes the structure is decorated with elements made from 22 mm laminated chipboard.
Almost all furniture parts are made from 16 mm laminated chipboard (except for doors and facades).
Laminated chipboard
Laminated chipboard is cut on special machines along guides. Of course, you can saw it off at home using a jigsaw, but then there will be chips and wavy irregularities on the edges. It is almost impossible to saw off chipboard evenly with a jigsaw at home.
Edges
The most vulnerable place of laminated chipboard is when it is cut down. It is the easiest way for moisture to penetrate inside, so if the protection is poor, the ends may soon swell. Therefore, the ends are closed using edges; there are several types of them.
- Melamine edge is the cheapest, but of poor quality. You can stick it on at home using an iron.
Melamine edge
- PVC edge 0.4 and 2 mm is the best option. It can only be glued on a special machine, so it is done immediately when ordering a cut. To save money, 0.4 mm is glued to the invisible ends, and 2 mm to the external ones, which will experience constant loads and friction.
PVC edge 2 mm
- ABS edge is similar to PVC, but made from environmentally friendly material.
- Mortise T-shaped profile - inserted into a groove previously made with a milling cutter. Rarely used.
Mortise T-profile
- Overhead U-profile - can be easily glued to liquid nails at home. The main disadvantage is that the edges will protrude a few millimeters, so dirt will get stuck under it. On the other hand, this drawback allows you to hide a poor-quality cut.
Overlay edge
Article on the topic: edging laminated chipboard.
Furniture finishing
If desired, you can improve the appearance with original inserts. These can be mirror panels, dividers, various patterns or stencils, or ornaments. Spot lighting is also a practical addition. In addition, it looks quite stylish, especially if there are glass or frosted inserts.
When installing furniture, make sure that it is not exposed to direct sunlight.
When using natural wood, it is recommended to coat it with varnish. Finding the right shade is not difficult. To fix, apply the coating two or three times, then the surface will look smooth and even. Drying time is required after each coat is applied. This will make the surface resistant to abrasion and fading. The panels should be coated before assembly, not after, to avoid smudges.
Repeated parts of the future product must be symmetrical to each other, otherwise misalignment is likely
The popular design with craquelure varnish makes the facade of the cabinet look original and expensive.
With the help of decoration, you can not only add style to a new piece of furniture, but also elevate an old product.
With the help of decoration, you can not only add style to a new piece of furniture, but also elevate an old product.
Tip: when installing furniture, make sure that it is not exposed to direct sunlight. This will avoid fading of surfaces and drying out of the wooden base.
To create cabinet furniture, you can choose inexpensive parts or use materials available in the house.
Facades
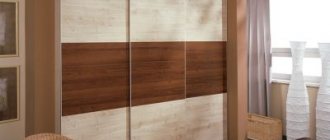
Kitchen fronts and furniture doors are usually made of more elegant material. But if you are making a drawer door inside a sliding wardrobe that no one will see, you can use regular 16 mm laminated chipboard with a 2 mm PVC edge for it. But the cabinets in the kitchen should look more presentable.
The facade is a separate furniture element. It is usually made to order. If the dimensions of the facades are non-standard, their production may take several months.
You can easily navigate the standard dimensions: usually the facades are made 2 mm smaller than the cabinet itself on each side. Therefore, for a standard 600 mm cabinet, a 596 mm façade is used.
The height of the kitchen cabinet also depends on the facade and ranges from 715 to 725 mm for floor cabinets (without legs) and low wall cabinets, and 915-925 mm for high wall cabinets.
Standard front sizes for kitchen cabinets
Types of facades
Since facades serve mainly a decorative function, the choice is huge; they differ in appearance and material.
- Facades made of laminated MDF. This is a pressed material, more moisture-resistant and dense compared to chipboard. Most often, the surface is laminated to look like wood. But no matter how strong the film is, over time it can come off at the edges and crack. The main advantage of this material is its low price and fast production.
MDF facades
- In addition to standard blank facades, there are also options with figured cutouts for stained glass. The glass is attached to the cover on the reverse side.
- Softforming - such facades are similar to ordinary MDF, but have a characteristic two-color layout with relief on both sides. They can only be used in dry rooms, bedrooms or living rooms.
Softforming
- Postforming – even higher quality and durable products. Thin plastic at the edges is wrapped 90° or 180°, thereby eliminating unnecessary seams at the corners. Chipboard or MDF boards are used as the base. Typically, postforming is done in a strict form, without unnecessary pretentious decorative elements.
Postforming
- Plastic facades are of high quality, but expensive. They consist of a base (chipboard/MDF) lined on both sides with thick plastic. They always have a strict design and a flat surface, glossy or matte. The edges of the slab are sometimes protected with ABS edges or aluminum profiles. Super-glossy acrylic plastic has been especially popular lately.
Plastic facades in aluminum profile
- Facades made of wood and veneer are suitable for lovers of natural materials, but they are expensive. In addition, there is a long debate about environmental friendliness: there is an opinion that there is so much varnish and impregnation that there is only one name left for the tree.
Wooden facades
- Painted facades to resemble enamel. They have a significant drawback - the surface is vulnerable to scratches and deformations, and has low chemical resistance. They used to be popular due to their rich color, but with the advent of glossy acrylic plastic, everything changed.
- Aluminum facades with glass are suitable for a high-tech kitchen. They look modern, but are difficult to manufacture and install. Non-standard fittings are used for their fastening.
Preparation before assembly
The selected material - chipboard, chipboard or solid wood panels - must be properly processed. Preparing the parts of a cabinet or chest of drawers involves leveling the surfaces, if it is not a laminated base, as well as cleaning them from roughness and burrs. The cut edges of the chipboard can simply be sanded and covered with a matching laminated edge.
Spot lighting is also a practical addition.
Any material that you are going to use must be of high quality and well dried so that after production the product does not create dangerous chemical fumes in the room.
Before assembling cabinet furniture, you need to carefully measure the area where the structure will be installed. For a cabinet with doors, you need to leave a little free space so that the doors can open without the possibility of friction against the walls.
You can use a power tool in your work, which simplifies the attachment of a particular part to the body.
Repeated parts of the future product must be symmetrical to each other, otherwise misalignment is likely.
Select fasteners after you have decided on the base material. Try to purchase reliable connecting parts. They should be purchased with a reserve so that if they fail, they can be easily restored.
Sandpaper is suitable as a material for cleaning surfaces.
Back walls and bottoms of drawers
The back wall and bottom of the drawers are most often made of HDF. The smooth side of the sheet should face the inside of the cabinet/drawer. The thickness of the sheets is 3-5 mm, the color is selected to match the chipboard.
Some people prefer to attach HDF to a furniture stapler, but this cannot be done. Over time, the brackets will become loose and the structure may warp. It’s not worth talking about the bottom of the drawers - a stapler is clearly not suitable for fastening.
Furniture LDVP
Sometimes it is inserted into a groove prepared with a milling cutter, but all dimensions must match down to the millimeter.
Most often, HDF is attached to nails or self-tapping screws. It is better to use self-tapping screws with a press washer, but before screwing them in, you must drill a hole, otherwise the product may crack.
In rare cases, for example, to create a “stiffener” in a tall cabinet or in drawers with high loads, fiberboard is replaced with laminated chipboard. These materials can also be combined.
Additional tool
A hammer drill is useful in the production or assembly of furniture.
This is a highly specialized tool with high impact power.
The main purpose is to drill holes for mounting and installation of built-in furniture.
Over time, a circular saw will be in demand in the carpentry workshop for cutting wooden panels, countertops and furniture panels.
The miter saw is designed for cutting at an angle.
In addition to wooden elements, this tool is used for cutting aluminum profiles.
High speeds ensure an even cut, without chipping or cracking.
Using a miter box allows you to replace an electric saw with a regular hacksaw.
The miter box is designed for smooth cutting at different angles.
Tabletops
A tabletop is a horizontal work surface on which you can cook, eat, read, write, etc.
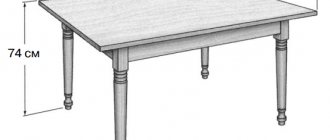
Most office and desk tables, as well as cheap dining tables, have a tabletop made of the same chipboard as the main parts. The thickness is 16 or 22 mm, it is necessary to frame it with a 2 mm PVC edge.
Special countertops are used for the kitchen. They are a sheet of chipboard 28-38 mm thick, which is covered on top with durable plastic using postforming technology. Moisture-resistant countertops are green when cut, while regular chipboard is gray. A proper kitchen countertop should have a drip tray that will prevent dripping liquid from getting onto the fronts and drawers.
Cutting a regular and moisture-resistant countertop
The weak point of such countertops is the cut edge. They are usually covered with a simple melamine edge, so they become unusable within the first year of use. To avoid this, it is recommended to protect the edges with special aluminum profiles (end strip), and to protect against moisture, pre-coat the cut with silicone sealant.
There are also other types of profiles: corner and connecting strips, which are needed for joining several cabinets with different countertops.
Corner, connecting and end strip for table top
Another element is a decorative corner that closes the gap between the wall and the tabletop.
Skirting board for table top
A wall panel is sometimes used to finish the apron. Unlike tiles or mosaics, it is more practical due to the absence of seams and is inexpensive compared to glass splashbacks.
The tabletop is attached to the cabinets from below using short self-tapping screws to horizontal spacers so as not to spoil the smooth front surface.
Scheme of fastening the tabletop to the cabinet
Countertops made from natural or artificial stone are higher quality and more durable than others. Natural stone is heavy and requires special care due to its high porosity. But artificial stone does not have such disadvantages; it can be given any size and shape. The main disadvantage of stone countertops is the high price; for a small kitchen they cost from 40 thousand rubles. and more.
An alternative option is a countertop made of tiles or porcelain stoneware. You can make it yourself, but the tiles cannot be mounted on regular plywood or chipboard. The base must first be covered with cement-fiber sheets.
Assembly tool
You should separately look at what devices, tools and accessories are needed during direct assembly. Of course, for some tools, especially the electric ones presented in the list, you can find a manual alternative. But this is not always a wise decision. You'll soon understand why.
If you have watched numerous videos on assembling furniture products, you have probably seen different tools in the furniture maker’s arsenal.
It’s not a fact that you will need a jig-type device used for drilling holes in products, but the next set will certainly come in handy.
- Screwdriver. An alternative is a regular screwdriver. But for a furniture maker it is better to have a power tool that tightens and unscrews fasteners and does the job in a couple of seconds, while it takes several minutes to turn with a screwdriver. At the same time, you also need to have a set of good screwdrivers on hand;
- Drill. In the case of furniture assembly, a power of 500 W is sufficient. Indispensable in preparing holes in the furniture itself, as well as in walls and other surfaces for further installation;
- Drill. This is a very obvious addition to the previous tool. Moreover, it is better to buy a set of drills from 4.5 to 10 mm, designed for working on metal, concrete and wood. Situations vary;
- Jigsaw. Again, electric is better, although there is also a manual one. Without it, it will be difficult to perfectly fit wood, MDF or chipboard products;
- Hammers. Take a regular metal one and definitely a rubber one;
- Hexagons. Since almost all furniture is now assembled using confirmats, you cannot do without hexagons of different sizes;
- An iron or a special construction-type hair dryer. Such devices will be useful for those who plan to independently apply furniture edges or glue films to facades;
- Furniture clamps. Such a tool cannot be considered mandatory if you are only assembling furniture from ready-made elements made at a furniture factory. If you make furniture yourself, then clamps will help you process and connect elements with rectilinear shapes;
- Strepler. And not clerical, but construction. It helps well when fixing drawers, back walls, covering upholstered furniture, etc.
I cannot guarantee that this set will be optimal for your situation. However, furniture, as well as the tasks facing the assembler, are very diverse.
It depends on the specific situation what will be useful to the master, and what he will not even look at due to the lack of need to use this or that device.
Personal experience suggests that the same drill or screwdriver is not always needed if you assemble furniture from ready-made elements. All holes are pre-provided by the manufacturer. And sometimes an ordinary screwdriver is enough to tighten several screws. However, confirmats are often used instead of self-tapping screws. But you can't tighten them with a screwdriver. Here you need ordinary and inexpensive hexagons. At the same time, a good electric screwdriver costs quite a lot. First, think about how much work you have to do before spending money on a tool that may not be useful at all.
What is your standard set when you assemble or make furniture yourself? Personally, as part of my last build, I had hex keys, a regular Phillips screwdriver, a rubber mallet and a lot of patience in my arsenal. Unfortunately, the screwdriver failed at the most crucial moment, and about 40 fastenings had to be done manually. But now, with peace of mind, I can buy myself a new high-quality power tool, which I have long dreamed of.
Thanks to everyone who reads our site! Subscribe, leave comments, ask questions and don’t forget to tell your friends about us!
Location of parts
A detail is any element of cabinet furniture: lids, tabletops, walls, facades, shelves. Each part can be either nested or invoice. Choosing the right type of location is very important.
Let's look at examples of two kitchen cabinets: one of them will stand on legs, and the second will be hanging.
Base cabinet:
As can be seen in the photo, the operating stress in the floor-standing cabinet is directed downwards from the lid and in the first option is naturally transmitted through the parts to the cabinet legs.
Correct and incorrect options for assembling a floor cabinet
In the second, incorrect option, the load is transmitted through the confirmat (furniture screw), and because of this it will be torn out of the part at a fracture.
Wall cabinet:
In the second example, the opposite is true: the load will go to the bottom shelf, and the attachment point will be on top.
Correct and incorrect assembly of a wall cabinet
If we use the same fastening scheme here as in the floor cabinet (option 1), all 4 bolts will be constantly under the load of being pulled out of the wood. Therefore, it is better if the confirmations experience stress on the fracture (see diagram “correctly”).
Other tools
- Self-tapping screws and confirmations.
Self-tapping screws and confirmations for furniture assembly
Rafix - eccentric couplers, which are used for fastening horizontal and vertical furniture parts.
Minifix is used for joining furniture pieces made of chipboard, MDF, plywood, solid wood
A drill for furniture hinges is used when assembling furniture in those places where it is necessary to install furniture hinges
This drill differs from other drills in that it drills an additional hole for mounting the confirmat head
Furniture tools are very different. They differ in size, functions, and purpose. This can come as a shock to a novice needleworker. It is difficult to know the features of each device, and even more so to decide on the fly where it should be used. But the right advice and practice will help you achieve your desired heights.
When creating such a specific creation as furniture, you need to get acquainted with another interesting group: consumables. These are any materials. They are unique in that they lose their properties during use. They are indispensable when twisting cabinet furniture.
Furniture fasteners
Furniture fasteners are hardware (metal products) that are used to connect parts. Most often, connections are made at right angles.
- Wooden dowels - inserted into pre-drilled holes in both parts. They are used for preliminary fixation and increasing the shear load, then the parts are fixed in a more reliable way.
Dowels
- Furniture corners are a popular, but outdated type of furniture fastening. Among the disadvantages: appearance, loosening over time and bulkiness.
Furniture corner
- Euroscrew (confirmed) – furniture screw. This is the main fastener for parts in modern furniture. Furniture makers almost never use ordinary self-tapping screws. Confirmats have a larger thread, so they stay inside the chipboard much better.
Confirmat
The holes for them can be drilled directly on site. To do this, use a special drill that makes a hole with different diameters for the thread, neck and head of the Euroscrew. The most commonly used confirmats are 7*50 mm. When drilling, special attention should be paid to the perpendicularity of the drilling, so as not to spoil the coating of the part with a through hole.
Drill for euroscrew
Furniture screws are tightened with a hex key or a screwdriver attachment. The caps for a Phillips screwdriver cannot be tightened tightly until the end.
The main disadvantage of this type of fastening is that screwed-in caps remain visible. To hide them, use plastic plugs matching the color of the chipboard.
- Eccentric ties are a modern and correct method of fastening. It leaves a hole only on the inside of the product, but requires very precise drilling.
Eccentric coupler
To obtain the required holes, use a Forstner drill. There's not much point in going to the trouble of using them to assemble items that will be hidden, but they work well for attaching drawer doors.
Forstner drill
Article on the topic: DIY kitchen assembly.
Marking devices
By marking we mean auxiliary tools. There are rarely problems finding them, since the main part is already in your home from the very beginning. Even if you haven’t assembled furniture before, but have repaired, drawn, measured, screwed something, etc.
This section includes universal tools, that is, you will need them in different areas of home activities. There is no need to buy them specifically in order to assemble furniture with your own hands.
- To get started, take a tape measure. Moreover, choose a length of at least 3 m. It will allow you to know exactly what dimensions of a particular product, make an indent, etc.;
- Pencil. Where would we be without him? It is easy to wash, but can be marked. For furniture work, an HB pencil is suitable, that is, with a medium degree of hardness;
- Take a square. Without it, it is difficult to draw clear and even lines. Particularly relevant when working with fiberboard, chipboard and MDF;
- The awl will help in situations where you need to drill surfaces with sheathing, where there is a risk of wrapping around the drill;
- Good old sandpaper. Rubs out uneven surfaces. If you have a ready-made furniture structure, or components made of wood, chipboard and other materials, take fine grain;
- Sharp knife. Better stationery. Copes perfectly with cuts and removing unnecessary elements;
- Jamb-knife. Relevant when cutting PVC furniture edges;
- Classic pliers. Unscrew something, pull it out, etc.
I don’t think there will be any problems finding these components. Especially if you live in Minsk, Moscow or Kyiv.
When you have laid out the markings and prepared the materials for your furniture, it’s time to put everything together.
Now you can move on to the next set, which will be directly involved in the furniture assembly procedure.
Furniture fittings
- Handles - everything is clear here. They are usually attached with screws.
- Legs are convenient in rooms where wet floor cleaning is often done, for example, in the kitchen. Any wood, especially chipboard, will quickly deteriorate from daily contact with water. In addition, the legs can be used to level furniture on uneven surfaces.
- A silicone damper is a cheap but very useful part that can reduce the noise of impacts from cabinet doors. It is glued to the top and bottom of the cabinet door or end to soften the impact.
Silicone damper
- Furniture hinges. Round cutouts for them (additives) in the facades can be made in any furniture workshop, if the manufacturer has not made them in advance. The hinges differ in the degree of door opening. Standard hinges have an opening angle of 180° and a closed angle of 90°. The hinges have a special mechanism that allows you to adjust the doors in height and seating depth. Separate hinges are sold for glass doors; you can clamp the glass into them without drilling a hole.
Furniture hinges
Among the inexpensive manufacturers of accessories, we can recommend the Chinese Boyard, and among the serious global manufacturers, the Austrian Blum.
Bed
If we are talking about a standard model, then it consists of three main parts - a headboard, a frame and a base. Otherwise you will need a diagram.
The assembly process itself is not complicated and includes several stages:
- Base assembly - connecting the side, rear and head elements of the frame.
- Attaching the headboard, legs, corners and parts holding the base.
- Installation of fasteners that ensure reliable connection of the entire structure.
- Installation of the base and laying the mattress.
The rigidity of the bed can be adjusted with special screws, which should be included in the kit. If we are talking about models with lifting mechanisms, it is better to entrust this matter to professionals.
Drawers and slides
There are many ways to make furniture boxes. The simplest of them is to assemble a perimeter from laminated chipboard. If a beautiful facade is required, it is screwed onto the main frame from the inside (like the tabletop). The façade can also be secured to eccentrics as the fourth wall of the drawer.
But the main thing is not to assemble the drawer, but to secure it correctly.
Drawer guides are divided into roller or ball guides.
- Roller guides are usually attached to the bottom of the drawer. He will ride on them on two rollers. A pair of such guides costs about 150 rubles, but it is highly not recommended to use them. The main disadvantage is that they do not allow the drawer to be pulled out completely; a heavy drawer in the more than half-open position may simply fall.
- Ball guides, or as they are also called, “full extension telescopic guides,” can exactly double the length. They have many balls inside, like bearings, so they provide a smooth ride.
Roller and ball guides for drawers
- In addition, Blum has metaboxes and tandemboxes. These are ready-made side walls of drawers with installed guides. All that remains is to install the façade, back wall and bottom.
Recommendations
The main principle in equipping your own workshop is to purchase tools as needed.
You should start with simple products and amateur tools, gradually improving your skills and craftsmanship.
Moving on to more complex tasks, purchasing professional tools for making furniture will become a necessity.
Due to the high cost, do not rush to buy everything.
Focusing on the cheapest models is the most common mistake.
There is also no need to purchase expensive options at the initial stage.
The main thing is convenience and the ability to complete the necessary tasks that lie ahead of you.
Now you know what tools you need to make your own furniture.
Installation of kitchen units
You can first install and adjust the hanging part of the kitchen unit, or vice versa - first of all, install the floor cabinets. And yet, the first option is more preferable, since the absence of the lower part of the furniture allows you to quickly cope with the installation of wall cabinets. In addition, when you have to drill holes for mounting wall cabinets, all the debris will spill onto the countertop. Moreover, you can drop a tool, which can leave noticeable marks on the countertop, which is not considered a cheap element of the kitchen set. In any case, they begin to install furniture from the corner of the kitchen.
As a rule, wall cabinets are located at a distance of 45 cm or higher from the countertop level. First of all, you should mark a horizontal line on the wall, which can be either at the level of fasteners or mark the upper limit of the furniture location.
In any case, the result is important. When installed correctly, all cabinets should be located on the same level, both vertically and horizontally. Doors should be adjusted so that they close and open freely without noticeable distortion.
Since kitchen furniture consists of separate cabinets, after installation and adjustment they must be fastened together. Do not try to fasten first and then hang. This is an impossible task, and there is no point in it, although you can try.
Furniture intersection ties
To tighten furniture, you can use special intersectional ties, although generally the tying of furniture sections is carried out with ordinary self-tapping screws, one at the top and bottom of the cabinets. In this case, it is very important to choose the correct length of screws.
How to hang cabinets in the kitchen
Even before assembling the kitchen set, you need to purchase canopies and intersectional furniture ties for attaching wall cabinets. Let's start with awnings; they come in different types, so we'll talk about them.
You already know how to assemble a kitchen set, you need to figure out how to install it in place. Kitchen wall cabinets are mounted on the wall. They are secured using furniture canopies. They come in the form of metal plates with holes for fasteners, but there are also more complex designs. Cheaper ones are ordinary metal plates. They can be of different shapes, made of ordinary or galvanized steel.
Simple awnings
The most common option (top left) is a plate with two small holes for fasteners and one large one (a hook or a screw head installed in the wall is inserted into it). It is installed on the end of the sidewalls - on the right and left. Under heavy load, this type of canopy can break, since the fasteners are located at a short distance from each other and the chipboard can fall apart. The bottom option is more reliable - more fasteners, but there is still a risk.
Furniture canopies
The other two types of furniture canopies are more reliable, since one of the screws will also be installed in the cabinet lid, that is, the load will be distributed over a larger area.
The corners performed well. One edge of this canopy is attached through the lid. A through hole is made, a bolt with a washer is installed at the bottom, and a nut (also with a washer) is tightened at the top. They are installed at a distance of 5-10 cm from the edge; if a large load is expected, you can install three or four pieces, which is impossible with previous models.
Kitchen cabinets are hung on corners with pads - to compensate for the difference in the thickness of the backsplash
The common drawback of all these mounts is that they are not adjustable. As they hanged, so it will be. There is no way to move it away from the wall or towards the wall. If the kitchen apron protrudes above the surface. walls, you have to mount a plank on the wall or select a lining (a piece of plywood, a piece of wood, etc.) for each fastener. The second drawback is that a separate hook or dowel must be installed under each canopy. Not very comfortable.
More modern furniture awnings for kitchen cabinets
Adjustable
A more complex and expensive canopy consists of a plastic body, a metal canopy and an adjustment system that allows you to move it forward/backward and up/down. These canopies are attached to the side walls of the cabinet from the inside; a small hole is cut in the back wall. These canopies are paired with a mounting rail or strip. It is mounted on the wall, and the hooks of the awnings cling to its upper protrusion. It is very easy to install and remove wall cabinets with this mounting system, and they have a sufficient “load capacity” of 20-50 kg per canopy (depending on the model and manufacturer).
