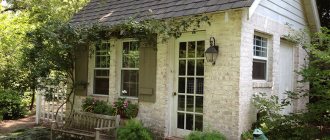
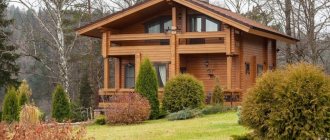
A brick house is strong and beautiful, but... A brick wall is heavy, so it requires a strong foundation. Brick does not hold heat well - it needs to be insulated. There are other additional costs. In general, it's expensive. There is an option to make a structure from timber and cover the house with bricks. It will turn out strong, beautiful, prestigious and... much cheaper.
In this article we will tell you how to properly brick a house.
Features of facing works
Scheme of options for insulating log and timber walls.
A house made of timber is decorated with bricks in such a way that the final thickness of the masonry is ¼ or ½ the thickness of the product.
This can only be done if there is a ledge; the masonry will rest on it. Before covering the building with bricks, it should be taken into account that the ledge should be located slightly below the lower frame of the wooden walls; as an alternative location of the ledge, you can use the place below the starting crown. If this requirement is not taken into account, moisture will accumulate on the ledge, which will lead to undesirable consequences.
It should be remembered that brick and wood are completely different materials in structure and composition, this causes different degrees and rates of their shrinkage.
Among other things, wood undergoes a process of changing moisture content over a long period of time, which ultimately affects its appearance, as well as its linear dimensions. Thus, after cycles of swelling and drying, wood is capable of deformation, unlike brick. Based on the above features, cladding work on log houses should begin after complete shrinkage of the building, which can take up to 3 years.
A house made of timber should be faced so that the top line of the masonry does not reach the height of the walls of the building by 1-1.5 cm. This will prevent damage to the eaves by wood, which can occur due to seasonal fluctuations in temperature and humidity.
A house made of timber can be protected with bricks using one of the existing technologies. The first involves the use of brick in tandem with sheathing made of insulation, which has a protective shell. The second involves the creation of a so-called ventilation facade, for which, in the process of carrying out work, a space is created between the wall of the main building and the cladding to ensure the movement of air masses.
Brick cladding of buildings
In order for a house to look attractive, you need to deal not only with its interior design, but also with its exterior. Typically, faced with brick - this material has been at the top of the list of the most popular products for correcting facades for several years now. They do this in order to improve the appearance of the walls of the building, as well as increase their physical properties, such as thermal insulation and strength. Most developers who decide to clad the facade of a building turn their attention to brick, since it is considered the most affordable and, at the same time, high-quality material.
Preparation process
Technical characteristics of facing bricks.
You can begin to clad a house made of timber if it has a solid strip foundation.
If there is a blind area, it cannot be used as a base. A house made of timber may not have a sufficient foundation width for the work, then you can resort to laying a strip foundation, which will be used for masonry. Its width should be 13-15 cm; as a more acceptable option, it is preferable to use a width of 20-25 cm.
It is worth remembering that such a solution in the form of laying an additional foundation is not the best option, since different parts of the resulting foundation will shrink differently. This can cause the building to skew, cracks can form in the base and walls, and mismatched openings in the main and facing walls can occur.
Waterproofing should be laid on the foundation; traditional roofing felt can be used as it. It should be installed in 2-3 layers; moreover, it is necessary to ensure that the material protrudes beyond the base by an average of 5 cm on both sides.
The lining of the building involves laying a heat insulator, which must be fixed to the walls. Mineral wool, which is produced in sheets, has proven itself to be excellent. If you want to save money, you can use a budget option for insulation, for which you should use expanded clay, which will have to be filled in during the work process.
Material selection
The next step in cladding a house made of timber is the choice of material. Let's consider possible options for materials for finishing the house:
An example of facing a log and frame house with brick.
The final choice of brick cladding material for a house can be made based on the idea of the desired appearance of the home, local natural conditions, traditions and financial capabilities. When purchasing a brick, you must ensure its quality, confirmed by the appropriate certificate. High quality brick produces a ringing sound when tapped with a metal object. This means that the finishing of the house from it will be of high quality.
The consumption of bricks for cladding a house made of timber can be determined by the area of the surface to be faced and the quantity per 1 m2, which is 50 pcs for a half-brick wall, taking into account the breakage, add 30-50 pcs. Solution consumption - 2 kg, also per m2.
Cladding technology
You can cover a wooden building with bricks using mortars of different compositions. These can be mixtures based on cement, limestone, clay. The best option is to use cement mortar.
The brand of the final mortar depends on the brand of cement used in the work. This dependence is directly proportional: the higher the grade of cement, the higher the strength of the masonry mixture.
Brick cladding scheme.
Before using the solution, you should check it for mobility, during which you need to use a cone whose weight is 300 g, height - 15 cm, and apex angle - 30°.
Thus, mobility is determined by the depth of immersion of the tool into the finished mixture. If the work involves using hollow bricks, the mobility indicator should be 7-8 cm, and for solid products the indicator can vary from 9 to 13 cm. Mobility indicates the ability of the mixture to spread under the influence of its weight.
Before bricking a house, you should prepare the mortar. So, to obtain a lime-cement mixture, you need to use 1 part M-500 cement, 2 parts lime paste and 8 parts sand. To prepare the cement mixture, you need to use 1 part M-500 cement and 4 parts sand.
Another method of preparing a solution involves adding glue to the composition, which is necessary to increase the strength properties; Liquid soap can also be added, which guarantees increased plasticity and prevents excessive fluidity. To obtain such a mixture, you need to use 4 parts sand, 1 part M-500 cement, 0.5 parts Fliesenkleber glue and a little liquid soap. This solution will be more expensive than the previous ones, but the quality characteristics will fully compensate for this disadvantage.
Brick layout.
In addition to the above advantages, such a composition will not come off the products, and its waterproofing characteristics will be excellent.
During the work process, you can trim the brick with a hammer-pick; the main masonry tool is a trowel or trowel; you need to spread it out and then level the mixture on the products.
Seams can be processed by jointing, and ventilation and smoke openings can be cleaned, and seams in channels can be smoothed and filled with a mop. It looks like a rubber plate that is secured between the flanges. To control the verticality and horizontality of the masonry, it is necessary to use control and measuring tools: a plumb line and a level.
The corners of the masonry, when the house is lined with bricks, also need to be checked; a square can be used for this. In order for the seams to be ultimately uniform and aesthetically pleasing, a tie cord must be used.
It is recommended to check the straightness of the masonry with a straightening rod, the length of which is also 2 meters, its cross-section should be 50x50. In addition, the tool must have notches on each row, which are necessary for marking the masonry. Fastening the ordering strip to the brick surface can be done using brackets with a transverse strip.
The house should be covered with bricks in polyproducts.
Thus, in the end, the thickness of the wall will be equal to 12.5 cm. In some cases, the masonry is carried out in a quarter of a brick, the product must be installed on the edge, the thickness of the masonry will be equal to 6.5 cm. If you decide not to lay the foundation, then mount brick can be placed on the protrusions of the plinth.
What is required for cladding?
Before covering a log house with bricks, you need to prepare all the materials and equipment necessary for these purposes. According to numerous reviews, to finish a building with facing bricks you will need the following equipment:
- measuring instruments (this can be a level, a rod, a trowel, a plumb line, a square);
- hammer-pick;
- the main consumables are insulation, waterproofing film, sand, cement mixture and brick.
Plating process
Additional recommendations
The facing wall should be connected to the main wall with clamps made of galvanized steel roofing; nails or pieces of steel wire can be used.
It is preferable to use galvanizing, since ordinary metal will be destroyed by condensation.
One end must be fixed to the main wall, the other must be placed in the masonry seam. Fasteners can be placed in 2 rows with a step that does not exceed 1 m. When cladding the timber, you should use moisture-resistant products.
There should be a distance between the wall and the masonry, the maximum length of which is 10 cm. A ventilation groove of 10-15 mm should be installed in the upper part of the wall; nets can be used to protect them. The masonry should be carried out with bandaging of the seams, the size of the bandage should not be less than ¼ of the length of the product. Expansion joints should be located closer to the corners, the step between them should be 10-14 m.
You can do the wall cladding yourself; it is only important to follow all the rules.
Wooden houses have been built throughout human history; they have an incredible number of advantages, but they also have their disadvantages. Covering a house made of timber with bricks will not be difficult even for a person who has taken up such an undertaking for the first time. The process is quite simple and fast, but requires considerable material costs.
Cladding timber with bricks does not take much time and is a quality component.
Before starting work, you need to make sure that the width of the foundation allows you to implement the idea. Facing the timber with bricks is envisaged during the design process in order to leave an additional 8 cm. In total, facing a log house with bricks does not take much time, but the whole process must be carried out systematically and clearly, after which the result will not be long in coming.
The particular importance of facing timber with bricks also lies in the quality component, because the tree will no longer be affected by the external humid environment.
But before starting work, you need to wait until the wood dries out in natural conditions, if there was precipitation before the installation began.
Features of wall cladding made of different materials
The facing masonry runs in half a brick. The self-supporting capacity of such a false wall is low. It must literally be tied to the facade. For this, different materials are used: ready-made flexible connections, anchors, nails, strips of sheet metal, masonry mesh.
The method of bonding, the need for insulation, the presence of a ventilated gap and vents depend on many properties of the facade material: strength, vapor permeability, holding force of fasteners, size of building blocks, etc.
Brick
In this case, everything is relatively simple. Both the wall and the cladding have almost the same parameters, including the dimensions of the brick. The most common fastening method is ready-made flexible connections made of metal or fiberglass. A flexible connection is a rod that has seals at the ends in the form of a “powder” of quartz sand (to improve adhesion). Such a rod is attached at one end to the horizontal mounting seam of the wall, and at the other to the cladding. If the seams do not match, then in the facing masonry the rod is placed in a vertical seam. Such cladding usually takes place simultaneously with insulation. For a newly built brick house, this makes it possible to reduce the thickness of the external walls and the total load on the foundation.
If polystyrene foam is used as insulation, then a ventilation gap is not needed. When using mineral wool, there is a need to ventilate water vapor from it. Therefore, on the side of the facing layer, a washer with a lock is put on the flexible connection, which presses the insulation mat against the wall of the house and leaves a ventilated gap between it and the facing. That is, the flexible connection also serves as a fastening for the insulation (there is no need to use umbrella dowels, as in curtain wall facades).
Number of connections per 1 sq. m walls - 4 pcs. (in openings - along the perimeter every 30 cm), minimum penetration into the seam is 90 mm, maximum - 150 mm.
Cinder block or monolithic cinder concrete houses
Cinder block is a lightweight concrete. Depending on the hollowness, the material can act in different capacities, including as thermal insulation. Its main disadvantages are its unattractive appearance and low resistance to precipitation and wind loads. Therefore, insulation of a cinder block house is usually not required, but cladding is required. The best material for this is considered to be brick with low water absorption (for example, clinker or hand-molded).
The vapor permeability of brick is lower than that of cinder block. As a result, in cold weather the dew point may “get” onto the cinder block, and water vapor will not be able to erode through the cladding. To prevent the main wall from becoming damp and collapsing, you need a ventilation gap and vents at the bottom of the cladding (at the base) and at the top (under the roof).
As a flexible connection, a masonry mesh is used, one edge of which is fixed to the wall with a bracket and dowel, and the second (in the masonry seam of the cladding) should not come out. The mesh is laid in every fifth row of brickwork.
Building blocks made of cellular concrete
Despite the differences in the manufacturing technology of aerated concrete and foam concrete, their load-bearing and thermal insulation properties are similar, there are only differences in vapor permeability (aerated concrete is higher). Facing for blocks made of cellular concrete is mandatory - the reasons are, in principle, the same as for cinder blocks.
As with cinder blocks, insulation is not necessary, but a ventilation gap is needed. Therefore, the method of attaching the facing masonry to the wall is similar.
Wooden houses
This is perhaps the rarest case of brick cladding.
It is almost impossible to veneer a log house with bricks due to the characteristic corner cuts of the crowns. Log houses do not have this problem, but the feasibility of cladding is very doubtful - the acquired advantages are much less than the disadvantages.
Frame (or frame-panel) wooden houses are attractive due to the absence of “wet” work, speed of construction and relatively low cost. Brick cladding is possible and practiced, but it neutralizes these advantages.
In any case, insulation when facing a wooden house with brick is, in principle, not necessary, but a gap is necessary - the lack of ventilation and weathering of excess moisture will lead to rotting of the wood. In addition, it is mandatory to treat the walls with antiseptics.
If insulation is carried out, it is performed using mineral wool mats, which have high vapor permeability. Installation of insulation is carried out over the lathing, using the technology of ventilated facades - with laying on top of a windproof, vapor-permeable membrane.
When insulating, it is not a masonry mesh that is used as a flexible connection, but pieces of wire attached to the wall with nails or self-tapping screws (at the rate of 4 pieces per 1 sq. m).
Basic aspects and getting started: instructions
Concrete grade M 200 is suitable for concreting.
To complete this stage of work you will need:
- Shovel. Edged board. Hammer with nails. Perforator. Mastic. Reinforcing rod 10 mm. Concrete mortar m300.
The most difficult thing is to achieve ideal vapor transmission so that a house made of timber does not begin to rot. The reason for this reaction is that wood walls and brick cladding have different densities.
Despite the large mass, houses made of timber are almost never built with more than 3 floors, i.e.
That is, strip and slab foundations will withstand them with a bang. To be sure, you need to retreat 3 cm in each direction beyond the final walls.
The foundation itself is made of exceptional quality (poured on site from M300 concrete mortar), since with its small dimensions it will have to bear considerable weight.
Scheme for facing a wooden wall with bricks: 1-vapor barrier, 2-load-bearing wall, 3-thermal insulation, 4-fiberglass or metal connections, 5-facing brick.
There are also moments when there is a desire to reface a house, but the old foundation does not allow this to be done due to its weakness. Strengthening the foundation will require some investment of effort, time and money, but the resulting result will last at least 50 years:
The foundation is being dug around the perimeter outside the house.
The width of the trench should not be large, so that later you don’t have to bury a lot of soil back; formwork panels are made, which will then be located at a distance of 10 cm from the base structure; using a hammer drill with diamond drills, grooves (10 mm) are made in the concrete to a depth of 10 cm They are spaced horizontally at a distance of 50 cm, and vertically at 25 cm (rounding towards additional holes). It often happens that a diamond drill gets dirty in concrete, so you should always keep a piece of brick on hand, which will remove the plaque with a bang; a small amount of mastic is applied to the very end of each groove, after which a rod is immediately inserted exactly in diameter.
The length of the rod outside the base is 8 cm, since contact of the metal with the ground is strictly unacceptable (the metal rots rapidly); the formwork is installed, and an M300 concrete solution is poured into the resulting trench.
It is necessary to allow 3 weeks for the solution to completely harden, after which the formwork can be dismantled and the work activity of interest can be continued. It is worth remembering that the foundation is not monolithic, but prefabricated, which slightly weakens the structure, but taking into account the fact that the mass will press from above is relatively small, the negative impact of the seam is neutralized.
Return to contents
Types of facing bricks: silicate, ordinary ceramic, hyperpressed, clinker.
You will need:
- Facing brick. Cement mortar m300. Grids \ slotted brick. Reinforcing rod 5 mm. Trowel. Cutter.
The laying is carried out using the spoon method on a thin layer of mortar of 3-4 mm. During the laying process, it is necessary to remove excess mortar using a cutter so that the seams look good. Each subsequent row is offset from the previous one so that the vertical seams do not coincide.
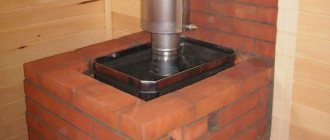
After row 1 is laid out, row 2 will need to be made with a number of ventilation gaps.
Each gap is located at a distance of 0.5 m from the previous one. In order for air to circulate without difficulty, you need to calculate the walls, where for every 10 m2 there will be a 35 cm2 gap. There are several approaches - slotted bricks, special gratings and partial filling of vertical joints.
Particular attention should be paid to the insulation, since it should not be damaged in the process (the need to bevel into the outer part of the building is determined by the weakness of thermal insulation materials to moisture).
Which option to choose depends solely on the wishes of the owner, since each is considered ideal.
On the cornice row, as well as on the second row, air outlets are made. Thanks to this approach, a complete ventilation system will be implemented between the walls and the cladding.
Many craftsmen work using technology that does not regulate the connection of the cladding to the wall, which is why the structure turns out to be quite shaky. You need to connect, and this is done with enviable regularity (5 joints per 1 m2). For joints, a 5 mm reinforcing rod or 2-3 mm thick sheet steel is used.
On the one hand they are mounted in the timber, but on the other - in the horizontal seams of the cladding. When attaching the cladding, you don’t need to try to do anything unusual, but just deepen the metal into both bases. It is very important that the frame is connected to the last row of masonry, otherwise it will significantly weaken the structure.
Return to contents
Every person who loves not only external beauty, but also the quality component should know how to brick a house made of timber. There will not be any particular difficulties during the work, but despite this, you need to do everything as efficiently as possible.
Once the timber is covered with bricks, lining the outside with polystyrene foam will no longer be possible. Physically sheathing it with foam plastic is not difficult, but it will bring absolutely no benefit.
When facing a house with brick, there are several factors that must be taken into account - a cement solution not weaker than m300 (cement comes without gravel, unlike concrete), the presence of air passages and a mandatory binding system. When covering a beam with a brick, you need to take the process as seriously as possible, so that the results will last at least 100 years. At this point, facing the house with brick can be considered complete, and you can begin any new venture.
Many owners like a house made of timber. The appearance of the log house is not always preserved, or the preferences of the residents change over the years.
What to do? Is there a way out of this situation? The owners begin to come up with different solutions: covering the house with decorative panels, siding, clapboard.
Is it possible to cover a house made of timber with bricks? The question worries many developers. Modern brick attracts with its reliability, beauty, and durability.
Is everything so good when covering the timber with bricks? Perhaps there are nuances that need to be taken into account when deciding to renovate the facade. Let's find out the intricacies of the process.
What is wood brick?
If you want to build an environmentally friendly, warm and reliable house, it is recommended to use bricks made from natural material - wood. Such a house or dacha is called a frame panel house. The laying of wooden bricks is specific in its own way, so it is recommended to contact specialists who know how to handle such material. It is faster and cheaper to build a frame house than a block or brick one, and there is no need to carry out additional brick cladding work. You can also sheathe a brick house with wooden blocks, additionally insulating the structure with mineral wool. If the construction of wooden cladding is carried out correctly, such a house will become warm, strong and beautiful.
We think through the details at the design stage
Covering a house made of timber with bricks is not difficult even for a person who has no experience in bricklaying. But here the question is not about the skill of the workers, but about the reliability, stability and longevity of the structure. You need to make sure that the brick wall does not harm the timber frame and the house as a whole:
We check the reliability of the foundation and the possibility of laying a brick wall.
Brick is heavier than wood. The new wall will put additional pressure on the foundation. Will he be able to withstand the load?
If a house made of timber is built according to your design, it is easy to find out the properties of the foundation by looking at the surviving drawings and estimates. It is problematic if the house was built by the previous owner quite a long time ago. There may be no design documents left.
We inspect the existing foundation of the house and draw conclusions: is it necessary to strengthen the foundation, is there a basis for laying a new wall. Don't put the brick on the ground. We make notes on the new house project. To strengthen it, you will need to dig a narrow ditch around the perimeter to the depth of the foundation, pour in cement mortar, and create a new strip foundation.
Sometimes reinforcement is required from inside the home. This must be taken into account. We calculate the amount of required bricks and mortar for masonry. It’s better to take it with a reserve. Is there a need to insulate walls made of timber?
Is there enough heat in the house or do you have to constantly increase the temperature during cold weather? It is better to insulate the walls before starting to lay the walls. We calculate the amount of insulation and do not forget about the vapor barrier.
A house made of timber breathes, condensation can form, which is contraindicated for any structure. A vapor barrier will prevent the formation of condensation. The brick wall must be tied to the main wall of the house made of timber. Fastenings are provided that will tighten two materials: metal mesh or pins, which must be galvanized.
Perhaps these are all the points that need to be thought through before facing a house made of timber with brick. The project and estimate will give an idea of the cost of the desired upgrades. Now let's look at each moment in the process.
How to cover a wooden house (timber, log, frame) with bricks
Cladding technology
You can complete the task yourself. The main thing is to carefully follow the technology.
Before building a brick wall, the wood is treated with an antiseptic. The treatment prevents the appearance of mold, mildew, and protects against insects and rodents.
The treated wall is covered with lathing. The planed timber is nailed vertically, the width between the boards should be slightly less than the width of the selected insulation.
Insulation is attached to the sheathing. Recommended material is mineral wool. You should not use polystyrene foam or expanded polystyrene - they do not allow moisture to pass through. Roofing felt is also undesirable due to its unpredictability. The standard insulation thickness is 50 mm, in the northern regions - 100-150 mm. Insulating sheets or mats are laid in two layers so that the second layer covers the joints of the first.
A wind barrier is placed on top of the insulation. The material must be vapor permeable on one side. The permeable side is applied to the wall with insulation, the impermeable side remains outside.
A distance of at least 60 millimeters must be maintained between the insulated wall and the brickwork. This ventilation gap is necessary to ventilate steam, which will eliminate condensation and destruction of wood with insulation. The gap can only be smaller on houses made of logs, but if it is built from beams or using the frame method, a minimum of 6 cm is required.
Ventilation holes are created in the first and top rows of masonry. Ways to create them:
- brick with through perforation is laid on its side;
- several seams are left that are not completely filled with mortar;
- A couple of holes are made in the wall and covered with a grill.
The brick is laid in a bandage. Masonry starts from the corners of the house. Each row is carefully checked for horizontal and vertical evenness using a level and plumb lines. The seam between the bricks is no more than 1-1.4 cm. Door and window openings are closed with concrete lintels.
Wall reinforcement
The facing wall is thin and needs to be strengthened. This is done by tying it to the main wall and reinforcing it.
One of the methods of binding is the use of wire. A 100-150 mm nail is driven halfway into the wall and bent upward. A soft 3mm wire about a meter long is tied to the nail in the middle and twisted. In the middle of the masonry, the ends of the wire are placed apart and the nail is pressed until a ring is formed.
The second method is nailing tin to the wall. You need a tin strip about a meter long and 2.5-3 centimeters wide. Its middle is attached to the wall with a nail or self-tapping screw, both edges are connected, together they reach the middle of the bricks, then they are bent in different directions.
The third method is to use masonry mesh. One side of it is attached to the wall, the other goes to the center of the bricks, where its edges are bent to the side so as not to slip out of the mortar.
Such fortifications should be distributed throughout the entire wall. You can maintain a distance of 50 centimeters between them, or maintain a frequency of 4 dressings per square meter.
To further strengthen the masonry, reinforcing mesh is used. Reinforcement with cells of 50x50 millimeters is selected. It is laid every five rows. Instead of a mesh, rods with a diameter of 6 mm can be used; they lie longitudinally.
Features in the absence of a foundation
The foundation of the house must support the weight of the masonry. If there is no foundation of the required thickness, it expands. To do this, a trench is dug along the existing foundation to the depth of the concrete. The width of the trench is selected so that after pouring the concrete mixture, the new foundation is equal to the sum of the thickness of the ventilation gap, insulation and bricks.
A sand cushion is placed at the bottom of the trench, roofing material or other waterproofing is laid on top, then reinforcement. Reinforcing pins are driven into the existing foundation with a downward slope of 15-20 degrees. They will be needed to connect the new base to the old one.
Next, the formwork is created and the concrete mixture is poured. The right thing to do is to do this continuously. After pouring, the concrete is compacted so that all air bubbles are released. After a few days, the formwork is removed, but construction of the brick wall begins after at least a month so that the foundation gains strength and undergoes shrinkage.
A foundation for masonry is needed in any case. If it is missing, it still needs to be filled.
Strengthening the foundation of a timber house
During a preliminary inspection, it was decided that the foundation needed to be strengthened.
A brick wall gives a lot of load. Even though we will cover a house made of timber with bricks in one layer, the weight will be decent. Let's get started:
We remove the decorative trim from the base part, if any. We dig a ditch around the perimeter of the house, stepping back from the walls by 100 mm (this will be a technical gap for ventilation). The ditch should be to the full depth of the foundation, but not wide. 100 mm is enough.
This will serve as a reinforcement of the previous foundation and the basis for the brickwork. We assemble the formwork and pour the mortar. The foundation needs to dry out and be waterproofed. Watch a video about what the foundation for facing bricks should be like. After the foundation has dried, we move on to brick work and insulation of the walls of the house made of timber.
Combined construction
To begin with, it is worth determining the basic properties of both brick and wood in order to have an idea in which direction it is best to use them.
Properties of materials
Brick:
- Environmental friendliness. Natural components, sand, water, clay, make this material an ideal “neighbor” for humans.
- Strength. For example, double silicate brick m 150, which is often used in the construction of houses, can withstand a load of 150 kg per square meter. cm.
- Duration of operation. Here we can talk not so much about years, but about decades and even centuries.
- Easy to use. Brickwork can be carried out even without having certain special knowledge in construction.
- Frost resistance. High performance makes it possible to build houses in any climate zone.
To be completely objective about bricks, it is necessary to note the disadvantages, which are associated primarily with low thermal insulation qualities. If a brick house does not require additional insulation from the outside or inside, then the wall should be 50-60 cm thick.
However, it is extremely difficult for building bricks to give off heat, so in the cold season it is possible to quite comfortably maintain a constant temperature in the premises.
Wood, timber:
- Environmentally friendly, as in the case of brick.
- Easy to use.
- Availability.
- Thermal insulation and sound insulation properties.
Of course, timber has a lot of disadvantages; after all, we are talking about wood, and this includes the possibility of rotting, the formation of mold, mildew, and a fire hazard.
We lay out a brick wall, following the rules
Before starting to work with bricks, it is necessary to process the timber around the perimeter of the house.
Do not neglect the impregnation of the walls. Wood is not a brick; it has the ability to rot and collapse. By closing the walls without treatment and gaps for ventilation, you risk reducing the service life of the wooden part.
If insulation is necessary, do it after the impregnation has weathered. The insulation should not reduce the ventilation gap, which is 50 mm wide between the brick and wooden walls. This space is necessary to remove moist air from the wooden wall.
Any wood breathes, allows vapors, air, and humidity to pass through. As long as the wall is not lined with brick, fumes escape unhindered. After facing a log house with brick, this opportunity disappears.
It must be created artificially. To get outside, special holes are made in the brickwork at the bottom of the house and in front of the eaves. It can be:
- ventilation grilles; special brick with holes; space in the connecting horizontal mortar joint.
The openings should not be accessible to rodents, which are unwelcome in the house.
Articles on the topic
Switching from brick to sandwich - installation, pros and cons, instructions, advice from masons
How to insulate a half-brick house with mineral wool and expanded polystyrene?, instructions, advice from masons
Brick foundation - step-by-step instructions, pros, cons, instructions, advice from masons
Brick columns for joists - preparation, how to make them, instructions, advice from masons
Insulating a house made of sand-lime brick - stages of work, instructions, advice from masons
Ventilation in a brick house - diagram, purpose, instructions, advice from masons
Mosaic with bricks - preparation, masonry features, instructions, advice from masons
Wooden floors in a brick house - types, how to install, instructions, advice from masons
Reviews ()
Working with bricks
The brick laying stage has arrived.
Wall covering can be done independently or by a team of masons. Depends on your abilities. A brick wall cannot stand on its own.
We fix it to a wooden wall. We take the prepared pins and mesh. We fix it on the timber frame, observing the distances:
- along the length of the wall every meter; along the height of the wall through 4 rows of brickwork.
The second side of the screed is walled up in the masonry.
We make the connection around the perimeter of the house. It is important to secure the last brick row so that the wall does not collapse in the future. You can see how to properly strengthen and cover the timber with bricks from the video report.
The house must be faced with brick from the bottom up along the entire perimeter, using mortar. Shift the brickwork to the side so that the vertical lines do not coincide with each other. Check the horizontal level of the new wall.
There should be no deviations or blockages. You can pull the thread. It will allow you to complete work faster and smoother.
We bring the wall to the top link of the frame. We get a new brick-lined house. How to lay bricks correctly, watch the video:
But is everything as happy as it seems at first glance? Is it possible to cover a house made of timber with bricks without problems in the future? Only construction experts or experienced users of brick-lined houses can answer the question.
Which brick to use
Facing bricks are produced using different technologies, due to which they have different characteristics and prices:
Ceramic. Of all the finishing materials, it is the most inexpensive. One of the disadvantages is high hygroscopicity: 6-15% depending on the technology and batch. When water gets into the pores, it expands when it freezes, causing destruction and the brick begins to crumble. Even the special finishing one, in which in factories the bed (the part that ends up outside) is specially protected. The solution is to cover the wall with a hydrophobic compound after installation. Only those that do not form a vapor-proof film
When choosing, pay attention to this: excess moisture must be removed. Frost resistance of ceramic facing bricks is 25-75 cycles (how many times it can withstand freezing/freezing without deterioration). The higher this indicator, the higher the price
This is explained by the high production costs
The higher this indicator, the higher the price. This is explained by high production costs.
Hyperpressed or non-firing. This type of facing brick is produced not by firing, but by pressing. It no longer contains clay, but lime with various fillers and pigments. The ability to use pigments allows you to obtain a wide range of colors. The front surface is often nonlinear, imitating wild stone. Looks decorative. But such nonlinearity threatens delamination: an uneven surface allows water to flow into the pores more abundantly and freezes in cold weather. This is treated in the same way as in the case of ceramics: hydrophobic impregnation. The frost resistance of high-quality unfired bricks is stated by manufacturers to be from 75 to 150 cycles.
Clinker. This brick is also ceramic, but a special technology gives it very high strength and density. Denser material absorbs water much worse. This is good for use, but when laying it it leads to difficulties: in order for the wall not to “float”, it must be laid on a hard, low-plasticity mortar, and it is more difficult to work with. Another disadvantage that limits the wide distribution of a material with excellent characteristics is that it is expensive compared to previous materials: prices are 50-150% higher, depending on the manufacturer. Frost resistance of clinker is from 100 to 150 cycles. Clinker cladding of a house with bricks is not a cheap pleasure, but it is the most attractive in appearance.
Silicate. The cheapest, but also the most “quickly perishable” of facing bricks: its frost resistance is 25-50 cycles. It conducts heat better. Not much, but still: the average thermal conductivity of ceramic is 0.16, silicate is 0.18. In addition, it is heavier: on average, the weight of ceramics is 2.4 kg, silicate of the same size is 3 kg. More weight requires a more powerful foundation and the price gain (silicate is cheaper) is not so great. If you consider that heating costs will also be higher, then the gain is questionable. It is advisable to cover the house with sand-lime brick in warm regions. In the northern regions this is completely unprofitable.
Choosing the type of brick is not everything
It is also necessary to pay attention to the size and shape of the holes. Solid finishing bricks are rarely used: they are more expensive and weigh more. On average, voids occupy about 28%, but they can be large and small
Given equal characteristics, give preference to bricks with small holes: the mortar will not flow into them. This will reduce the consumption of masonry mortar and increase the strength of the masonry
On average, voids occupy about 28%, but they can be large and small. Given equal characteristics, give preference to bricks with small holes: the mortar will not flow into them. This will reduce the consumption of masonry mortar and increase the strength of the masonry.
If you decide to clad the house with hyper-pressed brick, it should be made no earlier than 15-20 days ago. During this time, it gains basic strength (about 80%) and can be transported and loaded without fear.
Please note that the brick packaging should not be exposed to water during storage. This is especially true if you are planning to leave it for the winter.
What construction forums discuss on this topic, and what reviews and recommendations they give
Having looked through various construction forums, it cannot be said that there is a consensus on the question - is it possible to cover a house made of timber with bricks without consequences? Many forum users are convinced that a brick-lined house made of timber will not lose its properties and longevity. Main:
- follow the rules and stages of the process described above; prevent excess moisture from entering the space between the walls; monitor the ventilation holes so that the wooden walls do not “suffocate.”
The only bewilderment among people is the very fact of covering the timber with bricks.
Construction stores offer a large assortment of facade materials that are less expensive and do not require much effort or skill. But the timber wall itself looks complete. You don't have to do any cladding.
Exception: ordinary timber. Profiled and glued have a beautiful texture and refined appearance. Why then build a wooden house and then line it with brick?
You can immediately build a house from brick or other available material other than wood. It is necessary to take into account the fact of shrinkage of the wooden structure and inter-seasonal fluctuations of the walls. Will a lined house be able to cope with the process without cracks in the brick wall. The foundation and brick wall must follow the movements of the log house. Cladding a house made of timber is only required if the house is old, there are cracks, and the wood looks unsightly.
It is not possible to correct shortcomings with less expense. Then you can use brick. Calculate the costs needed to cover the timber with brick. Are they worth the result?
To complete all the work on lining a house on one floor, you will need at least 300,000 rubles, maybe more. It depends on where you live and the square meters of the house. There are alternative methods for less money.
It is better to try to restore a house made of timber to its previous appearance using sanding, caulking of walls, and paints and varnishes for wood.
Brick is good, but if the initial choice was made in favor of wood, is there any point in covering it up? Decision is on you. Situations are different and require an individual approach.
Similar articles
No comments yet
Building a brick house today is relatively expensive.
In addition, its finishing and insulation will require considerable expenses. A more economical solution would be to build a house from wooden beams and line it with brickwork on the outside. Such a warm and environmentally friendly building looks great from the outside and combines the best qualities of wood and stone.
A timber house lined with brick) has a number of advantages obtained as a result of this type of finishing
A timber house lined with brick) has a number of advantages obtained as a result of this type of finishing:
- Brick lining provides strong protection for a wooden house from adverse influences. Effective insulation of the structure allows you to save on heating costs. This cladding gives the building a solid appearance. Using a brick of one type or another and decorative finishing, it is possible to give the house originality. The fire safety of the building increases. A house made of timber, lined with brick, is distinguished not only by good thermal insulation, but also by sound insulation.
How to calculate the number of bricks
When calculating the amount of material, the formula is used: 50-55 bricks are needed per square meter of masonry. Therefore, for calculations, you need to obtain the area of all walls and multiply it by 55. For accurate calculations, the area of door and window openings is subtracted from the total area.
It is recommended to increase the resulting value by 10-15% - this is necessary to provide a reserve in case of combat during construction and transportation or in case of detection of a defect.[P3]
To predict the cost of work, the consumption of the solution should also be taken into account. It is calculated according to the rule: 2 kg of mixture is used for each square meter. Brick cladding not only makes a home more attractive, but also protects it from aging, weather, and outside fires. This technology requires precise calculations, but you don’t have to be a professional builder to use it. The main thing is to be consistent and attentive.
Foundation
To drain groundwater from the building, a concrete blind area must be installed
Facing a wooden house made of timber with bricks is an additional load on its foundation.
Therefore, it must be initially prepared for it: have the required size, take into account the soil conditions on the site and the magnitude of the total load. If this was not foreseen in advance, then the existing foundation is strengthened and expanded. To drain groundwater from the building, a concrete blind area must be installed.
Advantages of finishing
Cladding a house made of timber with bricks in this way has a number of advantages that may tempt you to choose this option:
- Good thermal insulation, which guarantees warmth in the house, which will allow you to significantly save on heating the entire building.
- The resistance of wooden beams to natural manifestations - rain, snow and other troubles will not be able to damage the wood hidden behind the brickwork.
- More fire resistant, less likely to cause a building fire.
- A house made of timber, lined with brick, has that feeling of solidity and strength that is characteristic of stone buildings. This look makes the house more elite.
- Good sound insulation due to the air gap between the house and the brick cladding.
Bundle of timber and brick wall
The walls are fastened to each other using flexible or rigid ties
The walls are fastened to each other using flexible or rigid ties.
In European countries, they do not associate rigid brick cladding with a brick wall, preferring flexible ones.
To do this, welded galvanized mesh is cut into strips of 30-40 cm and bent in half at a right angle. One “shelf” of binding is nailed with galvanized nails to a wooden wall. The other is walled up in a horizontal seam of the brickwork.
Instead of a mesh, you can use regular drywall hangers sold in stores. Such bundles will be made every 4-5 rows of brickwork.
The step between them is about 1 meter. Fastening the last row of masonry is mandatory. In this case, the multilayer structure can withstand increased loads.
Prerequisites for the work
If you have a house built from high-quality timber, its attractiveness is beyond doubt. Cladding work will only lead to unnecessary additional costs. The log house should be covered when a plank or frame building is built. It is especially advisable to carry out exterior finishing when the house was built a long time ago. Over time, the wood dries out, which causes cracks to appear. Brick cladding will not only improve the aesthetic properties, but also thoroughly strengthen the structure.
When covering a wooden house with siding, air access to the wood is blocked, which leads to its premature rotting.
Some “experts” claim that the log house of a wooden house can be made attractive by finishing it with siding. But this is a fundamentally wrong design decision. Using siding will not allow the wood to “breathe”. As a result, it will rot. Climatic conditions play an important role when cladding a log house. When cold winter or wet weather prevails in the region, it is imperative to clad a wooden structure with brick. Firstly, it will increase the thermal insulation and sound insulation properties of the building. Secondly, the service life of a wooden house will increase.
Carrying out masonry
The first row of bricks is laid on a layer of waterproofing. This may be roofing felt or other insulating material. The thickness of the walls is half a brick.
Cement grade M400 is used as a solution. You can clad the house using either special facing bricks or regular bricks – silicate or red. To reduce the penetration of moisture through a brick wall, treat it with a moisture-repellent impregnation.
The bottom gap between the rafters and the masonry should be at least 15 cm, otherwise the rafters may hang on the cladding when the building shrinks in winter.
Important! It is worth paying special attention to fastening and sealing slopes and window sills on a multi-layer structure.
Methods of external insulation
- Insulation with polystyrene foam and expanded polystyrene can be done in two ways: laying tile insulation in the cells of the frame or gluing the slabs directly to the wall. A detailed algorithm for insulating a house with EPS is described in the article “Step-by-step instructions for thermal insulation of a log house with polystyrene foam.” Thermal insulation with foam plastic is carried out in a similar way.
- Thermal insulation with polyurethane foam (PPU) is carried out by spraying using professional equipment.
- Installation of thermal panels is quite simple. Each element is provided with a “groove and tenon” type fastening. First, a starting profile is installed on which the elements are laid, joining them to each other. After final installation, the space between the wall and the panels is filled with foam.
- When laying mineral wool, installation of lathing is mandatory. The material strongly absorbs and accumulates moisture, which causes a decrease in its thermal insulation characteristics. The frame installation method allows you to make a ventilation hole between the wall and the insulation, as well as install a hydro- and vapor barrier layer on both sides of the insulation. Detailed instructions for installing mineral wool can be found in the article “Features of external insulation of a house with mineral wool.”
Internal insulation with warm plaster
For a wooden house, sawdust plaster, which consists of cement, clay, sawdust and paper, is best suited. Air passes through it, which allows the tree to breathe.
The work is performed in the following sequence:
- The surface must be carefully prepared to improve adhesion. It is cleaned of dirt, grease and dust, and then impregnated with antiseptic impregnations.
- A sheathing made of thin wooden strips is mounted on the wall.
- A cement mortar is mixed, where the necessary components are added, and then the mixture is mixed well until it reaches a thick consistency.
- The resulting solution is applied to the walls in the spaces between the frame guides and then leveled with a spatula. The minimum layer thickness is 10 mm.
- During work, the room must be well ventilated, otherwise fungus may appear on the plaster.
Features of timber buildings
Houses made of profiled timber do not differ in construction technology from log houses. The material itself is very attractive. The building is made of natural wood with a beautiful grain pattern and looks organically against the backdrop of the natural landscape. For low-rise private construction, sawn, glued and profiled timber is used, which determines the installation technology. Structures made from timber are environmentally friendly; this material is breathable.
The cross-section of the material ranges from 10 to 20 centimeters. The cross-sectional size is the thickness of the walls. For cold climates this is clearly not enough, so the walls outside and inside have to be insulated so that the final thickness of the walls is at least 40 centimeters for a temperate climate. There is a need to cladding facades with insulation, which is done with various materials that match the style of construction. Disadvantages include the ability of wood to absorb moisture, the tendency to form corrosion from excessive moisture, and high flammability. Exterior decoration is designed to reduce the influence of negative atmospheric factors, insulate and increase the safety of the home.