Often, the construction of a carport in the presence of a full-fledged garage is driven by the fact that there will be another car in the yard for a long time, for example, from relatives or a broken one. In this case, the cover does not always solve the problem, especially when you have to constantly take it off and put it on. In the case of a dacha, it’s even simpler: a small building completely replaces a permanent garage, which is not really needed there.
A high-quality, hand-made carport for a dacha or country house will protect your four-wheeled friend from scorching sun rays, snow caps or small birds.
The only thing that a roof and four pillars cannot protect a car from is the cold, but this is not necessary during the warm season. We will now tell you how to build such a building, from what, and how to calculate its area.
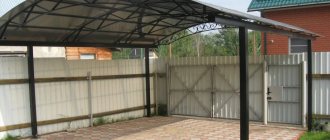
Options for canopies that protect cars from sun and rain
In summer cottages, carports are most often found in three types:
- Extensions to the building. Even a novice builder can carry out the construction with his own hands. They are fixed to the wall on one side, so you will have to dig in fewer pillars.
- Stationary ones have at least four supports, their design is varied.
- mobile awnings can be easily moved to another place and rolled up to be stored.
Tip: To reliably protect your car, you should build a carport with side walls.
The choice of building a summer garage depends on the size of the summer cottage and the location of the house. The second option is more profitable; the structure is installed near the fence.
What design should you pay attention to?
When choosing the type of canopy, you first need to choose a place for it, this will partially determine the design of the canopy.
The structure can be erected in the form of:
- separately located object;
- an object attached to some other structure (fence, wall of a house, etc.).
The low weight of polycarbonate makes it possible to install a simpler type of canopy - a canopy. It differs from a full-fledged canopy in that it will have supporting elements only on one side of the structure.
Canopies, as a rule, are attached to the wall of a house or other building. If you need to install such a structure as a separate object, then you will need to install reinforced supports on a very high-quality foundation, since it will bear a fairly large load.
Types of roof configurations and their advantages
The shape of the roof is determined by the roofing material and its placement in relation to the structure. The most common roofing forms for making a canopy:
Photo, drawing and roof diagram
- A pitched sloping roof is a simple way to arrange parking for cars on a summer cottage. It is economical, does not require special skills or professionalism during construction, is quickly erected, and is resistant to strong winds.
- A gable roof (hip) is more rigid and has high windproof characteristics.
- The arched shape has increased rigidity and is very durable. When creating an arched canopy, the slope angle must be made no higher than 10 degrees. When installing arched systems, there is no need to install a gutter.
Tips and tricks
When installing a wooden structure with a carport, the roof gables can be completely enclosed. Typically, this solution is resorted to in order to avoid rainwater from pouring through the pediment. Everything seems to be correct, but in this case, under a wooden canopy, when the car engine is running, a cloud of exhaust gases forms.
Over time, the under-roof surface begins to rust, and wooden parts may crack due to condensation. To avoid stagnation, you can install vents and ventilation windows on the roof.
What should be the height of a carport?
The dimensions of the summer cottage canopy depend on the size of the machine. It must fit with the calculation of opening the doors, hood, and trunk. Therefore, we make the width several centimeters larger.
If you decide to make a carport with your own hands, consider the following parameters:
- height - from 2.20 m to 2.5 m. With high structures, precipitation will fall on the car;
- the minimum height must be no lower than 2 m.
When calculating the dimensions for two cars, take the distance between the rear-view mirrors as 0.5 m.
Required tools and materials
To build a carport you do not need a large number of special tools. You can get by with a regular saw, a hammer and several containers.
However, to quickly build the structure, it is recommended to prepare the following tools:
- a circular saw;
- rope and stakes;
- shovel;
- building level;
- any container for water;
- concrete mixer;
- screwdriver or screwdriver with replaceable bits;
- keys.
Construction materials include:
- cement, sand and gravel;
- roof covering to choose from - slate, tiles, glass insulation, metal sheets;
- construction corners (minimum 8, if built without additional reinforcing beams);
- self-tapping screws, bolts, nuts, nails;
- construction timber of the required size in the required quantity.
Features of placing canopies in the country and near the house
Before you do the construction yourself, be sure to do painstaking work to create a diagram. Consider the ease of access to the summer garage, what the pillars are made of, and what roofing material will be used. Make a drawing with the dimensions of the width and length of the building. If you wish, buy ready-made projects.
Before building a carport, we select a suitable location on the site, level the site, and remove obstacles. We fill the low-lying area with sand, crushed stone, and install storm drains. Parking a heavy vehicle will require a reinforced concrete slab.
Features of site preparation
It is recommended to start building a carport with organizing the space. Its size depends on the number of machines that will be installed. If a small structure is planned, then the area of the space should accommodate one standard car.
When preparing a place for a canopy, you should follow these recommendations:
- Once a construction site has been selected, all grass, turf, and weeds must be cut off.
- The top part of the soil must be removed to a depth of 12-15 cm. Instead, a cushion of sand and crushed stone is laid, and compaction is additionally used.
- During preparation, a small slope is constructed along the way. And if the area is low-lying, then drainage pipes are laid around the perimeter.
- After making the canopy, any parking covering can be laid on the sand bed.
If the canopy is being built for a heavy SUV, then a reinforced concrete screed is suitable for the base.
To do this, plank formwork is created, it needs to be filled to the middle with concrete, then a reinforced mesh is laid out and the concrete mixture is added. Complete hardening of the site occurs within a month.
Features of the supporting structure
When building a stationary type canopy, we install at least 4 racks, which are subsequently connected to each other. Before installing the supports, we decide on the structures. We install supports in increments of no more than 1.5 meters. We calculate the dimensions in advance and put them on the drawing.
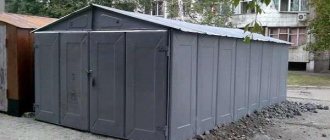
Stone, concrete, brick
Massive pillars do not require constant maintenance. But when installing heavy supports, the use of heavy equipment may be required. It is more difficult to build a canopy from brick, concrete or stone with your own hands than from wood or metal.
Scheme of a brick canopy with dimensions
Structures with massive pillars, upholstered on the sides with siding or clapboard, look solid and last a long time. Their construction costs a little less than the construction of a full-fledged garage.
Metal
Making a carport with your own hands from metal pipes ᴓ 80 mm is the right solution for creating supports. We make the indentations with a drill. Metal is afraid of corrosion, so you need to buy material that is protected from moisture.
Photo diagram of a metal canopy
We insert supports and fill the holes with concrete mortar. We connect the racks with crossbars. If you decide to make a canopy out of metal, you should use a welding machine.
Wooden carport
A wooden canopy is easy to make. Wooden posts are inserted into pre-dug holes. Wood is afraid of dampness, so when installing supports, treat the wooden canopy with antiseptics.
Wooden carport, diagram
Tar the bottoms of the posts that will be buried in the ground. The measures taken will increase the service life.
How to lay out the site
The easiest and most inexpensive way to make a platform under a carport is to fill it with gravel. To do this, you will need to remove the turf, dig the curb, pour crushed stone and compact it well using tamping platforms. Then the platform will be rigid and ruts will not form.
Compacted crushed stone is a good surface for car parking
Recently, areas paved with paving slabs or paving stones have become more popular. They have a more attractive appearance, but their construction is more expensive. Preparation begins the same way: first the soil is removed. But the pit is made about 20-25 cm deep. Crushed stone is poured onto the bottom, which is also compacted well. Then it is advisable to spread a layer of geotextile on the crushed stone. This is a non-woven material that will prevent the sand that will be poured on top from spilling out and mixing with gravel. Geotextiles also redistribute the load more evenly, preventing the base from sagging under the wheels of a car (it is used in road construction). A layer of sand is already poured onto it, which is also compacted. Paving slabs, clinker bricks, cobblestones and other similar materials are laid in the sand.
Paving slabs
In the middle in terms of costs is a concrete site. The base is also prepared from compacted crushed stone. Wooden planks are laid on it at a distance of 1 m, which are set level or with a slight slope to drain water. These strips serve as beacons during pouring, and then play the role of damping joints, compensating for the thermal expansion of concrete. With this structure, cracks appear less frequently.
A metal mesh made of galvanized wire is laid between the slats. You can, of course, use stainless steel, but it is expensive. The thickness of the wire is 3-4 mm, the cell is 10*10 cm. The top is filled with concrete not lower than M 250. The thickness of the concrete layer is 7-10 cm.
Concrete platform under a carport
Schemes and drawings of canopies
We have collected the best shed designs for building in a country house or in the courtyard of a private house. Please note that dimensions in the drawings may vary and are indicated in millimeters or centimeters.
Arched carport diagram
Scheme of a carport made of metal and polycarbonate
Characteristics of polycarbonate
Like any building material, polycarbonate has its strengths and weaknesses. Let's consider all the pros and cons of this material.
Advantages
- Light weight is by far the biggest advantage of the material. However, the low weight does not affect its strength at all. A simple example, a panel of (honeycomb) sheet 20 mm thick. standard size 2x3 m . 200 times stronger than glass;
- Low thermal conductivity due to the existing air gap;
- The honeycomb structure of the material makes it resistant to almost any mechanical damage. Impact resistance 2-4 J. depending on thickness;
- Easy to install. Having such a low weight, one person can easily cope with installation work;
- Easy to process. You can cut and drill polycarbonate without special equipment.
Flaws
- The main weakness of the material can be considered its ability to thermal linear expansion - 0.065 mm/(m C°) . At high temperatures, polycarbonate expands, at low temperatures it contracts. Therefore, during installation, it is very important to take this fact into account and leave the so-called “thermal gap” at the fastening points;
- Fear of ultraviolet radiation. However, technologists are not sitting idle, and today there is material on sale with special UV protection.
How to make a polycarbonate canopy
When choosing a roofing material for a shelter, you should pay attention to polycarbonate; it is the best for making a canopy. Polycarbonate coating looks great and has many advantages:
- durable;
- easy to install;
- has a rich palette of shades;
- has increased flexibility;
- withstands significant impacts;
- the shapes and sizes of the canopy can be of any configuration;
- low price.
Photo of carport
Photo of a carport
An arched homemade carport with screen walls made of polycarbonate sheets will protect the car from precipitation.
Color and quality of polycarbonate
Honeycomb panels made of polycarbonate are available in varying degrees of transparency and colors. Green goes well with the natural landscape. It is better to make the extension the same color as the house. In any case, the choice depends on the taste preferences of the owner. Products from trusted brands will not bring unpleasant surprises; their manufacturers value their reputation and adhere to strict standards.
Selection of polycarbonate panels
A canopy made of matte panels will protect the car from the harmful effects of ultraviolet radiation and precipitation. Polycarbonate is available in two types: monolithic and cellular. The second option is light, plastic, and diffuses light. Monolithic is of high quality, but heavy and expensive.
To build a canopy you will need sheets:
- roofing 16 mm thick;
- for vertical surfaces the material is 10 mm thick.
Advice: cover the ends of the cellular polycarbonate with punched paper tape, otherwise in a year they will become moldy, dirty, and become unusable.
Instructions for building a polycarbonate canopy
Installing the canopy step by step:
- make a diagram and drawing;
- preparing the site;
- install supports. We dig holes with a depth of 50 to 150 cm. We install the racks strictly vertically. We check the level. When you bury the supports, fill the holes with crushed stone and secure with concrete mortar. Leave for at least three days;
- we connect the racks with beams;
- we install a frame that should bear the load from snow in winter;
- we install drainage;
- Let's start installation. We lay the sheets with the factory film facing out. We cut the panels in accordance with the project. We connect with special profiles. We fix the honeycomb polycarbonate sheets with thermal washers with rubber bands to insulate the holes. We close the edges of the polycarbonate with end tape, protecting the honeycombs inside;
- remove the protective film;
- We cover the upper ends of the polycarbonate panels with aluminum tape.
Advice! A small margin of hole diameter will prevent cracking of the fastening points.
Monolithic polycarbonate is difficult to drill; it is secured with polymer putty.
Tips for caring for a polycarbonate canopy
This is a self-cleaning material; wash when dirty using soft cloths and soapy water. You may need a sponge or soft-bristled brush to remove stubborn dirt. Washing with a hose is allowed. Do not clean in hot, sunny weather. Fallen leaves are swept away with a soft broom. It is more convenient to clear the surfaces of a gable sloping roof from snow.
Choosing a roofing covering: emphasis on style!
Now everything is more or less clear with the design, and we can move on to the roof. Almost any roofing material is suitable for arranging a country carport, as long as it is light enough and does not put too much pressure on the supports (like ceramic tiles, for example).
Thin metal roofing or soft asphalt shingles are excellent for this purpose. But it doesn’t matter whether it’s polycarbonate that fits perfectly into the surrounding landscape design, whether it’s colored or transparent.
The important thing is that it gently diffuses light, and it will be comfortable to work with the car both in the rain and on a hot afternoon:
If you have chosen this option, then get ready for the fact that there will be a lot of work, but the strength and durability of the entire structure is definitely worth it.
Even a small canopy right in front of the entrance to a country house looks bright, stylish and quite practical:
By the way, polycarbonate is such a light material that it allows you to build even such a thin frame under it:
If you want something unusual, or you are not yet ready to purchase the same polycarbonate, then use the advice of skilled summer residents. Have you ever imagined that you could literally build a canopy out of plastic bottles? Country crafts - yes, small attributes for the garden, yes, but - a whole building?!
As it turned out, it’s still possible, look what comes of it:
For this undertaking, you will only need transparent plastic bottles, water, paint of different colors (you can use regular gouache), wooden stands and a strong rope.
The installation instructions themselves are brilliantly simple:
- Step 1. First prepare the bottles: pour a little water into the bottom of each, tint it in the desired color and fill it with decorative decorations if desired.
- Step 2. Next, make holes in the caps of plastic bottles and thread ropes through them. Tie them from the inside, making a knot.
- Step 3. Build a smooth horizontal frame from wooden planks.
- Step 4. Drive nails around the perimeter of the frame and stretch a mesh of ropes.
- Step 5. Tie plastic bottles to this mesh so that they are pressed quite tightly together.
Interestingly, this is easy to do with a ready-made pergola, and there is no need to build a separate frame. And the roof itself is short-lived, of course, because the plastic begins to deteriorate in the first 5 years under direct sunlight. But why not build a new “roof” in a couple of years? Moreover, the whole process takes a couple of hours at most.
How to build a wooden carport
Building a wooden carport with your own hands begins with laying a foundation of durable elements. After installing the supports, we nail the transverse cutting boards. We lay the rafters on the supports and make recesses in them according to the template. Stepping back 10 cm, we lay the outer rafter on the beam. Plank trusses cover a long span without any problems. They are assembled on the ground, then lifted and mounted on supporting structures. This reduces construction time. After completing the roof installation work, we install the gutter. We cover the gables with clapboard.
Wooden roofing material is treated with a waterproof mixture and fire-resistant impregnation. We secure the boards to the frame with galvanized screws. Roofing felt was previously laid on top of this traditional shelter, but recently metal tiles or ondulin have been laid.
Construction of a carport made of wood with your own hands
Any construction process includes several stages. When constructing a structure for a car, you will need to do the following:
- choose a suitable place for construction;
- pour the foundation;
- installation frame;
- carry out roofing work;
Choosing a place to build
Before you start building a canopy at your dacha, you need to decide whether it will be an independent structure or an extension to an existing one. The best place to build is the area in front of the entrance. You can also store equipment there while working. In addition, it is advisable to build the canopy on a hill. Then puddles will not accumulate under it.
Foundation
The foundation for the structure must withstand the entire load of the frame and roof. There are two options for pouring the foundation. You can use a pile-screw structure, which will make the finished structure stable.
An alternative is to dig small holes, insert piles and concrete. The best diameter for load-bearing piles is 120-150 millimeters. Burying depth is at least 100 centimeters. During digging, it is worth checking with a construction meter whether they are fixed evenly.
Construction of the frame
After installing the vertical piles, longitudinal beams are installed along the entire length of the structure. In this case, it is necessary to control the mounting angle. Longitudinal beams, which are fixed on the opposite side of the roof, are installed only after checking the level of inclination. It is not advisable for the tilt angle to exceed 3 degrees.
After this, you need to lay the rafters so that you can install the roof on them. It is worth leaving a distance of at least 60 centimeters between the rafter boards. Such boards are screwed to the support beams. If there is a gutter in the plan for water drainage, about 10 centimeters need to be cut off from the last rafter.
Roof installation
The final stage of construction is laying the roofing material. For the roof you can use slate, tiles, wood, glass insulation or polycarbonate. However, when using boards, the roof may leak, so it will be necessary to cover it with a layer of material that protects against rot.
When using slate or polycarbonate, such problems will not arise. The sheets are attached from the bottom to the top, so that each subsequent sheet overlaps the joint with the previous one.
On a gable roof, attach a canopy on top of the structure to protect against moisture getting inside. After laying the gutter, it is worth pointing the pipe vertically downwards. Around the foundation, at a short distance, it is worth digging small trenches to drain excess water. To avoid inconvenience, you can cover them with a rigid mesh.
Mobile canopy
Mobile prefabricated metal canopies consist of a folding compact structure - frames with awnings. They will protect the car during precipitation anywhere. You can install a mobile structure on one car in two hours, and it’s very cheap in terms of money.
Using homemade sheds as a summer option would be an ideal solution, but they cannot replace a full-fledged warm garage. It is possible to build a canopy for summer cottages without large material costs. Ready-made projects will help realize the idea of building with your own hands. Such canopies are a good budget solution for owners of private houses and summer cottages.
Video on how to make a simple carport with your own hands.
Preparatory stage
To make a strong and durable carport attached to a house or a permanent structure, it is important to prepare the necessary tools and materials. First of all, we mark out the place for the future structure - for this, a machine is installed in the construction area, and places for supporting elements are outlined. It is imperative to check that the supporting elements do not interfere with installing the car and opening the doors.
Usually the roof is longer than the canopy. It can extend beyond its perimeter by 50-100 cm, this is considered normal.
If polycarbonate carports are planned, the drawings will be the most important stage of construction. They are the ones who will help you do everything correctly and exactly according to the given parameters. You can make the drawings yourself or find them ready-made on the Internet.
When making it yourself, it is recommended to draw the planned structure on paper in several projections - from above and from the side. It is important to correctly calculate the required amount of material. It is advisable to add 10%, this will eliminate the need to purchase additional funds for construction.
For the frame, you can use a steel pipe or a wooden beam, it all depends on the desire of the owner. But if a tree is chosen, it will definitely need to be treated with special protective coatings.
Carports are manufactured using tools and materials from the following list:
- saw;
- hammer;
- if a canopy is being built from timber, then nails will be needed to secure it;
- to work with a profiled pipe you will need a grinder and a welding machine;
- level;
- plumb line;
- pegs;
- twine, any strong rope or cord will do;
- shovel;
- clamps;
- Self-tapping screws will be needed for fixing and fastening;
- screwdriver
Carport width for two cars
It is much more convenient and practical to make one large canopy than two separate structures. In addition, this allows you to save on building materials and precious square meters of land. In this case, cars can be located one after another or next to one another. In the first case, a long carport is built for 2 cars, the width of which is determined by the dimensions of the larger vehicle. It is enough to measure its parameters by adding 0.5 meters on each side. A large carport with 2 cars assumes that its width will be equal to the sum of the dimensions of the car with the doors open.
Roof installation
The member of the FORUMHOUSE portal sawed down the rafters on the ground, according to the drawings - he threw the battens onto a temporary flooring made of boards, and then secured them. He laid the sheathing board at intervals of one board and an overhang of 40 cm from the front. It was important to fit the structure to the covering in order to make do with a minimum of scraps. It was not easy without the help of workers.
Nicht79
“It was hard to lift the 50-200*6000 ridge beam alone, but it was ok, I used improvised means - ratchet belts and a kind word. I attached it to the harness with a corner where it was missing - with a stretcher. perf. using tape and adding a structural self-tapping screw from bottom to top, about 6-120mm. The bonding pads are made of 10-gauge plywood, fastened with rough 50-gauge galvanized nails.”
For the roof, the forum member chose ondulin - for a low price and the ability to bring everything to the site at once in the trunk of a car (ordering material online in the midst of a pandemic became a real quest for him). It was also possible to save on an expensive ridge element, which comes as an additional element - the user replaced it with parts of the sheet itself. To do this, Nicht79 cut it lengthwise and pressed it with nails.
As Nicht79 said, the construction stage itself turned out to be the simplest. Spurred by the approaching thunderstorm and the desire to quickly complete the canopy, he did all the work quickly, but strictly according to the instructions - without being distracted by the photo. The master did not spare nails - the winds in this area can be very strong (last spring, a fixed outdoor toilet was toppled by a whirlwind).
After some time, it was decided to cover one wall and the space on the street side with OSB sheets, adding a piece of plywood remaining from the overlays to prevent snow and slanting rain from getting in. The material, OSB, was liked by a member of our portal for its durability and affordable price.
Nicht79
“So there were actually three closed sides. Oh yes, the triangle of the pediment was covered with inch-sized scraps of an overlapping ladder - like an “American” one.
All that remains is to sort out the decorative trim, and the carport for two cars is ready. The task is not so easy - Nicht79 was looking for a budget option for covering OSB and fleece boards. And I found it!