Cars need protection from adverse weather conditions and intruders. Paid parking is not a solution to the problem, since equipment deteriorates from exposure to temperature changes, precipitation and solar radiation. A metal garage is an object that meets all the wishes of car owners. The premises ensure the safety of the vehicle, maintain a comfortable microclimate, and allow for repair and maintenance work. If the building is of sufficient size, furniture, machines and equipment can be installed in it.
Features of metal garages
Iron garages are solutions that have the right to exist where, for a number of reasons, it is impossible to build a structure made of brick or concrete. To implement it, you will not need to seriously dig a pit or carry out expensive installation of garage structures: in this case, common materials are used, assembly is carried out using welding or hardware.
The construction of a frame garage is easy to insulate, and its structures are easy to maintain. It is cheap and will pay for itself in the first years of operation.
How to properly sheathe the outside of a garage
The next stage of construction is covering the garage.
The materials for covering the frame are:
- Sheet metal 2.5 -3 millimeters thick.
- Profiled sheet with a thickness of at least 1.2 millimeters. It is attached to the garage frame with self-tapping screws or welded around the perimeter.
Before assembly, you must select the type of welding.
The most common ones for performing this type of work are:
- Manual electric arc welding.
- Semi-automatic welding in carbon dioxide.
In this case, semi-automatic welding will be used.
For a garage, this type of welding has a number of advantages over welding with conventional electrodes:
- High quality seams that can be made in any position without additional lining.
- Possibility of welding metals of small thickness, reducing the likelihood of metal burning.
- Low toxicity when welding elements and the absence of harmful fumes.
- Low cost of welding seams.
- Semi-automatic welding in a garage allows you to produce high-quality welds, and handling such equipment is much easier even for a novice welder. You can make minor repairs to your car or other equipment yourself.
Semiautomatic for welding work
Advantages and disadvantages
The peculiarities of installing garage metal structures lie in compliance with the conditions for ensuring rigidity: a frame and cladding are needed. The frame is made from a rolled profile of sufficient cross-section - this is the basis of the structure. But the walls and ceiling in the garage can be created from a sheet of relatively thin construction.
The main advantages are as follows:
- low weight of structures;
- ease of assembly and installation;
- low cost of materials and work;
- no need to install a capital foundation.
It seems that the metal structure satisfies the main requirements of the customer - speed of construction, strength, low costs for installation of structures and components. But there are also disadvantages. Steel structures are not very resistant to corrosive wear and require care and maintenance. Such a garage “rattles”, it is noticeably cold in winter, it will have to be insulated and noise-proofed additionally.
It is also impossible to install full electrical wiring in the structure. And the metal structures of the garage are difficult to burn, but still susceptible to fire.
Roof
If you make a pitched roof, it is better to use corrugated sheeting.
The required slope is provided either by different lengths of the posts, or by installing additional trusses in the form of a right triangle (if the slope is located across the long side). The disadvantage of corrugated sheeting is its low thickness (0.45–0.55 mm) and poor resistance to force breaking. This is one of the reasons why garages with walls made of corrugated sheets are recommended to be reinforced from the inside using reinforcing mesh.
Typically, a welded garage has a gable roof made of sheet metal. To prevent a sheet that is not profiled with stiffeners from bending, several trusses are used in the form of isosceles triangles. The trusses are welded on the ground at the rate of two at the short ends plus one at each intermediate post. Then they are installed, welded to the frame and tied along the ridge with a corner or two strips.
Choosing a metal garage design
Garages made of metal structures, despite unification and standardization, have clear differences. By type they are divided into:
- Manufactured in a factory. The parts and individual blocks of the garage will only need to be assembled together using the tools and the attached installation diagram. Essentially, this is a Lego garage set, only specific and for adults. Its advantage is quick installation, but its main disadvantage is its high cost.
- Makeshift garages. The structure is designed individually and adapted to specific needs. The advantage of the garage lies in the optimization of the design, since it is assembled for an individual customer. This is also a drawback, because each solution is reproduced for installation in a single copy.
With standard garage structures, everything is simple and clear: they are strictly tied to a specific scheme, subject to unification requirements, but are easy to assemble. On the other hand, they do not take into account all the circumstances, the subtleties of construction, and the terrain.
And individual garage projects can be of any shape, number of floors - it depends on the funds and ideas of the customer. But during their construction, it is necessary to ensure rigidity of installation and reliability, quality of welding (assembly) of the structure. A special case would be a typical used factory garage: it is, first of all, attracted by the price.
Lock selection
The lock must be of high quality
The lock should be chosen strong, massive, made of metal with a width of at least 3–4 mm. A padlock is strictly not recommended, as burglars can open gates with such a lock in a few minutes.
Note! The best options for locks for a metal garage are mortise and overhead. The rim lock should be secured so that the lock attachment points are not visible from the outside of the gate.
Hacking protection
To prevent burglars from drilling out the bolts that secure the lock to the gate, the lock must be welded onto metal corners. This will increase the burglary resistance of a metal garage. Of course, it would be advisable to install a video surveillance camera on the gate next to the lock, so that the footage of the burglars can then be transferred to the relevant authorities, or simply install an alarm on the garage, but all this is too expensive. And a garage owner with almost any financial means can fork out for a good-quality lock.
Check out a selection of photos of metal garages.
Drawings and diagrams
To build a garage from sheet iron, you will need calculations, sketches or drawings, and an installation plan. You can’t do without them, otherwise there is always a chance of making a mistake and missing some little things. It is imperative to know the dimensions (length, width, height) and area of the future structure.
If you don’t want to tinker with graphics, ready-made drawings of garage structures can be found below. The dimensions of the car for which you want to build a garage are chosen as the starting point. At the same time, standard approaches to the design of steel structures are taken into account so that the future structure becomes comfortable to use, a real home for a car.
Video description
What you need to pay attention to when choosing a ready-made used metal garage, watch in the video:
See also: Catalog of garage projects presented at the “Low-Rise Country” exhibition.
By the way, about the material. Firstly, after the construction of a dacha or country house, a thrifty owner always has metal profile waste that he does not throw away. You can use them too. If the garage will always be under supervision, then for its construction it is recommended to use cladding materials with low strength characteristics. And this will affect the reduction in construction costs. For example, instead of sheet iron with a thickness of 2-3 mm, use corrugated sheeting with a thickness of 0.7-1 mm.
In addition, the owner, together with invited craftsmen, can determine the dimensions of the structure, the type of its roof, the type of thermal insulation material and internal cladding. And all this should be adjusted to the budget allocated for the construction of a metal garage.
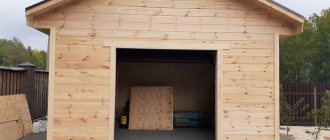
Inexpensive garage made of profiled sheets Source garazhtyt.ru
Required Tools
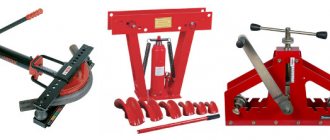
Since you will be working with metal, you will need a power tool for installation - an angle grinder, drill or screwdriver. In addition, you may need keys (a set of heads), attachments for hardware of various configurations (bits), a level, a tape measure, and a plumb line. The specific equipment depends on the situation: electric welding can be used to assemble the frame, and then a welding machine will be needed.
It is convenient if you first plan the work and select tools and materials for this. Then it is possible to correct the situation, correct minor errors and installation shortcomings.
Purchasing the necessary materials and preparing tools
Before building a garage with your own hands, purchase a profile pipe and the necessary consumables. For construction you will need pipes with the following cross-section:
- 100x100 mm, wall thickness 4 mm – for racks;
- 60x60 mm - for transverse and diagonal braces, increasing the strength and rigidity of the structure, for the frame of the sashes;
- 20x20 or 25x25 mm - for diagonal connections of gate leaves.
You also need canopies for the sashes - at least 4 pieces.
Tools you will need: an angle grinder (“grinder”) with metal discs, an electric drill with metal drills, wrenches, measuring tools and markers for marks. If permanent welded joints are planned, then it is necessary to prepare a welding machine and electrodes.
Construction of a foundation for a garage
A solid foundation of the structure is the key to success. It is a mistake to believe that a lightweight garage does not need a foundation. This is wrong. For metal structures, a monolithic reinforced concrete slab (sometimes a strip foundation) is used.
Before the start of zero cycle work, the depth of soil freezing and the location of aquifers are determined. It is advisable that the future construction site is not swampy or has poor drainage. When the pit is dug, a sand cushion and crushed stone preparation are made, and a foundation is laid on top of them. Don’t forget about waterproofing - it will protect the base from destruction.
Manufacturing of slab foundations
The pit has been dug, crushed stone has been poured and compacted, and you can begin laying the slab. First, the formwork is installed: strong, defect-free pine boards are used, tightly fitted into a “box” without gaps or cracks. Next, the reinforced frame is laid. These are rods of a predetermined diameter, placed crosswise in increments of 100-150 millimeters and tied with wire (ready-made welded mesh).
It is very important that there is a gap between the frame and the bottom of the slab, forming a protective layer of concrete. The mixture for the garage foundation is prepared independently or ordered at the factory; the factor of minimizing costs is important here. But in the first case, you will need to purchase crushed stone, cement, sand, and then prepare the concrete according to all the laws, dosing water.
And in the latter situation, the concrete truck will deliver the mixture with the required characteristics and guaranteed quality.
Manufacturing of strip foundations
A “cheaper” option for creating a garage base. Widely used in mass construction, in prefabricated form, it can also be used in private construction. If you choose such a scheme, you will need to use expensive equipment for installation, which will ultimately affect the overall cost of building a garage.
It is possible to make (pour) the foundation on site. To do this, they dig a trench 500-600 millimeters wide and the same depth along the perimeter of the garage, exactly along the contour of its walls and partitions. Then the reinforcement is laid and concrete is poured. Unlike the slab type, the consumption of metal and concrete mixture will be less. It is necessary to provide seats (anchors) for mounting the metal frame.
Installation of a metal frame
When assembling a steel frame with your own hands, you will need to be careful, follow the sequence of operations, check the angles, verticality of the posts and reliable fixation. When using welding, the frame elements are first aligned to their seats, distances and angles are measured, and then they are finally secured.
Installation on hardware is carried out in the same way, only in this case it is necessary to use contact pads on the foundation and anchors pre-embedded in it. It is permissible to use a combination of both methods in installation, temporarily fixing the frame elements on hardware and then scalding them. To ensure rigidity, vertical fragments must be tied with horizontal ones (beams), and inclined connections are used.
Installation of load-bearing beams
The design of the beams can be welded or rolled, it depends on the type of garage project chosen. When erecting the frame, be careful, following the assembly diagram, installing all parts of the fasteners, and carefully tightening the bolted connections.
This stage cannot be skipped, since the combination of vertical and horizontal sections makes it possible to achieve the required rigidity of the frame and create a monolithic spatial structure.
Installation of jumpers
Installation of additional horizontal connections (lintels) ensures the formation of rigid frame structures. Since a lightweight profile is used for the manufacture (assembly) of the frame, the required stability is achieved by using a large number of connections. This way, at the same time, it is possible not to exceed the cost of the finished project without compromising reliability.
Roof installation
When all work on the installation of the frame is completed, the angles, verticality, horizontality are checked, and the installation of the covering begins. To prevent precipitation from causing damage to metal structures or leading to corrosion, it is necessary to ensure their unimpeded removal from the roof surface and to construct a pitched roof. The tilt angle is up to 30 degrees, there is no need for more, and it is more difficult to build such a structure.
Installation method - welding or bolted connections, it is permissible to use both. At the end of the work, the frame is sheathed with corrugated sheets or flat products. Due to the fact that a metal garage is “cold” by default, a vapor barrier is not installed - there is no need for this.
Video description
The sequence of assembling the metal frame in the video:
Assembly diagram of a garage structure Source stroyfrost.ru
Then racks cut into 2 m lengths are installed in the corners. They are first positioned vertically. They are attached by electric welding to the lower trim. Now an important point: the length of 6 m is significant. If you place a corner of the top trim on two posts, it will sag. Therefore, intermediate posts are also installed along the length of the garage in increments of 1 m. Only for this purpose can you use a smaller corner: 35x35 or 40x40 mm. The same is done with the side of the building 4 m long.
The elements of the upper trim are laid on the installed supports. Welding is in progress. Please note that intermediate support posts are not mounted on the gate installation side. A 50x50 mm corner with a length of 4 m is quite rigid, so it will not sag under its own weight.
Roof formation
The simplest option is a pitched roof. To do this, five sections of a corner are welded vertically on the constructed box above the gate with an installation step of 1 m. The minimum length of the sections is 50 cm. They are connected on top with a horizontal piece of the corner.
Then measure the distance from the laid corner to the rear element of the upper skin. It must be more than 6 m. Another 60 cm is added to the size. This is for overhangs in front and behind the garage of 30 cm. The minimum size.
Metal structure for a garage with a pitched roof Source housechief.ru
Garage trim
Installation of the sheathing is carried out at the final stage. For this, rolled sheets and corrugated sheets (preferably galvanized) are used. The specific type is selected at the design stage, so that later you do not have to hastily change the installation diagram and fasteners. The most common method is with self-tapping screws. But for this you will need to calculate their number in advance and prepare the installation tool.
For corrugated sheets, fastening is done at the decline of the wave; a hole is drilled with a diameter slightly smaller than the size of the self-tapping screw. It is imperative to place a special washer under the head to prevent the penetration of moisture and the destruction of the metal due to corrosion.
Gate installation
For comfortable entry into the garage, you will need to build a gate. It is up to the customer to decide what they will be - swing, curtain or sliding. To install garage doors, you will need racks that can support the weight of the doors. At the same time, it is important that the total weight of the gate and its reliability do not exceed similar indicators of the main structures.
Be sure to take measurements of the frame diagonally (the discrepancy should be minimal) and check the correctness of the angles. The success of the enterprise (installation) depends on the accuracy of the calculation. For swing gates, the main requirement is to completely cover the opening and adhere to the counter surfaces of garage structures. When closing a hung (mounted) gate, no significant force should be applied, and distortions are also not allowed.
Floor coverings for a metal garage
When all the work on the outside is completed, the garage is sheathed in metal and is a completely finished structure, you can begin installing the flooring. The main requirements for it are as follows:
- abrasion resistance;
- strength;
- reliability;
- low cost.
It is extremely important that the costs of finishing the garage do not take up serious amounts from the budget, exceeding the costs of creating the structure itself. The most commonly used options include a poured (cement) floor, paved with bricks, and made of wooden boards.
Cement surface
The simplest way to create a stable and strong garage floor. For this you will need: cement grade M200-400, quarry (not river) sand, access to a water supply system and material for lighthouses. The last condition is necessary if the filling area is large and there is no possibility to fill the surface at one time. Beacons help you navigate by elevation marks and avoid noticeable transitions between fragments of the garage flooring.
To pour, you will need a concrete mixer: it will allow you to evenly combine the components of the solution and prepare a high-quality mixture. After installation, it doesn’t hurt to vibrate the poured area using a vibrating screed.
Before pouring begins, marks (floor level) are placed on the walls; they must coincide with those of the same name outside the garage so that there is no threshold. The disadvantage of this garage floor is that it is prone to chipping and requires repairs.
Concrete flooring
The most powerful, but at the same time labor-intensive design. You should prepare yourself for the fact that the minimum thickness of the concrete floor is 150-200 millimeters; this parameter is taken into account when building a garage.
You will definitely need reinforcement - without it, the installation of a coating makes no sense. Other necessary materials include M400 grade cement, fine crushed stone and sand. The components are mixed in a concrete mixer, this will ensure their uniform distribution.
Compaction and vibration during laying are an indispensable condition, otherwise the sand and liquid mortar will settle down, and the crushed stone will remain on top. In addition, in this case, there is a high probability of the formation of hidden voids and cavities. Load the floor 28 days after pouring, not earlier.
Brick floor
The brick floor in the garage is quite strong and reliable if it is made according to all the rules. But for this you need to have intact, unbroken stones, and carefully follow the laying technology. It is permissible to use clinker - this is an artificial brick, cast in the same way as paving slabs. The seams between individual elements must be rubbed with cement-sand mortar.
You can load the garage floor after the mixture has completely set. A serious drawback is considered to be poor susceptibility to unevenly distributed influences: the brick can crumble, over time, individual stones will inevitably become loose and will have to be re-strengthened.
Wooden covering
An old, proven way to simultaneously insulate the floor and lay a covering over the rough surface. The boards should be smooth, without fallen knots, preferably tongue-and-groove and well-dried. It is best to lay the floor on logs - special bars, but then the level will “rise” to a considerable height (this must be taken into account when designing a garage).
Before laying, it would be a good idea to soak the wood with a special solution to prevent rotting, and also to place an underlying layer of film under the floor (for waterproofing). The boards are fastened with ordinary nails and screws, which are driven into the wood at a slight angle and recessed.
Then the floor in the garage is painted in any possible way; you can even cover the edges of the boards around the perimeter with a plinth - it will be aesthetically pleasing and functional.
We build a garage with our own hands
Before purchasing materials and starting work, it is necessary to find and clear the site for the future structure and draw up a detailed drawing.
Selection and preparation of a site
When choosing a site for building a garage, you need to be guided by expediency and convenience. If some place is more suitable for building a bathhouse or gazebo, you can choose another area for the garage. The main requirement is that there are no obstacles to the vehicle leaving.
Ideally, the garage door line should be level with the fence line. This guarantees unhindered access of the car to the street and allows you to avoid installing a fence in this area.
To save money, a garage made of metal profiles can be attached to an existing building. In this case, you don’t have to build one of the walls, but due to the increased noise conductivity of the material, the extension does not need to be installed next to a residential building.
To build a garage, you cannot choose a place with fertile soil. Rotting of organic substances will begin under the building, as a result of which the structure may become distorted.
The selected area is cleared of debris and thickets and marked with pegs, reinforcement and rope, which will indicate the placement of all sides of the future garage.
Drawing up a drawing
Creating a drawing indicating all dimensions and materials is not a prerequisite for constructing a garage, but it is very useful for people who do not have experience in construction.
The drawing can indicate all the dimensions and characteristics of the future building, including the roof slope and floor height. The standard parameters of a garage for one car are as follows:
- The length of the building is 6 meters.
- Width - 3 meters.
- The height of the walls is 2 meters. Another half meter or a little more falls on the roof.
The drawing indicates all the parts, their placement and dimensions.
When creating a drawing and construction, you need to remember that part of the internal space will be taken up by insulating materials.
For small mobile garages, it will be enough to draw up a drawing of the “box” itself. It consists of two schemes:
- Building frame drawing.
- Sewing drawing.
If a stationary structure is being erected and installed in a permanent location, drawings of the foundation and inspection pit can also be added.
The project may include several drawings from different points
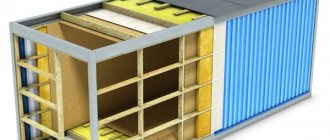
Insulation of the garage
The main and serious disadvantage of metal structures is that they are “cold” and are not suitable for long-term stay of people, especially in winter. To remedy the situation, the garage can be insulated.
To do this, use polystyrene foam, basalt wool or rolled material - whatever the customer deems necessary to use. In terms of thermal insulation properties, cotton wool is the leader, but polystyrene foam wins due to its low cost and availability. When insulating garage structures, it is important to provide a vapor barrier - a film laid between the thermal insulation layer and the metal.
Fastening is carried out using special anchors, self-tapping screws of suitable length with large heads. After installation, the finished insulation layer can be covered with plastic lining - this is economically justified for the overall “budget” nature of the garage structure.
Site preparation
The following types of foundations can be used as the basis for installing a welded garage:
- full profile belt (including with a basement);
- shallow tape;
- slab made of monolithic reinforced concrete;
- prefabricated slab.
In the first two cases, it will also be necessary to install a concrete floor on the ground. A slab foundation, in principle, will only require strengthening the surface of the top layer (ordinary concrete has low abrasion resistance and will “dust”).
If a welded garage is installed in a protected area, for example, on the site of a private house, then simply a flat paved area on a small hill can be used as the base. The main condition is that the tiles and the method of laying them can withstand the loads.
Ventilation device
Ventilation in the garage is important and necessary. The point is not only in air exchange, but also in ensuring the movement of warm and cold masses, timely removal of condensation from the surface of metal structures, so that in the future it does not lead to the formation of corrosion centers.
The simplest solution to the problem would be to install two pipes in the garage building: through the lower one there will be an influx of air, and through the upper one, brought to the roof and closed with a fungus, the outflow of air. If desired, you can install forced ventilation in the garage, but it will cost more, taking into account the cost of electricity to power the fan motor.
The solution must be as effective and cost-effective as possible so that the costs of its implementation and installation do not affect the budget of the construction customer.
Features of the roof structure of a frame house made of profile pipes
For such buildings, a single or gable roof is made. The roofing material rests on a truss, also made of profile pipes.
Corrugated sheets can be used as roofing material. For the roofs of small buildings, trusses are assembled on the ground and then, finished, lifted onto the top frame frame. Trusses from massive pipes are assembled and welded into a single structure directly on the roof. Typically, 3-4 trusses are used for a garage.
Attention! When drawing up a roof diagram, it should be taken into account that the joining of corrugated sheets should be carried out on the edges of the trusses.