Do-it-yourself brick barbecue project
In this article we will look at how to make a brick barbecue for your dacha with your own hands (there will be models for both the street and the gazebo). Models with a place for grilling kebabs and with stoves for installing a cauldron. Let's consider portable and stationary, simple (small) and real (large) barbecue complexes with barbecue, grill, sinks and places for cutting meat. Below you will find more than 18 projects with step-by-step photos, recommendations, instructions and construction tips.
Article menu:
This article contains 22 projects with step-by-step manufacturing photos:
- with a metal frame (.) Brazier made of brick + stove for a cauldron with your own hands (.) Brazier made of brick and metal - portable
— Simple
- Brick BBQ Grill
- Brick grill with table
- Do-it-yourself small stationary brick grill
- Brick grill in the gazebo. Master Class
- Construction of a garden barbecue made of bricks
- Do-it-yourself barbecue with an arched roof in a gazebo
- Outdoor brick grill in the letter W with a roof
— Barbecue complexes = Barbecue complex of 300 bricks (barbecue) = Corner grill made of brick into a gazebo + oven + stove for a cauldron = Project of a wooden gazebo with a brick grill. + Photo = 3 in 1 : brick grill, barbecue, smokehouse
— To the gazebo ☀ Wooden gazebo with barbecue ☀ Wooden gazebo with a simple brick barbecue inside. ☀ Brick gazebo with barbecue ☀ Gazebo with barbecue under the same roof as the house (Annex) with your own hands
— Braziers made of blocks ✨ 3 MODELS of grills and grills made of blocks ✨ Grill smokehouse made of blocks ✨ BBQ grill made of blocks photo gallery ✨ DRAWINGS of grills and barbecues made of blocks
Possibilities of a barbecue with a cauldron
A brazier for a cauldron can be assembled from metal if you have welding skills.
To assemble a brazier for a cauldron with your own hands, you need a little time and skills in using household tools. A little effort will pay off in the long run with significantly expanded culinary capabilities.
The modernized hearth can be used to prepare the following dishes:
- shashlik;
- baked vegetables and fruits;
- jacket potatoes;
- classic pilaf;
- kharcho;
- borsch;
- oriental delicacies;
- pies and pancakes.
It will also be possible to heat water, make tea, brew compotes and many other drinks that require prolonged heat exposure to achieve the desired effect.
Peculiarities
A brick barbecue is a stationary outdoor fireplace. And when designing, it is necessary to take into account the features of its installation and placement.
Types of barbecue and placement features
There are two types of outdoor brick barbecues: a single oven and a complex of oven devices.
In the first case, it can be a closed or open hearth with provisions for installing a spit, skewers or grate over smoldering coals.
If it is an open hearth, without a domed vault and a chimney, then it can only be located in the open air, subject to appropriate fire safety measures.
But if you take a strict approach, it is not easy to comply with these measures in the limited space of the local area.
A closed stove with a chimney can be placed either outdoors or in a gazebo (or under a canopy).
And quite often, owners are not content with just one barbecue function - baking food in the heat of burnt wood or charcoal. Here, nearby, they can put a stove with a hob, a tandoor, sections for storing firewood, a work table for cutting meat and preparing food. And this is a whole complex for cooking on the street.
But in any case, when choosing a location, they are guided by the standards for the placement of auxiliary (service) structures on the site - minimum distances from the house, the border with the neighboring site, and separate trees.
When a barbecue area is equipped with all the “conveniences” (water, drainage, electricity), then the proximity of utility networks and the possibility of connecting to them must be taken into account. If the connection to the water supply is not provided for according to the plan, then the stove should be located closer to the summer kitchen or not far from the house from the side of the regular kitchen.
Installation Features
Any brick structure, regardless of its size, requires a good foundation. And a stove is best suited for these purposes.
Moreover, when arranging a shallow strip foundation, it is necessary to take into account the characteristics of the soil. And they are such that the tape may not withstand the forces of frost heaving, and cracks will appear in the brickwork. The slab is a universal type of base, and it works well even on weak and floodable soils.
Usually the main counterargument against a slab is the high consumption of concrete. But for such a relatively small structure as a barbecue oven, not so much of it will be needed.
Materials for production
A brazier under a cauldron made of fireclay bricks.
You can make a brazier under a cauldron with your own hands from the following materials:
- Cast iron. They are distinguished by their massiveness, high heat capacity, and resistance to corrosion. Features include fragility, difficulty of processing and the possibility of cracks upon contact with liquids in a heated state.
- Steel. The production uses ordinary metal for supports and heat-resistant metal for the hearth. Stainless steel is considered the best option, although it requires significant costs. Metal products are universal, they can be stationary, transportable and wearable, integral and collapsible.
- Brick. Construction requires a foundation, clay and fireclay bricks. The structures are stationary, installed once and for all, and can last for several decades. The advantage of such devices is their stability, presentability and versatility.
The choice is determined by your own priorities, abilities and the landscape of the site.
Brick selection
Expensive, but the most suitable for masonry is clinker, another name is refractory brick. The main raw material is special clay, which is fired at high temperature.
Comes in different colors:
- red;
- sandy;
- dark brown;
- red with tan marks.
Clinker bricks differ from inexpensive ceramic bricks in their high strength and long service life. It is resistant to moisture and frost.
The good thing about clinker is that the finished structure turns out beautiful and does not require additional cladding.
It is allowed to use cheaper ceramic, red fireclay bricks. Feature article: “Brick for masonry stoves.”
It is important to take into account that silicate (white) brick is not suitable for creating a barbecue at home, because it begins to quickly deteriorate under the influence of moisture, temperature changes, and cannot withstand high temperatures.
Types of construction
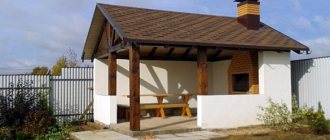
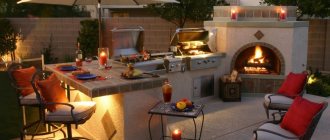
A barbecue with a cauldron in a covered gazebo
To make a barbecue with a cauldron convenient and functional, you should initially think through its design.
According to the structure of the structure, they can be of the following type:
- Covered. The modified hearth is installed on grass or a small area. A canopy is erected over it, protecting the oven and the cook from precipitation and sunlight. This solution is practical, easy to implement, and requires minimal effort and money.
- Universal. They represent a whole complex with an open hearth, a stove for a cauldron, a chimney, shelves, tables, a sink, and drawers for various accessories. The building is beautiful, pompous, but expensive. Water, sewerage and electricity supplies are provided.
As a rule, light buildings are made in dachas, where the owners visit periodically, and capital ones in the courtyards of private houses, where people live permanently.
Required Tools
To work you will need:
- shovel;
- Master OK;
- a trough for mixing mortar or a concrete mixer;
- buckets;
- building level, tape measure, plumb line;
- Bulgarian;
- reinforcing mesh;
- cement, crushed stone, sand, clay;
- fireclay brick;
- boards, plywood (for formwork assembly);
- metal corners, doors, grates, grates;
- hammer;
- mallet;
- rope and pegs (for marking under the foundation).
In order to save money, it is allowed to purchase fireclay bricks only for laying the firebox. For other areas of the oven that will not be exposed to high temperatures, you can take regular brick (not necessarily new).
We will analyze step by step the process of independently erecting a small outdoor barbecue, and clarify the nuances of each action.
Schemes and drawings
The work process reflected in the drawings
Developed during the planning stage. The drawing is a visual representation on paper of the future structure, where the shape, dimensions, and cross-sectional view are clearly visible. Created on a scale with a reduction several times from the actual dimensions.
For example, when specifying a scale of 1:10, it means that the design drawing is reduced by 10 times. For every 1 mm of drawing there is 1 cm in reality.
Corner barbecue diagram
It is customary to use a thick solid line to show the outline of the product. Thinner lines indicate the sizes of the elements.
Block barbecue diagram
Conventional shading in the drawing indicates the raw materials used for construction. For example, under an ordinary red brick, hatching is drawn at an angle; fireclay (fireproof) is marked with a check.
The drawing description includes the following details:
- general view of the product;
- outside view - facade;
- structure in a vertical section, where the internal structure is visible;
- horizontal section showing the principle of masonry.
Recommended oven sizes
The width of the barbecue when folded should correspond to the width of the skewers - 47-62 cm. The height of the frying platform is made slightly higher than the waist, so it will be more convenient to cook. The length of the firebox should be such as to simultaneously accommodate from 8 to 10 skewers.
Preparatory work
They consist of clearing the construction site of debris, vegetation, and marking. For the last step, rope and wooden pegs are used.
Foundation installation
A brick barbecue is a heavy structure, so it is recommended to pour a monolithic concrete slab under it.
Briefly, the procedure for constructing the foundation looks like this:
- A hole is dug with a depth of 30 cm. The dimensions should be 20 cm larger on each side than the future product.
- The bottom is carefully compacted.
- A 15 cm thick cushion is poured from layers of sand and gravel. It's being compacted. Moisturized with water.
- The formwork is assembled from boards. The knocked down frame is placed around the perimeter of the dug hole.
- The bottom of the pit is reinforced with metal mesh.
- Cement mortar is being poured. The M500 brand is best suited for cooking.
- The poured mixture is pierced with a piece of reinforcement to remove air bubbles.
- The slab should extend above the ground level.
- Curing time is up to 4 weeks.
- In dry weather, to avoid cracks, the surface is moistened with water.
The frozen slab is covered with waterproofing (dense polyethylene, roofing felt) on top.
While the foundation hardens, you need to soak the clay for the solution. The finished solution should not crack when compressed.
You can get acquainted with other types of foundations for the furnace by clicking on the link.
It is important to think through the supply of communications even before the foundation is poured.
The day before laying, the brick should also be prepared. It is thoroughly watered so that it does not absorb moisture from the solution. The adhesion to the surface will be better.
Order of brickwork
The order should be carried out in the following sequence:
- It’s better to start by laying out the first row dry. This will allow you to adjust each brick to size if you need to trim it. The gap between the elements is 1 cm. The evenness of the diagonals is checked.
- Laying facing bricks can be done using a solution of cement and sand (in a ratio of 1:3). To improve the plasticity of the mixture, you can add a little lime. The recommended seam size is from 8 to 10 mm.
- In areas where bricks pass without dressing, it is necessary to carry out reinforcement with metal wire.
- Each subsequent row is shifted by half a brick. To adjust the elements to size, use a grinder.
- Every 3 rows, compliance with the masonry level is checked, and preferably more often.
- After 8 rows you need to create jumpers for the grill and countertop. To do this, take metal corners measuring 45*45 mm and set them up like an inverted letter T. Half of the shelf is sawed off. The metal should not come into close contact with the brickwork.
- Afterwards you can start laying the firebox. Fireclay bricks are connected to each other with clay-sand mortar. The thickness of the seams is no more than 4 mm.
- Metal corners are also used to form support for the bottom.
- The second row of bricks for the firebox completely covers the first. This way the seams will not burn through. Some craftsmen replace the first two rows of masonry with a concrete slab, but the creation will cost many times more, although it will be no less reliable.
- Parallel laying of the firebox and facing bricks is allowed. But between the lining and the firebox there is always a gap of 1 cm so that they do not touch.
To improve the decorative appearance, stove makers resort to constructing a combustion arch. To do this, a wooden blank is first made in the form of a semicircle and placed in the barbecue portal. Next is the masonry. Bricks are cut to the required sizes using a grinder.
The arch made of facing bricks must be covered from the inside with a fire-resistant lintel. Placed on a metal corner.
How to calculate
For a stationary barbecue with a hole for a cauldron, it is necessary to correctly calculate the amount of brick.
The correct choice of the size of the future stove directly determines how convenient it will be to use, the volume of production of the product, fuel consumption, and the level of safety.
The following parameters should be correctly calculated:
- Length. The optimal interval is 10 cm between the skewers, plus 5 cm on each side to the walls. If there is a bowl, add its diameter at the installation site, subject to a combined device. For 6 people you need 70 cm for skewers and 30 cm for the container. Total 100 cm.
- Width. The standard length of a skewer is 30 cm. This means that for optimal distribution of heat and no contact with the walls, it should be 25 cm. This is enough for a bowl of this diameter, since it is partially immersed in the fryer.
- Depth. It has been experimentally established that there should be a distance of 15-16 cm from the coals to the food. Taking into account the thickness of the coal layer of 5-8 cm and the planted food of 4-7 cm, the depth is 23-26 cm.
- Height. Selected according to the height of the cook. It is selected empirically by measuring the distance from the ground to the elbow. You can use the furniture standard of 80 cm.
When choosing the dimensions of the structure, you should not be tied to the size of the vat. It is much easier to find suitable cookware than to adjust the oven for it.
Preparation of the solution
The main components of the masonry mixture are clay and sand. The recommended proportion is two parts sand to one part clay. The day before mixing the solution, the clay is soaked in water.
An important feature of clay is that the fatter it is, the greater the sand consumption.
If the consistency is correct, the solution will slide off the trowel, leaving a small mark on it. If it falls off without any traces, then a lot of sand has been added; on the contrary, it smears a lot - there is an excess of clay in the mixture.
For laying the main parts, cement is not added to the mixture due to low heat resistance. But it is permissible to cover the grill with facing material using cement mortar.
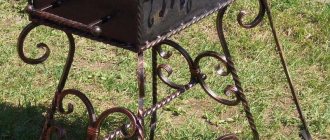
Metal cauldron version
Forged barbecue with a canopy
To more accurately determine the functionality of the fireplace, you need to choose the location of its installation. If there are no restrictions, the structure is placed next to the recreation area - near the gazebo, bathhouse, next to the pond. It would not be amiss to have nearby communications - water supply and sewerage.
The next stage is project development. The drawing must show the following details:
- Base. Will it be a monolithic reinforced concrete foundation with mortgages or a platform paved with tiles.
- Supports. Legs and shelves are indicated. As a rule, there are two shelves - one on top for dishes, the other on the bottom for firewood and coal.
- Brazier. Four walls and a base for the cauldron are drawn. The location of the bowl can be in the center or on the edge. The firebox can be common or separate.
- Canopy or roof. This structure is needed for protection from snow, rain, and sunlight. The roof can be shared with the hearth, removable, or be a separate structure covering the stove or the entire recreation area.
To weld a grill with a place for a cauldron, you will need the following tools:
- welding;
- Bulgarian;
- drill;
- spanners;
- screwdrivers;
- roulette;
- square;
- level;
- hammer.
List of materials:
- corner 30x30 mm;
- profile pipe 20x40 mm;
- fireproof sheet steel 4-6 mm;
- cutting by meter;
- bolts and nuts;
- rivets;
- electrodes, metal discs;
- gas cylinder or one wheel rim.
After welding, the metal barbecue must be coated with blacksmith paint.
Standard instructions for assembling the barbecue:
- Preparing the workplace, checking the availability of materials and the functionality of tools.
- Performing markings. Cut metal into blanks. Cleaning cuts from burrs, rounding sharp edges, grinding weld spots.
- Connecting the walls to each other by spot welding. After correcting the shape, attach to the bottom.
- Placement of final sutures. Drilling holes in the bottom and bottom of the walls.
- Applying and securing the stand for the cauldron. A ring from a gas cylinder or wheel rim is used. Another option is a square of corners, which provides the ability to adjust the size to accommodate dishes of different sizes.
- Creating support elements. A frame is made from pipes and angles, shelves are created, then the roasting pan and legs are joined together in a groove or welded.
- Cutting holes in the walls for placing skewers. Depending on priorities, they are given a triangular, square or semicircular shape. The latter is easier to clean from dirt.
Finally, the stove is cleaned of deposits and splashes, and decorative elements are applied to it if desired.
Brick cutting and chopping
A grinder with a stone cutting disc is perfect for cutting brick. During operation, a lot of dust is generated, so it is recommended to protect your eyes and respiratory organs with goggles and a mask.
The process takes place in the following sequence:
- Marking bricks with a pencil, ruler or tape measure.
- Cutting (splitting) elements to the required sizes.
- Teska (grinding) of the resulting blanks.
To speed up the marking process, experts recommend making templates. This is especially effective in cases where it is necessary to cut parts of the same size in large quantities.
Material for templates - pieces of roofing felt, parchment, thick cardboard.
To make templates of non-standard shapes, you need to use ingenuity. For example, to get a longitudinal half of a brick, it is enough to bend the template of an ordinary half lengthwise. This will reduce the number of templates and speed up the cutting process.
Parts for which templates cannot be made (bevels, oven appliances) are marked during preliminary dry laying.
When cutting, you need to work at high speeds, otherwise even a new disk will quickly wear out.
It is not necessary to make a full cut, just a cut is enough and then carefully split. But this applies to cases of obtaining parts of simple shapes. For complex elements, it is better to cut the workpiece to the end.
Experts recommend using a new disk to first cut off complex parts, then simple ones, since standard parts can be cut off even with a worn disk.
It is worth saying that cut parts have a smooth surface, chipped parts have a rough surface, sometimes even with defects. You can smooth out the roughness:
- processing with a grinding disc;
- grinding the chopped parts against each other;
- with a pick.
It is better to place bricks with chipped edges against a thick seam.
How to install a cauldron on the grill
Installing a cauldron on a brazier
If you do not want to overload the brazier with additional options that increase its dimensions, you can use several effective ways to install a cauldron on a brazier.
The most popular options:
- on bricks laid on the bottom of the hearth;
- on a grill grate that is strong enough;
- on a hanging hook, with independent or combined support;
- on a special stand in the form of a rim with legs.
Each solution is attractive and practical in its own way.
Chimney device
When the chimney continues to be laid out of brick, the order of work is as follows:
- The top of the combustion and facing parts are brought out to one level.
- To lay the smoke collector, a solid brick is taken. The solution is cement-sand. Cement grade – from M150.
- The first row is flush with the inside of the firebox. All subsequent ones are shifted by ⅓ of the brick.
There is no need to shift it over a greater distance, otherwise the bricks will simply fall inside the firebox over time.
- The laying is carried out until a small opening remains (30*30 cm, 25*25 cm).
- The finished brick chimney is covered with a protective cap on top to prevent moisture and precipitation from getting inside.
There is an option for mounting a chimney made of heat-resistant concrete or a double-circuit chimney made of sandwich pipes.
Read step-by-step instructions for installing a chimney made from sandwich pipes.
Masonry
The brick oven is laid using a standard set of masonry tools, which includes:
- level, plumb line, square;
- cords;
- templates for masonry joints of different thicknesses (for the firebox and chimney - 3 mm, for other parts of the stove body - 5-8 mm);
- trowels;
- mallet;
- pickaxe, grinder with a disk for adjusting the dimensions of bricks and steel angles;
- jointing
The first rows are laid out dry first. They check the proportionality of fireclay and ordinary bricks, determine the size of the trim where it is necessary.
Then the laying begins. An ordinary brick is moistened by dipping it in a bucket of water for a couple of minutes. Fireclay bricks are only rinsed. After adjustment, the fireclay brick must be laid so that the side pounded with a mallet or cut with a disk faces outward, and not into the firebox or chimney. The masonry process itself involves bandaging the seams, with periodic monitoring of the vertical walls and horizontal seams.
After finishing the masonry, the stove is dried under natural conditions for 5-7 days. And then they are heated for one to two weeks (depending on the size and weight of the structure).
Small brick barbecue project for beginners: