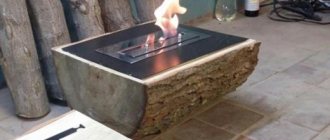
There are often cases when you need to carefully process the edge of a board, create a connecting groove, or cut out a part of a rather complex shape. This operation is done using a milling cutter. You can buy such a tool at an electronics store or make it yourself. The article will give detailed instructions on how to make a router from a drill.
Homemade router
Using homemade machines in the workshop
The work that is performed in the workshop affects the equipment of the room with special devices. Typically, equipment is placed if the free area is at least 3 m2.
Workshops are often set up in small rooms, outbuildings, and garages. The best place is a separate building. In this case, the noise from the work being performed will not disturb other residents of the house.
Universal workshops are often set up to perform various jobs. If a person is engaged in the production of any products, then specific homemade tools and devices are made. Often workshops are equipped with machines for carpentry and processing of metal blanks. Often, premises for the repair of wheeled vehicles are also set up.
Basically the workshop is equipped with:
- devices that allow you to prepare tools, facilitate labor and mechanize operations;
- homemade products for processing metal parts;
- workbenches.
A workbench made of wooden elements Source skilljob.ru
It is also necessary to install shelves in the room where various tools will be stored. At the same time, they ensure unhindered access to them and compliance with fire safety rules.
Materials and tools
List of tools and materials required for assembly:
- Chipboard or a sheet of plywood approximately 12 mm thick is suitable for making a tabletop (the exact dimensions are selected individually).
- Boards of suitable thickness.
- Several wooden blocks.
- Self-tapping screws, screwdriver or screwdriver.
- Ruler and pencil for marking.
Important! If the design should ultimately be as reliable as possible, you can use metal (pipes, corners) instead of wood.
It is advisable to coat the wood with construction glue or PVA. To secure the moving units, studs or bolts with a diameter of 8 mm are used. You need to select nuts for them (regular and wing nuts).
Workbench for a carpenter
This type of equipment is a table. It is distinguished by its high strength and the presence of 2 vices on the tabletop. The table is also equipped with clamps that clamp the workpieces during planing. In addition, the workbench may still have places where other homemade devices, such as a router, will be attached.
A special table must have a comfortable height. She matches the height of the master. The minimum length of the workbench is 1000 mm. Often it is equal to 1700 mm or even 2000 mm. The standard width is 800 mm.
Before making a workbench for carpentry, get acquainted with its main parts Source infourok.ru
A workbench table is created as follows:
- The table surface is created - this is a shield, which is made from oak, beech or hornbeam boards with a minimum thickness of 55 mm. They are tightly fitted to each other. The boards used are impregnated with drying oil before joining. To create a rigid structure, a 50 mm block is used. It is fixed around the perimeter of the working surface.
- The supporting elements of the workbench are made. To do this, use linden or pine timber. Its size is 120*120 mm or 150*150 mm, and its length is approximately 1200 mm. The supports are connected by jumpers in the horizontal plane. To do this, take boards that are fixed at a distance of 300 mm from the floor.
- Make homemade devices to accommodate the tool. These are shelves located under the countertop. When they are open, they are often replaced with bedside tables.
- Attach a vice.
If a stationary workbench is created, its supporting elements are fixed to the floor. Depending on the specifics of the work being performed, mobile and collapsible tables are also manufactured.
Mobile workbench on wheels Source foamin.ru
Carpenter's workbench vice
This homemade tool is made using a screw rod. Its thread length must be at least 160 mm. In this case, the diameter of the rod itself must be 20 mm. For the vice you will also need wooden blocks and metal pins. The manufacturing sequence is as follows:
- Prepare a block of 200*300 mm. Its minimum thickness should be 50 mm. This will be one of the sponges. A hole for a screw is drilled in the center of the workpiece. On the sides of it, two more holes are made for the studs.
- A second movable jaw 200*180 mm is cut out and similar holes are drilled in it.
- A threaded pin is inserted into the workpiece. A handle is installed at one end. To prevent the jaws from moving, pins with a cross section of 10 mm are passed through other holes.
Wooden vice for a carpenter Source infradom.ru
Metal workbench for a mechanic
All useful homemade products and devices simplify the processing of workpieces. Such devices include a workbench for a mechanic. Its minimum dimensions are:
- length – 1800 mm;
- width – 700 mm;
- height – 900 mm.
The table is created in the following sequence:
- frame assembly;
- installation of 2 cabinets, covered with metal;
- securing a working surface consisting of a wooden base in the form of a shield, on which a sheet of metal of a suitable size is placed on top;
- assembly and installation of a rack at the back of the workbench to strengthen the entire structure and accommodate tools.
When assembling a bench, use:
- beams as racks - four corrugated pipes 40*60 mm with a wall thickness of at least 2 mm;
- three beams 50*40 mm to connect the racks and ensure longitudinal rigidity of the structure;
- corrugated pipe 40*30 mm with a wall of at least 1 mm in the amount of 9 pieces to create the frame of the cabinets;
- metal corner 50*50 mm for the manufacture of shelving racks, the height of which will be a maximum of 2000 mm;
- board 50 mm thick for the tabletop panel;
- a sheet of metal no thinner than 6 mm to cover the top surface of the workbench.
Sheet metal Source glavmetall.com
See also: Catalog of construction companies that have their own production of materials and components for the construction of houses
Preparing for work
Before constructing a homemade combined machine with your own hands, you need to prepare the following materials and tools:
Tools
- drilling machine;
- band saw or jigsaw;
- screwdriver;
- clamps;
- ruler, pencil;
- hand cutter;
- cutter-crown 30 mm.
Materials
| Name | View | Quantity |
| Sanded plywood | 15 mm | 1 |
| Wooden block | 8x9x650 mm | 1 |
| Wooden block | 290x27x16 mm | 1 |
| Wood glue | ||
| Sandpaper |
Accessories
| Name | View | Quantity |
| bolt with nut and washer | 6x55 mm | 3 |
| furniture steel coupling with slot | DIN 7965, internal diameter M6 | 2 |
| metal strip | 0.5x10x200 | 1 |
| hook screw | 3x30 mm | 1 |
| aluminum sleeve in the form of a tube | Outer diameter 10mm, length 23mm, 2mm wall thickness | 1 |
| steel clamp | According to the diameter of the router | 1 |
| self-tapping screws | 35 mm | 20 |
| mini router | 1 |
Design elements
Figure 2.
Figure 3.
Figure 4.
- Drill version cover.
Figure 5.
Figure 6.
Figure 7.
Wood lathe for lathe
There are various homemade machines and machines for the workshop. They all make the job easier. These include a lathe. Its structural elements are:
- Durable frame made of metal angle or pipe. Sometimes it is created from wooden blocks. The bed is fixed to the floor, and its lower part is weighted.
- A support, which is a supporting element for the cutters. This part of the machine must provide reliable fixation and allow the workpiece to move to the side. For this purpose, the design provides a screw rod.
- The clamping spindle, also called the headstock. The head of a powerful electric drill is often used as it.
The head of an electric drill is often used as a headstock. Source woodtoolsimg.ru
- Tailstock used for longitudinal movement of the workpiece. It is recommended to use the factory spindle, which has four cams.
- Electric drive providing rotation of 1500 rpm. Its power should be from 250 to 400 W. Often a washing machine motor is used as an electric motor. The design also includes a belt drive. This is a transmission, for the operation of which it is necessary to install pulleys on the shafts.
The electric motor of washing machines is often used as a drive for a lathe. Source dobro-teh.ru
Cutters for the machine
It is recommended to equip homemade devices with factory cutters. After all, they are sharpened with high quality using special equipment. As a last resort, for production use:
- old files without significant defects;
- steel square reinforcement is the optimal material for making cutters;
- square or rectangular spring from the car.
Subsequently, the existing workpieces are sharpened. Creates a semi-circular cutting edge for roughing wood parts. Finish turning work is carried out with a cutter that has a straight blade.
After sharpening, the cutting elements are hardened. During this process, the cutters are first heated and then placed in machine oil.
Wood boring tools for a lathe Source 24aul.ru
Designing a press for a garage with your own hands
The design of a homemade garage press is intended for straightening, pressing, bending sheet materials and for compression. Devices for plumbing work are characterized by a compact and simple design. The forces from such a press can vary between 5-100 tons. For garage work, 10-20 tons is quite enough. To make a similar design, a manual drive is used. The hydraulic device contains two chambers with pistons.
Homemade design
Do-it-yourself press from a jack drawings
You can see how to make a simple device on a special video of a press made from a jack with your own hands:
A simple option is a hydraulic one, which can be constructed from a bottle jack. An important element is the frame, inside of which the jack is placed. The platform is used as a reliable base. The upper surface is used to support the elements being processed. The table should move freely up and down on the frame. In this case, rigid springs are attached to the base on one side, and to the working surface on the other.
Using a jack
Here is a simple assembly diagram:
- the necessary elements are cut out according to the drawings;
- The base is mounted by welding. In this case, the steel structure should resemble the letter P;
- a mobile table is made from a pipe and channel;
- Finally, the springs are fixed.
Stationary circulation saw
The stationary circular saw is placed on a sturdy table. Its working surface is usually made of metal sheet. It is reinforced with stiffening ribs. For their manufacture, a steel angle is used.
On the working surface there are usually:
- stops;
- guides;
- elements for adjustment;
- cutting disc.
On a note! The circular saw is powered by an electric motor. Its power should be approximately 800 W, and its rotation should be 1700 rpm. The electric motor of the angle grinder corresponds to these characteristics.
Angle grinder for a stationary circular saw Source tdrim.ru
Before making a device for sawing wooden parts, prepare a working angle grinder with the necessary characteristics. Further actions are performed in the following order:
- Assembling the frame.
- Prepare a worktop in which a slot is made for the cutting disc.
- Two wooden blocks are fastened in parallel. They will be used as stops.
- Set the scale necessary to control the cutting of wooden parts.
- Clamps are installed so that workpieces and guides can be fixed.
- The grinder is secured by first installing the disk into the previously created slot in the table top. The power tool is fixed from below the working surface.
Manufacturing process
A simple design option
How to make a router from a drill or screwdriver? For household needs, you can assemble a vertical router; it has a fairly simple design and is easy to make at home.
Make a foundation
The sole (or base) should be oval or round with a hole for the cutter to pass through (done in advance). It should be offset relative to the center of the workpiece, taking into account the thickness of the stand, which is located on the side.
The size of the base is selected individually.
Install drill
Next, you will need to place the drill on the created base to mark its position. Using stops and clamps, secure it to the work area.
Attach to workbench
Having placed them exactly at right angles, fix the gusset and stand to the tabletop. Securely secure the tool body to the base. After installation, it is important to make sure that there are no backlashes or distortions on the created unit.
Drilling machine
Interesting homemade products and devices often help craftsmen out when making various products in the workshop. One such device is a drilling machine. Its main parts include:
- electric drill;
- base made of metal parts with the ability to secure the workpiece;
- a stand for fixing an electric drill, which is created using chipboard with a thickness of 20 to 25 mm or an old photographic enlarger;
- a unit that supplies the drilling tool.
The drill press stand must have guide rails. They are necessary for the electric drill to move strictly in a vertical direction. There are different options for feeding an electric tool, but the most common design is a lever with a spring. It is manually controlled by simply pressing. The design of the machine also includes stops. They are needed to adjust the depth of the hole created in the part.
Threading
Processing parts on drilling machines also involves creating various threads. Tapping is usually done using nuts or machine taps. The latter require subsequent removal from the hole, which must be taken into account during cutting.
When working with non-ferrous alloys and ductile steels, chip-free taps are often used. They can be used when working with holes up to 36 millimeters in size.
Countersinking
Countersinking is the processing of recesses necessary to mask the head of fasteners. Countersinking is carried out using a guiding centering tool. This is necessary for the two axes to coincide.
Countering
Countering refers to the processing of the surfaces of the bosses used as a support for nut and screw heads. It is very important that the fastener shaft does not deform during the tightening process. To do this, you need to control the position of the end, which must be clearly perpendicular to the axis. A special tool called a counterbore is complemented by a special guide tool.
CNC router
There are homemade machines and devices of complex design. Such devices include a CNC router. It is made for processing metal and wooden parts.
Work with a CNC router is carried out to a higher quality. This machine has advanced capabilities. When creating it, an LPT port is used, and numerical control is also provided. The copying unit is created from printer carriages with a matrix of needles.
The milling device is assembled as follows:
- The tabletop is made using a plywood sheet. Instead, chipboard with a thickness of at least 15 mm is used.
- A cutout is created to accommodate the cutter.
- The milling unit is installed.
- The electric drive is located.
- The transmission is secured.
- The spindle is mounted.
- The stops are fixed.
The process of creating a wood router Source tmklazer.rf
A CNC milling machine for processing metal workpieces is made with a more durable frame. The device is created in the following sequence:
- The column and frame are mounted when using a channel. From them a structure in the shape of the letter “P” is created. In it, the bridge between two supporting elements is formed by a part that is the base of the milling unit.
- Guides are made from angle iron. They are fixed with bolts on the column.
- Guide consoles are created from a pipe with a rectangular cross-section. To move them to a height of maximum 150 mm, the design provides a car jack.
- A threaded pin is inserted into the console.
- A working surface is created.
- A vice, fixing elements and guides are installed.
- The rotating unit is mounted. In this case, they strictly ensure that the shaft is in a vertical plane.
Do-it-yourself knife sharpening device: drawings and nuances
To make a sharpener from a washing machine engine with your own hands, you can take parts from old Soviet appliances. To build a sharpening machine you will need the following parts:
- tube for turning flanges;
- grindstone;
- special nuts;
- steel elements for the construction of protective casings;
- cable cord;
- launching device;
- a block of wood or a metal corner.
Homemade unit for sharpening knives
The flange section must match the dimensions of the bushing. A sharpening stone will also be placed on this element. This part will also have a special thread. In this case, the flange is pressed onto the motor shaft. Fastening is carried out by welding or bolting.
The working winding is fixed to the cable. Moreover, it has a resistance of 12 ohms, which can be calculated using a multimeter. A frame is also made, for which a metal corner is taken.
Thicknesser
Crafts for the workshop are often created to perform woodworking. The material always has to be planed. It is to solve this problem that a surface planer is made. The machine consists of the following parts:
- The frame consists of two frame structures, which are welded from 40*40 mm corners. The frames are fastened with studs.
- Tabletop made of metal or lumber, pre-impregnated with drying oil. The working surface is bolted to the frame.
Bed with a steel tabletop for thickness planer Source prostanki.com
- A broach consisting of rubber rollers. They are taken from a broken washing machine. The rollers are provided with smooth rotation by sliding them onto bearings.
- A casing that protects rotating parts. It is made of sheet metal about 5 mm thick and fixed to a frame made of corners measuring 20*20 mm.
- Electric motor with a power of 6 kW, which can rotate at a speed of at least 3000 rpm.
Clamps are used to secure the thickness planer. The device is fixed on the working surface. Do not forget about the required gap, when setting it, take into account the thickness of the workpiece.
Wood sanding machine
The design of such a machine has a cylinder on which sandpaper is placed. This unit rotates while processing the part. The assembly of a homemade machine is often performed for grinding cylindrical workpieces. A device is also made to create a flat surface of the workpiece.
When fixing the sanding paper, follow these rules:
- the width of the abrasive cloth should be approximately 250 mm;
- the sanding belt is connected without a gap exclusively end-to-end;
- The sandpaper is attached using a high-quality adhesive;
- at the edges of the shaft for the abrasive cloth there must be a side, the protrusion of which is from 2.5 to 4 mm;
- a rubber backing should be placed under the tape.
The shaft of the device is rotated by an electric motor. These two parts of the machine are connected by a belt drive. The design of the frame itself can have different designs. The option is chosen depending on the size of the workpieces being processed.
Device for polishing wooden parts Source notperfect.ru
Briefly about the main thing
Typically, craftsmen assemble machines for their workshops if the area of the room is at least 3 m2. Universal devices are manufactured or to perform a specific type of work. In addition to shelves and racks, in the workshop you can often find a workbench for carpentry work made of boards and bars, which is equipped with a vice.
Craftsmen also make a metal workbench from corrugated steel pipes, angles, and sheet metal. They also assemble a lathe on a metal frame, with a clamping spindle in the form of a drill head and an electric drive. Also popular in the workshop are a stationary circular saw based on a grinder, a drilling machine made from an electric drill, a surface planer made from an electric planer, and a CNC router.
Ratings 0
Video
If you set a goal and assemble a milling machine with your own hands, you can get at your disposal an effective device that allows you to perform many technological operations on metal and other materials. Serial models of such equipment have long been well known; they are actively used at most manufacturing enterprises operating in various industries. These machines are distinguished by their wide functionality, which allows them to process workpieces made of metal, wood and a number of other materials.
Knowing all the advantages of such a device, many home craftsmen are wondering how to use available and inexpensive components. It should be said right away that it is possible to manufacture such a machine; moreover, it is possible to additionally provide it with functions that are inherent not only in milling, but also in turning equipment.
The simplest to use is a vertical milling machine. You can assemble it using a hand drill, spending very little time and effort. In order to make a more functional mini-milling machine for your home workshop with your own hands, you must find other components and have a lot of time, but this task is completely solvable.
When planning to make a milling machine for metal and wood with your own hands, it is very important to pay attention to the fact that the device should work on the same principle as serial equipment. To comply with this important requirement, you can familiarize yourself with the drawings of serial equipment and watch a video of the operation of a factory machine.
Milling tables are often called milling machines, but their designs are fundamentally different
A milling table is often called a milling machine. We will look at its structure at the end of this article. But a separate detailed article is devoted to the manufacture of a homemade milling table, which can be found by clicking on the link below.