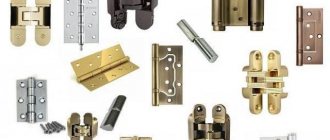
After purchasing and installing interior doors, the question of installing fittings arises. This problem can be solved by calling a specialist or studying the technology of cutting in a locking device and performing the procedure on their own.
Experts recommend purchasing and installing interior doors with a built-in lock. In this case, there is no need to install it. But they cost much more. In order to minimize financial resources, some craftsmen try to attach locks themselves.
These instructions will help you install a lock on an interior door. Beginners who have not yet encountered such a process will be able to understand all the nuances and perform the procedure for installing the mechanism with their own hands.
Types of manual milling installations
Inserting a lock into an interior door with a router is much more practical than using a drill, much less a chisel. The latter tool generally requires certain skills. Otherwise, there is a risk of damage to the decorative coating of the door. In addition, this process takes quite a long time.
A hand router can complete the task in a very short time. And the quality of work is a bonus. The mechanism will make all the necessary grooves and recesses with extreme precision and without damaging the surface of the door. And the need for fine-tuning arises only in some cases. Usually, after the operation is completed, constipation can be installed immediately.
But the device does not insert hinges with a router until the very end. At the final stage, you still have to do a little work with a hammer and chisel. To select angles. But, after passing the cutter, this operation becomes simple and takes little time.
All manual milling cutters can be divided into 4 categories:
- vertical;
- edge;
- combined;
- special purpose.
A simple plunge router Source ytimg.com
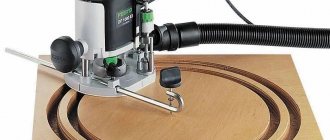
A vertical router is also called a plunge router. It is used for cutting grooves. Moreover, the width and depth of the passage can be set in advance. This tool is often used as a router for cutting locks and hinges.
Edge routers process the edges of wooden products. They are used where decorative finishing is needed. Therefore, they also have another name - edging.
The combination tool is usually used by professional woodworkers. It combines the capabilities of both vertical and edge options. And it can also be considered as a device for inserting loops with a router.
Special-purpose power tools come in different varieties. It performs certain technological tasks. And the most common among craftsmen are dowel and lamella milling cutters. They are also called figireans. But all of them are used for curly processing of wood surfaces.
Attach the handle
To attach the door handle, we install decorative trims on both sides of the door and secure them with self-tapping screws.
We fix a rod with a hexagonal or square cross-section, which will connect the door handles on both sides of the door.
We close the interior door and mark the position of the lock tongue on the door jamb.
We measure the length of the tongue with a ruler. Then we transfer these dimensions to the door jamb.
We apply the receiving pad to the marked marks and trace it with a pencil.
We drill holes along this contour and, using a chisel, bring the seat for the overlay to the desired shape.
We install the cover in place and secure it with self-tapping screws. That's all.
Finally, we check how the door lock opens and closes, and if necessary, bend the tongue of the lining or rearrange it.
The entire lock insertion process described above is most suitable for a simple wooden door.
A lock can be easily inserted into a wooden door in any convenient place, while doors made of other materials require a special approach.
Tool selection criteria
Let's figure out how to choose a tool with a cutter for installing locks on doors. And also for preparation for hanging loops. And since the above operations are only part of the capabilities of the router, the recommendations boil down to the following.
Master at work Source psoriazugat.psopt.ru
See also: Catalog of companies that specialize in doors, windows and related work
You don't need too powerful a tool for housework. Most of its features are simply not useful. In addition, there is a small minus. A tool designed for more complex tasks than cutting a simple groove will not be able to provide the required high speeds. In addition, professional milling cutters weigh a lot.
Secondly, it is necessary to pay attention to the actual overhang of the working tool. In the technical documentation it is somewhat overstated. And therefore, later, during work, you have to drill out the grooves to install the lock with another tool.
An important parameter is ease of use. The device should not be heavy and have a sufficiently long cord. And also with a convenient location of control buttons. Its functionality must be thought out in advance. So that when working, you don’t have to urgently look for a replacement if the tool is not able to perform the required operation.
Convenient template for inserting loops Source avito.st
The equipment also plays an important role. The backlight option is very useful for a high-quality overview of the work area. And in addition to cutters for cutting in hinges and locks, the device must have various holders and additional attachments. It’s good if the kit already includes a special device that makes it easier to insert locks and hinges. It will be very useful especially for beginners.
How to install a magnetic lock on an interior door. Magnetic lock
It must be said that few people are familiar with such a mechanism as a magnetic lock. Meanwhile, it is very suitable for closing bedrooms and children's rooms, because it works virtually silently.
Magnetic lock for an interior door - the bolt enters the slot without any help when closing, and to pull it back out, a force is applied through the handle.
The mechanism of operation of magnetic locks can be compared with magnets installed on wardrobe doors. The device consists of two magnetic or magnetic and metal pads, one of which is fixed on the door frame, the other is installed in the door leaf. When the door is closed, the distance between the magnets is reduced, and they are attracted to each other, holding the leaf in the door frame until the lock is unlocked.
The mechanism opens by turning the handle or even simply by pressing on the door with force. When the canvas is opened, the distance between the magnets naturally increases, so their interaction stops.
Thanks to their conventional design, magnetic locks are durable and easy to use.
The advantages of these types of structures include the following points:
- The locks are not equipped with a supporting spring, which is installed in all other types of locks and is an “Achilles heel” - it often either weakens or fails.
- The absence of a tongue simplifies the operation of the mechanism.
- The door opens silently, which is especially important for children's rooms.
- Most locks have standard dimensional characteristics and are therefore suitable for various types of doors.
- Magnets, with the assistance of each other, also play the role of a door closer.
There are several types of magnetic devices - these are passive, electric and equipped with a crossbar.
Simple passive door magnetic lock
- The passive design of the lock consists of a magnet mounted on the door and an iron plate fixed to the door frame. When two parts approach each other, a magnetic field appears between them, with the help of which the canvas is fixed in the box. To open a door closed with a magnet, you need to apply a lot of force. Such locks are often mounted on sliding doors or accordion doors.
- A lock equipped with a bolt has a rather complex design. In addition to the magnet, a mechanical part goes into it. From the outside, such models do not actually differ from ordinary locking devices, but, unlike them, a magnetic lock does not have a pressing spring. The bolt (tongue) is made of magnetized metal and, when the door is closed, it spontaneously fits into the groove of the strip attached to the door frame. The door opens after pressing the handle, at this moment the magnets are mechanically moved apart, the bolt is pulled into the lock body.
This type of magnetic locks is highly reliable, which is why it is popular among consumers.
- In most cases, electrical mechanisms are installed at the entrance to the apartment, but if desired and financially able, they can also be installed on interior doors. This version of the locking device can be opened using a card, key or control panel. True, a similar lock can only work when it is connected to a power source - without electricity, the lock does not work.
The design of the lock includes its magnetic part and a strike plate. When locked, the supplied power generates an electric field of the highest intensity, and it is impossible to open the door. To open, a special key, card, or pressing a button interrupts the power supply to the electromagnet coil for a certain time—the field disappears, and the blade is not attracted to the strike plate.
The lock is characterized by silent operation and reliability in the presence of an uninterruptible power supply. The disadvantages of these models include their high price and impressive size. And, in fact, for interior doors this still looks like excess.
Setting up the router
Inserting loops with a router begins with setting up the tool. The device itself will perform the entire operation if you set the necessary parameters on it in advance. In particular, it is necessary to set the required engine speed. And also set the desired processing depth.
To do this, you will need to bring the tool to a neutral position:
- Place the router on a hard and level surface.
- Loosen the feed pin lock.
- Lower the cutter to the level of the supporting surface.
- Set “0” on the processing depth scale.
- Secure the pin.
Professional router Source routerforums.com
Preparing doors and working with a router
Let's take a closer look at how to cut grooves for a lock and hinges on a door using a router. Let's look at an example of hanging loops. The lock is cut in identically, using a similar algorithm. In order not to apply markings manually, it is better to purchase special templates. Their cost is low, and the store has a wide assortment for any model of locks and awnings.
Installing a cutter into a tool Source amazon.com
Step-by-step instructions for working with a router:
- The door is securely fixed to the floor with the side end surface facing up. It is better to use special clamps.
- The places where the loops will be located are marked.
- A template is placed on the marking and secured.
- The router is adjusted to the desired depth and placed on top of the template.
- Wood is removed from the inside of the template using a milling cutter.
- At the end of the operation, the router along with the device is removed to the side.
- The groove is refined with a chisel (the corners are selected).
- Hinges are installed on the treated areas and secured with fasteners.
Templates
One-time work can be accurately completed without special complex templates, using only a parallel stop, which limits the displacement of the cutter beyond the markings to one side.
But for professional work with large volumes, special templates are often used. These can be either sets of templates for different configurations of fittings, or universal ones with adjustable sizes.
Both homemade and factory-made ready-made options are used.
An example of the design of one of the factory templates:
The device makes it possible to install and move the router in the position required for sampling exactly in place.
Example of homemade templates:
It makes sense to make such a device when there is a large amount of work to be done.
Furniture hinge insertion
To select a large-diameter blind hole with a hand router, you need to make a template yourself. It has a stop bar, thanks to which the tool can be easily positioned on the furniture door. It is done very simply.
Milling for a furniture hinge Source amazon.com
A rectangle with sides 280×140 mm is cut out of plywood 4-5 mm thick. Divide the width in half and draw a line. We retreat 70 mm from the corners along one of the sides along the length and also connect these points with a line. At the intersection we drill a hole with a diameter of 51 mm.
We select a wooden plank for support. Its length is 140 mm, and its cross-section is 5×30 mm. We place the stop at the very edge of the hole, stepping back from the edge of the rectangle by 15 mm. We attach the plank with glue and small nails. The template is ready.
The depth is set on the router to 11.5 mm. The template is applied to the furniture board, and the strip rests against its end. And in several passes the groove is selected. In this way, a blind hole is made for a standard furniture hinge with a 35 mm cup.
Marking
Before installing the ZM, it is important to find out how the markings are made for its types.
As a rule, markings are applied in accordance with templates or corresponding elements of the lock, which are previously applied to the door. It’s better to draw lines with a sharp awl or needle – it’s easier to follow the marks. If you are using a pencil, then you need to consider the width of the drawn line and the distance between it and the part. It is difficult even for a qualified specialist to calculate all this.
Template for marking
Important! At the marking stage, it is forbidden to use a mechanic's scriber, since it makes an indent even greater than a pencil. And it is generally impossible to remove its scratches. The door after contact with this scriber will need urgent repairs.
It is better not to use a scriber
How to mark a round ZM
First of all, you need to decide on the place where you will put the round lock. Next, complete the markings using the installation instructions and template. The distance between the marking and the floor should be about 97 cm. When applying this side of the marking, you need to take into account the thickness of the door and the length of the locking tongue. The markings must be applied on the side of the larva.
When placing two dots on the “face” of the door, you need to retreat from its end edge 6 cm for the first dot and 7 cm for the second.
You need to mark a hole with a diameter of 5 cm on the door. You will put a handle in it. Make another hole with a diameter of 2.3 cm at the end of the door, just make sure that it is located exactly opposite the main hole. Its main task is to place the structure with a latch.
Marking a flat blade
On the door jamb, mark the vertical and then the horizontal axis with a pencil. Apply the latter at a distance of 96.5 cm from the floor (80 cm is suitable for oak or old specimens). Mark with a pencil along the attached lock. To determine the socket under the ZM, you only need half the marking line. As a result, it should turn out a little larger than necessary. Thanks to this, it will be possible to create the correct gap for mounting the mechanism.
Marking the recesses for the spindle and cylinder has certain features. To do this, you need to attach the lock to the side, and make the holes with an additional indentation from the end of the door. The resulting holes must correspond to the size of the end plate.
Briefly about the main thing
To cut a lock with a router or hang hinges on a door, you need to choose the right tool. It is best to use a simple submersible model, since the combined model is heavy. This will create certain inconveniences, especially if there is no experience in such wood processing.
Using a router to cut in fittings is easy. But the process is greatly simplified if there are special templates. Having placed the device in the desired place, all that remains is to set the required processing depth on the tool and install it on top.
When working, you need to carefully monitor the process in order to notice overload in time. It can occur if the wood structure is too hard. Then you just need to reduce the speed of the tool using a special switch on the body.
Ratings 0
Additional accessories
When using a mortise lock, dust often collects in the hole in the strike plate, which is intended to hold the tongue, and chips also form in the hole. Such phenomena worsen the operation of the mechanism and the design of the interior door as a whole.
To avoid such consequences for the strike plate, there are special cell attachments for the reed element. In most cases, such a cell is made of durable plastic and is mounted under the strike plate.
- Author: Maria Sukhorukikh
Rate this article:
- 5
- 4
- 3
- 2
- 1
(0 votes, average: 0 out of 5)
Share with your friends!
