Profile pipes are rarely used for transporting liquids and gases. Their main purpose is lightweight building structures, in particular, the frame of prefabricated buildings. The square and rectangular cross-section of the pipes implies their high strength, due to additional stiffening ribs, combined with low weight, which reduces the load on the foundation and reduces the risks when constructing load-bearing elements of buildings. But if there are no particular difficulties with the construction of rectilinear structures, then an arch made of a profile pipe has its own characteristics in manufacturing.
Specialized companies offer their services for bending both round and profile pipes using professional equipment. But with minimal skills, it is possible to do it yourself.
Why are arches made of profile pipes needed?
Land owners are happy to improve the territory. Metal arched structures are required for the construction of:
- awnings;
- gazebos;
- greenhouses;
- garages;
- fence sections;
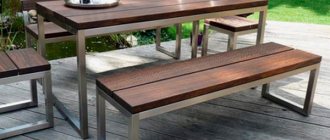
- decorative bridges, tables and benches;
- various temporary buildings and much more.
The use of profile pipes for the construction of frames can significantly reduce the time for installation of buildings. The presence of bent elements, on the one hand, decorates the appearance of the structure, and on the other, reduces wind and snow loads.
In order for the future building or structure not to disappoint during the process of its construction and operation, it is necessary to perform three main tasks when making arches, which are interconnected.
Firstly, the arches must be made of a profile pipe of the required size. Secondly, the presence of kinks and waves is not allowed on the bent product. The neat appearance of the arch will emphasize the geometry of the structure as a whole. Thirdly, curved metal profiles belonging to the same structural element of the building must be exactly the same. Otherwise, they may skew the building, so using products of different sizes is strictly not recommended.
Frame meaning
The main element of a plasterboard arch is the frame. You can create a frame for an arch with your own hands. Therefore, you can go through the entire installation process yourself. What is the frame itself? This, one might say, is the skeleton of the arch. It is on the frame that the plasterboard sheets are attached. That is why it is so important to make it durable and reliable. It is necessary to choose the right type of frame, depending on the material from which the walls are installed (brick or wood). Therefore, it is strongly recommended that you read this article before you start creating an arched frame yourself.
What to give up
Unfortunately, when using a manual pipe bender to make arches from profile metal pipes, good results are rarely achieved. The fact is that this tool is suitable for bending short sections of pipes of small cross-section. But it is impossible to make long and identical arches with its help. Although some craftsmen are capable of this process, it is not worth gaining experience in such work. There are simpler and higher quality options for manufacturing metal arched elements.
Another method of bending a profile pipe is with trimming. Its disadvantage is the sloppy appearance of the curved pipe, therefore metal profiles are cut and bent with further welding only in cases where the aesthetic side of the finished product does not matter at all.
A roll forming machine, which is classified as industrial equipment, also does not always pay off. Firstly, it can only be used in large-scale production. It will look ridiculous on a personal plot. Secondly, single orders are not always fulfilled with high quality due to problems with precise adjustment for each product. As a result, the radius of the arch from the profile pipe is inaccurate, and its side planes are turned by a “propeller”.
If there is a large volume of work, it is more reasonable to produce metal arches on roll forming machines, placing an order in specialized companies.
Video description
A master class on introducing spotlights into an arched opening is presented in the following video.
Illumination using LED strip is also possible. To do this, after covering the gypsum board, you need to make a small hole for the tape in the center of the arch. Next, insert the LED strip. After completing work on the arch, close the opening with an acrylic translucent decorative panel.
LED lighting looks unusual and stylish Source pinimg.com
Do-it-yourself bending of profile pipes
You can get out of the situation with the manufacture of metal arches using several old and good methods, which are unlikely to be appreciated by specialists who work with significant volumes of metal structures. But for house sheds and garden greenhouses, the following methods for making arches are quite acceptable.
Arches according to the template
This method gives confidence that the profile pipe will not be damaged. On the surface of a solid material, such as a concrete slab or metal sheet, the contour of the future arch is drawn in full size. Sections of corners or other profiles are vertically installed and welded onto the sheet along a line in increments of about five centimeters. Their height should be 4-5 centimeters greater than the cross-section of the profile pipe. If a concrete slab is used as a base, holes are made in its body into which metal rods with a diameter of 12-14 mm are securely fastened. This design will be a template that can be used many times.
To fix one end of the future arch, use at least 3-4 rigidly fixed pins. For reliability, many craftsmen recommend welding the end of the profile pipe to the outermost rod or corner.
The fixed pipe begins to bend using manual force. This must be done carefully so that the product does not break. In this case, there is no need to rush. The use of a lever or winch is allowed as available means. Profile pipes with a small cross-section are bent in a similar way.
Construction of an arch using a grinder
In fact, in addition to the grinder, you will also need a welding machine. It should be noted that this method is best used in the case when the finished frame at the bend is hidden under the finishing material or ideal requirements for the appearance of the structure are not imposed. The fact is that even well-polished welds will still be visible.
Before starting work on the profile pipe, mark the length and location of the bending section. Along its entire length, cuts are made with a grinder through equal sections on three sides of the pipe, leaving its outer wall intact. Now the arch can be bent to any required radius. The sawn areas are welded, after which the seams must be sanded.
Read also: Production of tanks for storing oil and petroleum products
Making an arch from a profile pipe using the hot method
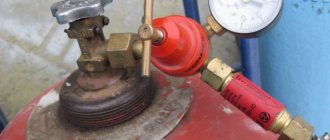
This bending method involves the use of dry, clean sand. It is poured into the pipe, having previously closed one of its holes with a wooden plug. After the sand fills the entire internal volume of the pipe, a wooden peg is driven into its second end.
The hot bending method requires the presence of a template or blank of the required radius.
The required bend area is marked with chalk or other available methods. This section is heated with a blowtorch, the pipe is inserted into the template and smoothly bent to the required radius. Sand, in this case, protects the pipe from loss of integrity and severe deformations.
After obtaining the required result, one of the plugs is burned out and the pipe is freed from sand.
The presented methods for manufacturing arches from profile pipes make it possible to install small architectural structures on the site without the involvement of specialists.
In order to move substances in liquid and gaseous states, a profile pipe is rarely used. Their main and important task and function is to reduce the weight of the erected frame structure of the proposed structure. Thanks to several available pipe ribs in square and rectangular cut versions, it has a high level of strength and reliability.
In tandem with its low weight, this ensures minimal impact of the load part on the base of the structure, and reduces the danger and life-threatening moments when creating load-bearing partitions. Installation work when creating a structure made of straight pipes is not difficult. But, with regards to arched structures made of profile pipes, in this case you will need to work hard, taking into account some of the nuances of construction. Professional firms provide assistance in creating bends of both rounded products and profile pipes. Professional workshops are equipped with special devices and tools. Of course, such services are not cheap, therefore, knowing some of the features of the bending process, as well as having basic experience, you can do all the necessary deformation processes yourself.
Lathing on the walls
So, let's make a frame for the wall:
- We step back from the wall a few centimeters, see if there are any larger protrusions on its plane, and put a mark on the ceiling in the left corner.
- In the right corner along the ceiling we retreat the same distance and put a mark.
- We transfer the points to the floor.
- We connect them along the entire perimeter of the wall.
- We mount guide rails along the resulting lines.
We mark the wall for mounting hangers:
- We place marks along the lower and upper horizontal rails every 60 cm.
- Connect the dots along the wall using upholstery thread.
- Along the guide vertical slats on both sides of the wall we place marks from bottom to top every half meter.
- We repeat point 2.
As a result, you should get a grid on the wall, at the intersection of the lines of which you need to attach hangers.
After the suspensions are fixed, we take the supporting rails and insert them into the grooves of the lower and upper guides.
But now the wall frame needs to be leveled. It is easier to do this with ordinary construction threads, which are pulled between two vertical profiles every half a meter. At this point, the do-it-yourself wall frame for plasterboard is ready.
Where can I use the created arch from a profile pipe?
People who have their own plot of land always try to bring it into a noble appearance, decorate it and decorate it.
Arches made of metal profile pipes can be used for:
- hinged roof and canopy;
- outdoor recreation areas, for example, gazebos;
- greenhouse structures;
- garage buildings;
- fence;
- creating decor, for example, crossing through an artificial pond on the site;
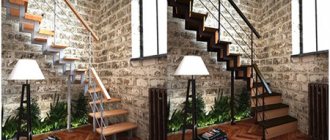
- various ladders and other devices.
By using a profile pipe to create frame structures, the time and effort spent on the creation process itself will be significantly reduced. In addition, curved products perform a decorative function, decorating the structure itself, and also perform a practical function, minimizing the impact of snow and wind gusts, reducing their negative consequences.
In order to obtain the expected result in the process of creating a structure and in the process of using it for appropriate purposes, when creating an arched product, you need to take into account and follow three elementary principles that follow from one another. To begin with, the arched product must be made from profile pipes of the appropriate size. Further, the already created product should have no breaks or waves. The more accurately the work is done, the more beautiful the geometric component of the structure will be. And lastly, deformed profile metal pipes, which are parts of one element, must be absolutely identical. If you do not follow this principle, you may end up with a skewed structure, so it is not advisable to use profiles of different sizes.
Ceiling base
Ceiling base
Box around the perimeter of the ceiling:
Profile boxes
So, the answer to the question of how to make a frame for a plasterboard box.
DIY assembly instructions:
- We retreat along the wall from the ceiling plane 5-7 cm, put a point in one of the corners of the room.
- Focusing on the set point, use a water level to place points in all corners of the room.
- Connect the dots with lines.
- We fasten the guide rail along the lines.
- We retreat from the wall along the ceiling the distance that will be the width of the box, put a point and repeat the action along the entire perimeter.
Advice! If you don't know how to draw the angle in the lines correctly, use a construction square.
- We attach guide rails along all the lines.
- If the box is wider than 50 cm, place points along the rail along the perimeter of the wall at a distance of 0.5 m from each other.
- From the profile on the ceiling, measure the distance to the horizon of the future box and, in accordance with the obtained value, cut pieces of the carrier rail with a “lip”.
- We insert the finished pieces into the grooves on the ceiling “lip down” and connect the metal.
- We take the guides and attach them along the entire perimeter to the “lip” with grooves to the walls.
- We also put marks on these guides every 0.5 m and connect them along the ceiling (with a cord with paint) with the marks on the walls. In the center of each line we attach a suspension to the ceiling.
Now you can measure the distance from the rail on the wall to the guide profile, which is attached to the vertical pieces with a “lip”. Based on the obtained figure, cut a piece of the carrier rail, insert it into the grooves of the guides and screw it on. Repeat this operation around the entire perimeter.
When leveling the base plane, use a standard rule or level.
What is better not to do?
Using a manual pipe bender to create an arched element from a profile, in most cases, the result is of insufficient quality and the desired result. All this happens because such a device is suitable for deforming small pieces of profile products with small cuts. Unfortunately, large and identical arched parts cannot be completed. Although there are such skilled workers who, even in such a difficult way, create the necessary details. But for a beginner in this business, it’s better not to take risks. For those who have never encountered this type of work, there are more suitable, understandable and high-quality ways to create an arched metal part. In addition to the described deformation option, there is another one that involves a trimming process. The disadvantages of this method include the fact that after such work the deformed product becomes not very neat. Only because of this, the method of cutting and bending profile pipes followed by the welding process is used when the appearance of the finished part is absolutely not important. A special machine for bending profile pipes belongs to the technical equipment of production. Even he sometimes cannot reproduce everything he has planned. In addition, such a machine can only be used in an industrial environment. In the private sector, located on a plot of land, such a machine is simply inappropriate. In addition, a one-time order may not turn out to be of very high quality, since it is quite problematic to configure the device for each part with absolute accuracy. In this case, the radius parameters of the profile arched element may turn out to be unequal, and its sidewalls may be turned in different directions. If it is necessary to create metal arches in large quantities, it is recommended to use the help of specialized companies by ordering the service of bending profile products using special equipment.
Creating profile deformations yourself
You can find a way out of the situation with creating profile arched elements by using some familiar methods. Of course, professionals who deal with massive bending of profile pipes every day will not appreciate them. But in order to improve the local area and greenhouse structures, such options for creating arched parts are acceptable and appropriate.
Non-standard designs
Very often, a frame for plasterboard is created with your own hands for structures of non-standard shape - niches, arches.
It is worth noting that not only the ease of installation and great capabilities have made drywall a popular material, but also the fact that the price of raw materials, even for very complex structures, is quite low.
You can often see a plasterboard frame for an arch in an apartment or house - and this is understandable, because such a complex geometric opening in the wall or around windows will be much more difficult to make from scratch from another material.
If the base for the arch is made around a window or front door, it is better to use moisture-resistant sheets for cladding.
Shelves
Profile shelves
Profiles and sheets are very convenient to use for installing shelves, since such a design allows you to independently design any desired size, area and even shape of the product.
In addition, the finishing of such shelves offers unlimited possibilities in choosing the color and texture of the material.
Cladding of unusual structures
Without any problems, you can make a frame from plasterboard for a fireplace; such a portal will look natural and solid.
Note! It is advisable to sheathe the structure around the fireplace with fire-resistant sheets. But in the bathroom it is better to use moisture-resistant sheets.
Such sheets cost a little more than regular ones. Remember, if you use materials that are not intended for this purpose to cover specific objects, this may not only affect the service life of the structure and its beauty, but also simply turn out to be dangerous.
Template arch details
This method guarantees a high-quality and undamaged metal pipe. On the outside of a rigid product, for example, a concrete base or a metal plate, markings are made of the contour elements of the future arched part. On the surface of a rigid base, in the direction of a straight line in a vertical plane with a distance of 5 cm, pieces of corners or other profile products are mounted using a welding machine. The height of the pipe sections must be greater than the cut of the profile product. If a concrete base is used for a rigid base, it is necessary to drill holes in it to firmly attach metal rods, the diameter of which will be about 15 mm. The created blank will serve as a template product for repeated use. In order to secure one end of the future profile product, you will need at least 4 firmly fixed rods. Some experts in bending pipes from profiles strongly argue that to ensure strength, it is necessary to fix the end of the metal pipe to a rod or corner, which is located at the very edge, by welding. The profile pipe, which has already been fixed to the template, begins to deform by applying manual force. You need to be vigilant, as you can easily overdo it and break the product. There is no need to rush; everything needs to be done slowly. Auxiliary devices can be various levers or mechanisms with chains or ropes. This method of creating a bend in a profile pipe is suitable for pipes with a small cut.
Read also: Wiring sockets in the kitchen distribution diagram
Creating an arched element using a grinder
In addition to the grinding machine, you will need to work with welding. It should be borne in mind that this method is recommended to be used only when the already created frame base is sheathed with decorative materials or it is not intended to create a beautiful appearance of the structure. This is due to the fact that even carefully created and polished joints will be visible to the naked eye after welding. The initial stage of the upcoming work is marking activities. This concerns the length of the section that will subsequently bend and the place in which it will be located. Along the entire length line, at the same distance from each other, it is necessary to use a grinding machine to make three-sided cuts of the pipe, while trying not to touch its outer surface. It is after this process that you can begin to bend the pipe, creating it in the form of an arch. The bending radius is determined purely individually. Places that were previously sawn must be patched using a welding machine. After this, the connecting places need to be sanded.
Creating an arched element from profile pipes using high temperature
This method of creating bends involves the use of clean sand mass in its dry form. First, you need to close one of the ends of the profile pipe with a barrier cover made of wood, and then the sand mass must be poured into the profile product. Having filled the entire internal space of the product, it is necessary to fix a pointed wooden stick at its second end. Of course, when using this method of deforming profile pipes, you need to have a blank or template product with the required radius. The area that will be subject to deformation is marked with chalk or a marker. Then, the marked area must be heated with a heating device, and the profile product must be fixed into a template blank. After this, you need to start bending it slowly and without sudden movements, reaching the desired radius. The sand mass, in this situation, serves as a protective shield against various damages and loss of its original shape. Having obtained the desired result, one of the barrier covers is eliminated, and the profile product is cleaned of sand mass. The considered methods for creating arched elements from profile pipes will help you install small buildings on land without the help of professional persons, but with your own hands.
Profile pipes often become a material for the manufacture of various crafts for the garden, in particular, they are used to make arches. The attractive aspects of this material are the low weight of the product, the ability to apply paint to the surface of the pipes if it is necessary to restore the color or if you want to give the product a brighter shade.
Content:
How to use an arch made from a profile pipe
Note that the scope of application of metal profile products does not entirely coincide with their direct purpose; pipelines for the transmission of gas or liquid are extremely rarely assembled from them. Most often, they serve as material for assembling lightweight building structures, in particular, quickly erected structures. A positive characteristic of this type of pipe products is the increased strength obtained due to the presence of additional stiffeners.
Among the undoubted advantages is low weight, which allows minimizing loads on the foundation or supports, reducing risks during the construction of load-bearing structural elements. If the structures have rectangular shapes, then the installation work does not cause any difficulties. The question is completely different if arches from a profile pipe are required. It is very difficult to do without special knowledge, skills and tools.
Of course, if you wish, you can use the services provided by specialized companies and order bends on profile pipes or round tubular products. But if you wish, you can try to do this difficult work yourself.
Features of arched structures
Often, landscaping a site involves the construction of several useful facilities for the economy:
- garages and greenhouses,
- gazebos and canopies,
- tables, benches,
- temporary buildings and fences.
A pergola or just an arch made of a plastic pipe will look picturesque against the backdrop of lush greenery; making it with your own hands is not so difficult.
Profile plastic pipes are available for sale in a wide range, with different cross-sections, and their assembly is easy.
If profile pipes are used when creating the frames of the above-mentioned structures, the installation process can be significantly simplified and accelerated. But again the question arises with the use of bent elements. In addition to the fact that they give structures attractiveness and visual lightness, they are also able to reduce wind loads on the structure. If we are talking about the winter period, then we should remember that snow masses do not accumulate on an arched roof.
Read also: Bell designation on an electrical diagram
The calculation of an arch from a profile pipe can be performed using a special program or using an online calculator; to get an accurate result, you will need to specify the length and height of the chord. As a result of the calculations, the depth of profile deflection will be determined, which will need to be obtained as a result of processing the pipe with a manual hydraulic pipe bender or bending machine.
What are the requirements for pipe structures?
In order for the construction process to end with the creation of a durable and reliable structure, the following rules, which are closely interrelated, should be remembered:
- To create an arched structure, pipes of a suitable diameter should be used.
- Bent products should not have kinks, waves, or other defects on the surface. The beautiful appearance of the product largely depends on the correct geometry of the arches included in its design.
- If the bent profiles used in the structure are not absolutely identical, then ultimately this fact can lead to the structure being skewed, i.e. The possibility of using different sized products in one design should be excluded.
Arc manufacturing options
Experts question the possibility of high-quality completion of a task using a manual pipe bender. Difficulties in obtaining a satisfactory result usually arise due to the fact that a pipe bender, although a special device, is designed to give a certain shape to short and small-diameter pipes.
Making an arc using a manual pipe bender, watch the video:
The chance of giving the same shape to several high arches on such a device is negligible. Of course, craftsmen can achieve good results, but it will be too difficult for an inexperienced worker to cope with such a task, and there is little point in gaining experience in such a process - a pipe arch can be made with your own hands in another, simpler way.
For example, you can bend a pipe and trim it. The main drawback of this option for making an arch is the sloppy appearance; the method followed by welding can be used if the aesthetics of the product is not of particular importance.
Profile Bending Machine
Pipe bending machines are specialized industrial equipment; their use cannot be called justified if the work is performed one-time and its volume is far from large-scale. Naturally, in the conditions of a summer cottage, the use of such equipment will look at least ridiculous.
The second important point is that it is simply irrational to carry out single orders on such equipment, because for the production of each single product it will be necessary to make a rather complex set-up of the machine. Typically, the result of such processing is arches with an insufficiently accurate profile and side planes turned by the propeller.
If the volume of work is large enough, it is easier to order the production of arches on a bending machine for a profile pipe from a specialized company.
How to make an arch from a profile pipe with your own hands
Of course, the methods that will be discussed further will not arouse either interest or high appreciation among specialists working on the manufacture of numerous structures.
However, these are the good old methods that will help home craftsmen make several correct arches and use them to build a support for growing climbing ornamental plants, a greenhouse, or a house shed.
We make arches according to a template
The first advantage of the method is that there is no threat of damage to the bent pipe. They begin work by drawing the calculated contour on a thick sheet of metal, in full size. Next, vertical sections of the profile are welded along the drawn line; the height of these fragments should exceed the cross-sectional size of the pipe by at least 4 or 5 cm. The spacing of the profile sections should be about five centimeters.
Instead of a metal sheet, you can use a concrete slab to make a template; you will need to make the required number of holes in it and secure strong metal rods with a diameter of about 12-14 mm in them. This design can also be used as a template as many times as necessary.
To securely fix the end of the arch you will need at least 3 or 4 securely fixed pins. Experienced craftsmen advise welding the end of the profile pipe to the rod.
You can bend the pipe manually; the work should be done slowly and carefully; sudden movements may cause the product to break. To reduce the physical effort required, you can use a winch or lever. It is possible to bend a high-quality arc in this way if it has a small cross-section.
We make an arch, use a grinder and a welding machine
This method of making an arch is suitable if the pipe structure is hidden behind the finishing material - any welding seam, even if it is performed by a master, will be noticeable on the finished product. Careful sanding will not hide it.
The work is performed in this order:
- Mark the segment on the pipe where the bend will be made,
- in the marked area, cuts are made at regular intervals, only the outer section of the wall is left intact,
- the sawn profile pipe is bent to the desired radius, this is very simple to do,
- The cut points are welded and carefully ground.
Hot method of making an arch from a profile pipe
To use this method you will need to stock up on clean sand. One end of the pipe is hammered with a peg, sand is poured into the other, as much as will fit. Then close the other end. For this method of making an arch, you will also need a template or blank with a calculated radius. Having outlined the area where the bend will be made, begin heating it with a blowtorch.
Then, using the template, bend the pipe. A pipe filled with sand is guaranteed not to burst, and deformation when bending it will be minimal. Next, the plugs are burned out, and the sand is poured out of the pipe.
Let's watch a video on how to bend a pipe:
Using the simple devices described above will help you independently bend arches from profile and round pipes, and build small original buildings on the site with your own hands, without involving specialists in the work.
Tools and accessories
To assemble you will need to have:
- Ceiling guide profiles PNP 28×27 mm.
- Ceiling profiles PP 60×27 mm (possible).
- Sealing tape.
- “Dowel-nails.”
- Jigsaw.
- The rule is aluminum.
- Drywall sheet.
- Putty for drywall joints.
- Reinforcing tape for seams (serpyanka) or paper tape.
- Roulette.
- Hammer.
- A stationery knife (or a special knife for cutting HA).
- Hammer + drill.
- Screwdriver.
- Self-tapping screws for metal 25–35 mm (black, frequent pitch).
- Acrylic primer.
- Metal scissors.
- Set of spatulas.
- Plastic protective corner.
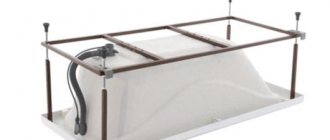
Here's what you need to stock up on to install an arch
To install an arch, it doesn’t make much difference what thickness of drywall you use. For the ends, 12.5mm is best, and for the arch, 9mm is best.
Video description
In this video you will learn a little more about the features of using arches in the kitchen:
An arched opening in the living room is a decorative element. It gives the interior a solemn, formal look. To achieve this goal, complex designs with niches, inserts of additional lighting, stucco molding, and even built-in decorative columns are used.
Spectacular and majestic columns in the arched doorway in the living room Source www.freelancejob.ru
The hallway and corridor always need more space. Therefore, the arched opening should be as wide and high as possible. In addition to the practicality of this design, this will visually enlarge the room.
Briefly about the main thing
A plasterboard arch is an alternative solution for decorating a doorway. Even a beginner will not have any problems with the question of how to install an arch: the technology is simple and the costs are minimal.
Arches look equally impressive in both small and large rooms. An arched opening visually increases the height of the room; it helps to free up space around the door, which can be used rationally. They fill the room with light and a feeling of “merity” of two adjacent rooms.
Ratings 0