Decorating doors with your own hands is a simple and economical way to tidy up your home and give it a more attractive look. This work includes not only finishing the door leaf, but also processing the slopes and frames. In other words, all parts of the doorway are subject to change. Such a need may arise during cosmetic repairs of an old door or installation of a new one. How to make a door jamb correctly?
How to seal a doorway after installing the door
After you have installed the door, a sad picture will certainly appear before your eyes - the gap that has formed between the new door frame and the doorway.
But don’t despair that your opening doesn’t look entirely attractive. Filling up an ugly, damaged area will not take you much effort or money. And you can watch how the work on improving the opening is carried out on the Internet in a video. Despite the fact that you do not have much work experience, finishing with your own hands is possible for any person, because the work is not very voluminous and will require from you not so much experience as accuracy and a creative approach.
With the help of doorways, the entire room is perceived, and the perfect finishing of slopes and filling of cracks adds a finished look to your new door structure.
Dimensions
The dimensions of the doorway can be either standard or non-standard. Most often, the parameters of the entrance door are 800 x 2000 mm. Thus, the size of the box is 870 x 2021 mm. These are the parameters that are encountered most often.
If you decide to replace an old door, you need to take your time with the purchase. After all, entrance openings in houses with old and new layouts may differ. Often, non-standard dimensions of the door frame are found in buildings with an old layout.
The dimensions of doorways are regulated by GOST, as well as building codes and regulations (SNiP). In accordance with GOST 6629-88, the width of the doorway can be 670-1872 mm, height - 2071-2371 mm.
Methods for making slopes
The outer side of the door is finished by master installers. But on the inside, everything is terrible. Before your eyes is a bare wall, bricks and a lot of possibilities for designing slopes.
The sloping part gives the doors a beautiful appearance, hides all fasteners and makes the entire structure stable.
Therefore, after the box is installed, you need to choose a finishing method, and there are not many of them:
- Finishing with platbands and additional boards;
- Plastering slopes;
- Gluing the material.
The division occurs according to different methods of forming the slope area, and choosing the material for cladding is not a problem. The most ideal option is to seal the slopes with concrete and then paint.
Finishing slopes with installation of finishing material on a special frame is beneficial when a decent amount of mortar is required for voids in the opening. Judging by the photo, using this method the slope will be flawless and even.
Slope using drywall
Making door slopes using drywall is a cheap and simple option that does not require any special skill. The surface of the slope immediately becomes smooth and suitable for further processing. Drywall can be installed on the slopes of doorways that do not have doors. In this way you can make both side and top slopes.
Interior slopes without doors, made in the shape of an arch, cannot be finished with plasterboard - it only provides a perfectly flat plane that cannot be bent.
How to do the job using drywall sheets:
- There are several ways to attach drywall. One of the simplest is gluing drywall to Fugenfüller putty mixture. First you need to measure the slope and its required dimensions. Drywall sheets are cut to fit the finished slope.
- Before gluing, it is necessary to attach the cut sheet to the slope to ensure that it is the correct size.
- You should work quickly with the fugenfüller, since this putty mixture dries very quickly. It cannot be kneaded using a mixer; kneading by hand will do.
- Several Fugenfüller spatulas are applied to the prepared piece of drywall, the drywall is applied to the slope and leveled using a square and level.
- After drying with Fugenfüller, the drywall can either be painted immediately or covered with wallpaper.
As can be seen from the information described in this article, when choosing how to finish the slopes of interior doors, you have the opportunity to choose a wide variety of options. All these options are presented in different price categories, so choosing the one you want won’t be difficult. This article described the advantages and disadvantages, as well as the sequence of work for the most popular types of finishing the slopes of interior doors, such as:
- plaster followed by applying putty;
- installation of overhead panels;
- plastic finishing;
- installation of plasterboard sheets on fugenfüller.
When choosing a method, consider not only the desired result, but also the availability of the necessary tools and materials to perform a particular type of work and the practical skills of the person who will do the work (if it is not possible to hire builders to carry out the work professionally).
Wide slopes of interior doors - video
Features of finishing for different walls
The easiest way is to seal openings in panel houses. The walls made of panels are stronger than brickwork and do not crumble at all, so the box is tightly installed in such an opening. You will need a little foam to seal the opening.
The brickwork is thicker than a concrete wall, so there will be room to turn around.
The material for the slopes can be anything: drywall, plastic and other sheet materials are suitable.
If you want the finish to look neat, use PVC panels as the finishing material; they are the most durable. Yes, and you can match the color of the door frame without any problems.
Dark wood species
Among the finishing materials used in the design of the door structure, preference is given to wood imitation finishes. It doesn’t matter whether artificial wood material or natural wood is used.
If the choice falls on a dark-colored interior door leaf, the most preferable options are: smoky oak, walnut, wenge, rosewood, etc.
The most popular shades on the door market are walnut or oak. Interior doors in these shades are combined with the color of the flooring and elements of the furniture ensemble. Light shades help to visually lighten the room, eliminating bulkiness. Wenge color is also in high demand. The door leaf often imitates the pattern of natural wood. It is important that the pattern of a particular texture looks the same everywhere and in the same direction, contributing to the integrity of the design.
Preparing for work
Whichever method you choose, the preparatory work will consist of covering the entire structure of the box with film and masking tape to protect it from accidental damage. Finishing the doorway involves preparatory work.
- All unevenness and roughness that may interfere with further work must be removed.
- You need to clean the surface, remove dust and prime it.
- If you plan to lay a cable in the opening, then you can lay it, but not in the case of erecting a frame.
Decorating Tips
When choosing an interior door, the main point is that the fittings look harmonious as part of the overall structure and interior design of the room.
- For the premium segment, forged handles are a good choice, but it is recommended to use them with extreme caution.
- The plastic used for the production of accessories passes environmental safety tests and is not inferior in strength to other materials. In addition, plastic fittings lend themselves well to painting, adding glitter and other modifications.
- Wooden elements are less durable, but are loved for their rich appearance.
- In the case of metal parts, they are noted to be cold to the touch. To brighten up this moment, fittings combined with another material are selected.
The method of decorating a canvas, which has lost some of its novelty over time, is selected depending on its material:
- Glass doors are decorated with stained glass film and painted with special paints. The task will be simplified by ready-made stencils.
- PVC canvases are restored using acrylic paint in a spray can. It is allowed to stick vinyl or non-woven wallpaper or patterns on a self-adhesive basis.
- Veneered products are also compatible with adhesive backings.
The complexity of repairing an interior door depends on the material it is made of and the degree of damage to the structure. When purchasing a product, it is important to consider the warranty period, which, if necessary, will reduce the financial costs of repair work.
Formation of a slope using finishing material for mortar
- All finishing materials are attached to cement mortar or special glue.
- To level, screw in the screws so that their heads are all at the same level. Since the sheathing will rest on these caps, take into account the thickness of the finishing fabric.
- The voids of the slope are filled with a solution, and a reliable adhesive composition is selected. For better fastening, glue is applied to both surfaces: the finish and the surface of the slope.
- Then the finishing material is applied and pressed down a little. We check all work with a level.
- The final stage is attaching the platbands.
Plasterboard finishing
Finishing door jambs with plasterboard can be done in two ways: using glue or using wooden slats. Most often the first method is used. Do not forget that before starting work it is necessary to take measurements of the door jamb.
The wall is primed. Prepare the necessary parts from drywall: 2 on the sides and 1 on top.
Mix the adhesive solution and apply it to the back side of the plasterboard blank. The cut strip is applied to the wall and leveled.
After the glue has dried, excess material must be carefully cut off. The corners and surface must be puttied and sanded down with sandpaper.
How and what is used to finish door slopes after installing the front door
After installing the new entrance door, all that remains is to update them with brand new slopes. They can be integrated into the interior design in different ways; plasterboard, laminate, MDF, PVC sandwich panels, as well as non-standard materials (for example, imitation natural stone) are suitable for design. In order not to spend money on the services of a specialist, you can install the slopes yourself, following the instructions.
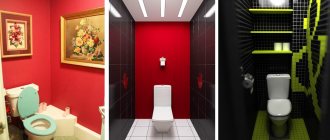
Black doors - bright interior
A black door leaf can help create a special style. This solution contributes to the sophistication of the interior. Interior doors in black color allow you to harmoniously combine with various interior items made in a wide variety of shades, just like white doors.
The key to a successful combination is taking into account some rules for organizing the interior:
- If there are black doors, the shade of the walls should be light, and the flooring (laminate) should be lighter than the door. The combination of light-colored laminate and black doors visually increases the area of the room and represents a harmonious combination.
- If the door is selected in black, you can add additional inclusions of light, white tones and dark accents. A combination with milky and beige shades is recommended. The use of orange, yellow, and red will enliven the design. Using shades of blue, green, and lavender will provide a calm atmosphere in the room.
Additional elements – furniture parts, trim, plinth – will also help to harmoniously incorporate a black door leaf into the design.
Plastering slopes
[flat_ab > Slopes are most often plastered along with the entire apartment when the finishing is not completed.
- Putty knife.
- Level.
- Master OK.
- Rule.
- Painting mesh.
- Painting tape.
- Painting corners.
- Construction mixer.
- Plaster (dry mix).
- Finishing putty.
- The primer is liquid.
- Sandpaper.
- Water-based paint.
Do-it-yourself plastering sequence:
- Prime.
- Install and fix the beacons using a level.
- Close the junction of the wall and the slope using a painting corner.
- Cover the front door and frame with masking tape
- Attach the painting mesh.
- Make a solution.
- Fill potholes.
- Apply the solution to the entire surface, stretch along the beacons, then wait for it to dry and seal the cracks.
- Prime.
- Level with finishing putty.
- Wait until dry and sand with fine sandpaper.
- Paint with water emulsion.
If we are talking about a private house, it is advisable to treat the cleaned opening with an antifungal primer before work and add a little to the solution itself.
Laminate slopes
Laminate is a floor covering, often used for entrance door slopes; it does not require additional processing, it resists mechanical stress. Do-it-yourself finishing has a lot of nuances.
There are two ways to install laminate slopes:
- Frame installation. With this technology, you can insulate the opening: fill it with mineral wool or polyurethane foam. The disadvantage of the design is that the slats are placed only in a horizontal position.
- Glue installation. It requires a flat surface of the opening, or it must correspond to the dimensions of the laminate. The laminate is glued to the foam (at low pressure).
The first method is preferable for apartments, the second is universal.
Rules for combining door colors
A stylish interior should look harmonious and seamless. For this reason, the shade of the flooring and interior doors should be combined.
The following options will allow you to successfully select the desired color combinations:
- dark shades of canvas and floor;
- dark canvas and light floor covering;
- light shades of floors and doors;
- dark flooring and light doors.
To ensure harmony, the trim is chosen to match the tone of the door leaf , and the plinth is selected in the same way. This creates the most advantageous option, avoiding color disharmony. If we talk about the reverse combination, then a white floor and black doors are quite rare. This method is quite original and is recommended to be used exclusively in spacious rooms.
If a game of contrast is used, then the derivatives should be especially bright to avoid blurriness and inexpressiveness of the design. A skirting board selected in the right shade will smooth out the lack of expressiveness of the combination.
Slopes made of MDF panels
The most common finish: affordable, looks good, easy to install.
- MDF panels.
- Wooden bars, width 3 cm.
- Dowels.
- Self-tapping screws.
- Liquid nails.
- Platbands.
- Decorative corner.
- Guide strips.
Installation of MDF door slopes - do-it-yourself installation algorithm:
- Clear the opening.
- Drill holes around the perimeter for the dowels.
- Afterwards, attach the slats and guides.
- Measure dimensions and make templates for parts for slopes.
- Cut out the details.
- Install the top part onto the screws. Check that there are no gaps.
- Install into the side guides: inside on nails, outside on screws.
- Cover the outer corners with a flexible decorative corner to hide screws and irregularities.
- Cover the inside corners with decorative strips and the finishing is ready.
If you make slopes on the front door, it is not recommended to use plastic - it is very fragile, and the front door is often susceptible to mechanical stress.
After finishing the work, you need to install the platbands. If there is still wallpapering to be done, they will be installed after the renovation is completed.
Advantages: the finish looks presentable, easy installation.
Mortise locks
The mortise lock is installed on the vertical beam of the door at a height of 1000–1200 mm from the floor. First of all, a nest corresponding to the size of the lock is cut out in the vertical beam of the door using a chisel. To make this job easier, you can first drill a few holes and then clean out the socket with a chisel. The socket should be 3–5 mm deeper than the length of the lock.
Having installed the lock in the socket, use a pencil to mark a cutout for its front bar. Then remove the lock from the socket and select the wood with a chisel to a depth corresponding to the thickness of the front bar of the lock. Using a depth gauge of a caliper, take measurements from the bar to the key and from the bottom of the socket to the top of the key. These dimensions are accurately transferred to the door. Then, using a drill, drill holes for the key and use a chisel to connect, level and clean them. The key of the lock should fit freely into this hole. Then the lock is installed and secured with screws, and the key with a bolt.
The next stage is selecting a hole for the bolt (bolt) and cutting the locking plate. There are several methods for this rather complex operation. Here is the simplest of them. A rectangle is cut out of paper, shaped equal to the end of the crossbar. One side of this rectangle is moistened with water and precisely applied to the end of the crossbar. The other side is coated with glue. Then the door is closed and the bolt is pressed against the door frame by turning the key. A paper rectangle is glued to the jamb exactly in the place where you need to select a socket for the bolt. After this, a nest 3–4 mm wider than the crossbar is cut out in the door jamb using a chisel, the place is marked and wood is selected with a chisel to install the locking plate. The locking plate is secured with countersunk screws. The hole in the locking plate is several millimeters larger than the height of the bolt, and when installing, the clearance between the bolt and the locking plate should be at the bottom. This is done so that if the door settles over time, the bolt can move freely in its socket.
A rim lock is easier to install than a mortise lock.
To do this, you do not need to cut out sockets for the lock and bolt. To install such a lock, the main thing is to accurately mark and drill a hole for the key. The entire subsequent installation procedure is described in the instructions that come with the lock.
Helpful advice
– Sometimes a screw or screw is difficult to remove. In this case, in order not to tear off the slot, the blade of a screwdriver is inserted into it, and its blade is clamped with an adjustable wrench. Press the screwdriver with one hand and turn the key with the other.
Sandwich panel slopes
A PVC sandwich panel is two thin sheets of plastic with a layer of insulation (sheet thickness 1 cm).
Materials, tools for installing slopes of PVC sandwich panels on the front door:
- PVC sandwich panel.
- Profile (starting, cover).
- Plastic is liquid.
- Roulette.
- Knife.
- Self-tapping screws.
- Screwdriver.
- Drill.
- Screwdriver.
Installing slopes from sandwich panels, or how to do it yourself:
- Clean the opening from dust and foam residues.
- Take measurements of the parts of the sandwich panels (length width): one top, two sides. For convenience, you can cut out a cardboard template so that there are no gaps between the parts of the PVC sandwich panels after installation.
- Cut the starting profile and attach it with self-tapping screws (10 cm margins) along the edge. You don’t have to use a profile: make an opening in the foam 1 cm deep, insert the edge of the sandwich panels there.
- Install the PVC top panel.
- Afterwards, cut the starting profile to the width of the slope, install it under the ceiling and at the base of the floor. This does not have to be done if there is liquid plastic - the cracks can be sealed with it. But do not use sealant - it will darken.
- Installation of strips of sandwich panels.
- Cover the sections of the sandwich panels with a “lid” profile. Cut and install. An overlap forms in the corners of the structure.
- Where there is an overlap, cut the profile at an angle of 45 degrees.
If desired, the space between the PVC sandwich panel and the wall is filled with polyurethane foam. This is done after installing the sandwich panels.
For more information about installing slopes with your own hands after installing the front door, watch the video
Combination dark floor - dark door
The option of matching the color between the door leaf and the floor is a more common occurrence. The option of full matching of shades, as well as with a slight difference in shades, looks advantageous. If the door is slightly lighter than the color of the floor, the interior will not suffer at all.
It's all about the work of the subconscious. A person views the environment from the bottom up . Thus, the door becomes a link between the shades of a light ceiling and a dark floor.
You should avoid combining dark shades of doors and floors if the room is very small. An excess of dark color will lead to a visual narrowing of an already modest space, and as a result the room will turn into a small closet. When there is a lack of lighting in the room, the problem becomes even more acute. A combination of dark shades of doors and floors is allowed in cases where the room has high ceilings and large windows.
So, the basic rules:
- If you decide to use dark shades for the door leaf and floor in the hallway, you need the floor covering to be slightly darker than the door. Such combinations are among the most common.
- Options made from dark floor coverings and door panels are strictly unacceptable if the room is cramped. This combination will help create a special gloom.
- The optimal combination when choosing dark doors and floors is the presence of a large height and a large window.
- A prerequisite is that the lighting level matches the selected shade. If there is not enough light in the room, it is better not to use a dark shade.
Non-standard solutions
In addition to the above standard methods using popular materials, you can use more original options that will highlight the interior, decorate the front door and surprise your friends:
- Artificial stone is a non-standard finishing of slopes. The main advantage is resistance to mechanical stress (if it is not a plaster model, it is fragile). Not a cheap option, requires the participation of a specialist.
- Tile. A type such as clinker (imitation brick or stone) is suitable.
- Plastic panels are an affordable but unreliable finish.
- Decorative plaster – in terms of aesthetics and durability, it has no equal. But you will need to work hard to find a good specialist in this field, because this work requires a creative approach and professionalism.
Materials can be combined if their properties are similar (sandwich panel parts + stone, laminate + tile and others).
Tips for repairers: how to seal the front door after installation? Materials for work
The front door is the first thing a guest sees when entering a home, so appearance is very important. After installing the front door, traces of foam and slopes remain that need to be sealed. Finishing begins after installing the door block. Additionally, soundproofing or insulating materials may be needed to avoid noise and cold from the street.
Features of repair of sliding structures
Sliding doors have doors with rollers that slide between two horizontal tracks. The lower rails set the movement of the canvas, and the upper ones hold the sashes and do not allow them to fall out.
Interior doors with a similar design require regular maintenance of the mechanisms:
- cleaning the guides;
- rail lubrication;
- control over the correct movement of the valves.
Common signs of faulty sliding doors include:
- subsidence of the canvas;
- extraneous noises, creaks and knocks during operation;
- loosening of fasteners;
- deformation of the valves.
Materials for work
Wood panels, laminate, veneer, MDF, plasterboard, plastic and other materials are used for embedding. You need to prepare:
- Screwdriver Set;
- screwdriver with a set of bits;
- drill for metal.
You will also need:
- level to check;
- polyurethane foam;
- wooden slats;
- putty knife;
- fastening means.
Plaster
Plastering is the most common method. It is used to eliminate defects after the door has been installed. You will need to set the guide beacons and mix the solution. A vapor barrier is carried out on the foam seam of the door block to avoid the appearance of moisture on the internal slopes in the future. This will also help prevent the appearance of fungus and mold.
For external and internal work, a special hydro- and vapor barrier sealant is used, which can be bought at any hardware store (Stiz A, B, etc.). We seal the openings with a plaster mixture (sand-cement mortar) and carefully level them. For basic sealing, tile adhesive is sometimes also used.
Plastering work begins when both adjacent walls are already plastered and the opening is covered with a primer compound. If sounds are heard from the stairwell, the gaps are first filled with soundproofing materials. Excess plaster mortar is cut off with a float or a regular lath. When the material dries, you will need to grout it.
This video shows the plastering work of a doorway:
Drywall
Finishing with plasterboard, which is installed in the doorway, leads to an ideal result. The surface of the sheets is treated with putty.
Plasterboard sheets are mounted:
For doorways it is better to use glue. This option is preferable for interior doors, but for entrance doors it is better to use a different finishing method. After processing, the plasterboard sheets can be plastered, painted or covered with wallpaper or ceramic tiles.
This video shows how to finish a doorway with plasterboard:
Gluing
Gluing finishing panels made of different materials can also be a way to solve the problem:
- First, we fill the guide strips on the edges of the openings according to the level, then we apply the platband on the outside of the slope, and measure the distances.
- They cut blanks for the slopes with a jigsaw, glue a decorative corner on the top and sides of the opening, which is covered with a platband.
- The top crossbar of the panel is secured to the frame, then they begin to finish the side parts of the slopes, while the protruding parts will need to be cut off.
- Small cracks are filled with putty.
- The slope on the side of the frame is secured with glue or small nails.
Elimination of damage to the canvas
Correcting defects that appear on the surface of an interior door for various reasons requires a specific approach.
- Scratches can be removed using regular sandpaper followed by priming.
- More serious damage with the formation of a deep dent or hole in the canvas is more difficult and takes longer to repair. The hole is cut using a construction knife. The hollow space is filled with paper and covered with foam. After it dries, the excess is cut off, and the surface is painted over or decorated in a suitable way.
- If the film coating is damaged, it is recommended to get rid of it and cover the canvas with new material.
Chipboard and MDF
MDF is generally stronger and denser and more resistant to moisture than chipboard. This material can withstand any type of processing and is easier to decorate. But both options are influenced by external factors. A common problem is scratches on the surface of the canvas. Eliminating the defect is not expensive and can be done without the help of a professional.
For repairs the following are pre-prepared:
- grit sandpaper up to 200;
- wood putty;
- priming;
- enamel for wood;
- brush.
- Use sandpaper to clean the damaged area and a small area around it.
- After this, the surface is treated with putty and left to dry.
- The putty material dries and the canvas is sanded again.
- Next, a layer of primer is applied to it, and after it dries, enamel is applied.
Solid and veneer
The weak point of solid interior doors is the decorative coating. The following defects are typical for interior doors made of natural materials:
- cracking due to high indoor humidity;
- drying the canvas causes gaps to form;
- peeling of the top coating characteristic of a veneer coating;
- chipping and rotting are also consequences of moisture.
In case of minor damage, it is enough to get by with suitable decor. In the case of serious deformations, for example, dents, more serious measures will be required to eliminate them. Some use the service of calling a master, others update the design of the canvas on their own, but to achieve a good result, you first need to completely disassemble the structure and remove the old coating.
The main stages of restoration of a solid wood door:
- Cleaning the surface and removing the coating in the damaged area.
- Elimination of the defect - for deep damage, use wood putty, for medium damage - liquid wax, for small damage - a wax pencil.
- Leveling and sanding the blade.
- Restoring the paintwork - to match the paint tones, the entire canvas is often repainted.
Veneer is subject to the same damage as solid wood panels, so the restoration process is similar. But there is a specific defect characteristic of thin-sheet veneer - the formation of bubbles on the surface due to poor-quality gluing.
- To repair, you need to heat the swelling area with an iron for 8-14 seconds.
- Another option is to inject glue into the area of the swelling through a syringe, followed by rubbing with a soft cloth. To restore mechanical damage, a wax pencil in the color of the finish is used.
Doorway
If a new door frame is installed, you need to decorate the opening beautifully. For this, different cladding products are used that match the color of the door.
- Fill the voids with polyurethane foam.
- Seal the slopes with plaster.
- Fix the facing materials with special glue or cement mortar.
Slopes
When starting to finish the slopes of the entrance door indoors, you need to select a material: panels or a regular layer of plaster. Sealing is carried out in several stages.
How to seal correctly:
- Remove dirt and debris from the opening.
- Install external corners on both sides.
- Add foam or soundproofing material and remove protruding areas.
- Prime, plaster (you can use mixtures of Knauf, Ceresit, etc.).
- Cover with panels, if necessary, or putty with a finishing mixture.
When everything is done, you need to let it dry for at least a couple of days before painting or other work. Cladding materials are attached to the sheathing with plastic dowels and impact screws.
This video shows how to install slopes in a doorway:
There may be gaps between the trim and the door opening. They can be sealed with gypsum putty (for example, Rotband). The remaining foam will need to be carefully removed with a sharp knife.
- Cut the mounting foam 1–2 cm deep.
- Prime the gap.
- Cover with plaster.
- Glue the serpyanka.
- Cover with finishing putty.
- If the cracks are small, you can seal them with sealant and then plaster them.
- Polyurethane foam (if they are very large) and an adhesive solution are also used to seal cracks.
- The voids of the slope are also filled with mortar, especially if it is planned to lay panels in the future.
This video shows how to seal a gap in a doorway:
Holes
Open holes after installing the door require very careful sealing. It is most effective to use polyurethane foam, then primer and plaster. The joints are sealed with a special tape, the surface is puttied and finished (with wallpaper, tiles, panels).
This video shows how to seal holes in a doorway:
Shoals
To avoid covering the door jamb, you need to cover it with masking tape.
- If there are gaps between the jamb and the walls, they are sealed with mortar or felt, tow, cotton wool, and then with foam and plaster. A layer of solution is applied several times.
- If the holes are masked with drywall, then there should be no gaps between the wall and the panel. They are removed with glue. Plastic sheathing strips must be fastened at intervals of ten centimeters.
You can finish the doors after installation in different ways. The most popular of them is cladding:
Before plastering the doorway, beacons are installed, which will make it easier to level the surface. The voids are filled with a solution of sand and cement, glue. The surface is leveled according to the beacons, and then subjected to finishing.
Restoring a cracked door
If the product has dried out due to exposure to high temperatures, restoration involves disassembling the canvas. The purpose of the repair is to eliminate the gaps between the planks, as well as to prevent the panels from hanging inside the grooves.
The frame elements of the paneled door leaf are connected with a tongue-and-groove lock lubricated with glue. Additionally, long self-tapping screws - dowels - can be used for screeding. The caps are closed on top with decorative plugs.
When repairing an old wooden door, the leaf is removed from its hinges, placed vertically on one of the sides, the plugs are removed and the pins are unscrewed. The glue on the lock joint has long dried out. The frame element can be easily removed. The locking joint is cleaned of the remnants of old glue and the panels are repaired.
All inserts are removed from the frame. The grooves and edges of the panels are cleaned of glue. The door is carefully blown out with a vacuum cleaner so that dust does not interfere with gluing. A thin layer of silicone-based sealant is driven inside the grooves. After inserting the panel into place, wipe off the squeezed-out excess sealant with a rag.
The locking joint of the frame is generously lubricated with wood glue. You can use PVA. The frame element is put in place, the door leaf is clamped with clamps, the dowels are screwed into the old holes and the plugs are closed. The canvas remains in a clamped state until the glue completely hardens. You cannot drill new holes for the dowels, since using a hand drill will result in them being at a slight angle. After uneven screwing of the dowel, the frame will become skewed.
Sources
- https://dekoriko.ru/dveri/mezhkomnatnye/restavraciya/
- https://stroy-podskazka.ru/dveri/mezhkomnatnye/restavraciya/
- https://dvernoiguru.ru/remont/restavratsiya-derevyannyh-dverej/
- https://pechistroy.ru/stroymaterialy/15-sposobov-obnovleniya-staroy-dveri-podrobnoe-opisanie-metodik.html
[collapse]
Post Views: 6,052
Finishing a doorway after installing a steel door
The front door is the face of any building. The appearance of the entire structure depends on how well it is manufactured and installed. Nowadays, steel entrance doors are more popular. They are reliable, long-lasting, and do not require complex maintenance. You can purchase models of regular design or with glass inserts and various decorative elements. Whichever door
Whatever you choose, the finishing of the doorway must also be done with high quality and perfection, because the type of door structure depends on this. A professional craftsman will help you bring the doorway back to normal. But finishing the doorway yourself after installing a steel door will save you money.
What can slopes be made from?
Slopes can be internal or external, depending on their location relative to the room. When finishing them, two problems are solved: aesthetic and thermal insulation. To do this, you need to choose the right material.
MDF panels
Now for this type of work, in most cases, MDF panels are chosen, which have proven themselves in bathroom renovations. This wood fiber material comes in several types.
- Veneered is a material perfectly suitable for finishing a doorway; it is particularly strong and durable compared to other types of panels.
- Laminated is a water-resistant material that is slightly less durable than veneered MDF. But it is very attractive from the outside: it has a rich palette of colors, and there are also panels that imitate the texture of natural wood. Such MDF is also perfect for finishing a doorway after installing a metal entrance door.
- Painted is a material whose surface is less durable. It is not suitable for this type of work.
We make slopes from MDF with our own hands
If you decide to finish the doorway with MDF panels on your own, then the following materials and tools will be useful to you:
- MDF panels (3 pcs.);
- platbands (3 pcs.);
- decorative bending corner (3 pcs.);
- decorative rail (3 pcs.);
- guides (slats with a width of 10 mm and a width of 30 mm, the total length of the slats is approximately 9 m);
- screws (length 35 mm), approximately 30 pcs.;
- dowels (diameter – 6 mm), approximately 30 pcs.;
- watery nails;
- cement mortar;
- polyurethane foam;
- jigsaw;
- assembly knife;
- chisel;
- brace;
- bit;
- roulette;
- pencil.